
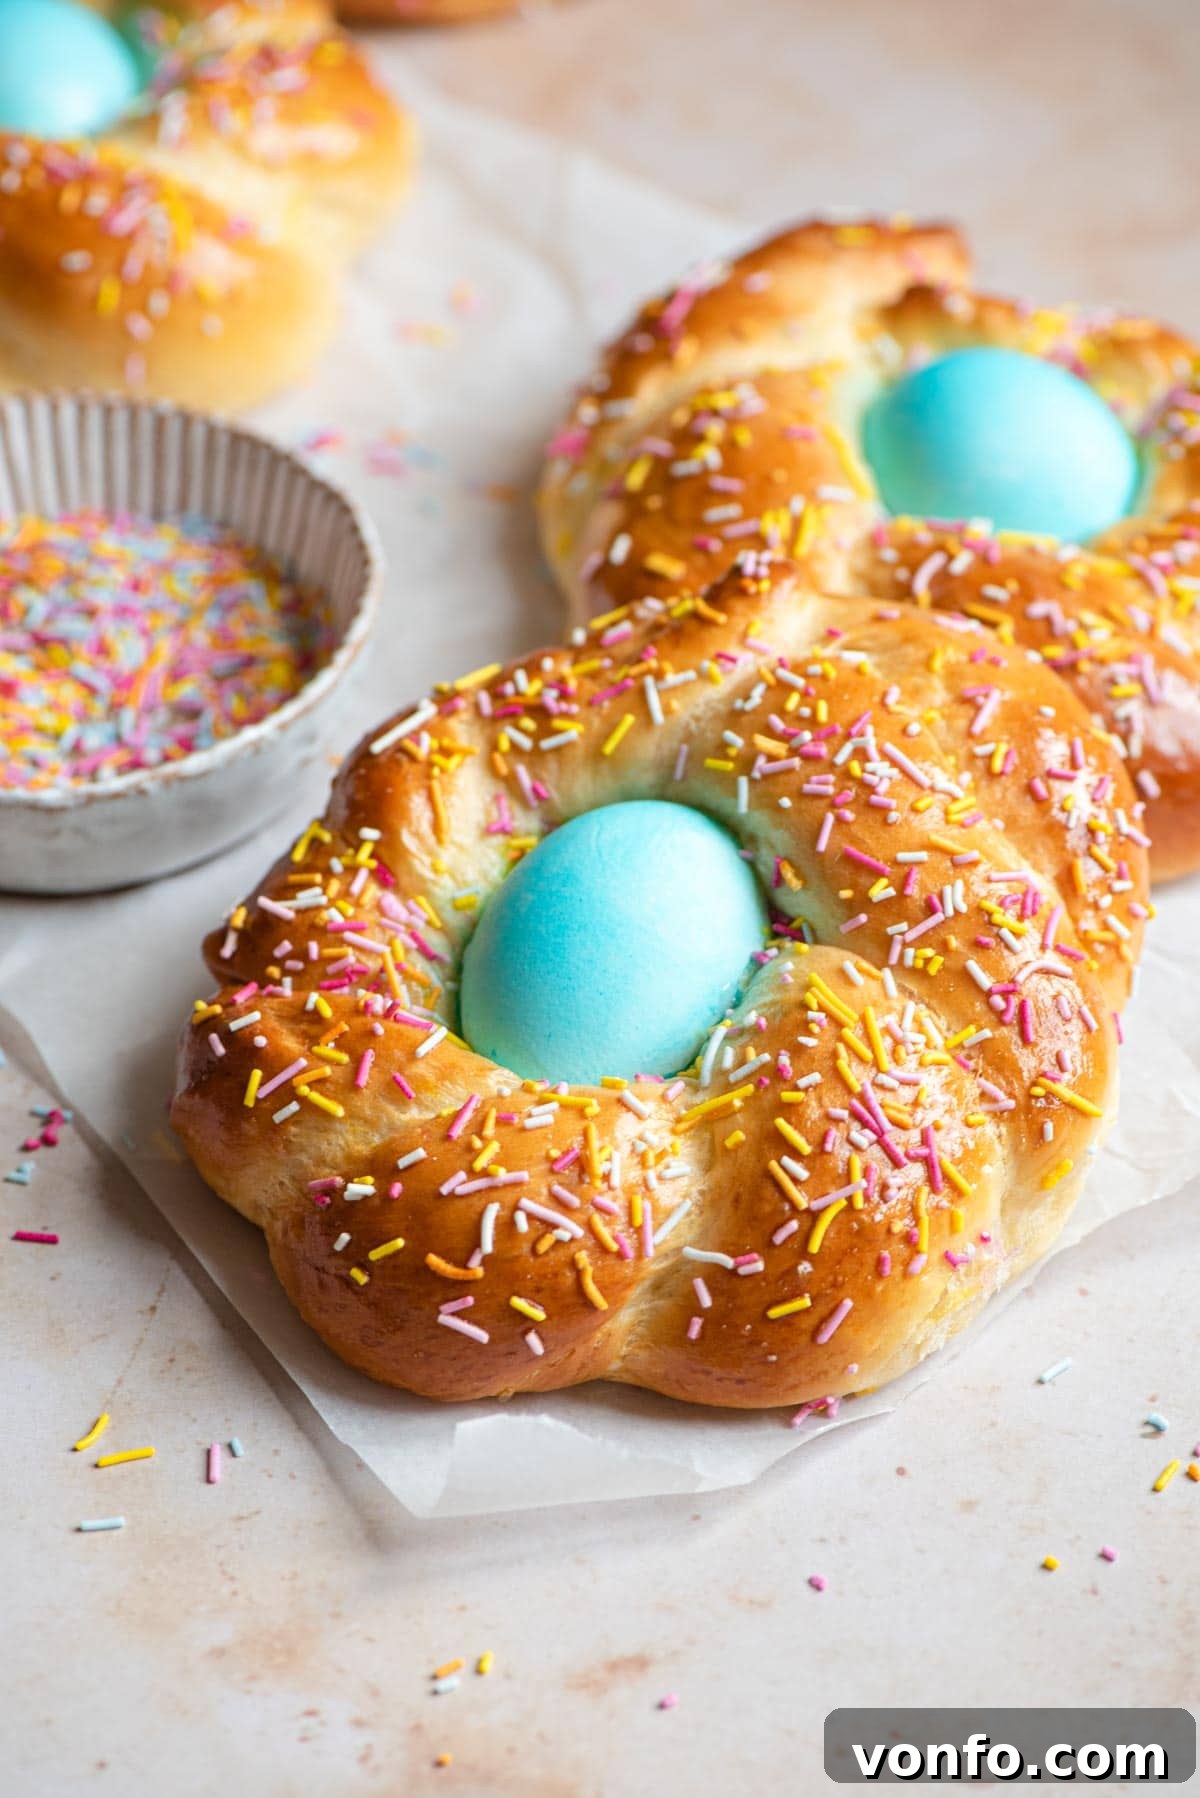
Authentic Italian Easter Bread: A Festive & Flavorful Tradition (Pane di Pasqua)
Step into the rich culinary traditions of Italy with our recipe for Authentic Italian Easter Bread, also lovingly known as Pane di Pasqua. This delightful brioche-style bread is a true springtime masterpiece, renowned for its incredibly soft, sweet, and buttery texture. Adorned with vibrant, colorful eggs nestled within its braids and finished with bright sprinkles, it’s a feast for both the eyes and the palate. Whether you’re seeking the perfect centerpiece for your Easter breakfast table or a comforting snack with butter or jam, this homemade Easter bread recipe promises to bring joy and tradition to your holiday celebration.
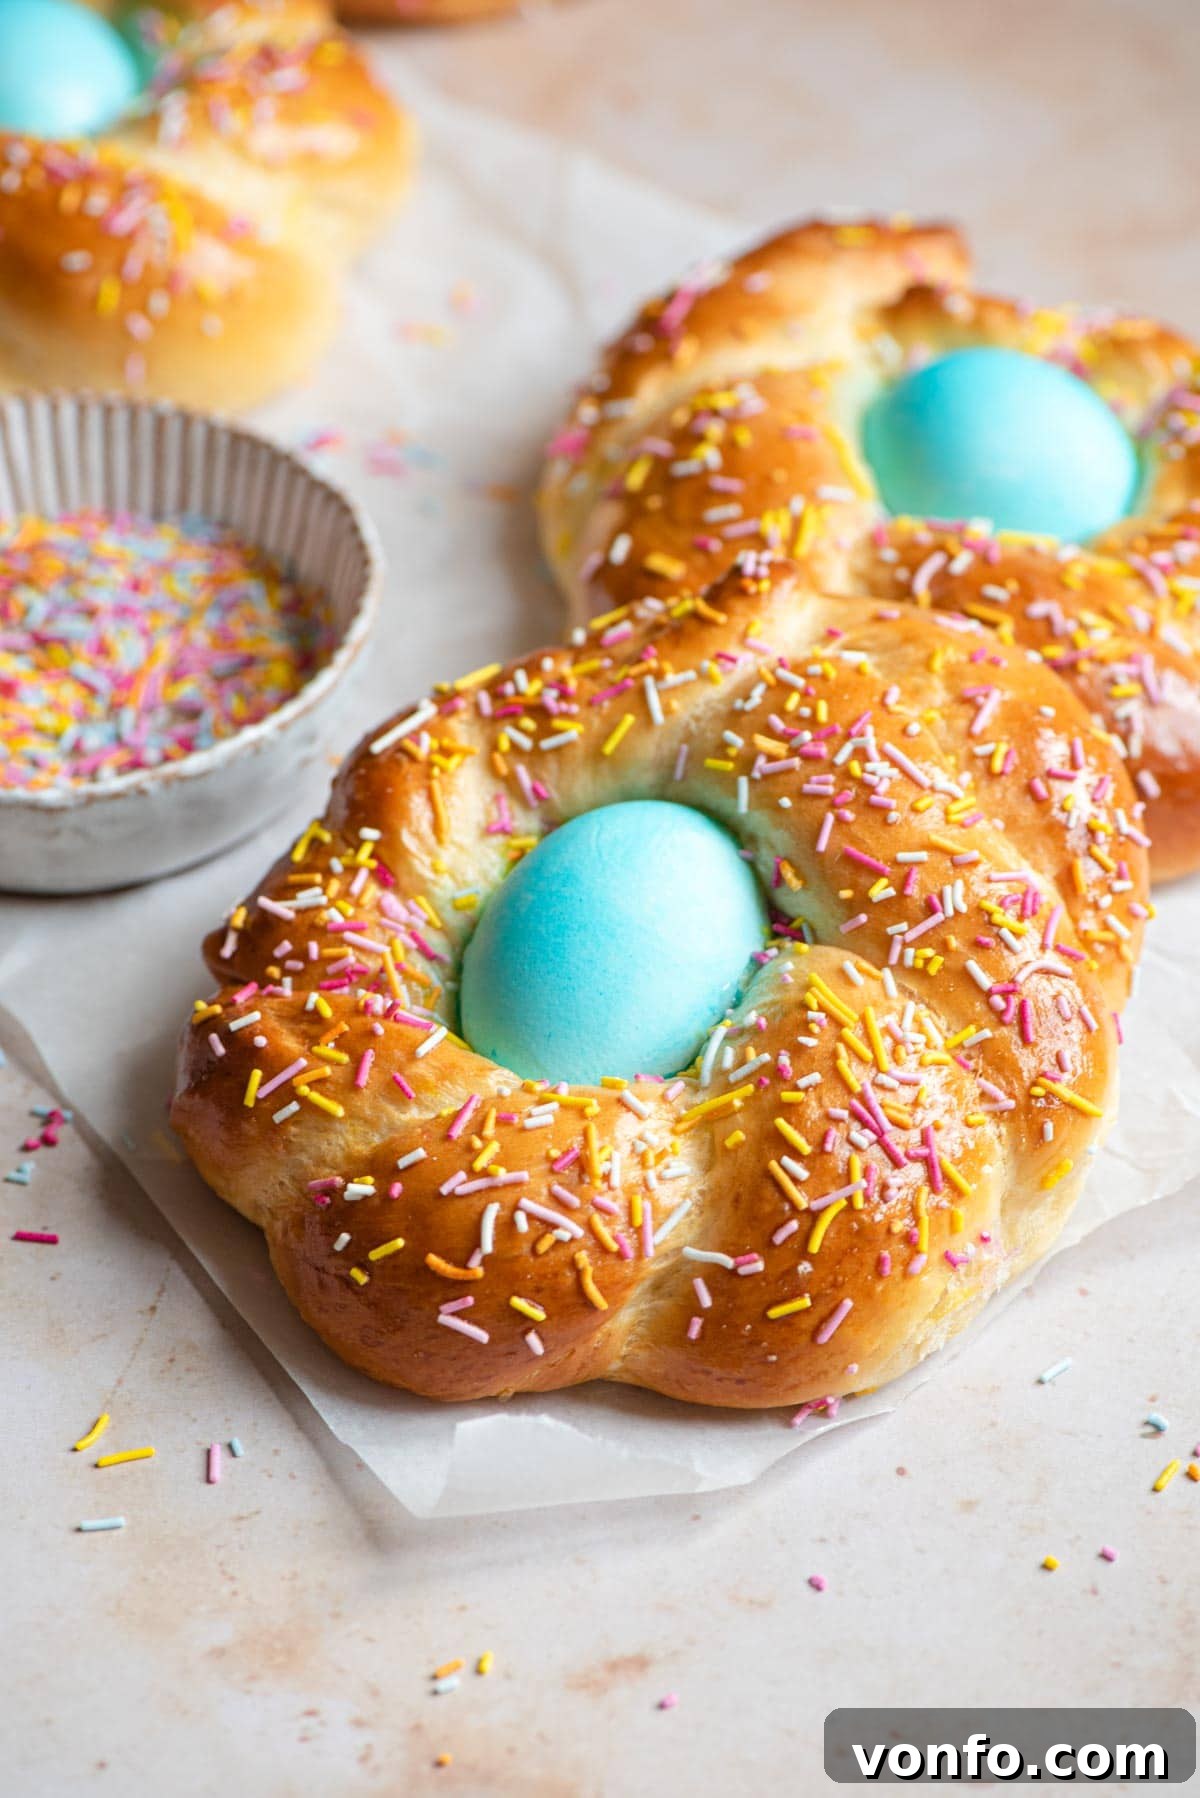
Pane di Pasqua is far more than just a bread; it’s a cherished symbol of renewal, rebirth, and celebration that heralds the arrival of Spring. This sweet brioche dough is incredibly tender and rich, infused with the bright, aromatic zest of lemon and a hint of warm vanilla. Its delicate flavor profile perfectly complements the joyful spirit of Easter, making it a beloved staple in Italian households for generations.
The bread is artfully shaped into enchanting wreaths or cozy nests, with beautifully colored raw eggs carefully placed in their centers. These eggs serve as a poignant symbol of new life and the resurrection, central themes of the Easter holiday. While modern interpretations often include brightly dyed eggs and an abundance of sprinkles for added festivity – delightful additions perfect for celebrating the start of Spring – the core tradition remains deeply rooted in history.
Historically, the braided nests of Pane di Pasqua were meticulously crafted with three strands, representing the Holy Trinity: The Father, The Son, and The Holy Spirit. In earlier times, the eggs were typically left in their natural state, and sprinkles were not part of the traditional ornamentation. However, these contemporary flourishes have become widely embraced, adding a playful and visually stunning dimension to this already captivating bread. While entirely optional, these vibrant additions undoubtedly enhance the bread’s celebratory appeal, making each loaf a unique and personal expression of holiday cheer.
Essential Ingredients for Your Perfect Italian Easter Bread
Crafting the perfect Italian Easter Bread begins with selecting high-quality ingredients. Each component plays a vital role in achieving that signature soft texture and rich flavor. Below, you’ll find a detailed list of what you’ll need, along with important notes to ensure your baking success. Pay close attention to these details, as they are key to creating an authentic and delicious Pane di Pasqua.
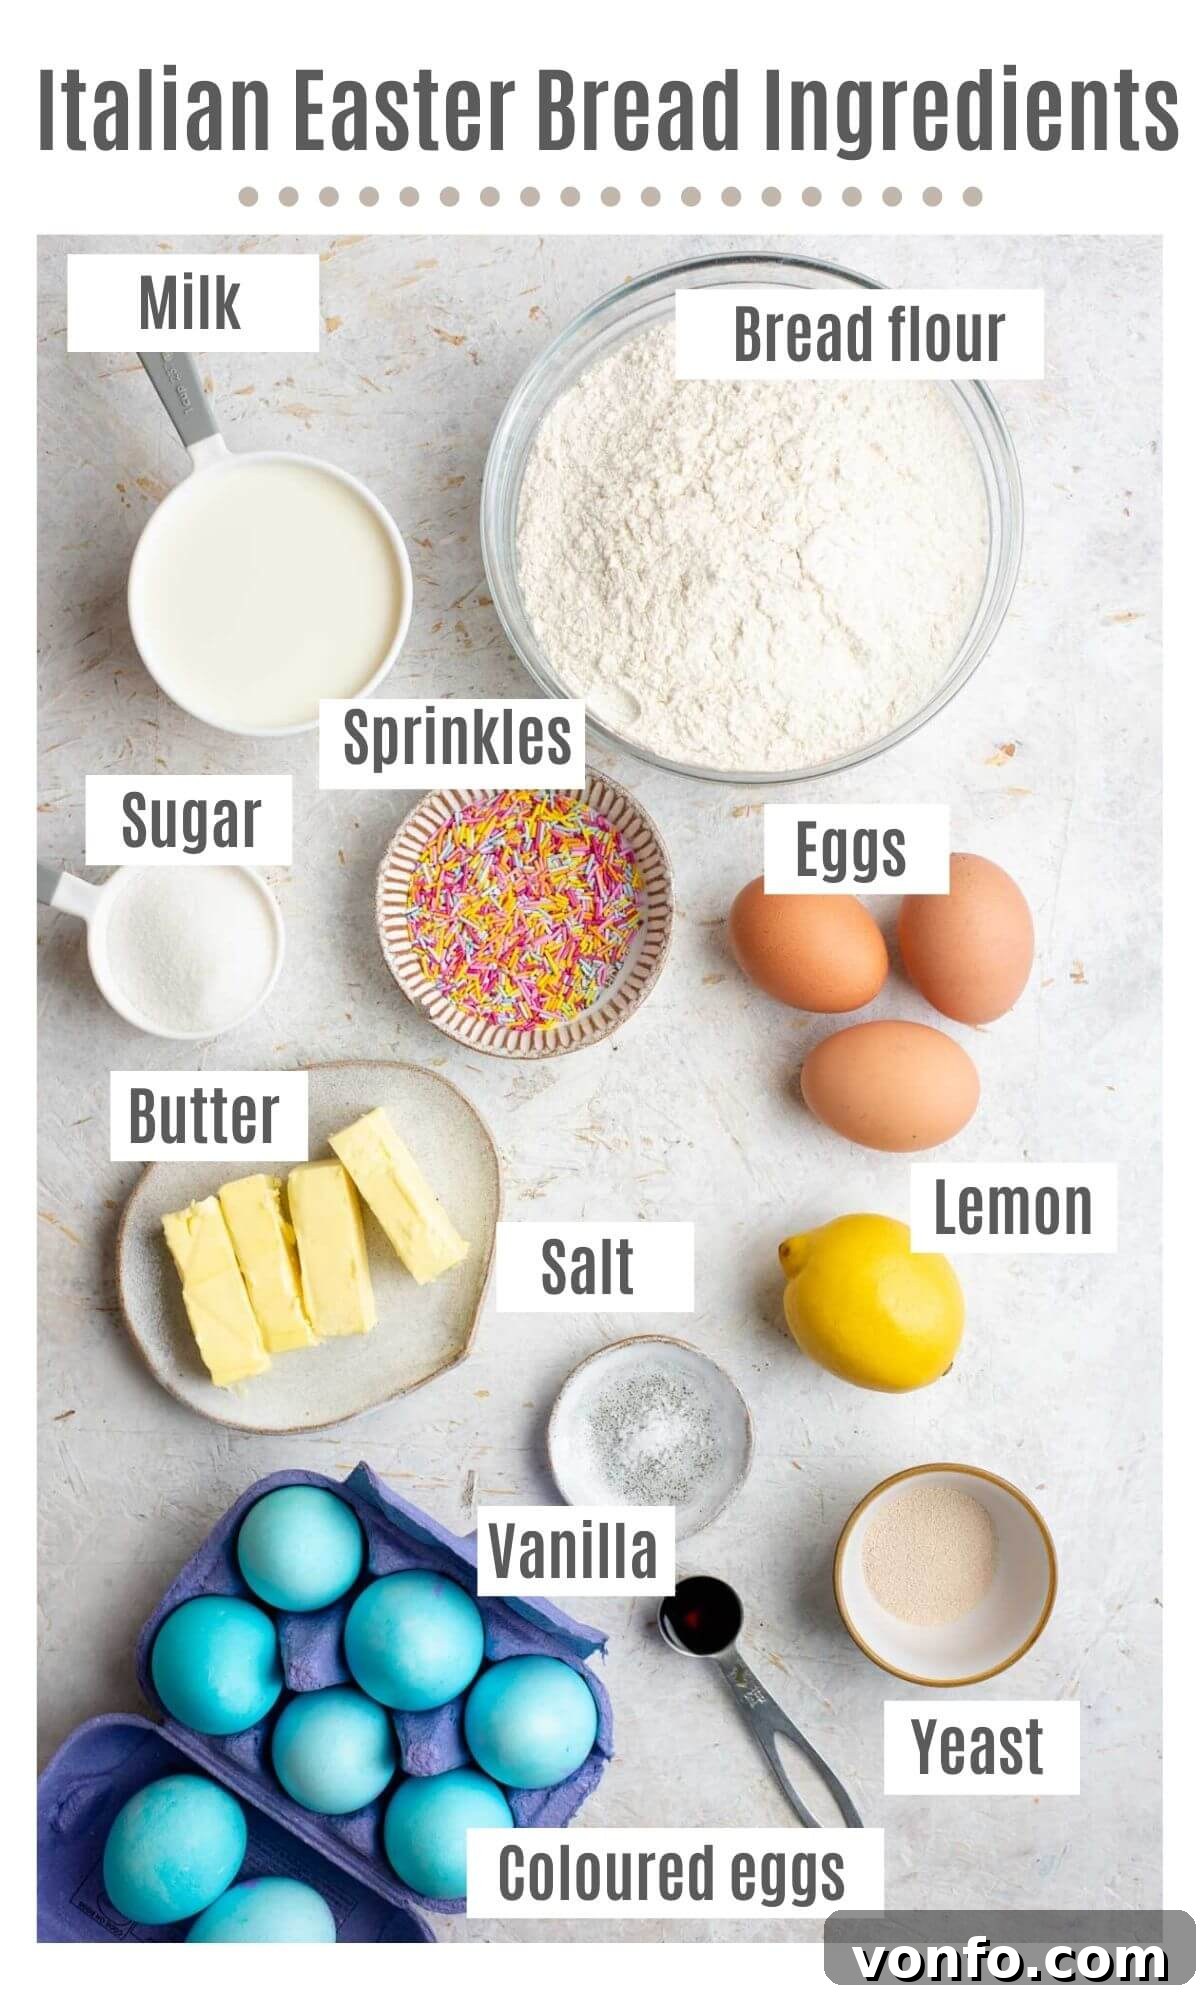
- Flour: For an exceptionally soft and tender crumb, we highly recommend using bread flour. Its higher protein content develops gluten beautifully, resulting in a more elastic dough and a wonderfully chewy yet soft bread. If bread flour isn’t available, all-purpose flour can be used, but be aware that the final texture may be slightly different—a little less chewy but still delicious.
- Sugar: Simple white granulated sugar provides the perfect level of sweetness, complementing the rich brioche dough without overpowering the other flavors.
- Milk: Opt for whole milk (full-fat). The higher fat content of whole milk contributes significantly to the richness, tenderness, and overall flavor of the dough, making your Easter bread truly indulgent.
- Vanilla: Always use real vanilla extract or vanilla bean paste. The authentic flavor of real vanilla is crucial here; avoid imitation vanilla essence, as it lacks the depth and complexity needed for this delicate bread.
- Yeast: We specify dry instant yeast for its convenience and reliability. Most instant yeasts do not require prior activation in liquid. However, if your specific brand recommends activating it, simply dissolve it in a small portion of the warm milk from the recipe before adding it to the dry ingredients.
- Citrus Zest: The bright, fragrant zest of 1 lemon or orange is a quintessential flavor in Italian Easter bread. Lemon zest offers a classic, tangy aroma, while orange zest provides a slightly sweeter, more floral note. Both are delicious and will infuse your bread with a delightful, fresh essence.
- Salt: Even in a sweet bread, salt is indispensable. It balances the sweetness, enhances all the other flavors, and plays a critical role in controlling yeast activity and strengthening the gluten structure. Do not skip it!
- Sprinkles: These are entirely optional festive additions. Colorful sprinkles add a joyful touch and visual appeal, especially when celebrating spring. Choose bright, festive colors to make your bread truly pop!
- Colored Eggs: To create the iconic look of Pane di Pasqua, you’ll need raw eggs in their shells. These are placed directly into the dough before baking. You can use any color of food coloring you like to dye the raw eggs. Remember, do not boil them first! White-shelled eggs typically yield the brightest and most vibrant colors.
Step-by-Step Guide: Crafting Your Perfect Italian Easter Bread Dough
Follow these detailed instructions to prepare the rich and tender brioche dough for your Italian Easter Bread. Using a stand mixer will simplify the kneading process, but the dough can also be kneaded by hand with a little extra effort and time.
Mixing the Dough
- Start by gently warming the milk. It should be lukewarm, not hot (around 105-115°F or 40-46°C), as excessively hot milk can kill the yeast. Separately, melt the unsalted butter and allow it to cool slightly so it’s not piping hot when added to the other ingredients.
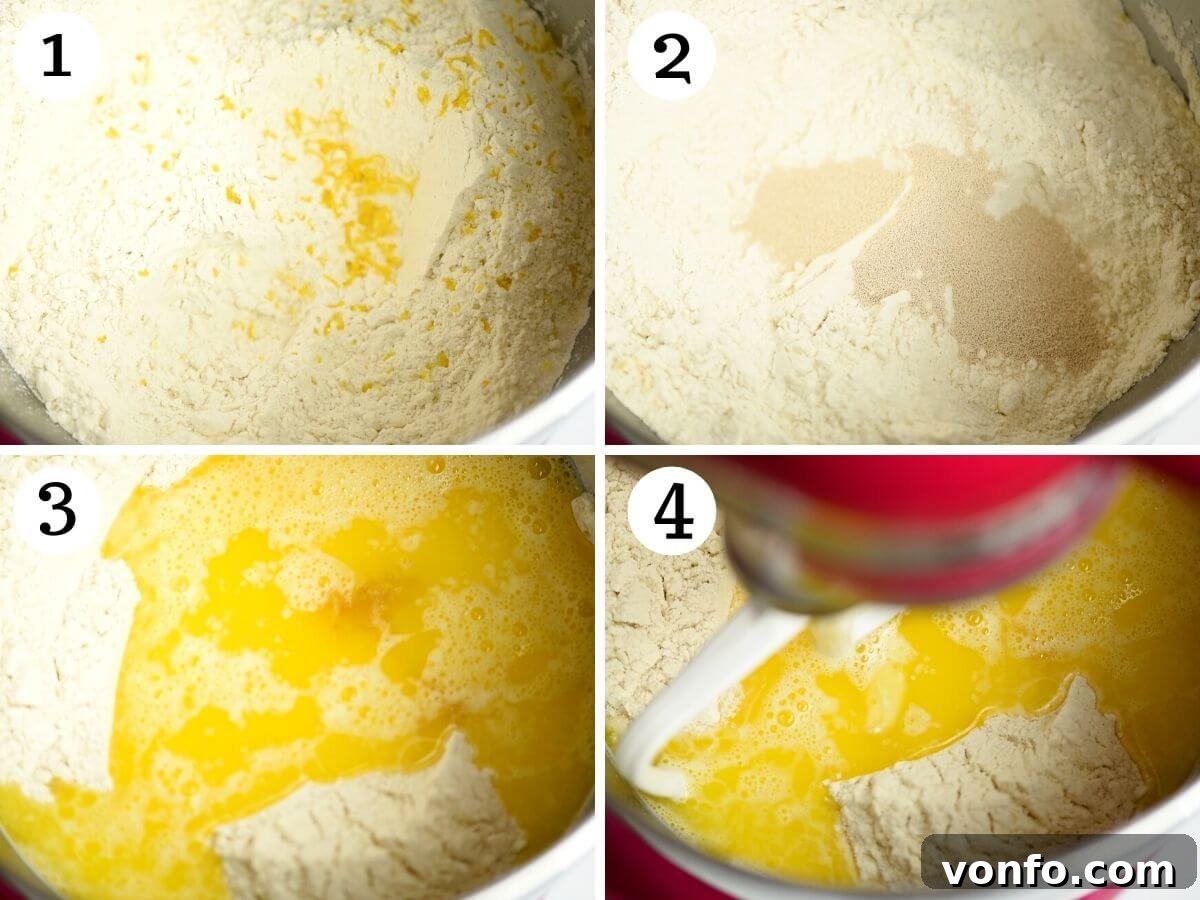
- In the bowl of your stand mixer, combine the bread flour, granulated sugar, salt, and the fragrant lemon zest. Use a whisk attachment to mix these dry ingredients thoroughly until they are well combined. This ensures an even distribution of flavors throughout the dough.
- Next, add the instant yeast to the dry mixture and mix again for a few seconds to incorporate it. Create a small well in the center of the bowl. Into this well, pour the two whisked large eggs, the warmed milk, the cooled melted butter, and the vanilla extract.
Kneading and First Rise
- Attach the paddle attachment to your stand mixer and mix everything on low speed for a few seconds until a shaggy, rough dough begins to form. The dough will look quite sticky at this stage, which is perfectly normal for a brioche-style dough.
- Switch to the dough hook attachment. Knead the dough on a medium-low speed for a full 10 minutes. This extended kneading time is crucial for developing the gluten, which gives brioche its characteristic soft and airy texture. The dough will remain somewhat sticky, but it should be manageable and should not stick excessively to your hands when lightly touched. It should also pull away from the sides of the bowl.
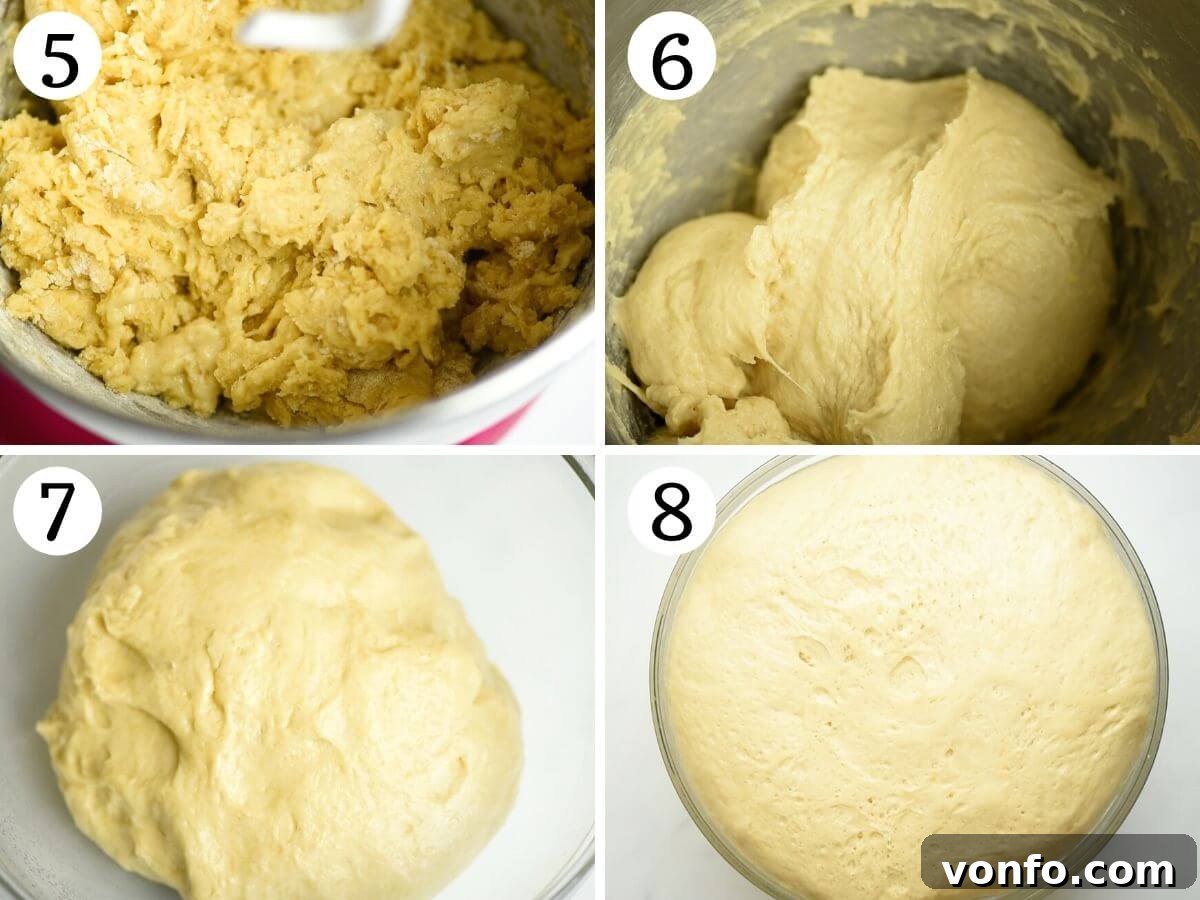
- Once kneaded, gently transfer the dough to a clean bowl that has been lightly oiled. This prevents the dough from sticking as it rises. Cover the bowl tightly with plastic wrap to create a warm, humid environment. Allow the dough to rise in a warm place for approximately 2 hours, or until it has visibly doubled in size. This first rise, known as bulk fermentation, is essential for flavor development and a light texture.
Mastering the Art of Coloring Easter Eggs for Pane di Pasqua
Adding beautifully colored eggs to your Italian Easter Bread is a delightful modern tradition that brings a burst of joy and spring festivity. The key to success lies in preparing your eggs correctly. Remember, these eggs are raw and will cook inside the bread, so proper coloring techniques are essential to prevent any color bleed and ensure vibrant results.
Tips for Vibrant, Lasting Colors:
- Always use raw eggs: Do not pre-cook or boil your eggs. They will bake and harden perfectly within the bread.
- Choose white-shelled eggs: For the most vibrant and true-to-color results, opt for white-shelled eggs over brown. Their lighter surface allows the food coloring to truly pop.
- Gel food coloring is best: Gel food coloring typically provides more intense pigments than liquid food coloring, requiring less product for brilliant results. You have complete freedom to choose any colors that inspire you for your Easter theme!
Coloring Process:
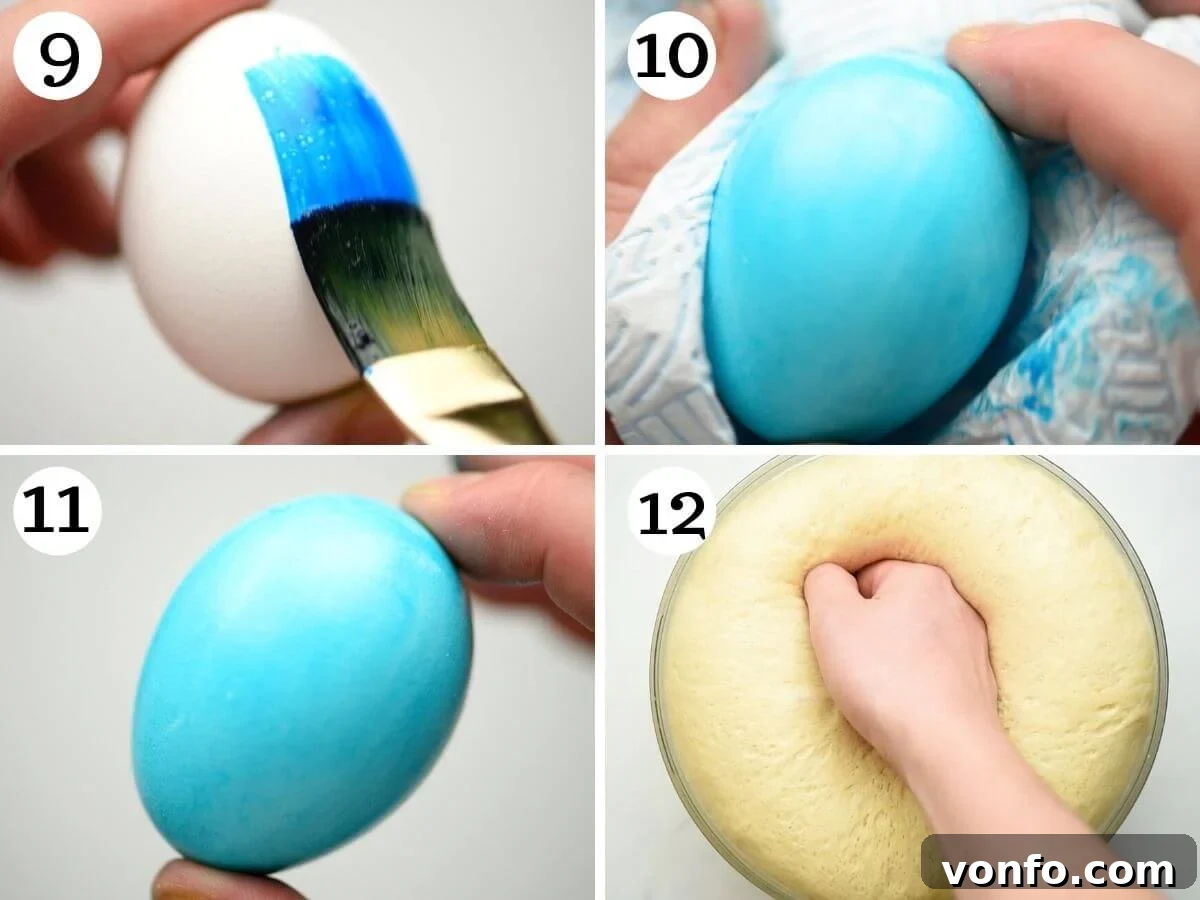
- Using a clean, slightly damp paintbrush, dip it into your chosen gel food coloring. Gently brush the color evenly all over the surface of the raw egg. Ensure full coverage for a uniform hue.
- Once the egg is completely covered with color, take a dry kitchen paper towel and gently rub it over the egg. This technique helps to smooth out any visible brush strokes, resulting in a more polished and professional finish. It also helps to absorb any excess moisture or uneven coloring.
- After the colored eggs have dried completely (this might take a few minutes, depending on the thickness of the application), gently rinse them under cold running water. This crucial step helps to remove any excess food coloring from the surface, preventing it from leaching onto your bread dough during the second rise and baking.
- Finally, pat the rinsed eggs thoroughly dry with a clean kitchen towel. Ensure they are completely dry before placing them into the braided dough. This minimizes any risk of color transfer.
Shaping and Braiding Your Beautiful Italian Easter Bread Nests
Once your dough has completed its first rise, it’s time for the creative and iconic part of making Pane di Pasqua: shaping it into beautiful braided nests that will cradle your colorful Easter eggs. Precision and a light touch are key during this stage to ensure a tender and evenly baked loaf.
Preparing the Dough for Shaping
- After the dough has doubled in size from its first rise, gently “knock the air out” by lightly pressing down on it. This redistributes the yeast and helps create a finer crumb.
- Transfer the deflated dough onto a clean work surface. Dust your surface very lightly with flour. Be cautious not to add too much flour at this stage, as it can make the dough stiff and difficult to roll into long strands, affecting its elasticity and the final texture of your braided bread.
Braiding the Wreaths
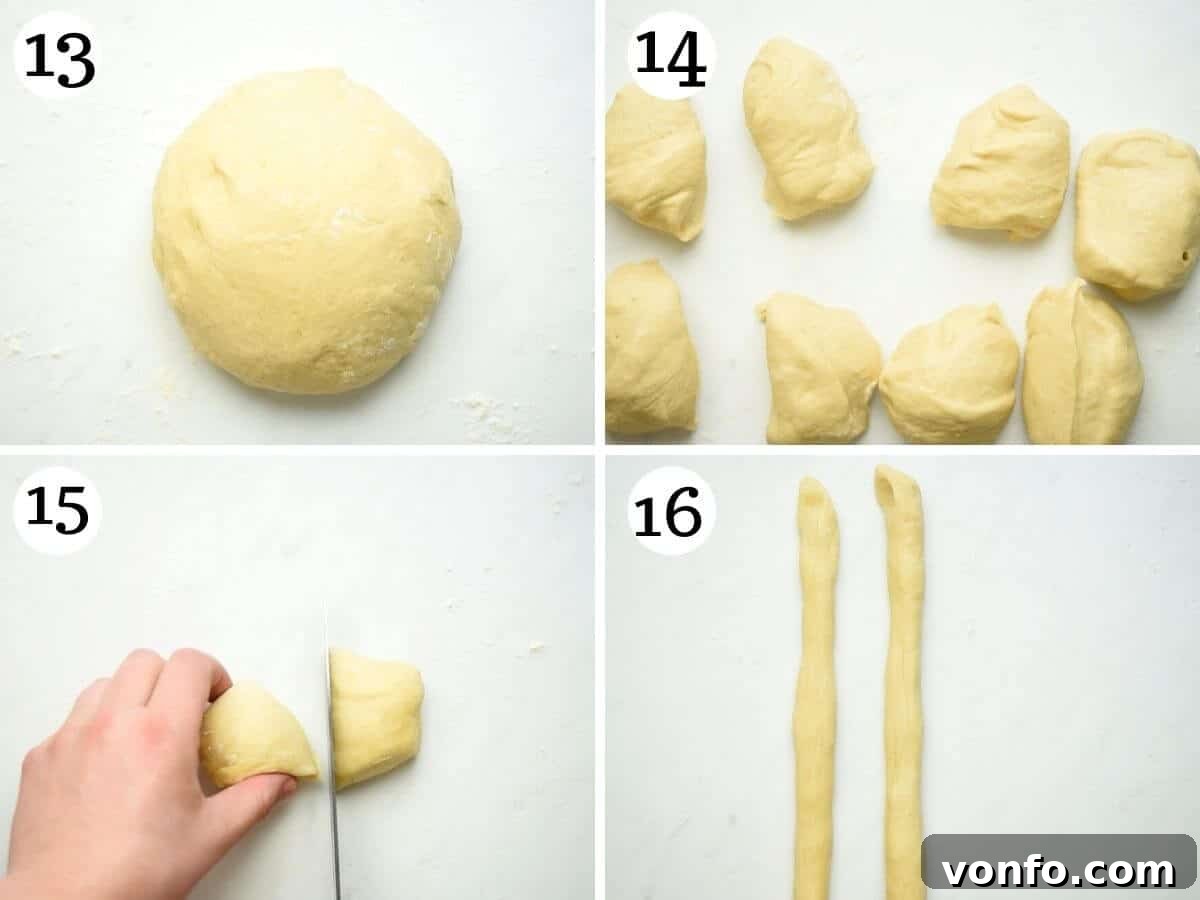
- Divide the dough into 8 equal portions. For this recipe, we’ll be making 8 individual bread nests. Then, take each of these 8 portions and cut them in half, giving you a total of 16 smaller pieces of dough.
- From these 16 pieces, take two pieces and roll each one between your palms and the work surface to form a long, even strand, approximately 10 inches (25 cm) in length. Aim for consistent thickness across the strand for even baking.
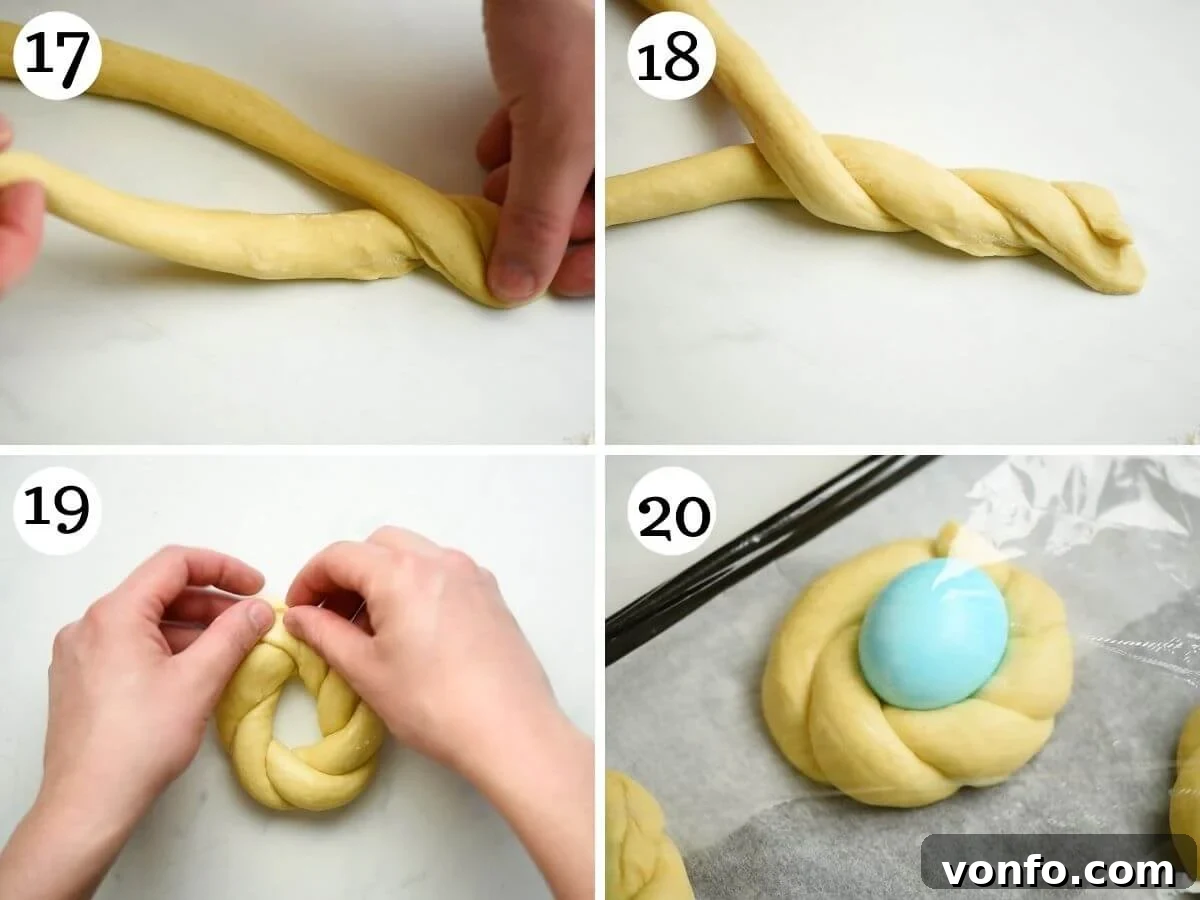
- Pinch the ends of these two strands together firmly at one end. This creates a secure starting point for your braid.
- Gently weave the two strands together to create a simple two-strand braid. While traditional Pane di Pasqua often features a three-strand braid, a two-strand twist is simpler and still yields a beautiful effect. If you prefer a three-strand braid, combine three pieces of dough into one section and roll them into individual strands before braiding.
- Once braided, join the top and bottom ends of the braided dough together to form a circular wreath or nest shape. Pinch the ends firmly to seal them.
- Carefully place each formed wreath onto a baking tray lined with baking parchment. Ensure there is about 2 inches (5 cm) of space between each bread to allow for expansion during the second rise and baking. Gently place one of your pre-colored raw eggs into the center of each wreath.
- Repeat this shaping and braiding process with the remaining pieces of dough and colored eggs until all 8 Easter bread nests are formed and placed on the baking trays. You may need more than one baking tray depending on their size.
Second Rise and Baking
- Once all the breads are shaped and arranged on the baking trays, cover the trays loosely with plastic wrap. Leave them to rise again for approximately 1 hour in a warm place. This second rise, or proofing, allows the dough to become light and airy before baking. The breads should look noticeably puffier.
- While the breads are completing their second rise, pre-heat your oven to 350°F (180°C). This ensures the oven is at the correct temperature when the breads are ready to bake, which is crucial for even cooking and a beautiful golden crust.
- Just before baking, gently brush the tops of each Easter bread with a beaten egg. This egg wash will give the bread a gorgeous, shiny, golden-brown crust. Immediately after egg washing, generously sprinkle the tops of the breads with your chosen festive sprinkles.
- Bake the breads in the pre-heated oven for 20-25 minutes, or until they are beautifully golden brown on top and cooked through. The internal temperature of the bread should register around 200-210°F (93-99°C) if you use a thermometer. The raw egg in the center will cook and harden during this process.
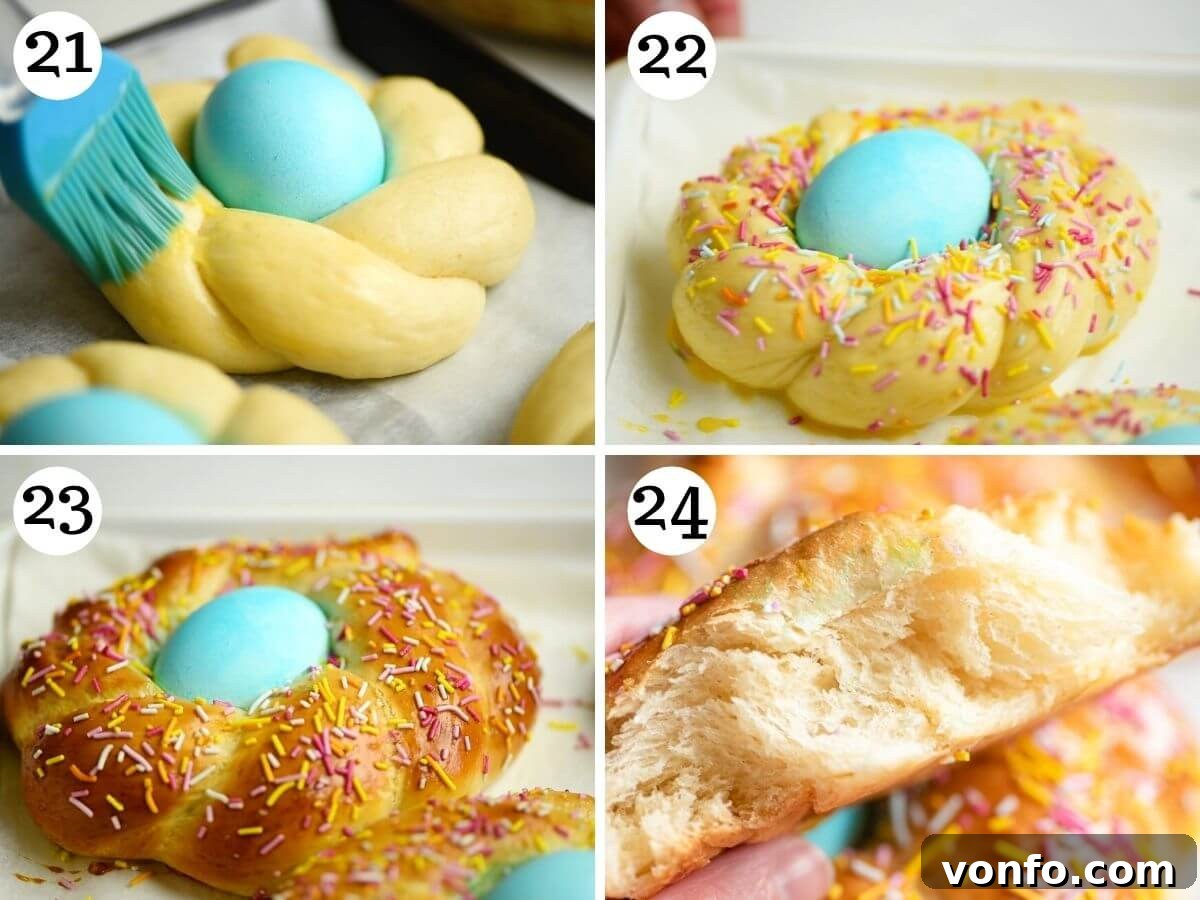
- Once baked to perfection, remove the baking trays from the oven. Allow the Italian Easter bread to cool on the tray for a few minutes before transferring them to a wire rack to cool completely. While tempting to dig in immediately, allowing them to cool slightly improves their texture. For the best experience, this bread is best enjoyed the same day it’s baked, when it’s at its peak freshness, softness, and flavor.
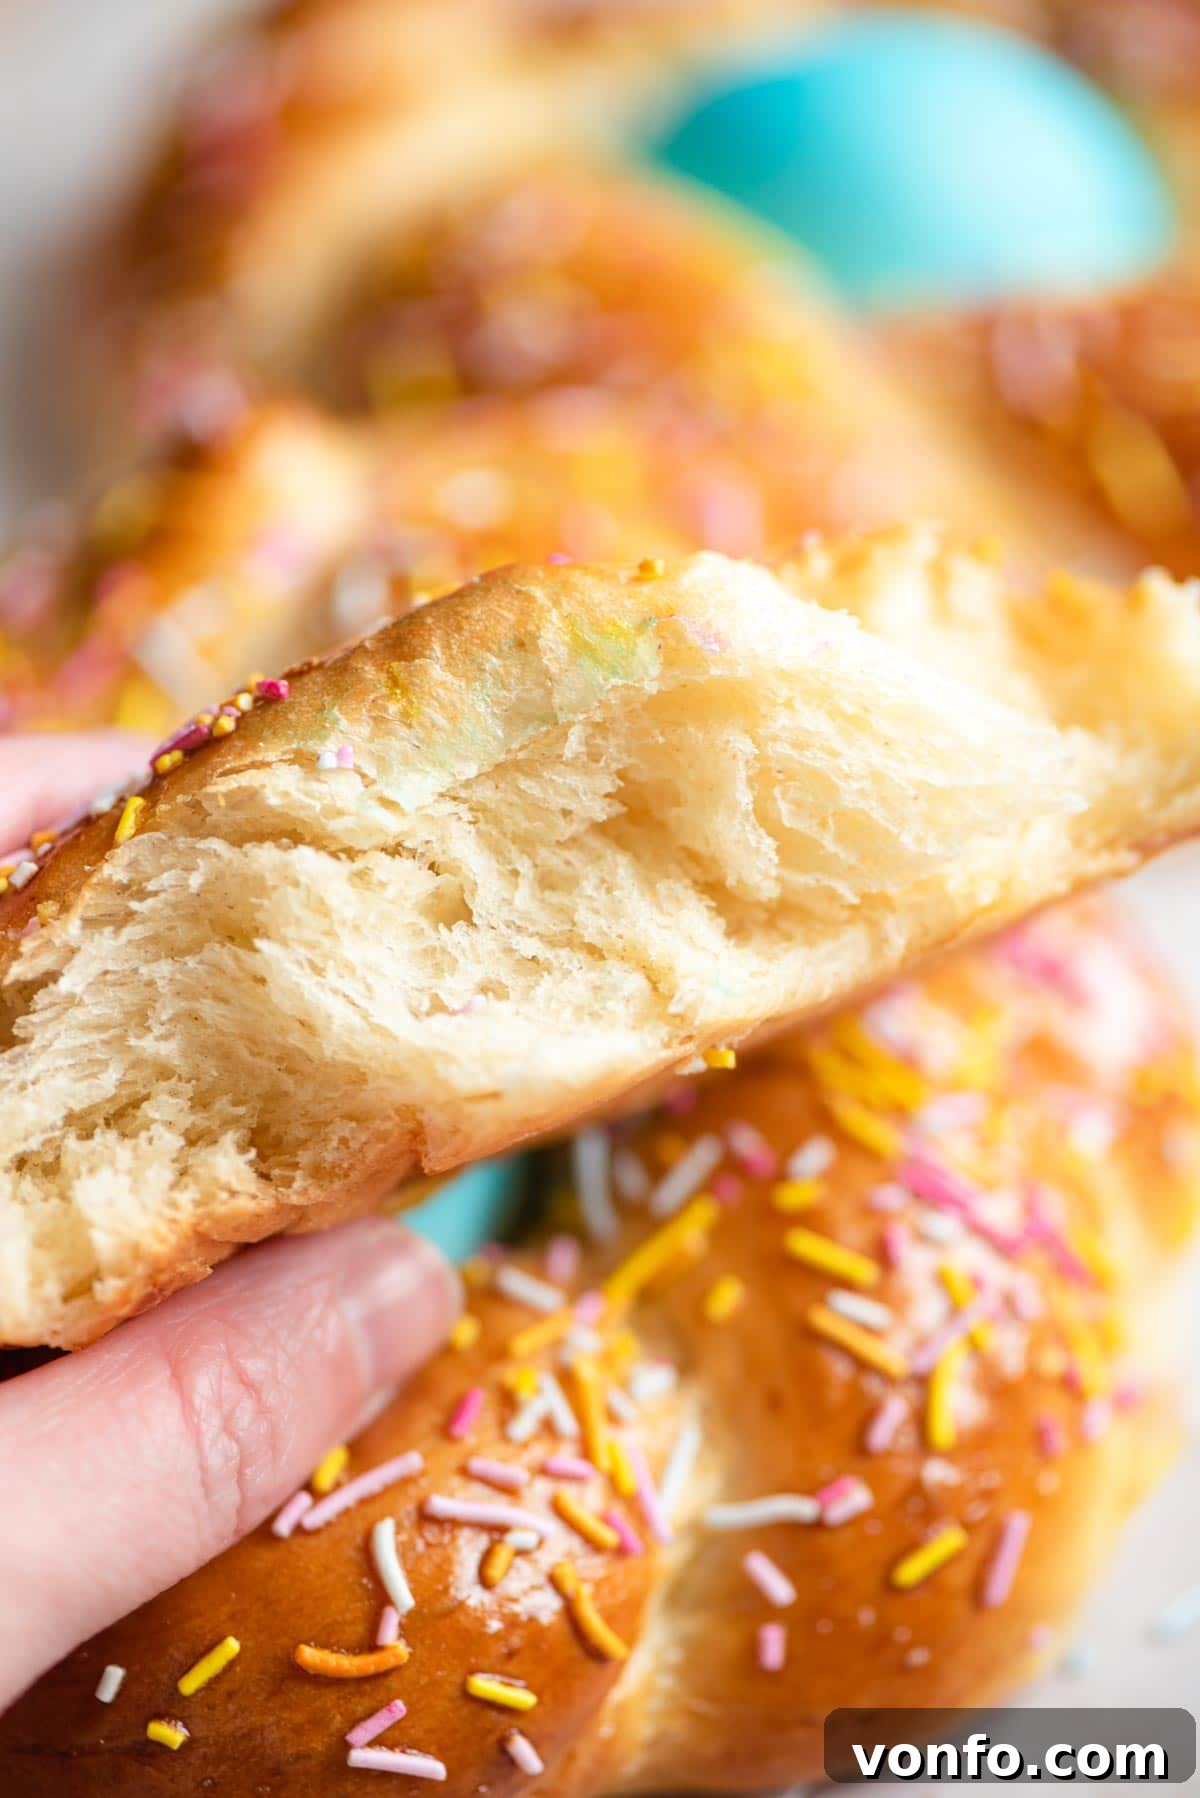
To truly appreciate the exquisite texture of this sweet brioche bread, take a moment to admire the inside. The crumb should be incredibly soft, fluffy, and tender – a testament to a well-made Pane di Pasqua!
Expert Tips & Frequently Asked Questions for Italian Easter Bread
To ensure your Pane di Pasqua turns out perfectly every time, and to answer some common queries, here are some invaluable tips and FAQs gathered from years of baking experience. Mastering these details will elevate your Easter bread from good to truly exceptional.
Top Tips for Success:
- Serve Fresh for Best Experience: Like most brioche-style breads, Italian Easter bread is at its absolute best when served on the same day it’s baked. It’s incredibly fresh, soft, and buttery. While still delicious the next day, it tends to dry out quickly. If enjoying it on subsequent days, it’s wonderful lightly toasted and spread with jam or butter, or even transformed into French toast.
- Accurate Flour Measurement is Key: Precision in measuring flour is crucial for bread baking. If you don’t have a kitchen scale (which is highly recommended for accuracy), make sure to spoon the flour into your measuring cups rather than scooping directly from the bag. Level off the top with a straight edge or knife to avoid overpacking the flour, which can lead to a dense, dry dough.
- Embrace Whole Milk for Richness: While lower-fat milk can be used, we strongly advocate for whole milk. Its higher fat content imparts unparalleled richness, depth of flavor, and tenderness to the brioche dough that simply cannot be achieved with skim or low-fat varieties. This is a treat, so indulge a little!
- Achieving Vibrant Egg Colors: For stunningly bright and clear colored eggs, gel food coloring is your best friend due to its concentrated pigment. Also, always opt for white-shelled eggs, as they provide a neutral canvas for colors to shine. After dyeing, rinse and thoroughly pat dry the eggs to prevent color bleeding onto the dough during baking.
- Experiment with Additional Flavors: While delightful in its classic form, Italian Easter bread is versatile. Feel free to incorporate candied peel or raisins into the dough for a touch of fruity sweetness. For alternative aromatic profiles, consider adding a dash of anise extract for a licorice note, or almond extract for a nutty complexity.
- Clever Use for Leftovers: If you find yourself with leftover bread that has started to dry out, don’t despair! It makes the most delicious French toast. The rich brioche soaks up the custard beautifully. Alternatively, a slice dunked into a frothy cappuccino is a classic Italian breakfast delight.
Frequently Asked Questions:
What’s the best way to serve Italian Easter Bread?
Italian Easter bread is incredibly delicious simply eaten on its own, savoring its sweet, buttery flavor. For a traditional breakfast or snack, it can also be spread with your favorite jam or butter. It pairs wonderfully with coffee or tea.
How do I stop the food coloring from running onto the bread?
The most effective way to prevent food coloring from transferring to the dough is to rinse the dyed raw eggs gently under cold water after the coloring has completely dried. Then, pat them thoroughly dry with kitchen paper before placing them into the bread nests.
What do you do with the cooked eggs inside the bread?
The eggs baked inside the bread will be hard-boiled and perfectly safe to eat! Once the bread has cooled, you can easily remove them. They are fantastic chopped up and used in salads or sandwiches. Just be sure to store them in the refrigerator if you plan to eat them later.
Can I prepare Italian Easter Bread dough in advance?
Yes, you absolutely can! Prepare the dough as instructed through the kneading stage. Instead of letting it rise at room temperature, place the lightly oiled, plastic-wrapped bowl of dough into the refrigerator overnight. It will slowly rise and double in size in the cold environment. The next day, simply remove it from the fridge, allow it to come closer to room temperature for about 30-60 minutes, then proceed with shaping into wreaths and the second rise. Keep in mind that the cold dough may take a little longer for its second rise.
Can I freeze baked Italian Easter Bread?
Yes, Italian Easter bread freezes well. Once completely baked and cooled, wrap the bread tightly in plastic wrap, then again in aluminum foil, or place it in a freezer-safe bag. It can be frozen for up to 3 months. To enjoy, defrost completely at room temperature, then warm gently in the oven for a few minutes, or toast slices if preferred, to restore its soft texture.
Explore More Italian Easter & Celebration Recipes
If you’ve enjoyed baking this Italian Easter Bread, we invite you to explore other traditional Italian recipes perfect for Easter and various celebrations:
- Pizza Rustica Recipe: A savory Easter pie, rich with meats and cheeses.
- Italian Lamb Ragu: A hearty and flavorful stew, often served during Easter.
- Torta Pasqualina: A delightful spinach and ricotta pie, perfect for spring.
- Cenci di Carnevale (Chiacchiere, Crostoli, Bugie): Traditional Italian Fried Pastries for festive occasions.
We love hearing about your culinary adventures! If you’ve tried this Italian Easter Bread recipe or any other recipe from our blog, please don’t hesitate to rate the recipe and share your feedback in the comments below. Your experiences and insights are invaluable to us and our community of home bakers! You can also FOLLOW ME on FACEBOOK, INSTAGRAM, and PINTEREST to stay updated with more delicious food inspirations and behind-the-scenes glimpses.
Italian Easter Bread (Pane di Pasqua) Recipe Card
Step-by-Step Photos and Detailed Instructions Available Above
This recipe comes with comprehensive step-by-step photos, helpful tips, and tricks to ensure your success on your very first try!
By Emily
Cook Time: 20 mins |
Proving Time: 3 hrs |
Total Time: 3 hrs 50 mins |
Servings: 8 breads

Recipe Summary:
Learn how to make Italian Easter bread. This braided soft, sweet, and buttery brioche-style bread is baked with fun, colorful eggs and bright sprinkles. It’s perfect for an Easter breakfast or served as a delightful snack with butter or jam.
Ingredients:
- 3.5 cups bread flour (470g), spooned and leveled
- 6 tbsp unsalted butter, melted (85g)
- 1 cup whole milk, warmed (240ml)
- 3 large eggs (2 for dough, 1 for egg wash)
- ⅓ cup granulated sugar (70g)
- ½ tsp salt
- 2 tsp instant yeast (fast action yeast)
- 1 tsp vanilla extract
- Zest of 1 lemon
- 8 raw eggs in their shells (for decorating)
- Food coloring for painting the eggs (optional)
- Sprinkles (optional, for topping)
Instructions:
Dough Preparation:
- Gently warm the milk (it should be lukewarm, not hot) and melt butter separately, allowing butter to cool slightly.
- Add the flour, sugar, salt, and lemon zest to a bowl of a stand mixer and mix to combine.
- Add the yeast, mix to combine, then make a well in the center of the bowl. Add 2 whisked large eggs, warm milk, melted butter, and 1 tsp of vanilla extract.
- Using a paddle attachment, mix everything for a few seconds until a rough dough forms. Swap to a dough hook attachment and knead the dough for 10 minutes on a medium/low speed. The dough will be very sticky but shouldn’t stick to your hands when touched.
- Transfer the dough to a clean, lightly oiled bowl, cover with plastic wrap, and let it rise for 2 hours or until doubled in size.
Coloring the Eggs:
- Paint raw, uncooked eggs with any food coloring of your choice (gel food coloring works best). Let them dry completely, then give them a gentle rinse under cold water to prevent the color from running onto the dough. Pat them dry with kitchen paper.
- Note: It’s best to use white-shelled eggs rather than brown for brighter colors.
Assembling the Easter Bread:
- Once risen, gently knock the air out of the dough and place it on a clean work surface very lightly dusted with flour (don’t add too much, or it’ll be too difficult to roll).
- Cut the dough into 8 equal pieces, then cut each piece in half so you have 16 smaller pieces. Roll two pieces of dough to roughly 10-inch long strands. Pinch the strands together at the top and weave them together to create a braid. Join the top and bottom ends together to create a wreath.
- Place the formed wreath on a baking tray lined with baking parchment and place a colored egg in the middle of the wreath. Repeat with the remaining pieces, ensuring they are spaced about 2 inches apart.
- Cover the baking tray loosely with plastic wrap and leave to rise again for 1 hour.
- Once risen, pre-heat the oven to 350°F (180°C).
- Gently brush the Easter bread with the remaining beaten egg (for egg wash) and top generously with sprinkles.
- Bake in the oven for 20-25 minutes until golden brown on top.
- Remove from the oven, let cool on a wire rack, and serve. Best eaten the same day for optimal freshness and softness.
Notes:
- Preparing in advance: You can prepare the dough and place it into the fridge overnight until doubled in size. The next day, you can shape them into wreaths and let them rise. They may take a little longer to rise since the dough is cold.
- Measure the flour correctly: If you don’t have a kitchen scale and are using cups, make sure to spoon the flour into the cups and level it off with a knife so you don’t overpack it.
- Serve the same day: This Italian Easter bread is best served the same day when it’s fresh and extra soft. Like most brioche breads, it dries out quickly, so it’s best spread with jam or butter or toasted the next day.
- Use whole milk: Although you can use lower-fat milk, you won’t get the rich flavor and tenderness that you get from using whole milk!
- Additional flavors: You can add candied peel or raisins if you like and adapt the flavors with something like anise or almond extract.
- Leftovers: Leftover bread can be made into the most delicious French toast or dunked into a frothy cappuccino for breakfast if it has dried out too much.
- Freezing: You can freeze the baked bread for up to 3 months. Defrost completely, then warm up in the oven or toast if preferred.
Helpful Info for All Recipes:
- I always use extra virgin olive oil in all of my recipes unless stated otherwise.
- When I use canned or jarred tomatoes of any kind, I always use Cirio or Mutti brands for the best results and flavor.
- All vegetables are medium-sized unless stated otherwise.
- All recipes are tested and developed using a fan (convection) oven.
- Find out more about how nutrition is calculated.
- Check out our must-have Italian Pantry Staples.
- You can also find all our Essential Kitchen Tools for Italian Cooking.
Nutrition:
Carbohydrates: 54g |
Protein: 12g |
Fat: 13g |
Saturated Fat: 7g |
Trans Fat: 1g |
Cholesterol: 96mg |
Sodium: 189mg |
Potassium: 156mg |
Fiber: 2g |
Sugar: 11g |
Vitamin A: 417IU |
Vitamin C: 1mg |
Calcium: 57mg |
Iron: 1mg
Nutrition information is automatically calculated, so should only be used as an approximation.