
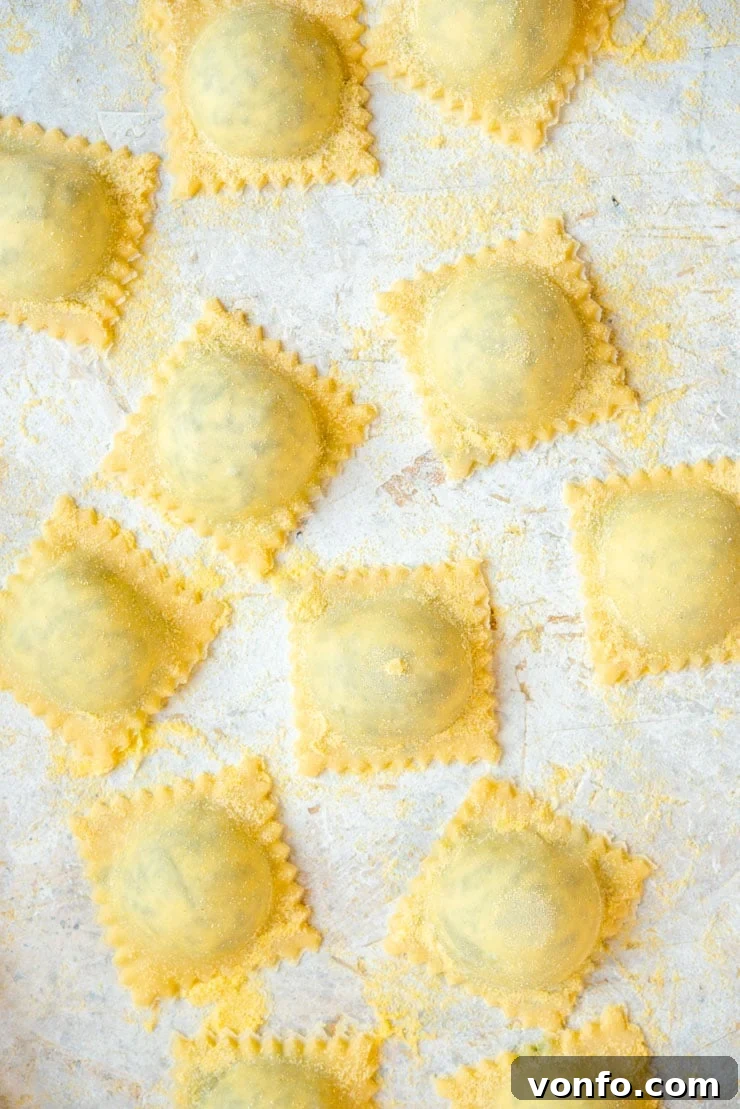
The Ultimate Guide to Homemade Ravioli: From Dough to Deliciousness
Embark on a culinary journey to create the most exquisite homemade ravioli from scratch. This comprehensive guide provides step-by-step photo instructions, expert tips on choosing the right tools, crafting perfect pasta dough, selecting divine fillings, and mastering sealing techniques. Prepare to make ravioli that will impress even the most discerning palates!
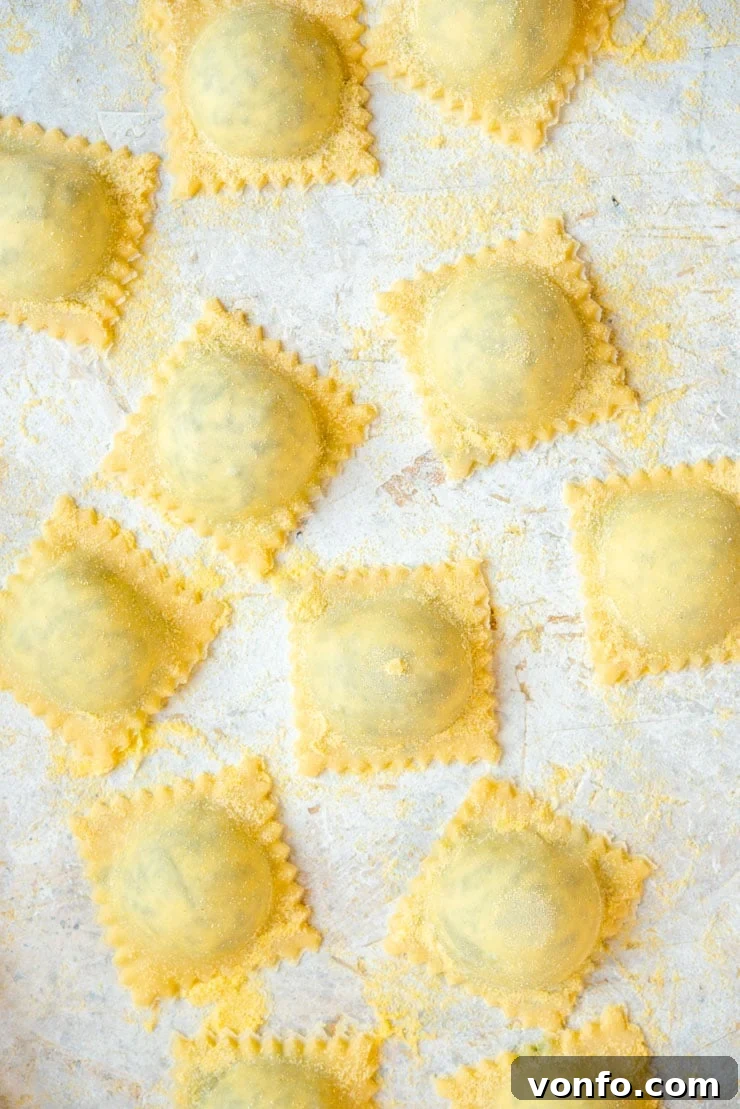
The journey of making homemade ravioli, while requiring a touch of dedication and patience, is an incredibly rewarding experience. There’s truly nothing quite like the delicate texture of fresh, silky pasta, encasing a rich, flavorful filling, all brought together with a complementary sauce. It’s a taste of authentic Italian comfort that store-bought options simply cannot replicate.
What might initially seem like a daunting task quickly becomes an enjoyable ritual with practice. Each batch you create will become easier, more intuitive, and even more delicious. This guide is designed to be your steadfast companion, covering every crucial aspect, from assembling your essential toolkit to mastering the art of the perfect pasta dough, exploring an array of incredible fillings, and much more.
Essential Tools for Ravioli Making
Creating beautiful and consistent homemade ravioli can be significantly aided by using the right tools. While a rolling pin and a knife are sufficient for the truly traditionalist, these specialized instruments offer precision and ease, allowing you to achieve various shapes and sizes for your pasta parcels.
*This post contains affiliate links, which means we may earn a small commission if you make a purchase through them.*
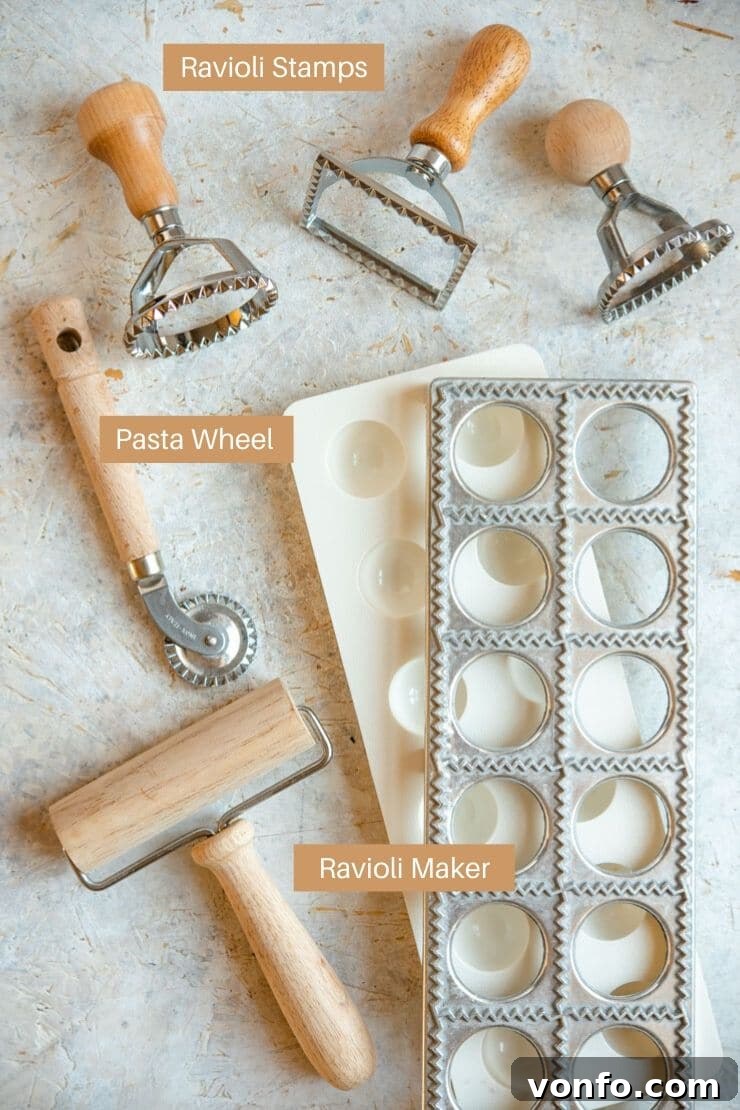
- Ravioli Wheel or Pasta Wheels: This simple yet indispensable tool features a crimped edge, perfect for cutting out hand-filled ravioli with a decorative seal. It allows for complete creative freedom regarding the size and shape of your ravioli, from large squares to elegant circles. A good pasta wheel glides smoothly through the dough, leaving a beautiful, textured edge that helps seal the pasta securely.
- Ravioli Stamps or Cutters: For those seeking uniformity and classic shapes, ravioli stamps are an excellent choice. Available in various designs, the most common being squares and circles, these stamps help you achieve perfectly proportioned ravioli every time. You simply place the stamp over the filled pasta sheets and press down to cut and seal the ravioli. Some stamps even have ejector springs for easy release.
- Ravioli Maker (Tray): This tool is a fantastic option for making multiple ravioli quickly and ensuring consistent sizing. It typically consists of a metal tray with indentations, often accompanied by a plastic mold or roller. It’s particularly useful for beginners or when preparing a large batch of ravioli, as it streamlines the filling and sealing process. You can find detailed instructions on its usage in the “How to Fill and Seal Ravioli” section below.
Crafting the Perfect Pasta Dough
The foundation of any exceptional homemade ravioli is, without a doubt, a high-quality pasta dough. A well-made dough provides the ideal texture and flavor, acting as a delicate envelope for your chosen filling. Before you even think about fillings or sauces, mastering your pasta dough is key.
We highly recommend following our dedicated guide for How to Make Homemade Pasta Dough. It’s our tried-and-true recipe, designed to be straightforward and accessible for home cooks. This guide delves into essential tips, including the best types of flour to use – typically Italian ’00’ flour for its fine texture, or a blend with durum wheat semolina for added bite and elasticity.
Top Tip: While a pasta machine (either hand-cranked or an attachment for a stand mixer) is an invaluable time-saver and highly recommended for achieving consistent thinness, don’t despair if you don’t own one. You can absolutely achieve wonderful results with just a good old-fashioned rolling pin and a bit of elbow grease. The key is to be persistent and roll the dough as thinly and evenly as possible.
Achieving the Ideal Pasta Dough Thickness
The thickness of your pasta dough is a critical factor in the success of your homemade ravioli, influencing both texture and cooking performance. Rolling your pasta to the correct thinness ensures that the pasta is delicate enough to complement the filling, yet robust enough to hold its shape during cooking without tearing.
When using a manual pasta machine, I typically roll my dough sheets to setting number 7. On many standard machines, where 9 is often the thinnest setting, number 7 represents the third-thinnest option. This particular thickness strikes a perfect balance: the pasta retains a delightful “bite” (al dente quality) and is also considerably easier to handle and fill without the risk of tearing. If you roll it too thin, it becomes overly fragile; too thick, and it can overpower the delicate filling.
If you’re unsure or rolling by hand, a general rule of thumb is to roll the pasta dough as thin as you possibly can without it tearing. You should be able to see your hand faintly through the sheet of dough. As you gain more experience with making ravioli, you’ll naturally discover your preferred thickness, adjusting it based on the type of filling and your desired final texture. Remember, consistency in thickness across the entire sheet is vital for even cooking.
Selecting the Best Fillings for Your Ravioli
The filling is the heart of your ravioli, and choosing the right one is crucial for a memorable dish. While creativity is encouraged, there are a few fundamental rules to ensure your ravioli are not only delicious but also hold together perfectly during cooking.
- Ensure the Filling is Not Too Wet: This is perhaps the most important tip. Your filling should always have a paste-like consistency, similar to firm ricotta cheese or cream cheese. If the filling is too saucy or overly moist, the fresh pasta will become sticky and difficult to work with, prone to tearing, and may adhere to your work surface. More critically, a wet filling can weaken the pasta, causing the ravioli to burst open when boiled, releasing all its flavor into the water.
- The Filling Should Not Be Too Rough: Just as a wet filling can cause problems, so can a filling with large, coarse, or sharp pieces. A rough texture could easily puncture the delicate pasta dough, leading to the same disastrous outcome as a wet filling during boiling. Ensure all ingredients are finely chopped, puréed, or well-mashed to create a smooth, cohesive mixture that won’t compromise the integrity of the pasta.
- Balance Flavors: Consider how the filling will interact with your chosen sauce. A rich, creamy filling might pair well with a light butter and sage sauce, while a vegetable-based filling could stand up to a simple tomato sauce. The filling should be well-seasoned but not overly strong, allowing the freshness of the pasta and the nuances of the sauce to shine through.
Here are some of my favorite versatile fillings and inspiring ideas for you to try:
- Mushroom Ravioli with Parmesan Cream Sauce (A highly popular and incredibly flavorful recipe!)
- Sweet Butternut Squash (Often enhanced with amaretti biscuits or sage for a traditional touch.)
- Classic Spinach and Ricotta (A timeless and comforting combination, ensure spinach is well-drained.)
- Creamy Burrata (A luxurious and decadent filling, often paired with a simple tomato sauce.)
- Delicate Stracchino (A soft, fresh Italian cheese offering a subtle tang.)
- Savory Prosciutto (Finely minced and combined with ricotta or breadcrumbs for texture.)
- Spicy Sausage and Fennel (A robust and aromatic choice, perfect for a heartier meal.)
How to Fill and Seal Ravioli – Three Expert Methods
Once you have your perfectly rolled pasta dough and your delectable filling, it’s time for the art of assembling the ravioli. There are several effective methods, each offering slightly different results in terms of speed, uniformity, and aesthetic. Choose the one that best suits your comfort level and the tools you have available.
Method 1: Using a Ravioli Maker (Tray)
The ravioli maker is an excellent tool for achieving consistently shaped and sized ravioli, especially useful for larger batches or for beginners.
- **Prepare the Tray:** A critical first step when using a ravioli maker is to dust it very generously and lightly with semolina flour or ’00’ flour. This crucial step prevents the delicate pasta dough from sticking to the mold – a common mishap that can lead to frustration and torn ravioli. (Refer to photo 1 in the original for visual guidance on dusting.)
- **Lay the First Pasta Sheet:** Carefully place your first sheet of thinly rolled pasta dough directly over the floured ravioli maker. Ensure there is enough overlap on all the edges, as this excess dough will be trimmed later.
- **Create Pockets:** Gently lay the plastic dimpled mold (if your maker has one) over the pasta sheet, aligning it with the indentations. Very lightly press down to create small pockets or depressions in the pasta, which will serve as guides for your filling. (Refer to photos 2 & 3 in the original for visual guidance.)
- **Add Filling:** Spoon your desired filling into each of these created pockets. Approximately one heaped teaspoon is usually sufficient for standard-sized ravioli, but adjust based on the size of your maker’s indentations. (Refer to photo 4 in the original.)
- **Cover and Seal:** Carefully place your second sheet of pasta dough directly over the filled first sheet. Using your fingertips, gently press around each mound of filling to seal the two pasta sheets together and, crucially, to remove any trapped air around the filling. Air pockets can cause the ravioli to burst during cooking. (Refer to photos 5 & 6 in the original.)
- **Cut and Release:** If your ravioli maker comes with a mini rolling pin, use it to roll firmly over the top of the pasta. This action will cut the pasta around the edges of each ravioli and crimp them securely.
- **Trim and Unmold:** Remove the excess pasta dough from around the edges of the ravioli maker. Then, carefully turn the entire maker over onto a clean, floured surface. The perfectly formed ravioli should fall out easily, ready for cooking! (Refer to photos 7 & 8 in the original.)
Method 2: Using a Ravioli Stamp
Ravioli stamps offer a classic, artisanal look and are perfect for creating individual, handcrafted ravioli with elegant crimped edges.
- **Prepare Your Surface:** Lay one sheet of your thinly rolled pasta dough onto a clean work surface that has been lightly dusted with semolina flour. This prevents sticking.
- **Mark the Dough:** Lightly press your chosen ravioli stamp onto the pasta sheet. You only want to create a faint impression or guide for where to place the filling; do not cut through the dough at this stage. (Refer to photo 1 in the original for visual guidance.)
- **Portion the Filling:** Place your filling (around one heaped teaspoon, or adjusted to your stamp size) neatly in the center of each marked area on the pasta sheet. (Refer to photo 2 in the original.)
- **Layer and Gently Seal:** Carefully lay a second sheet of pasta dough directly over the first, ensuring it covers all the mounds of filling. Using your hands, gently cup around each mound of filling, pressing lightly but firmly to seal the two pasta sheets together. As you press, work outwards from the center of the filling to meticulously push out any trapped air.
- **Top Tip for Sealing:** If you find your pasta dough is a little dry or having trouble sticking, you can very lightly dab the edges of the pasta around the filling with a tiny bit of water using your finger. This acts as a natural glue, helping to create a secure seal.
- **Final Cut:** Finally, take your ravioli stamp and firmly press down around each mound of filling to cut out individual ravioli. Lift the stamp, and you’ll have beautifully formed ravioli, ready to cook! (Refer to photos 3 & 4 in the original.)
Method 3: The Free Hand Method (with a Pasta Wheel)
This method offers the most flexibility and a truly rustic, homemade look. It relies on your spatial judgment and the precise cutting of a pasta wheel.
- **Lay Out Dough:** Place one long sheet of your thinly rolled pasta dough on a lightly floured surface.
- **Space the Filling:** Spoon mounds of your chosen filling onto the pasta sheet, leaving approximately two finger-widths of space between each mound. The exact amount of filling will depend on how large you want your individual ravioli to be, but a heaped teaspoon is a good starting point for medium-sized ravioli. (Refer to photo 1 in the original for visual guidance.)
- **Cover and Seal Air:** Lay your second sheet of pasta dough directly over the first, carefully covering all the mounds of filling. Now, using your fingertips, gently cup your hands around each mound of filling, pressing lightly to seal the pasta sheets together while simultaneously pushing out any trapped air. This is crucial for preventing bursts during cooking. (Refer to photo 2 in the original.)
- **Cut with Precision:** Using your pasta wheel, carefully cut the sides of the ravioli, separating them into individual squares, rectangles, or even triangles – the shape is entirely up to your preference. You can neaten up the edges and adjust the size as you cut, ensuring each ravioli is sealed on all sides. (Refer to photos 3 & 4 in the original.)
- **Top Tip for Alternatives:** If you don’t have a specialized pasta wheel, you can certainly use a pizza cutter or even a sharp knife. While these won’t create the beautiful crimped edges, they will effectively cut and seal your ravioli, still yielding a delicious homemade product.
Pairing Ravioli with the Perfect Sauce
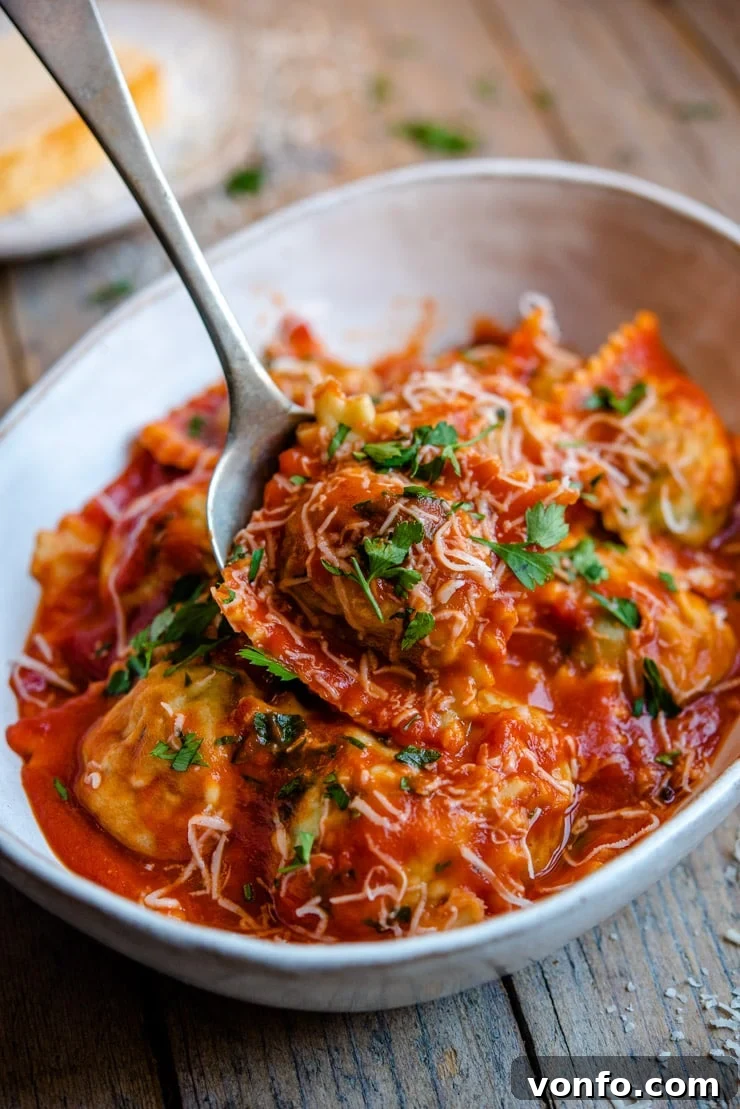
The sauce you choose for your homemade ravioli is just as important as the filling itself. It should complement and enhance the flavors of the pasta and its interior, rather than overwhelming them. Think of the sauce as the perfect accompaniment, adding another layer of depth and enjoyment to your dish.
The possibilities for ravioli sauces are virtually endless, ranging from a vibrant Authentic Italian Tomato Sauce, a fragrant Herby Garlic Butter Pasta Sauce, various cream-based sauces, or even a hearty slow-cooked Ragu. The key is balance and harmony.
For example, if you’ve made a delicate ricotta and spinach filling, a simple butter and sage sauce allows the fresh flavors to shine. For a richer filling like butternut squash, a brown butter sauce with toasted nuts can be divine. I’m particularly fond of the rich and luscious Parmesan cream sauce that perfectly complements our mushroom ravioli recipe – it’s a truly unforgettable pairing!
The main principle to remember is that the sauce should never overpower the delicate flavors of your filling and fresh pasta. Aim for a sauce that provides a contrasting texture, a complementary flavor profile, and ties the entire dish together beautifully, making each bite a delightful experience.
Preparing Homemade Ravioli in Advance
Homemade ravioli can be a labor of love, and sometimes you might want to prepare them ahead of time to save precious minutes before a meal or when entertaining guests. Thankfully, ravioli are quite versatile when it comes to advance preparation and storage.
- Short-Term Storage (Same Day): If you plan to cook your ravioli within a couple of hours of making them, you can store them on a large baking sheet or board. Make sure the surface is generously dusted with semolina flour to prevent sticking. Arrange the ravioli in a single layer, ensuring they don’t touch each other. Once arranged, lightly cover them with a clean kitchen towel or plastic wrap to prevent them from drying out. Store at room temperature if cooking within 1-2 hours, or refrigerate if storing for longer, up to 4 hours.
- Long-Term Storage (Freezing): For preparing ravioli a day or more in advance, freezing is the best option. This method not only preserves their freshness but also ensures they cook beautifully without sticking together.
- Initial Freeze: Lay the freshly made ravioli in a single, even layer on a baking sheet lined with parchment paper and lightly dusted with semolina flour. Ensure there is adequate space between each ravioli. Place the baking sheet in the freezer until the ravioli are completely solid, typically for 30-60 minutes, depending on their size.
- Transfer for Storage: Once frozen solid, you can transfer the ravioli to a freezer-safe ziploc bag or an airtight container. This initial freezing step prevents them from sticking together in a large clump, allowing you to easily take out only what you need. They can be stored in the freezer for up to 1-2 months for best quality.
- Cooking from Frozen: There is absolutely no need to thaw or defrost frozen ravioli before cooking them. In fact, attempting to thaw them can often cause them to stick together and potentially rupture. Simply cook them straight from frozen in a pot of generously salted boiling water. They will typically require a minute or two longer to cook than fresh ravioli, usually around 5-8 minutes, depending on their size and thickness.
Pro Tips for Flawless Homemade Ravioli
Achieving restaurant-quality homemade ravioli is within reach with these expert tips:
- Flour is Your Friend (Semolina Preferred): Always have a generous supply of fine semolina flour on hand. Use it to dust your work surface, pasta sheets, and finished ravioli to prevent any sticking. Semolina is preferable to regular flour as it has a coarser texture that reduces moisture absorption, helping the pasta stay firm.
- Understand Flour Alternatives: While semolina is ideal, you can use regular all-purpose flour for dusting. Be aware, however, that regular flour tends to absorb moisture more quickly and can dry out your pasta dough faster, making it a bit more delicate to handle.
- Filling Consistency is Key: Reiterate this golden rule: your chosen filling must always be smooth, cohesive, and neither too wet nor too rough. Avoid any large chunks or sharp edges that could tear the delicate pasta dough during assembly or cooking. A pasty, firm consistency is perfect.
- Master the Dough First: A great ravioli starts with great pasta. Refer to our go-to recipe for homemade pasta dough here to ensure you have a resilient, pliable, and delicious foundation.
- Invest in Tools, But Don’t Depend on Them: While specialized tools like ravioli makers, stamps, and pasta wheels certainly streamline the process and make it easier to achieve uniform results, they are not strictly necessary. With a rolling pin, a sharp knife, a cookie cutter, or even a pizza wheel, and a little extra effort and precision, you can still produce equally delicious homemade ravioli.
- Work Efficiently: Fresh pasta dough can dry out quickly, especially in a warm kitchen. Work in batches and keep unused dough covered with a damp cloth or plastic wrap. When filling and sealing, try to work at a steady pace to prevent the pasta from becoming too dry to seal effectively.
- Expel Air Pockets: This cannot be stressed enough – ensure all air is pressed out from around the filling before sealing. Trapped air expands when heated, causing ravioli to burst in the boiling water.
- Cook in Batches: When cooking, don’t overcrowd your pot. Cook ravioli in small batches to maintain consistent water temperature and prevent them from sticking together.
More Homemade Pasta Creations to Explore
Once you’ve mastered ravioli, the world of homemade pasta awaits! Here are some other delightful pasta recipes to expand your repertoire:
- Luxurious Lobster Ravioli with Vodka Cream Sauce
- Earthy Mushroom Ravioli With Parmesan Cream Sauce
- Comforting Butternut Squash Ravioli with Sage and Brown Butter Sauce
- Traditional Homemade Agnolotti (step by step)
We love hearing about your culinary adventures! If you’ve tried making your own Homemade Ravioli or any other recipe from our collection, please share your experience and feedback in the comments below. Your insights are invaluable to us! You can also Follow us on Facebook, Instagram, and Pinterest to discover more delicious food ideas and keep up with our latest creations.
Detailed Step-By-Step Photos Are Provided Above in the Main Article.
This recipe comes with comprehensive step-by-step photos, helpful tips, and tricks to ensure perfect results on your first attempt!
Homemade Ravioli Recipe
By Emily
30 mins
40 mins
1 hr 10 mins
4 – 6 servings
Print Recipe
Equipment
- Pasta machine or rolling pin
- Ravioli wheel, ravioli stamp, or ravioli maker (tray)
- Large baking sheets
Ingredients
- 1 batch homemade egg pasta dough
- Semolina flour, for dusting (recommended here)
- Filling of choice (see notes below for ideas)
- Optional: Water, for sealing if needed
Instructions
General Preparation for All Methods
- Prepare one batch of homemade egg pasta dough according to our guide and allow it to rest.
- While the dough rests, prepare your chosen ravioli filling, ensuring it is smooth, not too wet, and free of sharp pieces.
- Set up your workspace with plenty of semolina flour for dusting.
- Roll out your pasta dough into thin sheets, ideally to a thickness of setting 7 on a pasta machine, or as thin as possible without tearing if rolling by hand.
Method A: Using a Ravioli Maker
- Lightly dust your ravioli maker generously with semolina or ’00’ flour to prevent sticking.
- Place one sheet of pasta dough over the maker, ensuring it covers all indentations with ample overlap.
- If your maker has plastic dimples, place them over the pasta and lightly press to create pockets for the filling.
- Spoon about 1 heaped teaspoon of your desired filling into each pocket.
- Place a second sheet of pasta directly over the first, gently pressing down around each mound of filling to seal and expel any trapped air.
- Use the mini roller (if provided) to roll over the maker, cutting and sealing the ravioli edges.
- Remove excess dough, then invert the maker onto a floured surface to release the perfectly formed ravioli.
Method B: Using a Ravioli Stamp
- Lay one sheet of pasta on a clean, semolina-dusted surface.
- Lightly press your stamp onto the pasta to create faint guide marks for the filling; do not cut through.
- Place about 1 heaped teaspoon of filling in the center of each marked area.
- Cover with a second pasta sheet, and gently cup your hands around the filling, pressing lightly to seal the pasta and remove air. If needed, lightly dab the pasta edges with water for a better seal.
- Finally, use your stamp to cut out each individual ravioli.
Method C: The Free Hand Method (with a pasta wheel)
- Lay out one sheet of pasta on a floured surface.
- Space mounds of filling (about 1 heaped teaspoon each) approximately two finger-widths apart.
- Place the second pasta sheet directly over the first, gently pressing around the filling with your hands to seal and push out air.
- Using a pasta wheel (or pizza cutter/knife), cut the sides of the ravioli into individual squares or your desired shape, ensuring all edges are sealed.
Cooking Instructions
- Bring a large pot of generously salted water to a rolling boil.
- Carefully add the ravioli (fresh or frozen) to the boiling water, cooking in batches to avoid overcrowding.
- Cook fresh ravioli for 3-5 minutes, and frozen ravioli for 5-8 minutes, or until they float to the surface and are al dente.
- Using a slotted spoon, transfer the cooked ravioli directly into your prepared sauce. Gently toss to coat and serve immediately.
Notes
- Always have plenty of semolina flour available to dust your work surface and the ravioli, preventing them from sticking. While regular flour can be used, semolina is preferred as it dries out the pasta less quickly.
- The filling must be smooth, cohesive, and neither too wet nor too rough. Any sharp edges or excessive moisture can cause the pasta to tear or burst during cooking.
- For the ultimate pasta dough, refer to our detailed guide: How to Make Homemade Pasta Dough.
- While specialized tools (ravioli maker, stamps, pasta wheel) make the process easier and yield uniform results, you can certainly make homemade ravioli with just a rolling pin and a knife, cookie cutter, or pizza wheel – it just requires a little more effort.
- Nutrition information provided is an approximation and calculated without the filling, as fillings can vary widely.
Ravioli Filling and Sauce Ideas
- For a rich, savory option: Mushroom Ravioli with Parmesan Cream Sauce
- For an elegant, decadent meal: Lobster Ravioli with Vodka Cream Sauce
- Classic and comforting: Ricotta and Spinach (ensure spinach is very well-drained)
- Sweet and earthy: Butternut Squash with Sage Butter
Helpful Info for All Recipes
- I always use extra virgin olive oil in all of my recipes unless stated otherwise.
- When using canned or jarred tomatoes, I consistently choose Cirio or Mutti brands for their superior quality and flavor.
- All vegetables mentioned are assumed to be medium-sized unless otherwise specified.
- All our recipes are tested and developed using a fan (convection) oven.
- Find out more about how nutrition is calculated.
- Discover our essential Italian Pantry Staples.
- Explore all our recommended Essential Kitchen Tools for Italian Cooking.
Nutrition
Calories:
104
kcal
Nutrition information is automatically calculated and should be used as an approximation only, especially as fillings are not included.
Did you try this recipe?
We’d love to hear your feedback! Leave a comment below!