
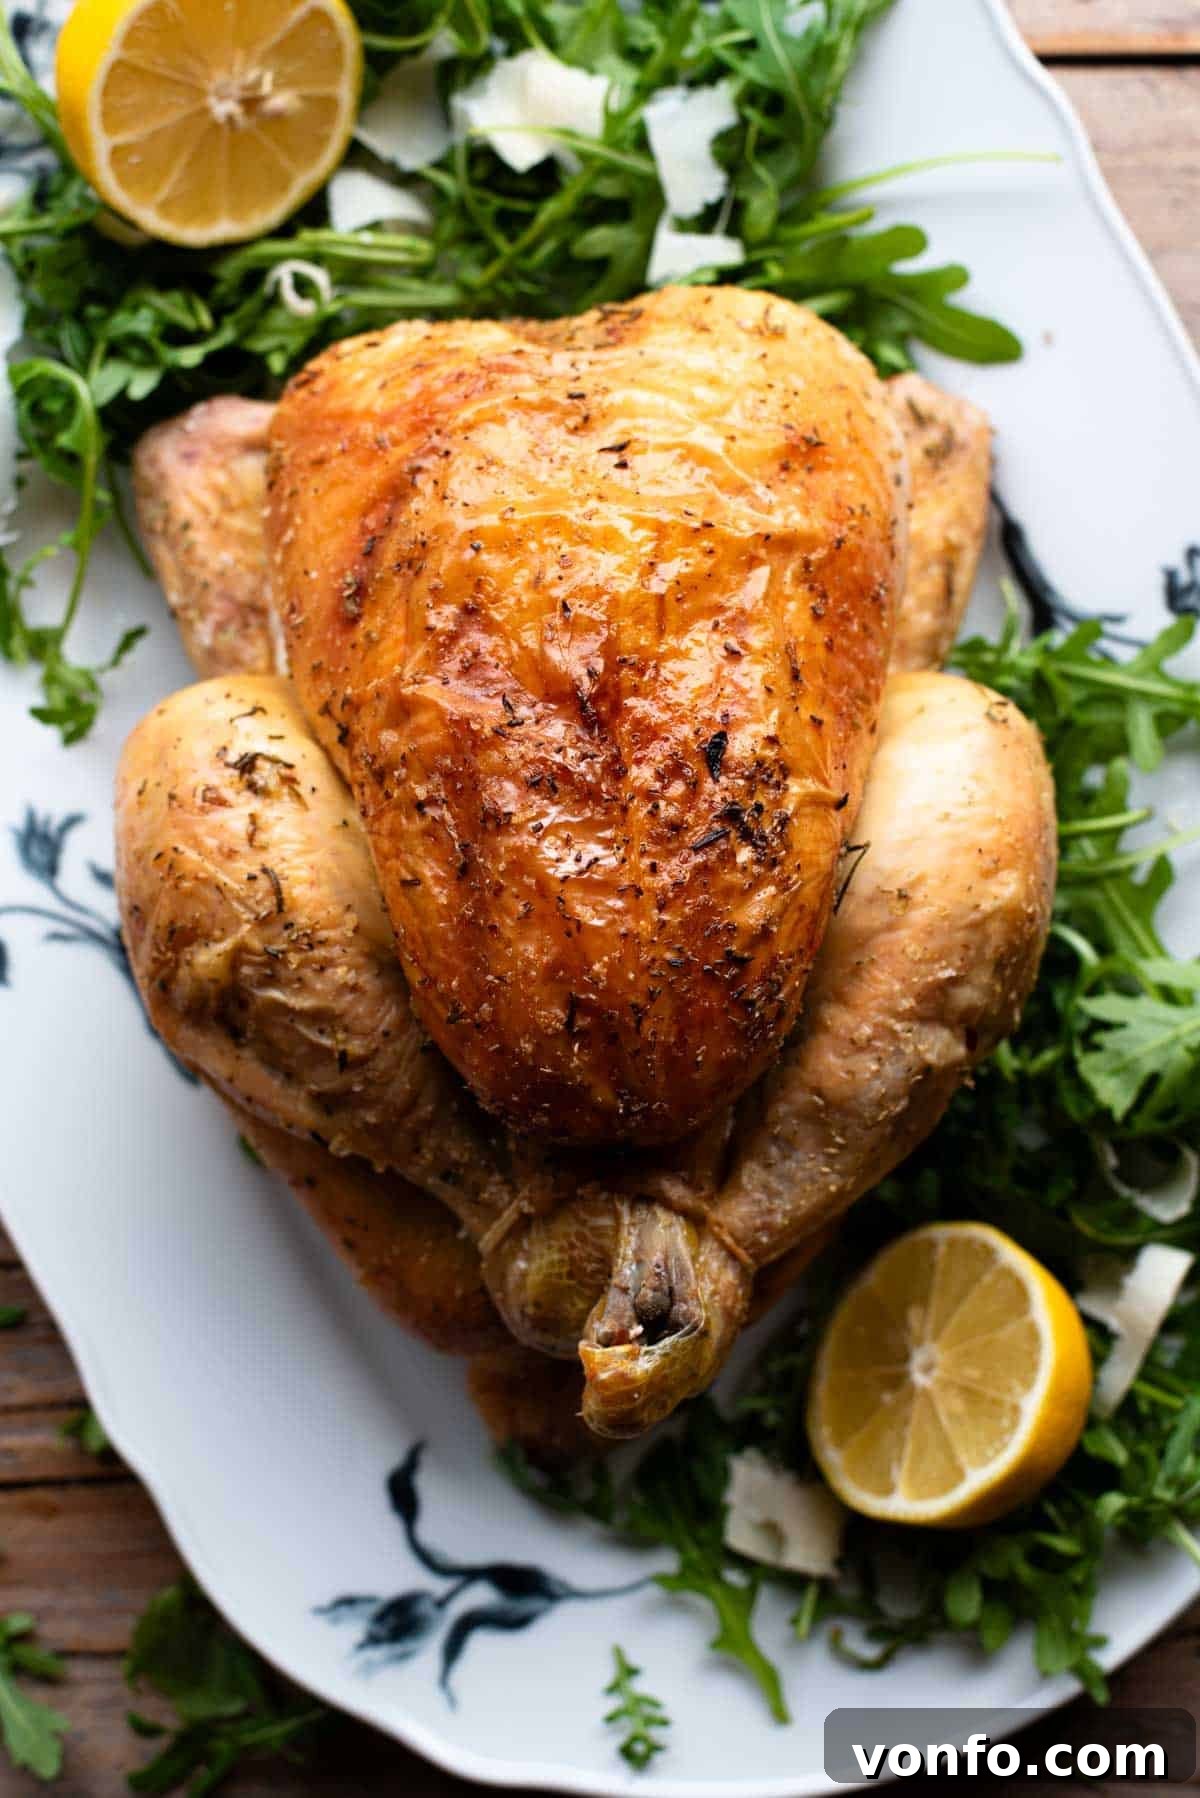
Welcome to our definitive guide on crafting the most succulent and flavorful Lemon Roast Chicken. This recipe isn’t just about roasting a chicken; it’s about creating an experience—a dish that boasts a subtle, fragrant lemon essence woven throughout the tender meat, complemented by a bright, zesty lemon kick in the accompanying gravy. We’ll demystify the art of achieving that perfect roast, sharing all our cherished tips and tricks, and walk you through preparing an incredibly delicious, wholesome gravy that elevates the entire meal.
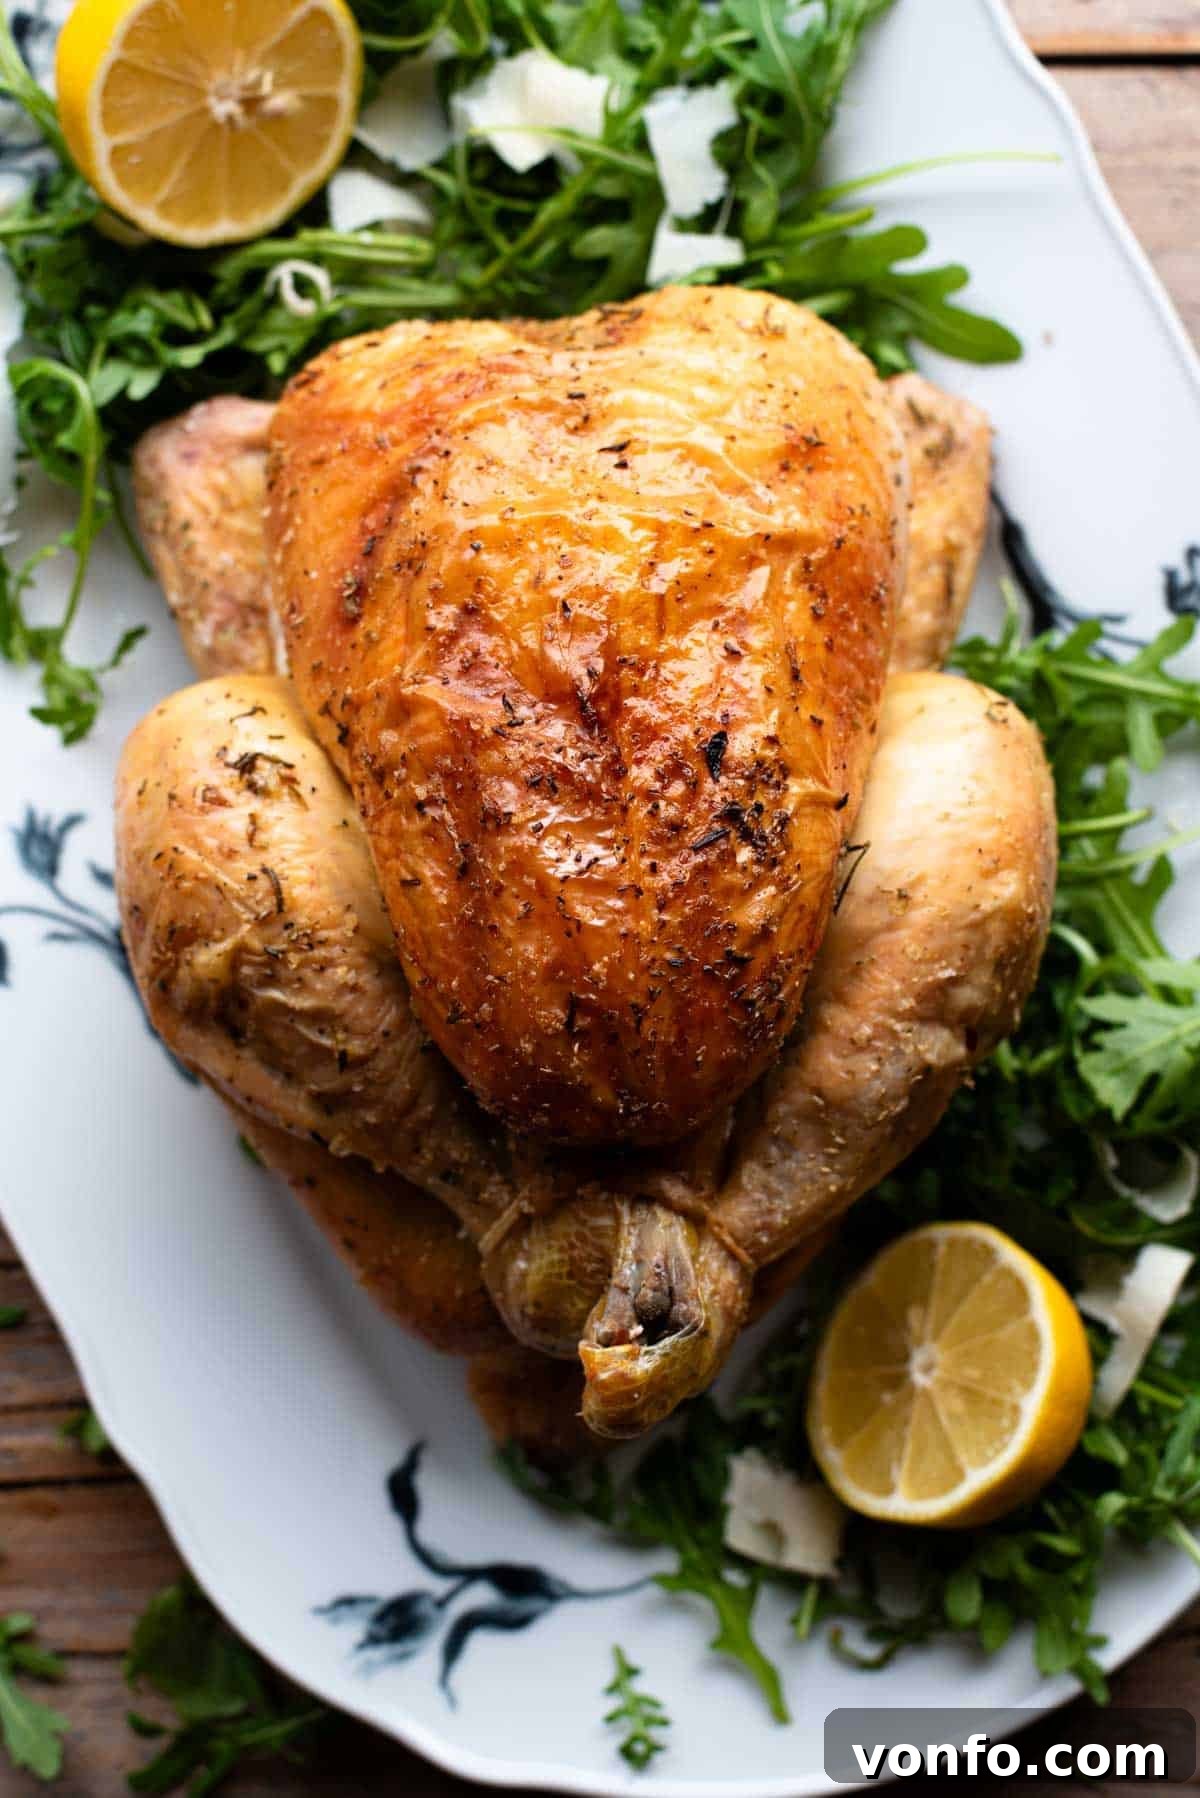
For years, this simple yet undeniably delicious lemon roast chicken has been a staple in our kitchen. It’s a recipe that never disappoints, delivering consistently juicy results and an unforgettable depth of flavor. While the process may seem straightforward, a few key principles are vital for success: selecting quality ingredients, mastering the art of seasoning, and understanding the importance of proper resting. Adhering to these pillars transforms a good roast into a truly exceptional one, promising tender meat and a rich, aromatic gravy that will leave everyone wanting more.
Why This Lemon Roast Chicken Is A Must-Try
Our lemon roast chicken recipe stands out for its simplicity and the incredible depth of flavor it achieves with minimal fuss. This isn’t just another chicken recipe; it’s a celebration of classic comfort food infused with bright, refreshing notes of citrus and aromatic herbs. The magic happens as the lemon and rosemary gently permeate the chicken during roasting, creating a beautifully balanced taste that’s both comforting and sophisticated. It’s perfect for a cozy Sunday dinner, a festive holiday gathering, or even a flavorful weeknight meal that feels special. Plus, with our detailed instructions, even novice cooks can achieve a restaurant-quality roast chicken at home.
Essential Ingredients for the Perfect Lemon Roast Chicken
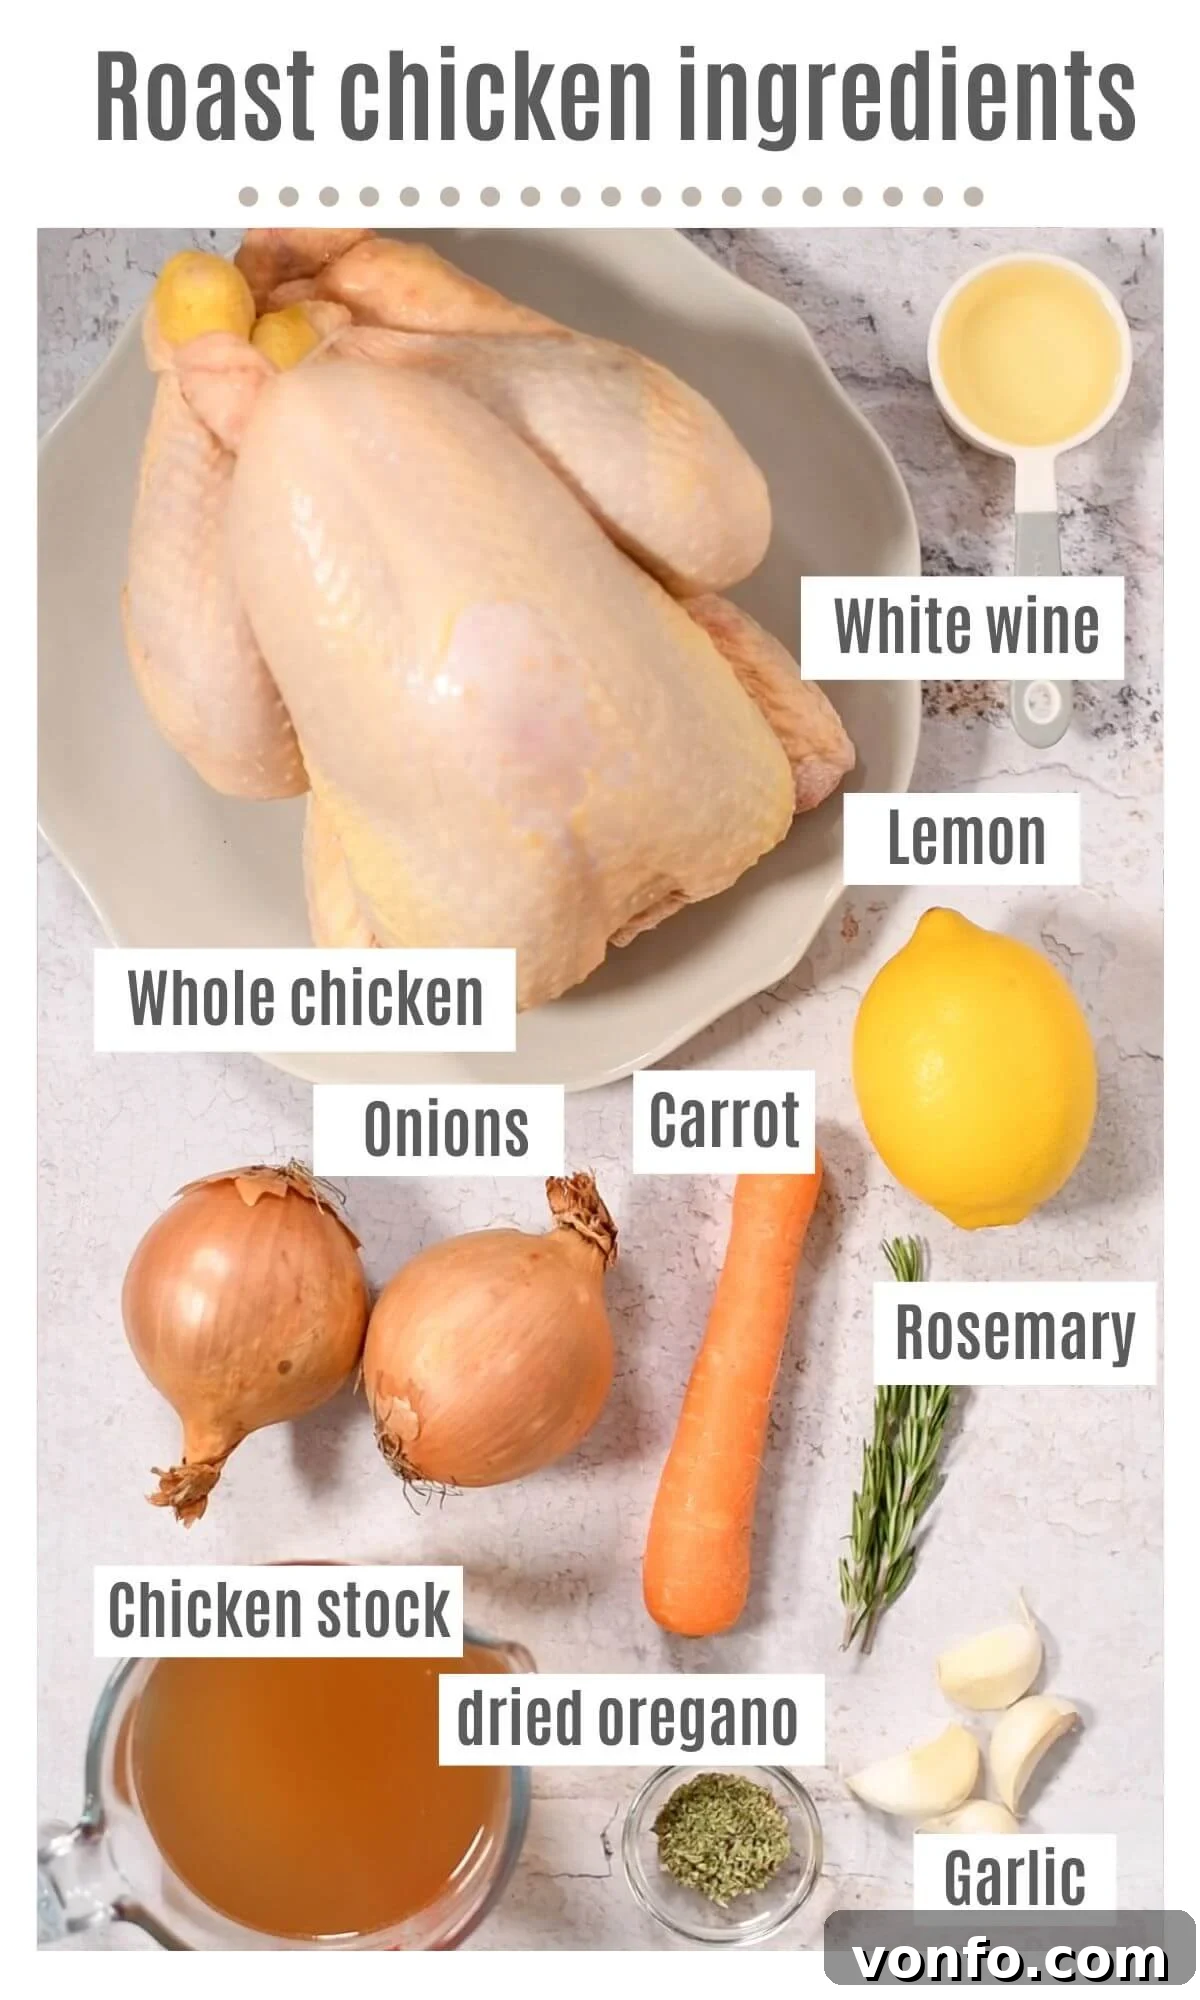
The foundation of any great dish lies in its ingredients. For this Lemon Roast Chicken, a careful selection ensures maximum flavor and juiciness. Here’s a closer look at what you’ll need and why each component is crucial:
Ingredient Notes and Expert Substitutions
- Whole Chicken: We cannot stress enough the importance of quality here. If possible, opt for a free-range and organic chicken. Beyond the ethical considerations, the superior flavor, texture, and natural juiciness of these birds are truly noticeable. While they might be a splurge, a single whole chicken can easily provide 2-3 meals, making it a cost-effective choice in the long run. However, we understand that this isn’t always feasible, so choose the best quality chicken that fits your budget and preferences. For an average 2.2kg (5lb) chicken, expect it to serve 4-6 people generously.
- Lemon: Use a good quality, unwaxed lemon. Since the lemon zest and juice will infuse the chicken’s cavity and later the gravy, avoiding wax ensures pure, unadulterated flavor. The lemon provides essential aromatics and a bright, acidic lift to both the meat and the savory gravy.
- Herbs: Our recipe calls for a combination of dried oregano and fresh rosemary. These herbs offer a robust, earthy fragrance that beautifully complements the lemon. If you’re looking to experiment, fresh thyme or even tarragon can make excellent substitutions, each offering a slightly different aromatic profile. Fresh herbs are always preferred for their vibrant essential oils, but good quality dried herbs are perfectly acceptable.
- Vegetables: Carrots, onions, and garlic are more than just aromatics; they form the flavorful bed for the chicken and are essential for building the gravy’s base. We typically leave the skin on our onions (after thoroughly cleaning them) as it imparts a richer, deeper color to the gravy. However, feel free to peel them if you prefer. These vegetables caramelize during roasting, adding incredible sweetness and depth to the pan drippings.
- Chicken Stock (Optional for Gravy): While the gravy is technically optional, it is an absolute game-changer and highly recommended. Use a high-quality, low-sodium chicken stock, or even better, homemade stock, to ensure the richest flavor without overpowering saltiness. The stock forms the liquid base for a velvety, delicious gravy that captures all the savory notes from the roasted chicken and vegetables.
- White Wine (Optional for Gravy): A dry white wine, such as a crisp Italian Pinot Grigio or Sauvignon Blanc, adds an exquisite layer of acidity and complexity to the gravy. The alcohol cooks off, leaving behind a nuanced flavor that brightens the sauce. If you prefer not to use wine, simply increase the amount of chicken stock.
Step-by-Step Guide to Roasting Your Lemon Chicken
Achieving a perfectly roasted chicken is simpler than you might think. Follow these clear, detailed steps for a juicy, flavorful bird and an irresistible gravy.
Step 1: Prepare Your Oven and Chicken
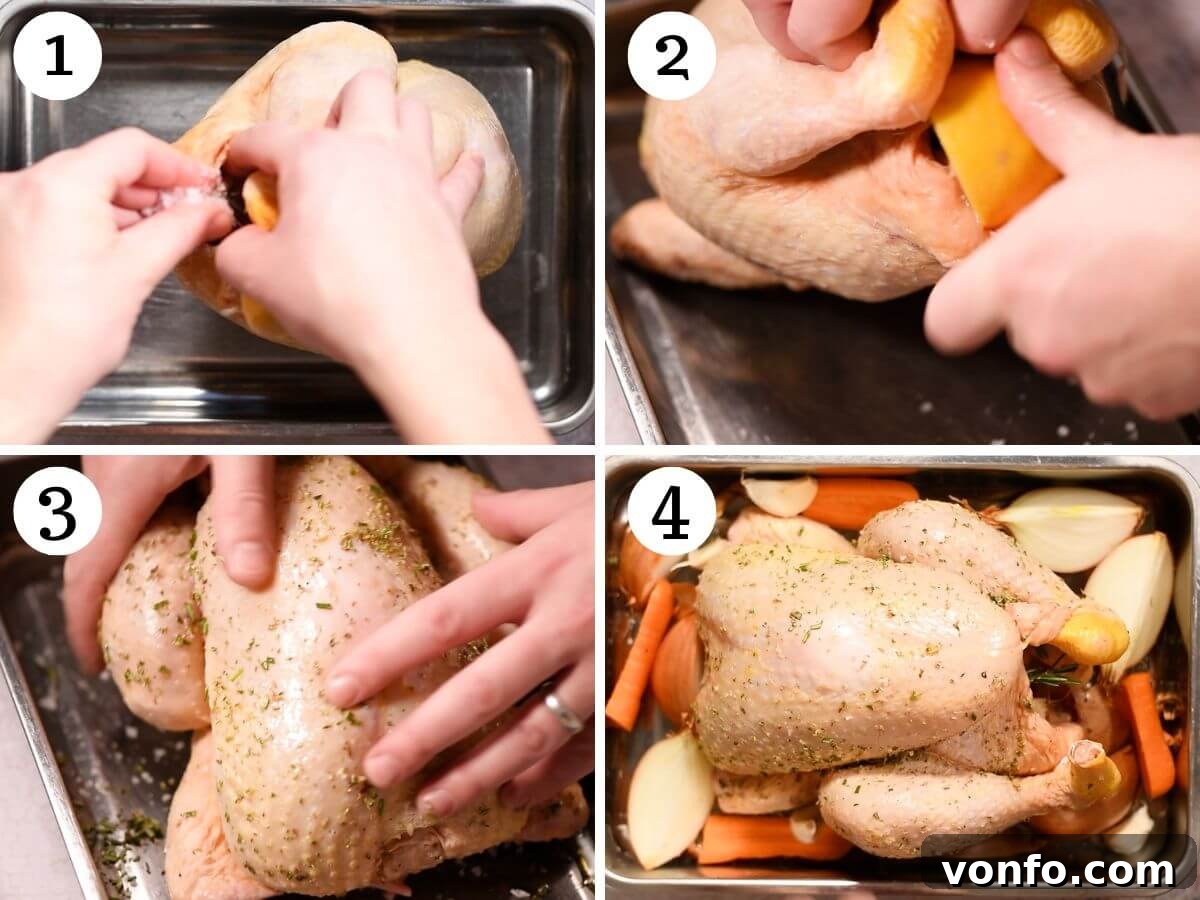
Pre-heat your oven to 180°C (350°F). While the oven heats, generously season the inside cavity of your whole chicken with salt. Then, stuff the cavity with one lemon cut in half, a quarter of an onion, and one sprig of fresh rosemary. These aromatics will infuse the chicken with incredible flavor from the inside out (photos 1 and 2).
Step 2: Season the Exterior
Place the seasoned chicken in your roasting tray. Now, it’s time to focus on the exterior. Season the entire outside of the chicken generously with salt. Drizzle 1-2 tablespoons of olive oil over the chicken, then sprinkle with dried oregano and finely chopped fresh rosemary. Using your hands, rub the herbs and salt thoroughly all over the chicken, making sure to coat the bottom and crevices for an even, flavorful crust (photo 3).
Step 3: Add Vegetables and Roast
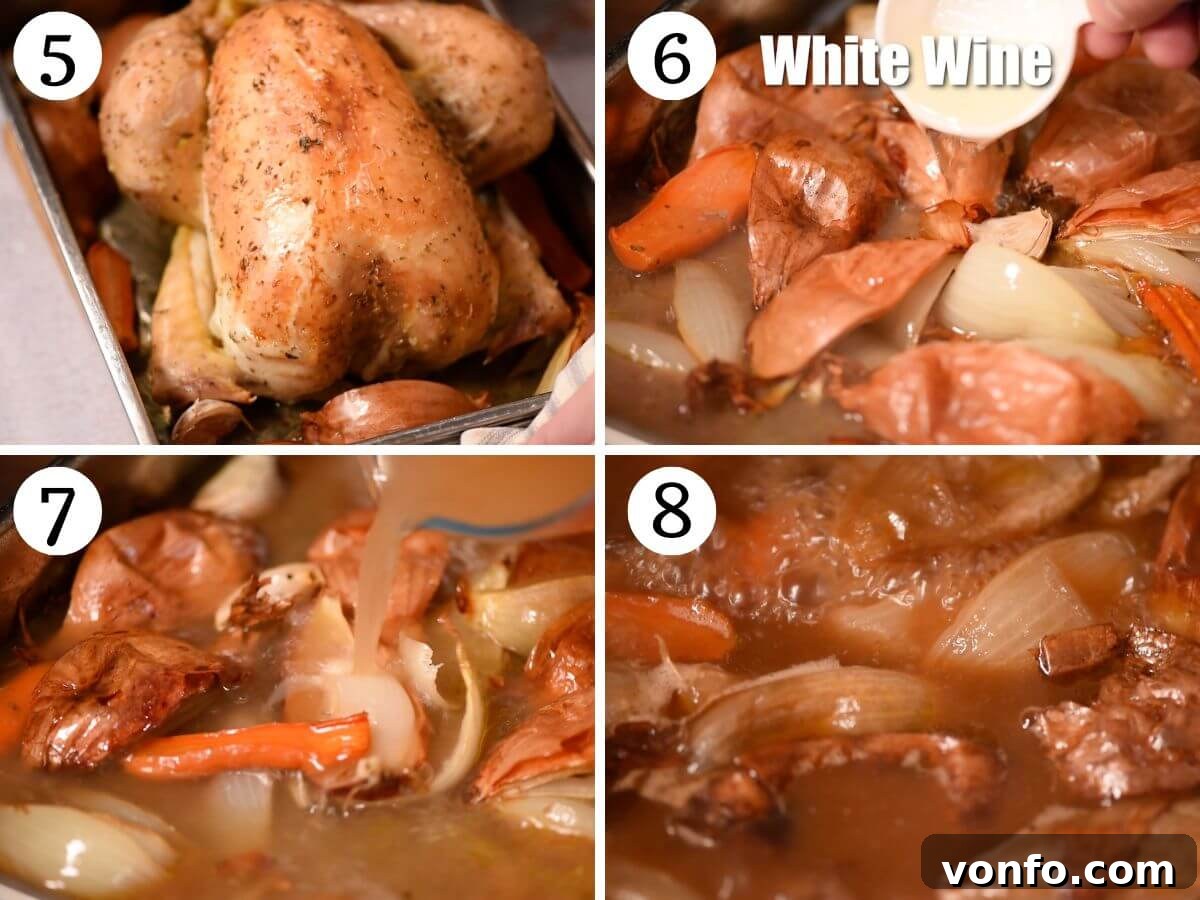
Arrange the remaining onion and carrot pieces around the chicken in the tray, along with the 4 cloves of garlic. These vegetables will not only add flavor to the chicken but also create a rich base for your gravy. Roast the chicken uncovered for approximately 1 hour and 45 minutes. This timing is ideal for a 2.2kg (4.8 lbs) chicken. For smaller chickens, adjust cooking time accordingly (see notes below) (photos 4 and 5).
Step 4: The Crucial Resting Period
Once roasted, remove the chicken from the oven. This next step is absolutely essential for a truly juicy and flavorful chicken: cover the chicken loosely with foil and allow it to rest for 45 minutes to 1 hour. During this time, the juices, which have been drawn to the surface by the heat, redistribute back into the meat fibers, ensuring every bite is tender and moist. Do not skip or shorten this step!
How to Make the Optional, Flavor-Packed Gravy
Don’t let those delicious pan drippings go to waste! Making a homemade gravy is easy and immensely rewarding.
Step 5: Deglaze and Simmer
While the chicken rests, place the roasting tray with the cooked vegetables and drippings directly onto the stove over medium heat. Add the white wine (if using) and use a wooden spoon to scrape up any browned bits from the bottom of the tray—this is called deglazing and is packed with flavor. Let the wine reduce by half, then pour in the chicken stock (photos 6-8).
Allow the stock to simmer gently for about 30 minutes, uncovered, until it has reduced and the flavors have concentrated. This slow reduction is key to a rich, deeply flavored gravy.
Step 6: Strain and Thicken
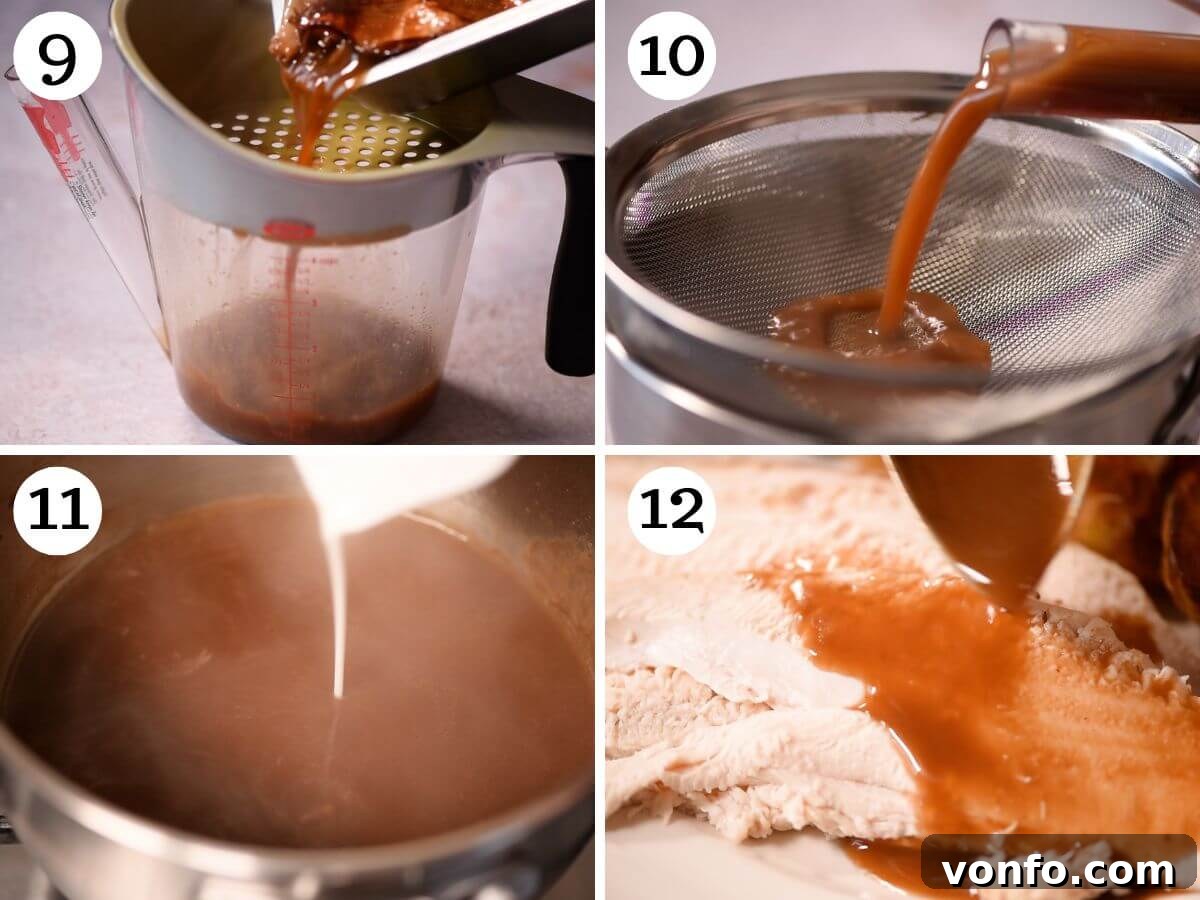
Carefully sieve the gravy into a jug or bowl, pressing the roasted vegetables with a potato masher or fork to extract every last drop of flavorful juice. If you have a gravy separator, use it to easily skim off any excess fat, leaving you with a silky, lighter gravy. Transfer the sieved gravy to a clean saucepan and bring it to a simmer (photo 9).
In a small bowl, whisk together the water and corn starch until smooth to create a slurry. Gradually add this slurry to the simmering gravy, stirring or whisking constantly to prevent lumps (photos 10 and 11).
Continue to simmer for approximately 10 minutes, stirring occasionally, until the gravy has thickened to your desired consistency. Taste the gravy and add additional salt and pepper if needed. We often find it’s perfectly seasoned from the drippings and stock. Serve this incredible homemade gravy generously alongside your perfectly roasted lemon chicken (photo 12).
Important Tips for a Perfect, Juicy Roast Chicken
- Quality Matters: Investing in a high-quality chicken truly makes a world of difference. We are firm believers that the flavor, juiciness, and overall eating experience are significantly enhanced when using organic and free-range poultry. While it may cost a little more, the superior taste justifies the expense, especially for a centerpiece meal. Choose the best chicken you can access.
- Seasoning is Key: Proper seasoning is paramount for a flavorful roast. We recommend using Maldon sea salt flakes for their excellent texture and clean taste, but always use the salt you are most comfortable with to ensure you have control over the seasoning level. Crucially, remember to season both the inside cavity and the entire exterior of the chicken for a balanced flavor profile. Don’t be shy with the salt and pepper!
- The Art of Resting: This cannot be overstated: resting your chicken after roasting is a non-negotiable step for tenderness and juiciness. For a 2.2kg (5lb) chicken, a resting period of 45 minutes to 1 hour is ideal. During cooking, muscle fibers contract and push juices to the surface. Resting allows these fibers to relax and the juices to redistribute throughout the meat. Carving too early will cause all those precious juices to run out, leaving you with dry, tough chicken. Trust us on this vital step!
- Checking for Doneness: To ensure your chicken is safely cooked through, use a meat thermometer inserted into the thickest part of the thigh, avoiding the bone. The internal temperature should register 75°C (165°F) and hold for at least 2 minutes. Another visual cue is to make a small incision in the thigh meat; the juices should run clear, not pink.
- Pre-heating the Roasting Tray (Optional but Recommended): For an even crispier skin, you can pre-heat your empty roasting tray in the oven for 10-15 minutes before adding the chicken. This creates an initial burst of heat upon contact, helping to render fat and crisp the skin faster.
Lemon Roast Chicken Recipe FAQs
What internal temperature should a cooked roast chicken be?
The safe internal temperature for a fully cooked whole roast chicken is 75°C or 165°F. Always use a reliable meat thermometer inserted into the thickest part of the thigh (without touching the bone) to ensure accuracy.
How long does leftover roast chicken last?
Cooked roast chicken, properly stored in an airtight container, will keep well in the refrigerator for up to 4 days. Always ensure it cools down completely before refrigerating to prevent bacterial growth.
Can I freeze leftover chicken?
Absolutely! Leftover cooked chicken can be frozen for future meals. Shred or chop the chicken meat and store it in suitable freezer bags or airtight containers. It will last for up to 3 months. For best results, defrost the chicken completely in the refrigerator overnight before using or reheating. This makes it perfect for quick soups, salads, or casseroles.
What size chicken should I buy for a roast?
A chicken weighing between 1.5kg (3.3 lbs) and 2.2kg (5 lbs) is generally ideal for roasting. A 2.2kg chicken typically serves 4-6 people, while a smaller 1.5kg bird is perfect for 2-3. Adjust roasting times according to the chicken’s weight (approximately 20 minutes per pound plus an additional 20 minutes).
Can I use different herbs for this recipe?
Yes, feel free to customize the herbs! While rosemary and oregano offer a classic flavor, fresh thyme, sage, or even a hint of marjoram would also pair beautifully with lemon. Experiment to find your favorite combination.
Maximizing Your Roast: Delicious Ideas for Leftover Chicken
A whole roast chicken offers fantastic value, providing not just one delicious meal but also a wealth of possibilities for leftovers. Here are some creative and tasty ways to make the most of every last bit:
- Homemade Chicken Stock: This is a must! After carving the meat, don’t discard the carcass, bones, and any leftover bits. Simmer them with some aromatic vegetables (like onion, carrot, celery) and water for several hours to create a rich, nutritious homemade chicken stock. This liquid gold can be frozen for months and forms the base for countless delicious dishes. You can follow the instructions in our Pastina Soup recipe for how to make homemade stock.
- Hearty Soups: Utilize your homemade stock and shredded leftover chicken to create comforting soups. Think classic chicken noodle (like our Pastina Soup), a creamy Italian Potato and Zucchini Soup with added chicken, or even our Lemon Chicken Orzo Soup. Leftover chicken is a fantastic addition to almost any vegetable or grain-based soup.
- Creamy Risotto: Elevate your risotto by using rich chicken stock as the liquid. Add shredded chicken towards the end of cooking for a deeply satisfying and comforting meal. Explore ideas from our risotto recipe category.
- Fresh Salads and Sandwiches: Shredded leftover chicken is incredibly versatile for quick and easy lunches. Toss it into a vibrant green salad, mix it with mayonnaise and celery for a classic chicken salad sandwich, or layer it with your favorite toppings in a wrap. The combinations are truly endless!
- Chicken Pot Pie or Casseroles: Transform your leftovers into a comforting chicken pot pie with a flaky crust or a hearty baked casserole. These are fantastic ways to feed a crowd and use up various vegetables you might have on hand.
What to Serve with Your Perfectly Roasted Lemon Chicken
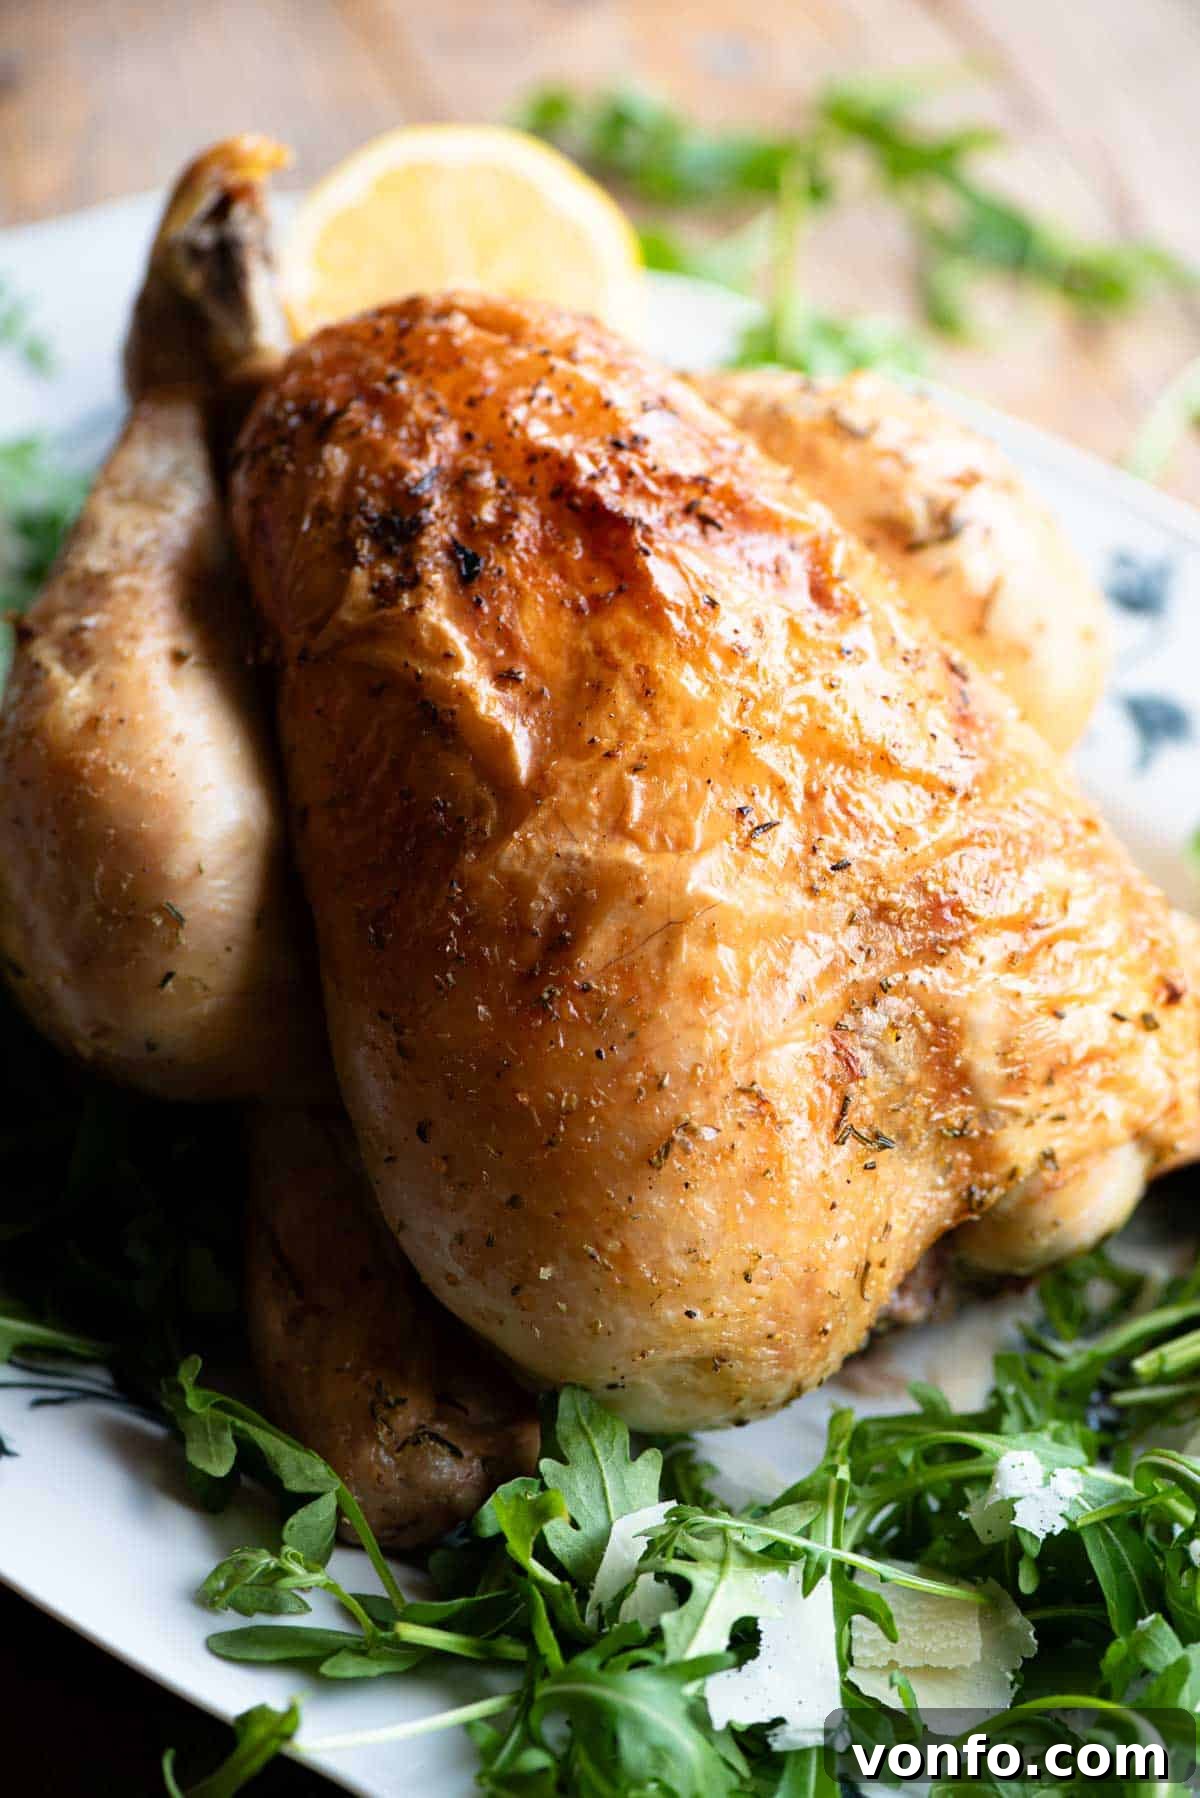
A beautifully roasted chicken deserves equally delicious side dishes. Here are some fantastic options that complement the lemon and herb flavors of the chicken. We also highly recommend serving this with a simple arugula salad for a refreshing contrast.
Sides
Grilled Fennel with Lemon Zest
The subtle anise flavor of grilled fennel, brightened with lemon zest, is an exquisite pairing for roast chicken.
Sides
Peas and Pancetta – Easy Italian Side Dish
A simple yet elegant Italian side dish featuring sweet peas and savory pancetta, adding a lovely texture and flavor to your meal.
Sides
Parmesan Roasted Potatoes and Broccoli
Crispy roasted potatoes and tender broccoli florets, enhanced with Parmesan cheese, offer a hearty and delicious accompaniment.
Sides
Classic Gnocchi alla Romana
These baked semolina gnocchi are rich, cheesy, and incredibly comforting, making them a unique and satisfying side dish.
This post was first published on 11th September 2018 but has since been updated with a new recipe, improved photos, and enhanced tips for a better cooking experience.
If you’ve tried this Simple Lemon Roast Chicken recipe or any other recipe on our blog, we’d love to hear from you! Don’t forget to rate the recipe and share your experience in the comments below. Your feedback means a lot to us. You can also follow us on Facebook, Instagram, and Pinterest, or sign up for our Newsletter to discover more of our delicious culinary creations.
Simple Lemon Roast Chicken Recipe
By Emily
- Prep time:
- 10 mins
- Cook time:
- 1 hr 45 mins
- Resting time:
- 1 hr
- Total time:
- 2 hrs 55 mins
- Servings:
- 4 – 6 servings (for a 2.2kg/5lb chicken)

This recipe will guide you through making the most delicious and juicy Lemon Roast Chicken. Our roast chicken features a subtle, fragrant lemon flavor infused throughout the meat and a bright lemony zing in the accompanying gravy. We’ll share all the essential tips and tricks to achieve a perfect roast chicken and an incredibly flavorful gravy.
Ingredients
- 1 whole chicken, approximately 2.2kg (5 lb), organic and free-range if possible
- 1 unwaxed lemon
- 2 onions
- 4 garlic cloves
- 1 sprig fresh rosemary
- ½ tablespoon chopped fresh rosemary
- ½ tablespoon dried oregano
- 1 carrot
- 1-2 tablespoons olive oil
- Salt and pepper (Maldon sea salt flakes recommended)
Optional Gravy Ingredients:
- ¼ cup white wine (60ml), dry Italian white recommended
- 1 litre chicken stock, homemade or good quality, low sodium
- 2 teaspoons corn starch
- 1 teaspoon water
- Salt and pepper to taste
Instructions
- Pre-heat your oven to 180°C (350°F).
- Season the inside of the chicken generously with salt. Stuff the cavity with 1 whole lemon (cut in half), a quarter of an onion, and 1 sprig of fresh rosemary.
- Place the chicken in your roasting tray. Season the entire outside of the chicken with salt. Drizzle with 1-2 tablespoons of olive oil, then sprinkle with dried oregano and finely chopped rosemary. Rub the herbs and salt thoroughly over the chicken, ensuring the bottom is also seasoned.
- Arrange the remaining onion and carrot pieces around the chicken in the tray, along with the 4 cloves of garlic. Roast the chicken uncovered for 1 hour and 45 minutes (for a 2.2kg/4.8 lbs chicken).
- Once roasted, remove the chicken from the oven. Cover it loosely with foil and allow it to rest for a minimum of 45 minutes, up to 1 hour. This crucial step ensures a juicy and flavorful chicken.
To Make the Optional Gravy:
- Place the roasting tray containing the cooked vegetables and drippings onto the stove over medium heat. Add the white wine and let it simmer until it has reduced by half.
- Pour in the chicken stock and continue to simmer for 30 minutes, allowing it to reduce and intensify in flavor.
- Carefully sieve the gravy into a jug or bowl, pressing the roasted vegetables with a potato masher or fork to extract all their delicious juices. Using a gravy jug can help skim off excess fat.
- Transfer the sieved gravy to a clean saucepan and bring it to a gentle simmer. In a small bowl, mix the water with the corn starch until smooth, then whisk it into the simmering gravy.
- Simmer the gravy for approximately 10 minutes, stirring or whisking occasionally, until it thickens to your desired consistency. Taste and adjust seasoning with salt and pepper if needed.
- Serve the rich, lemony gravy alongside your perfectly roasted chicken.
Video Tutorial
A video tutorial showcasing the step-by-step process of making this delicious Lemon Roast Chicken and gravy is available for visual guidance. Please refer to the original article for the video content.
Recipe Notes
- Resting: We cannot stress enough the importance of resting the chicken after roasting. For a chicken of this size (2.2kg/5lbs), a minimum of 45 minutes, up to 1 hour, is the perfect resting time. Failing to rest the chicken sufficiently will result in tough and dry meat, as the muscle fibers are tense immediately after cooking, causing all the delicious juices to escape when carved.
- Checking for Doneness: If you’re unsure whether your chicken is cooked through, use a meat thermometer. Insert it into the thickest part of the thigh, making sure not to touch the bone; it should register 75°C (165°F) for at least 2 minutes. Alternatively, make a small incision in the thigh meat, and the juices should run clear.
- Storage and Freezing: Leftover cooked chicken will keep well, covered, in the fridge for up to 4 days. It can also be frozen in suitable freezer bags or containers for up to 3 months. Always ensure the chicken is completely defrosted before reheating.
- Cook Time for Weight:
- 1.5kg (3.3 lbs) chicken: cook for approximately 1 hour 30 minutes.
- 2kg-2.2kg (4.4-5 lbs) chicken: cook for approximately 1 hour 45 minutes.
Always verify doneness with a meat thermometer, as oven temperatures can vary.
Helpful Information for All Our Recipes
- We consistently use extra virgin olive oil in all our recipes unless otherwise specified, for its superior flavor and health benefits.
- For canned or jarred tomatoes, we always recommend Cirio or Mutti brands to ensure the best possible results and authentic Italian flavor.
- All vegetables are assumed to be medium-sized unless specifically stated otherwise in the recipe.
- All our recipes are meticulously tested and developed using a fan (convection) oven, so cooking times may vary slightly in conventional ovens.
- Find out more about how nutrition information is calculated on our website.
- Discover our must-have Italian Pantry Staples to stock your kitchen.
- Explore all our Essential Kitchen Tools for Italian Cooking to equip your culinary space.
Nutrition Information (Approximate per serving)
- Calories: 439 kcal
- Carbohydrates: 8 g
- Protein: 34 g
- Fat: 29 g
- Saturated Fat: 8 g
- Polyunsaturated Fat: 6 g
- Monounsaturated Fat: 13 g
- Trans Fat: 0.2 g
- Cholesterol: 132 mg
- Sodium: 133 mg
- Potassium: 466 mg
- Fiber: 2 g
- Sugar: 3 g
- Vitamin A: 1963 IU
- Vitamin C: 16 mg
- Calcium: 49 mg
- Iron: 2 mg
Nutrition information is automatically calculated and should be used as an approximation. Actual values may vary based on specific ingredients and preparation methods.
Did you try this recipe? Leave a comment below and let us know what you thought!