
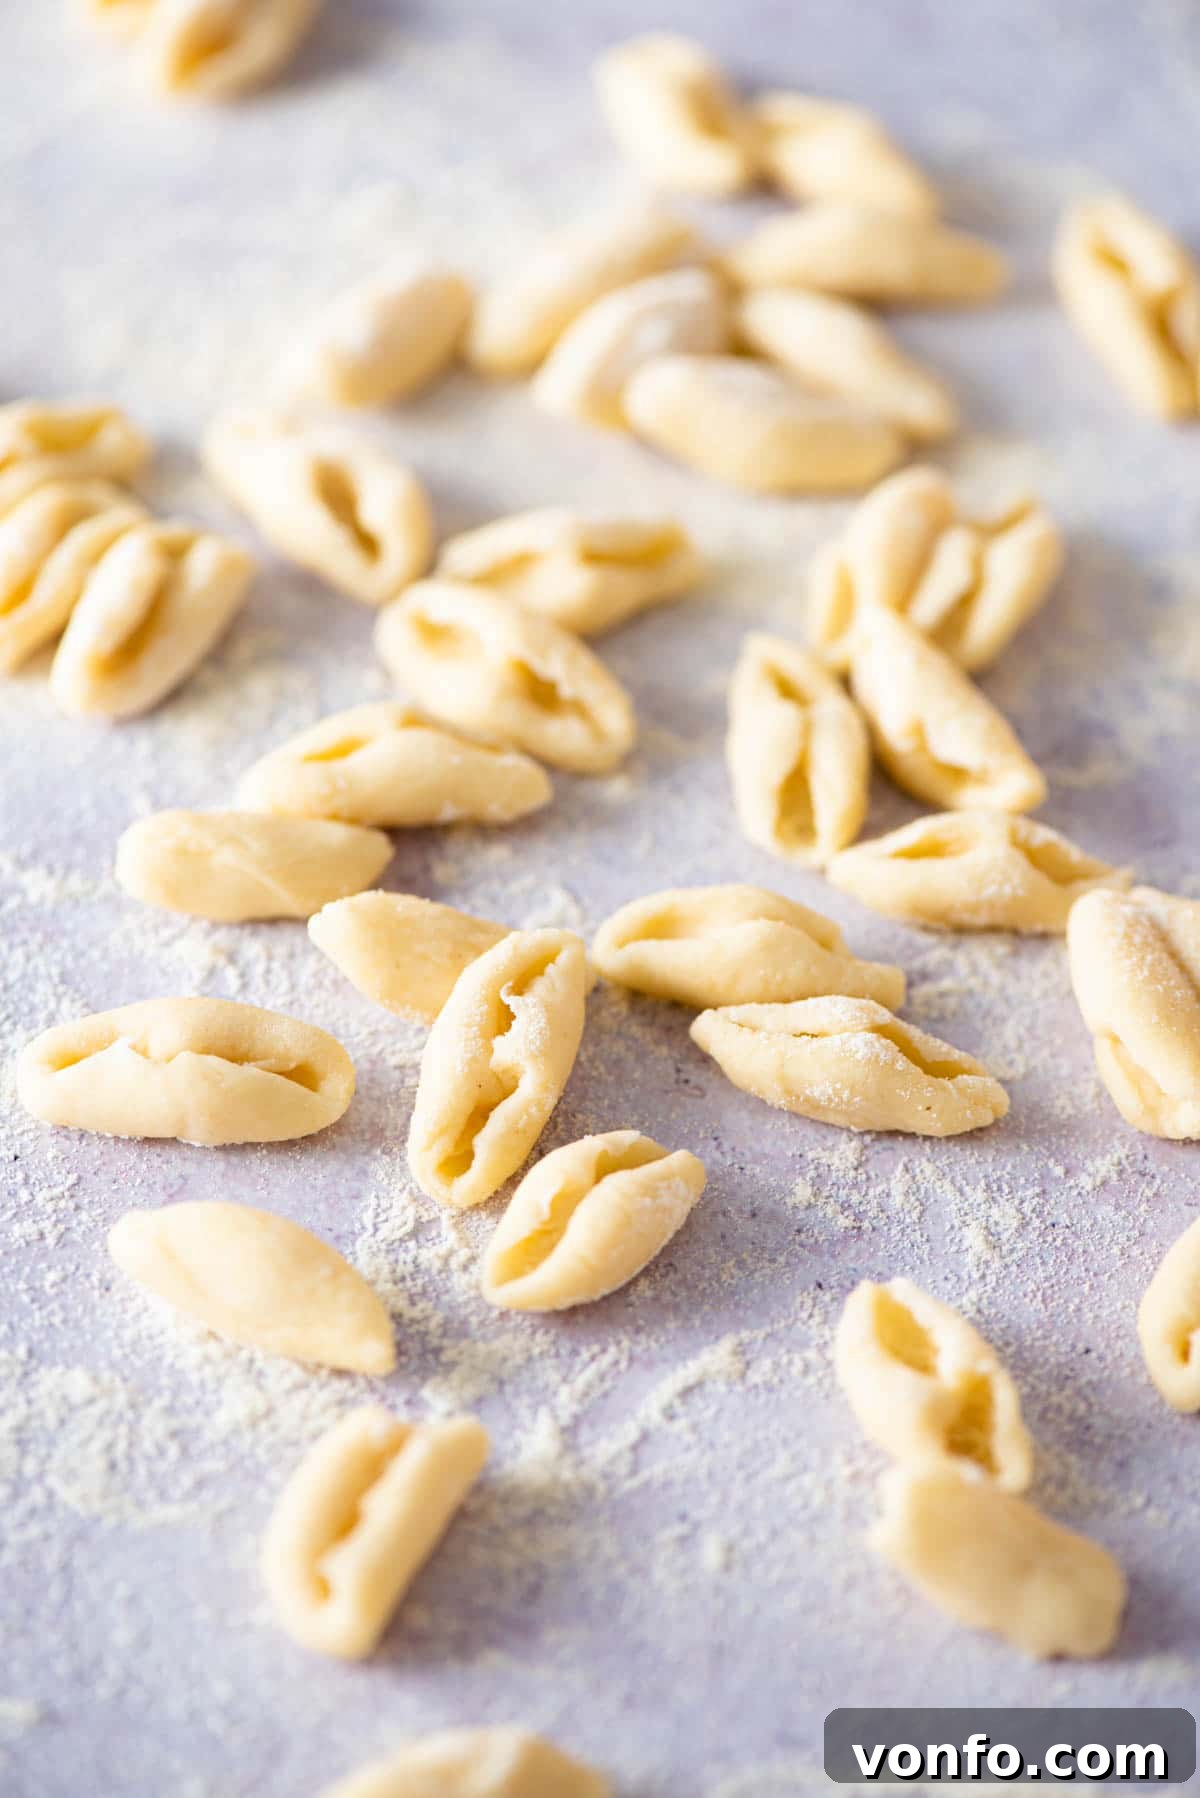
Homemade Cavatelli Pasta: A Simple 2-Ingredient, Eggless Italian Delight
Embark on a culinary journey to Southern Italy right from your kitchen with this incredibly simple and rewarding recipe for homemade Cavatelli pasta. Requiring just two staple ingredients – fine semolina flour and water – this eggless pasta dough is a dream to work with, making the art of fresh pasta accessible to everyone. Forget complicated machines; these charming, small shells are effortlessly shaped by hand and promise a delightful texture that perfectly cradles your favorite sauces. Prepare to impress your family and friends with this authentic taste of Italian tradition!
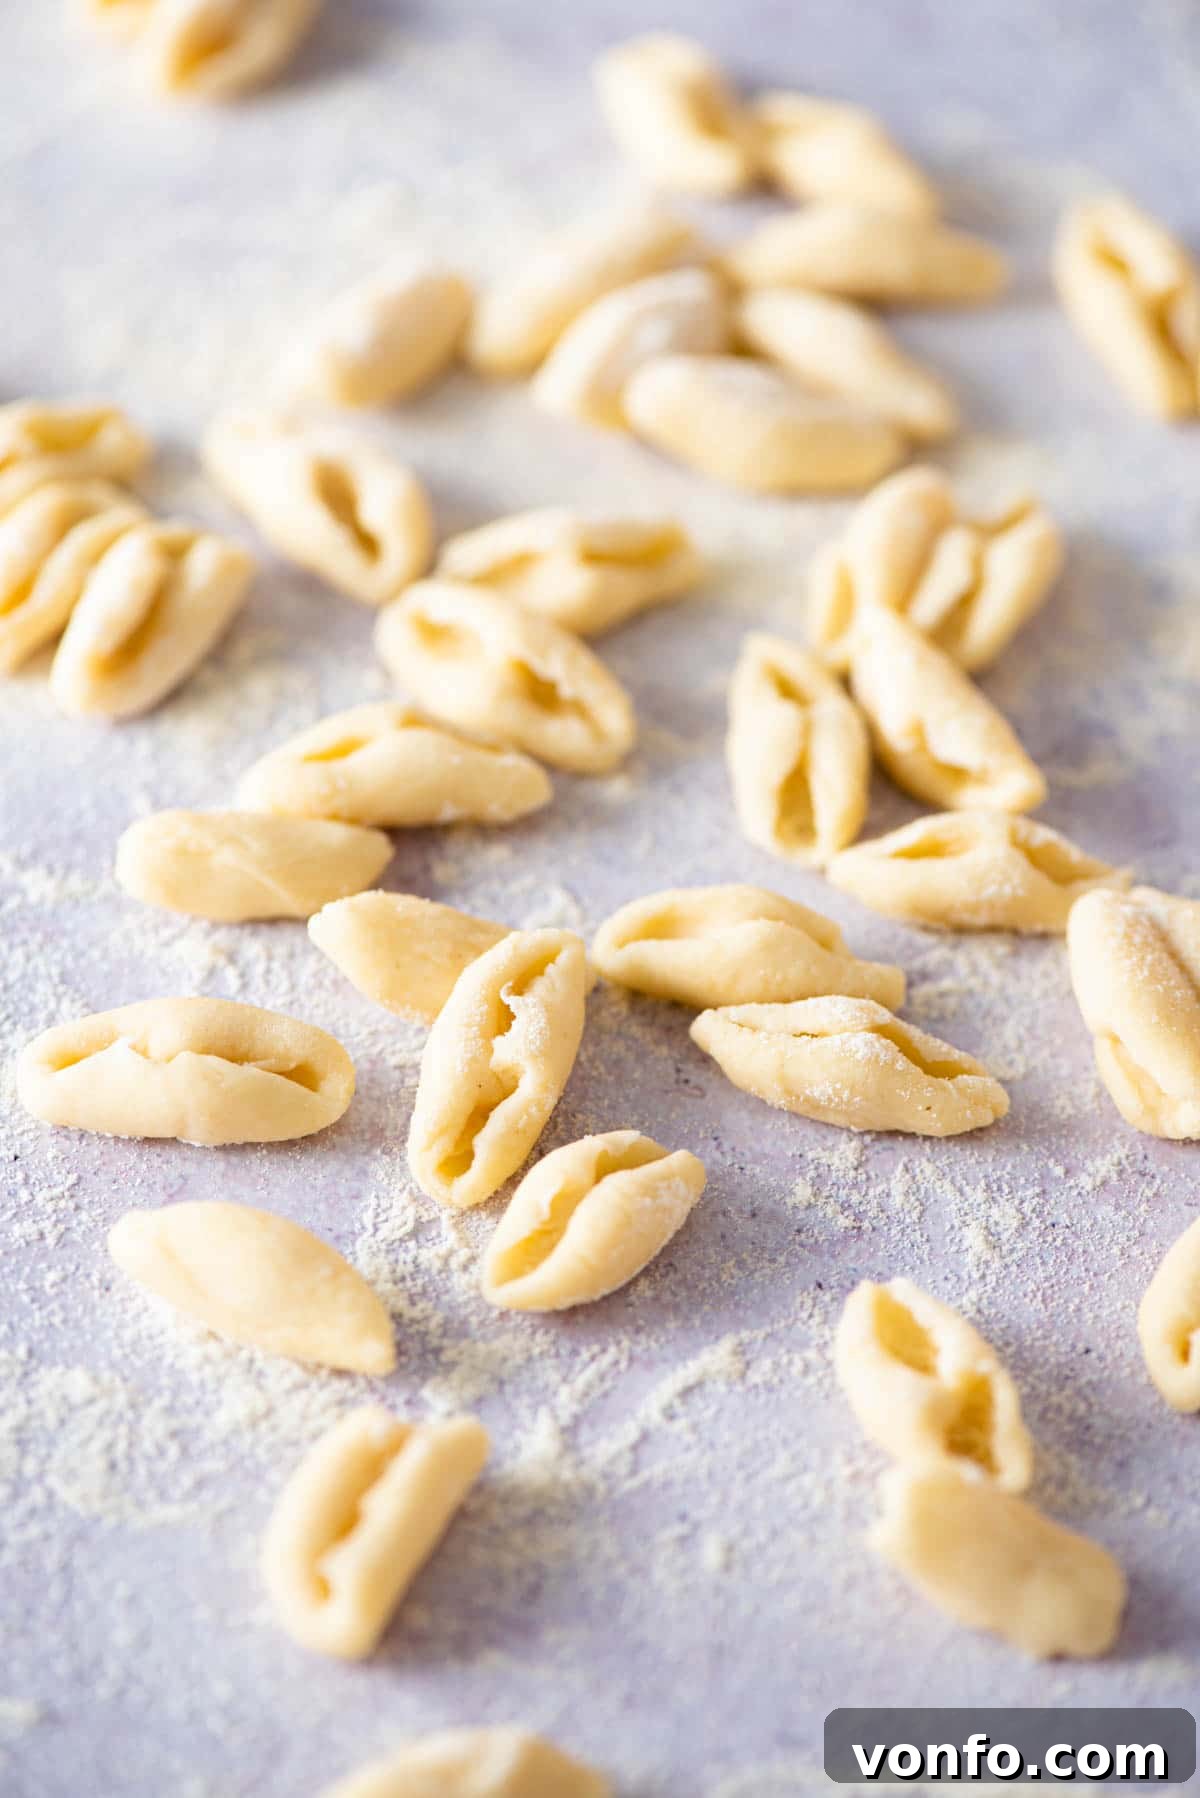
Unveiling the Charm of Cavatelli: A Southern Italian Staple
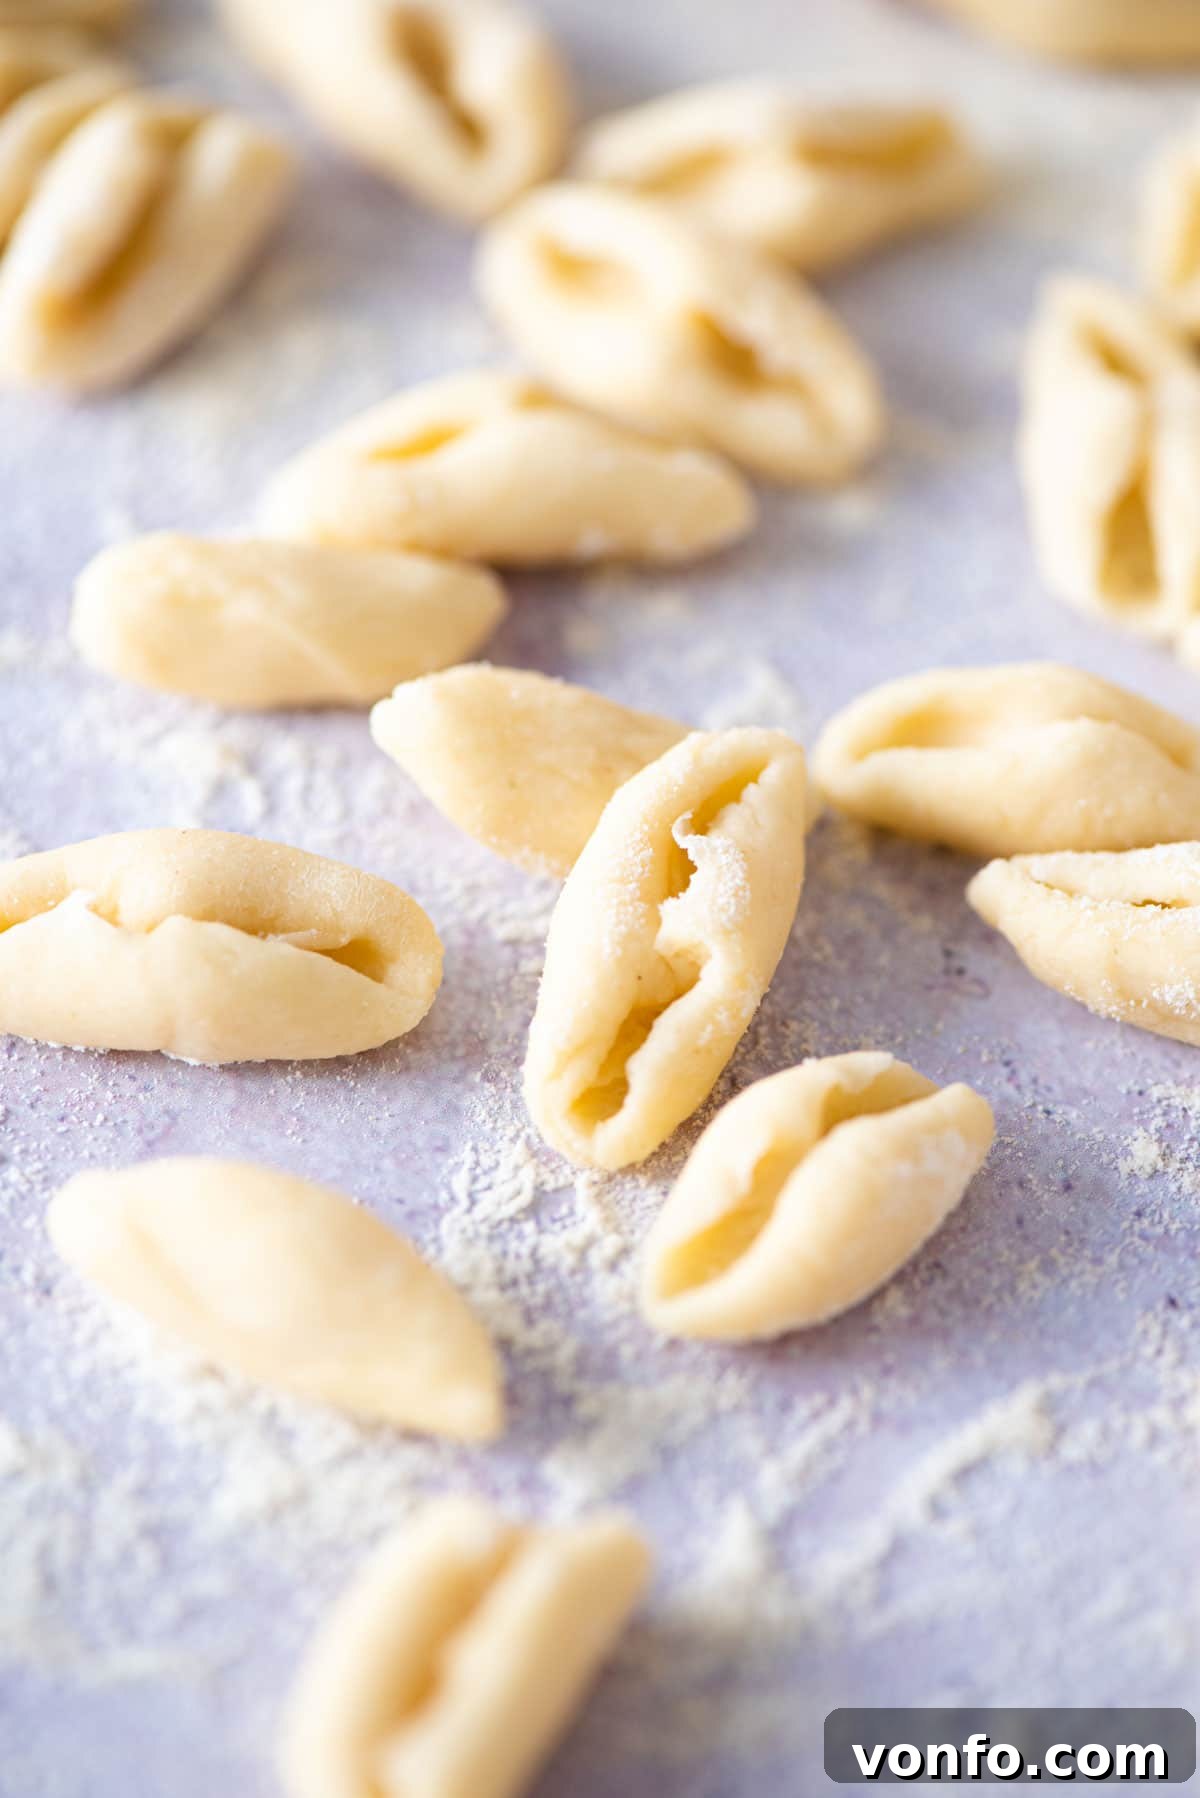
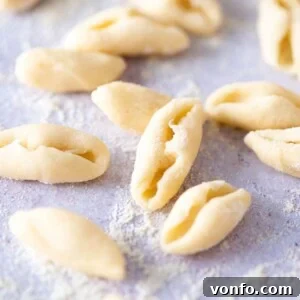
Cavatelli, translating roughly to “little hollows,” are a beloved pasta shape originating from the sun-drenched regions of Southern Italy, particularly Molise and Puglia. Their distinctive shape—resembling small, elongated shells—is not just aesthetically pleasing but also serves a practical purpose: these hollows are fantastic at capturing and holding rich, flavorful sauces. What truly sets Cavatelli apart, and makes them such a joy to prepare at home, is their straightforward composition. Unlike many fresh pasta varieties that rely on eggs, Cavatelli are traditionally made with a simple semolina pasta dough, comprising only fine semolina flour and warm water. This eggless formula not only makes the dough incredibly pliable and easy to handle but also results in a uniquely satisfying, chewy texture once cooked.
While specialized cavatelli machines exist for mass production, there’s absolutely no need to clutter your kitchen with another gadget. The beauty of Cavatelli lies in their rustic, hand-shaped nature. With just your fingers or a simple tool, you can create these beautiful pasta pieces, making the entire process a wonderfully tactile and meditative experience. Traditionally, Cavatelli are smooth, but you can also find a ridged version, known as Cavatelli Rigati. These ridged varieties, much like Gnocchetti Sardi or Malloreddus, offer an even greater surface area for sauce adherence, promising an explosion of flavor in every bite.
Below, you’ll find a comprehensive guide to crafting your own homemade Cavatelli, including detailed insights into ingredients, step-by-step instructions with accompanying photos, expert tips, delicious variations, and even a video tutorial to guide you. For a full printable recipe, simply scroll to the dedicated recipe card at the bottom of this page.
Essential Ingredients for Perfect Homemade Cavatelli
Crafting exquisite Cavatelli pasta requires just two humble ingredients, proving that sometimes, simplicity truly is the key to culinary greatness. The quality of these few components, however, makes all the difference. Refer to the image below to visualize everything you’ll need, along with crucial tips on selecting the best ingredients.
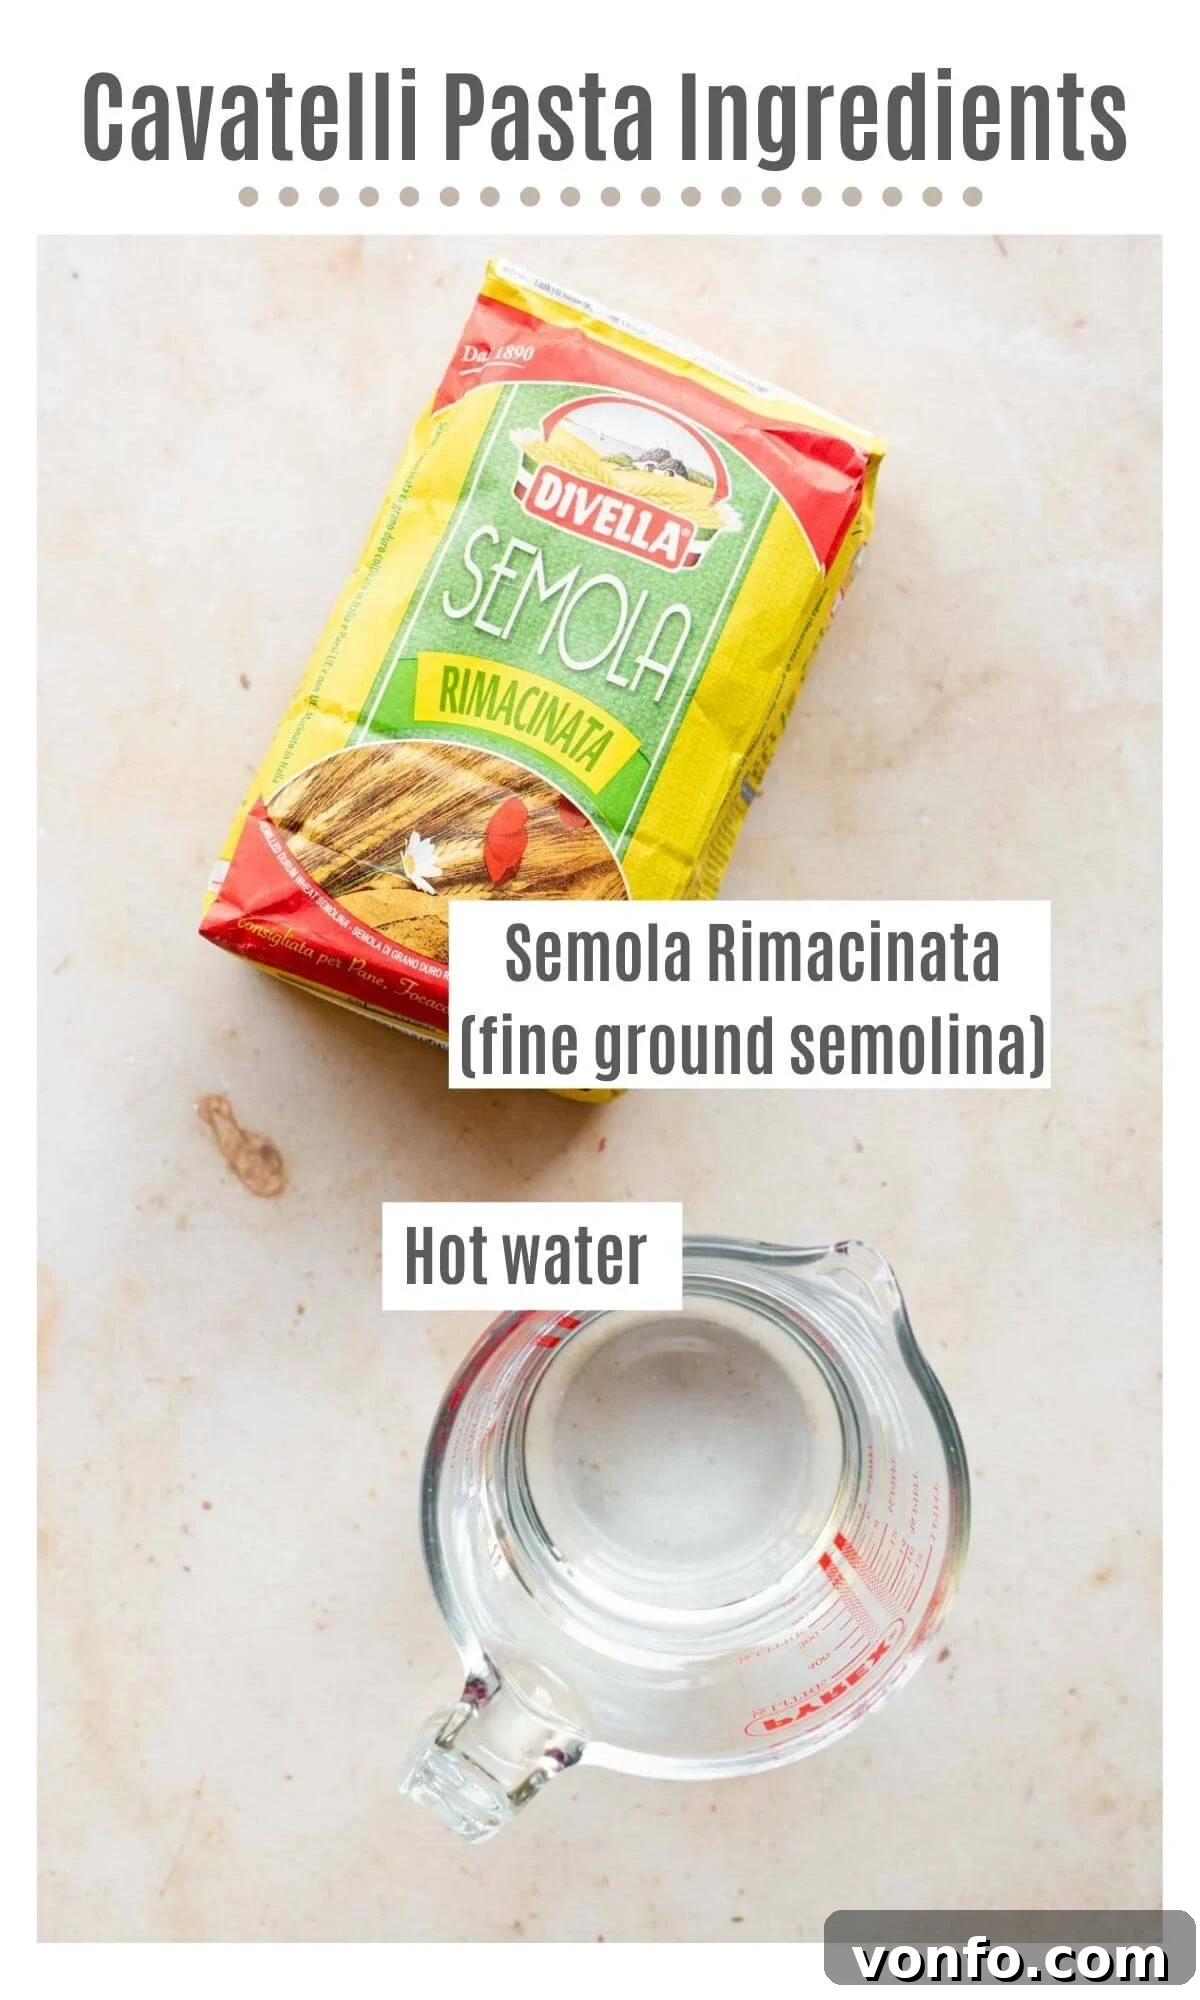
- Semola Rimacinata (300g / 2 cups): This is the star ingredient. Semola rimacinata is a finely milled durum wheat semolina flour, which gives Cavatelli its distinctive golden color, firm structure, and pleasant chewiness. It has a higher protein content than all-purpose flour, making it ideal for sturdy pasta that holds its shape. You should be able to find it in Italian specialty food stores or conveniently online. If semola rimacinata is unavailable, Italian ’00’ flour can be used as a substitute, though the final texture may be slightly softer.
- Warm Water (150ml / 2/3 cup): The second crucial element. The warmth of the water is not merely a suggestion; it genuinely aids in hydrating the semolina flour more effectively and helps to activate the gluten, making the dough much easier to knead and more pliable to work with. Ensure it’s warm to the touch, but not hot enough to cook the flour.
- Pinch of Salt (for cooking water, optional): While not part of the dough, a generous pinch of salt in your boiling water is essential for seasoning the pasta itself.
Crafting Your Cavatelli: Step-by-Step Instructions
Making homemade Cavatelli is a therapeutic and enjoyable process. Follow these detailed steps to create perfectly tender and chewy pasta from scratch.
1. Prepare the Dough
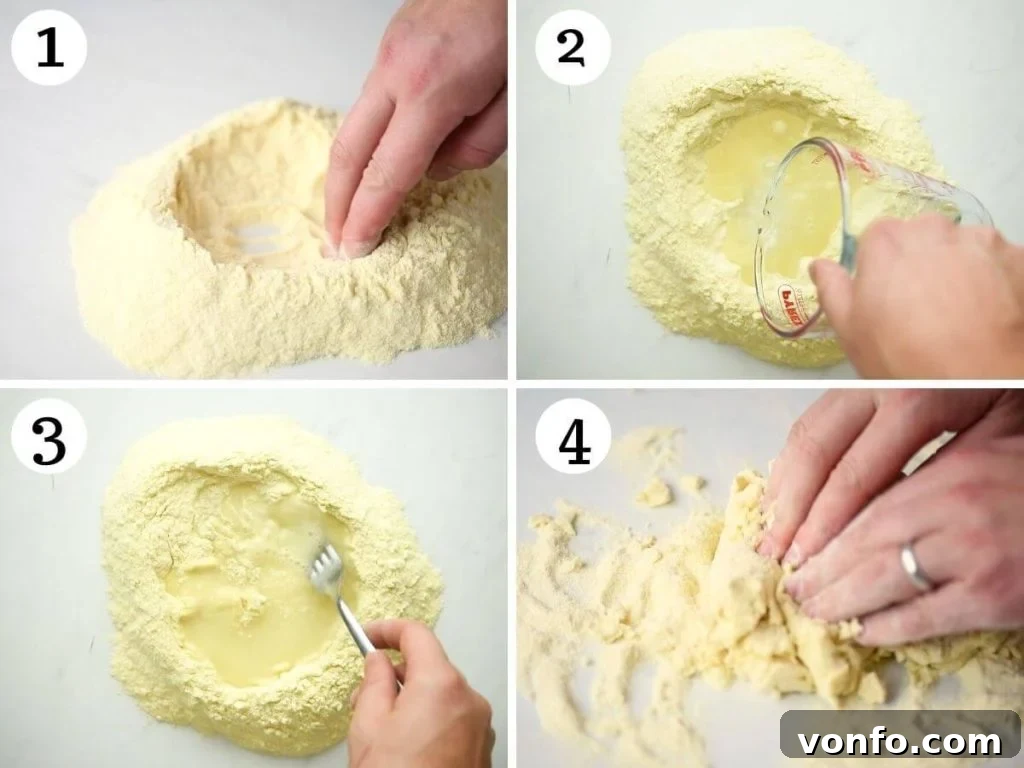
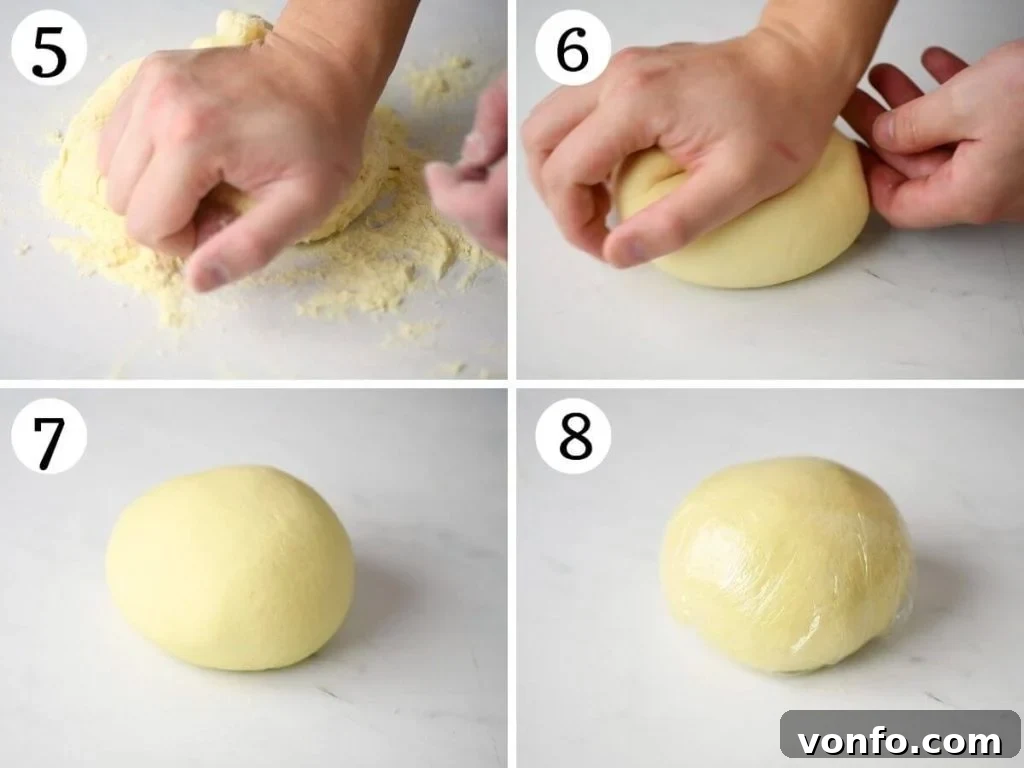
Begin by placing the semola flour in a large mixing bowl or, traditionally, directly onto a clean work surface. Create a deep well in the center of the flour, much like a volcano crater (photo 1). Gradually pour the warm water into this well. Using a fork, slowly incorporate the surrounding flour into the water, starting from the inner edges of the well. Continue mixing until a rough, shaggy dough forms. Once the dough comes together, transfer it to a clean, unfloured work surface and knead it vigorously for approximately 10 minutes. This kneading process is vital for developing the gluten, which gives the pasta its elasticity and characteristic chew. Continue kneading until the dough transforms into a smooth, uniform, and elastic ball (photos 2-7). It should feel firm but springy to the touch.
2. Rest the Dough
Once your dough ball is smooth and ready, cover it tightly with plastic wrap (or cling film). This prevents the dough from drying out and allows the gluten to relax and the flour to fully hydrate. Let it rest at room temperature for at least 30 minutes (photo 8). This resting period is crucial for a pliable and easy-to-work-with dough.
3. Divide and Roll the Dough Ropes
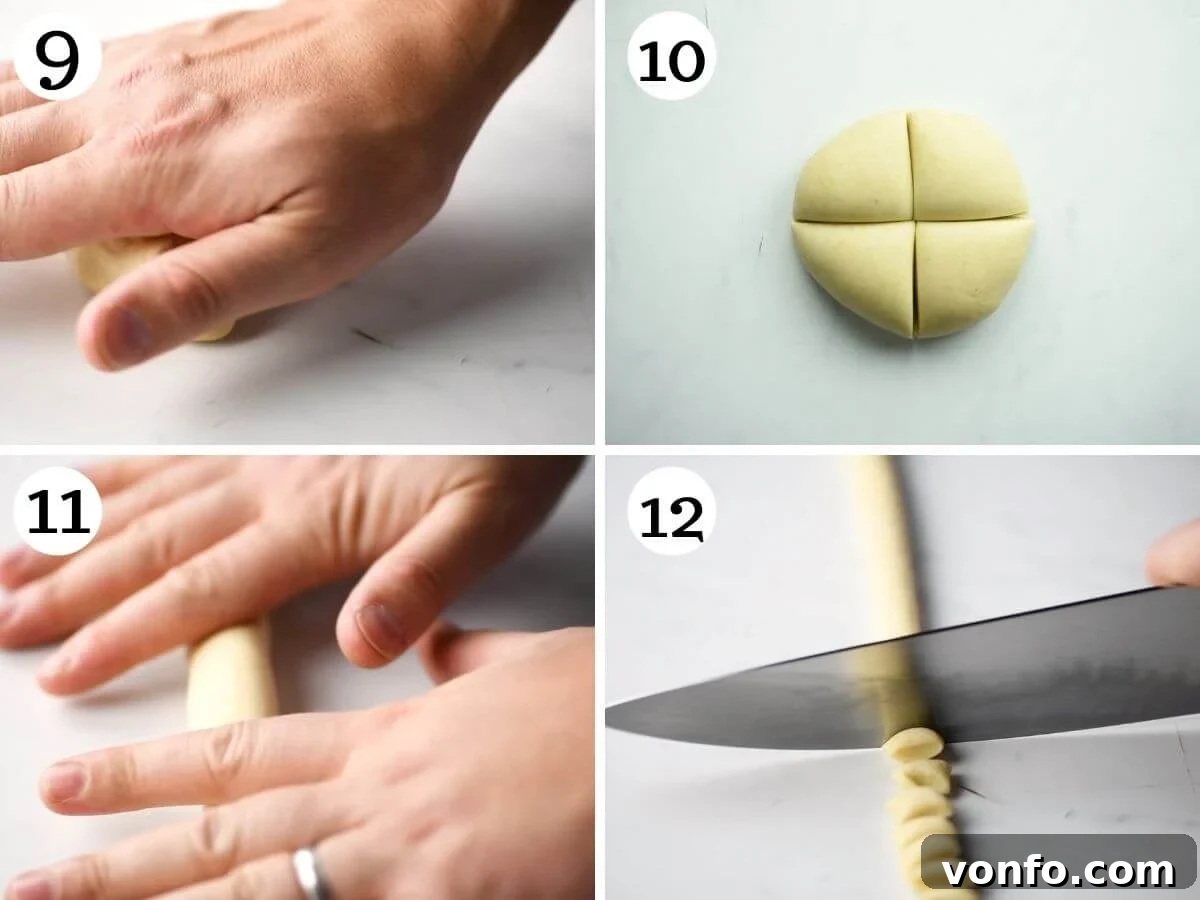
After resting, lightly flatten the dough ball and cut it into four equal quarters. This makes the rolling process more manageable. Take one quarter of the dough, ensuring the remaining pieces stay covered with plastic wrap to prevent them from drying out. On a clean work surface, which is crucial to keep unfloured at this stage (this allows the dough to grip the surface as you roll), gently roll the dough into a long, thin rope, approximately ½ inch (1.25 cm) thick. Aim for an even thickness along the entire rope (photos 9-11).
4. Shape the Cavatelli
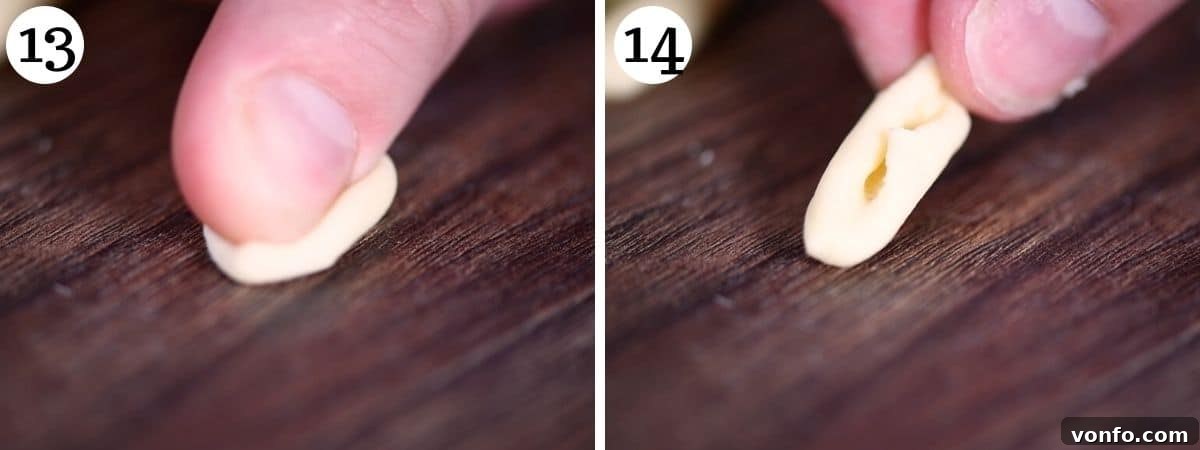
Once you have a thin rope, cut it into small, ½ inch (1.25 cm) wide squares. To shape the Cavatelli, take one small piece of dough and place it in front of you with a cut side facing upwards. Using the tip of your index finger or the side of your thumb, press down gently on the dough and roll it either towards or away from you. The motion should create a small, smooth shell-like shape with a slight hollow in the center. As each Cavatello is shaped, place it on a separate area of your work surface that has been lightly dusted with semolina flour to prevent sticking (photos 12-14). Repeat this process with the remaining dough, rolling each quarter into ropes, cutting into pieces, and shaping them one by one. Consistency in size and shape will lead to even cooking.
How to Make Ridged Cavatelli (Cavatelli Rigati)
For those who love extra texture and sauce-holding power, making ridged Cavatelli (Cavatelli Rigati) is a delightful variation. The process is similar to shaping traditional Cavatelli, but with the addition of a textured surface, much like the technique used for shaping potato gnocchi or Gnocchetti Sardi. There are two common methods:
- Using a Wooden Gnocchi Board: A small wooden gnocchi board, with its characteristic ridges, is the ideal tool for Cavatelli Rigati. Place a small cut piece of dough onto the board. You can either use your thumb to roll it away from you, applying moderate pressure to imprint the ridges, or use two fingers to roll it towards you, as described in the smooth cavatelli shaping. The key is to apply enough pressure to create defined ridges across the dough. If the dough feels too sticky, a very light dusting of semolina on the board can help, but avoid excess.
- Using the Back of a Fork: If you don’t have a gnocchi board, the back of a dinner fork works wonderfully. Hold a fork firmly, tines down. Place a small cut piece of dough onto the back of the fork’s tines. Using your thumb, gently roll the dough down the tines, applying light pressure. This will create charming ridges on one side of your cavatelli.
Cooking Your Homemade Cavatelli to Perfection
Once your beautiful Cavatelli are shaped, cooking them is a quick and straightforward process. Due to their denser, eggless semolina composition, they will have a slightly chewier texture than traditional egg pasta, which is part of their authentic charm.
Bring a large pot of generously salted water to a rolling boil. Ensure you use a large enough pot and plenty of water to prevent the pasta from sticking and to allow it to cook evenly. Add your fresh Cavatelli to the boiling water and cook for approximately 2-3 minutes. Fresh pasta cooks much faster than dried pasta, so keep a close eye on it. To test for readiness, simply scoop out one Cavatello and taste it. It should be tender yet still possess a pleasant chew – the quintessential “al dente” texture. Once cooked, drain the Cavatelli, reserving a small amount of the starchy pasta water. This reserved water can be used to loosen your sauce if needed.
Immediately toss the freshly cooked Cavatelli with your desired pasta sauce. The warm pasta will absorb the flavors of the sauce beautifully. Serve hot and enjoy your homemade creation!
Recipe Tips and Troubleshooting for Success
Achieving perfect homemade Cavatelli is simple with a few key considerations. Here are some essential tips and answers to frequently asked questions to ensure your pasta-making experience is a resounding success:
- Allow Adequate Dough Rest: This cannot be stressed enough. Letting the dough rest for at least 30 minutes (or even up to an hour) after kneading is crucial. It allows the gluten to relax, making the dough incredibly pliable, elastic, and much easier to roll and shape without constantly springing back.
- Avoid Flour When Rolling Ropes: When you are rolling the dough into long ropes or logs, it is paramount that your work surface is clean and completely free of flour. If the surface is floured, the dough will simply slide around, making it very difficult to create consistent ropes. The friction between the dough and the clean surface is what helps you achieve that even thickness. If your dough does become too sticky to roll without flour, cover it with plastic wrap and let it rest for another 10-15 minutes, then try again on a clean surface.
- Shape from the Cut Side: For the most aesthetically pleasing and uniform Cavatelli, always place the small cut piece of dough with the cut side facing you when shaping. Rolling from this side helps create a beautiful oval shape at both ends and provides better grip on your work surface for an easier roll. While not strictly necessary for taste, it contributes to the traditional look.
- Keep Cavatelli Small: When cutting your dough ropes into squares, aim for pieces approximately 1/2 inch (1.25 cm) wide. Larger pieces will result in very big, dense Cavatelli that may be less pleasant to eat and take longer to cook through. It might take a few tries to get the size just right, so don’t cut all the dough at once; practice with a small batch first.
Common Cavatelli Questions Answered:
This is a classic sign that your dough has not rested long enough, or perhaps not enough to relax the gluten sufficiently. Simply wrap the dough ball tightly in plastic wrap (cling film) and let it rest for an additional 10-15 minutes. The extra rest time will allow the gluten to relax, making the dough much more cooperative.
The best substitute for Semola Rimacinata is Italian ’00’ flour. While it won’t yield quite the same firm chew and golden color, it will still produce a delicious eggless pasta dough suitable for Cavatelli. Avoid using regular all-purpose flour, as it contains less protein and will result in a much softer texture.
Homemade Cavatelli, made with semolina and water, have a denser and chewier texture compared to lighter egg pastas, and they cook relatively quickly. Boil them in a large pot of generously salted water for approximately 2-3 minutes. Always taste one to check for doneness; they should be “al dente” – tender but with a firm bite.
Freshly made Cavatelli can be stored in the refrigerator for up to 4 days. Ensure they are lightly dusted with semolina flour and spread in a single layer (or between parchment paper layers) on a tray or plate to prevent them from sticking together. For longer storage, Cavatelli freeze exceptionally well. To freeze, lay them in a single, even layer on a baking tray and place it in the freezer. Once the individual Cavatelli are completely frozen solid (this prevents them from sticking together in a clump), transfer them to a freezer-safe bag or airtight container. They can be stored for up to 2-3 months. When ready to cook, boil them directly from frozen, adding a few extra minutes to the cooking time (usually 4-5 minutes).
Perfect Pairings: Sauces to Elevate Your Cavatelli
Cavatelli’s unique shape and satisfying chewiness make it an incredibly versatile pasta, capable of pairing beautifully with a wide array of sauces. From hearty meat ragus to light vegetable creations, these little shells are designed to capture and hold flavor. Traditionally, Cavatelli are often served with vibrant sauces common in Southern Italy:
- A simple broccoli sauce, often with garlic and chili flakes, is a classic pairing.
- A fresh tomato sauce, perhaps adorned with crumbled ricotta salata for a salty, tangy counterpoint.
- A slow-cooked Italian beef ragu, allowing the rich meat sauce to cling to every crevice.
Beyond tradition, Cavatelli excel with a variety of other sauce types. If you’re in the mood for a creamy, decadent experience, consider:
- Our luscious Ricotta Pasta Sauce: 2 Ways, offering both savory and vibrant options.
- A comforting Pasta alla Boscaiola, featuring hearty sausage and earthy mushrooms.
- A rich and tangy Creamy Gorgonzola Sauce for a bolder flavor profile.
For those who prefer the bright and fresh notes of tomato-based sauces, Cavatelli are an excellent match for:
- A timeless Salsa al Pomodoro (Tomato Basil Pasta), highlighting the simplicity of ripe tomatoes.
- A fiery Arrabbiata sauce: Spicy Tomato, adding a kick to your meal.
- Our delightful Ricotta Tomato Pasta Sauce, balancing creamy richness with zesty tomatoes.
Continue Your Homemade Pasta Journey: More Recipes to Explore
Once you’ve mastered the art of Cavatelli, a world of fresh, homemade pasta awaits! Delve deeper into the rewarding craft of pasta making with these other fantastic recipes from our kitchen:
- Semolina Pasta Dough (Egg-Free): The foundational dough for many Southern Italian shapes.
- How to Make Pici Pasta: Thick, hand-rolled Tuscan strands, another delightful egg-free option.
- Homemade Pasta Dough – How To Step By Step: Our comprehensive guide to classic egg pasta dough.
- How to Make Homemade Ravioli – The Ultimate Guide: Fill, fold, and savor these delicious stuffed pasta parcels.
- Spinach Pasta Dough (2 ingredient easy recipe): A vibrant, flavorful, and easy eggless dough.
- Beetroot Pasta Dough: Add a stunning color and subtle earthy sweetness to your pasta.
If you’ve had the pleasure of trying this Cavatelli Pasta recipe or any other delightful creation from our blog, please don’t hesitate to share your experience! We encourage you to rate the recipe and leave your valuable comments below; your feedback truly inspires us. You can also FOLLOW US on FACEBOOK, INSTAGRAM, and PINTEREST, or sign up for our NEWSLETTER to receive weekly doses of our delicious food straight to your inbox!
Recipe: Homemade Cavatelli Pasta
Author: Emily
Learn how to make authentic homemade Cavatelli pasta using just two simple ingredients! This eggless semolina pasta dough is incredibly easy to work with and results in delightful, chewy shells perfect for your favorite sauces.
- Prep Time: 30 minutes
- Resting Time: 30 minutes
- Total Time: 1 hour
- Servings: 4 servings (makes approximately 1 pound / 450g)
Ingredients
- 300 g Semola Rimacinata (fine semolina flour) (approx. 2 cups*)
- 150 ml Warm Water (approx. ⅔ cup)
Instructions
- Make the Dough: Place the 300g Semola Rimacinata in a large mixing bowl or on a clean work surface, forming a well in the center.
- Combine & Knead: Add the 150ml warm water to the well. Slowly incorporate the flour from the edges using a fork until a rough dough forms. Transfer to an unfloured surface and knead for 10 minutes until smooth and elastic.
- Rest the Dough: Cover the dough ball tightly with plastic wrap (cling film) and let it rest for at least 30 minutes at room temperature.
- Divide & Roll Ropes: Once rested, cut the dough into quarters. Keeping the remaining dough covered, roll one quarter into a long, ½ inch (1.25 cm) thick rope on a clean, unfloured surface.
- Cut & Shape Cavatelli: Cut the rope into ½ inch (1.25 cm) wide squares. Place one piece of dough with a cut side towards you. Using a finger or the side of your thumb, roll the dough towards or away from you to create a smooth shell shape. Place shaped cavatelli on a lightly floured area.
- Repeat: Continue with the remaining dough, rolling into ropes, cutting, and shaping until all the dough is used.
How to Cook Homemade Cavatelli
- Boil: Bring a large pot of generously salted water to a rolling boil.
- Cook: Add the fresh Cavatelli to the boiling water and cook for approximately 2-3 minutes. Taste one to ensure it’s “al dente” (tender with a slight chew).
- Serve: Drain the Cavatelli (reserving a splash of pasta water if desired) and toss immediately with your favorite pasta sauce. Serve hot.
Storage (Refrigerator and Freezer)
- Refrigerator Storage: If using within 4 days, lightly dust the Cavatelli with semolina flour and store them in a single layer on a tray, covered, in the refrigerator.
- Freezer Storage: To freeze, arrange the shaped Cavatelli in a single layer on a baking tray. Freeze until solid, then transfer to a freezer-safe bag or container to save space. Cook directly from frozen, adding a few minutes to the boiling time.
Video Tutorial
Watch our video guide to see each step of the Cavatelli-making process in action, from kneading the perfect dough to shaping these delightful pasta shells.
Video: Cavatelli Pasta – How to make Homemade Cavatelli Pasta with just 2 simple ingredients! Cavatelli are made with an eggless semolina pasta dough making them super easy to work with. Serve with your favourite sauce.
Notes
- *Measuring with cups: For precise results, especially with flour, we highly recommend using a kitchen scale. If using cups, gently spoon the semola into the cup and level it off with a knife to avoid over-measuring. Scooping directly can result in significantly more flour.
- Dough Resting is Key: Ensure the dough rests for at least 30 minutes. This allows the gluten to relax, making the dough much more pliable and easier to handle when rolling and shaping.
- No Flour for Rolling Ropes: It is critical that your work surface is unfloured when rolling the dough into ropes or logs. This friction helps the dough grip the surface, allowing you to roll consistent ropes. If floured, the dough will slip, making it difficult to work with.
- Roll from the Cut Side: When shaping individual cavatelli, place the dough piece with its cut side at the top. This technique helps achieve a consistent oval shape at both ends and provides a better surface grip for efficient rolling.
Nutrition Information (per serving)
(Approximate values, calculated automatically)
- Calories: 254 kcal
- Carbohydrates: 53g
- Protein: 10g
- Fat: 2g
- Saturated Fat: 1g
- Polyunsaturated Fat: 1g
- Monounsaturated Fat: 1g
- Sodium: 3mg
- Potassium: 323mg
- Calcium: 27mg
- Iron: 3mg
Nutrition information is automatically calculated and should be used as an approximation.