
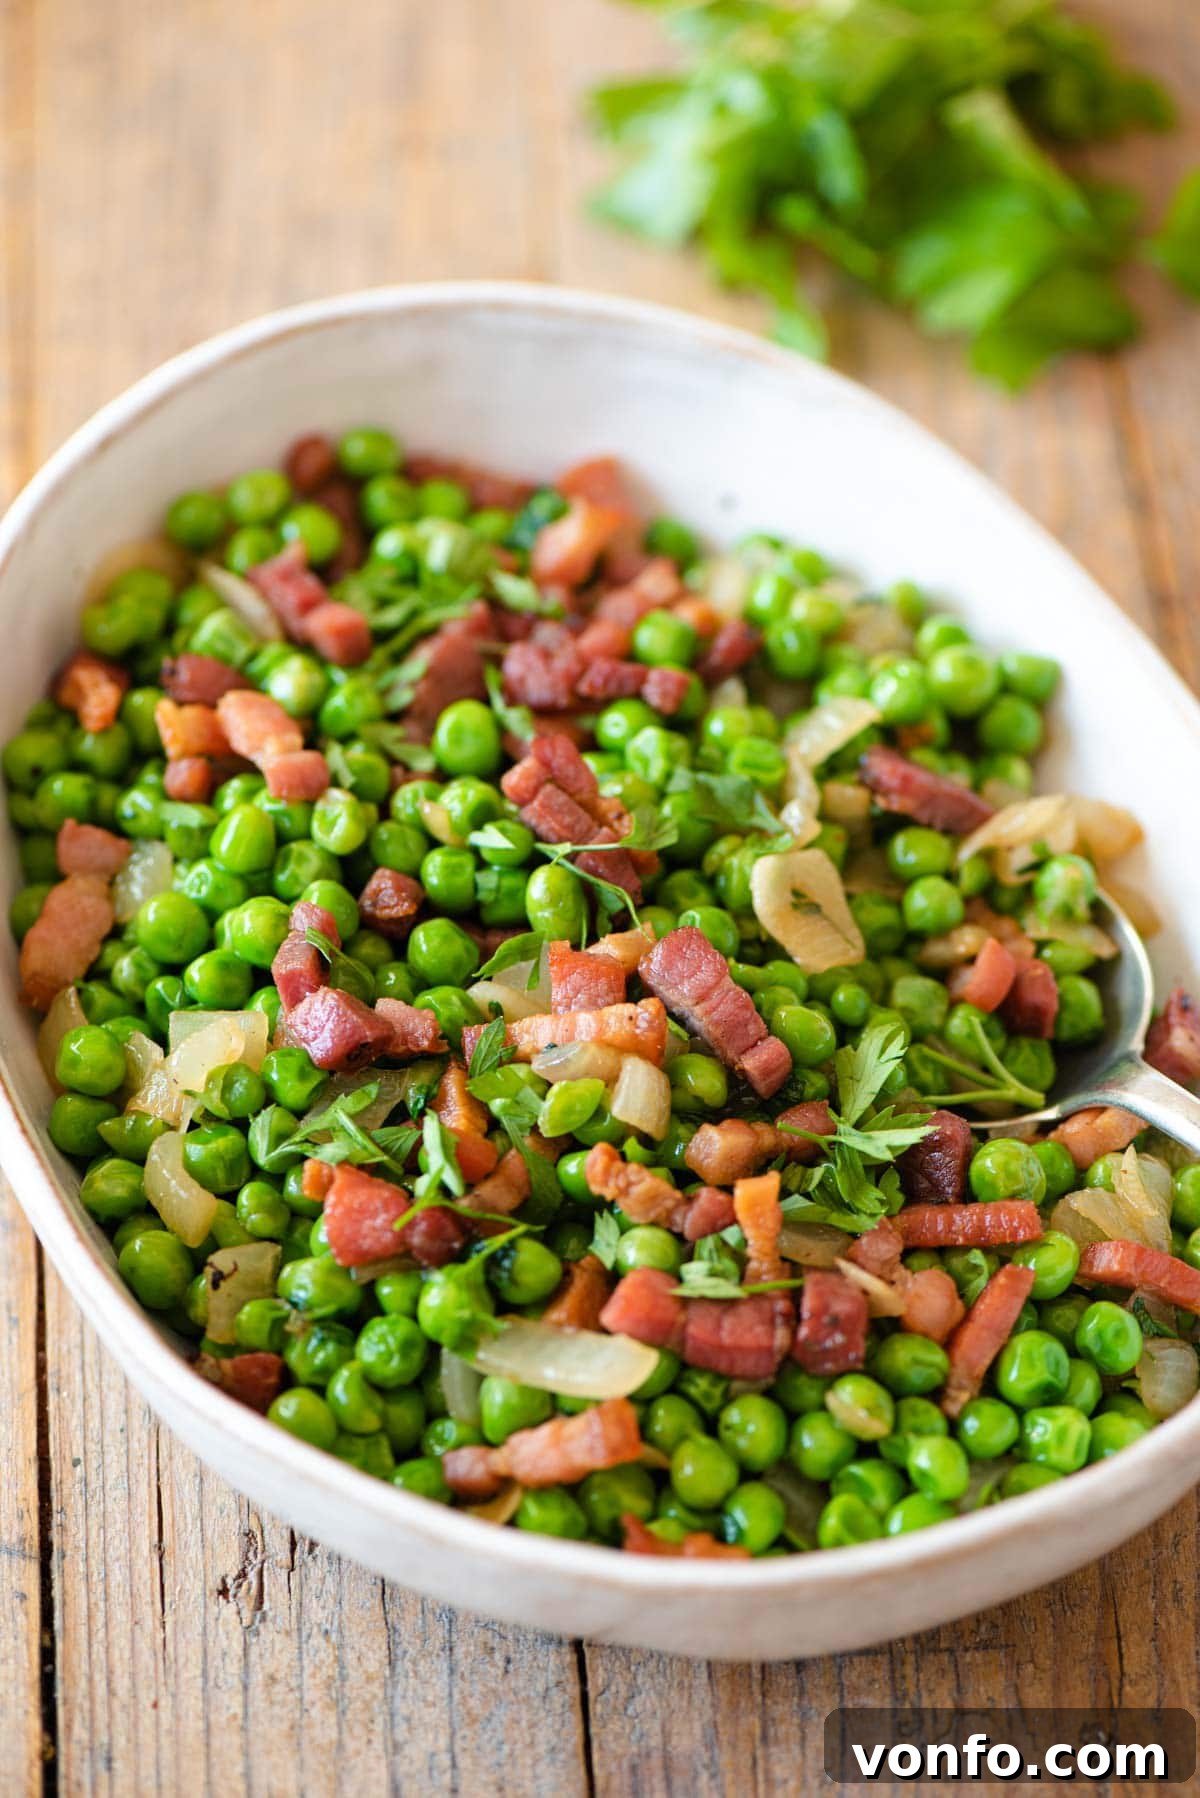
Embark on a culinary journey to Italy with one of the simplest yet most profoundly flavorful Italian side dishes: Peas and Pancetta. This unassuming combination of sweet green peas, salty cured pancetta, aromatic garlic, and fresh parsley creates a symphony of flavors that perfectly complements almost any main course. Its ease of preparation and incredible taste make it a staple in Italian homes and a fantastic addition to your kitchen repertoire.
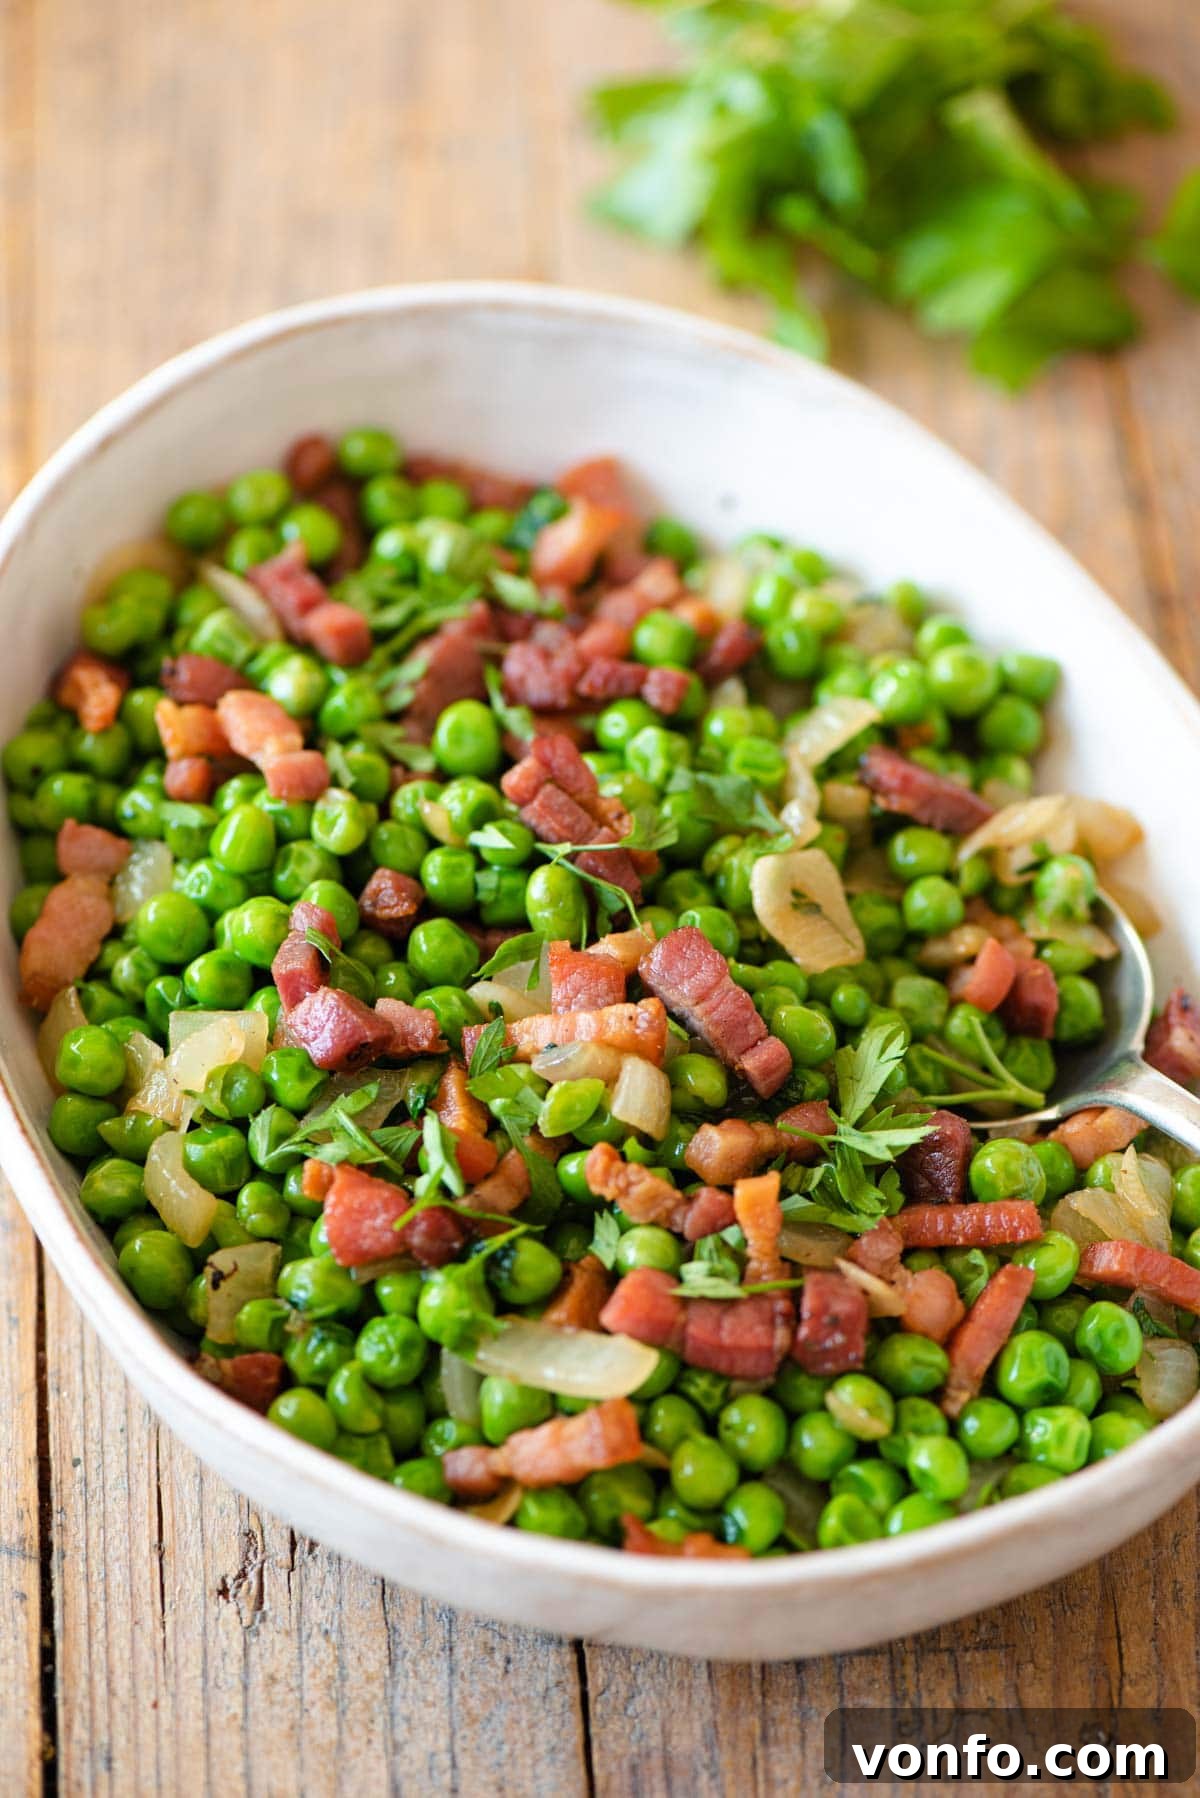
Why This Peas and Pancetta Recipe Will Become Your Favorite Side
If you’re searching for a side dish that delivers big on flavor without demanding hours in the kitchen, look no further. Peas and Pancetta is a beloved classic for a reason. It’s not only incredibly quick to make – requiring just about 20 minutes from start to finish – but it’s also surprisingly wholesome and undeniably delicious. The magic lies in the high-quality ingredients that, when combined, create a harmonious balance of tastes and textures: the savory crispness of pancetta, the delicate sweetness of peas, and the aromatic depth of garlic and onion, brightened by fresh herbs.
This versatile dish is truly a chameleon on your dining table. While it’s an exceptional companion to hearty roast meats like our Italian Roast Beef with Marsala and Onions, its adaptable nature means it pairs beautifully with almost any protein. Serve it alongside grilled chicken, baked fish, or even a simple pasta dish for an added touch of Italian elegance. It’s perfect for busy weeknights when you need a speedy yet satisfying accompaniment, or elegant enough for special occasions when you want to impress with minimal effort.
Essential Ingredients for Authentic Peas and Pancetta
The beauty of Italian cooking often lies in the simplicity and quality of its ingredients. For this Peas and Pancetta recipe, a handful of fresh, high-quality components are all you need to create a truly memorable dish. Let’s take a closer look at what makes each ingredient shine.
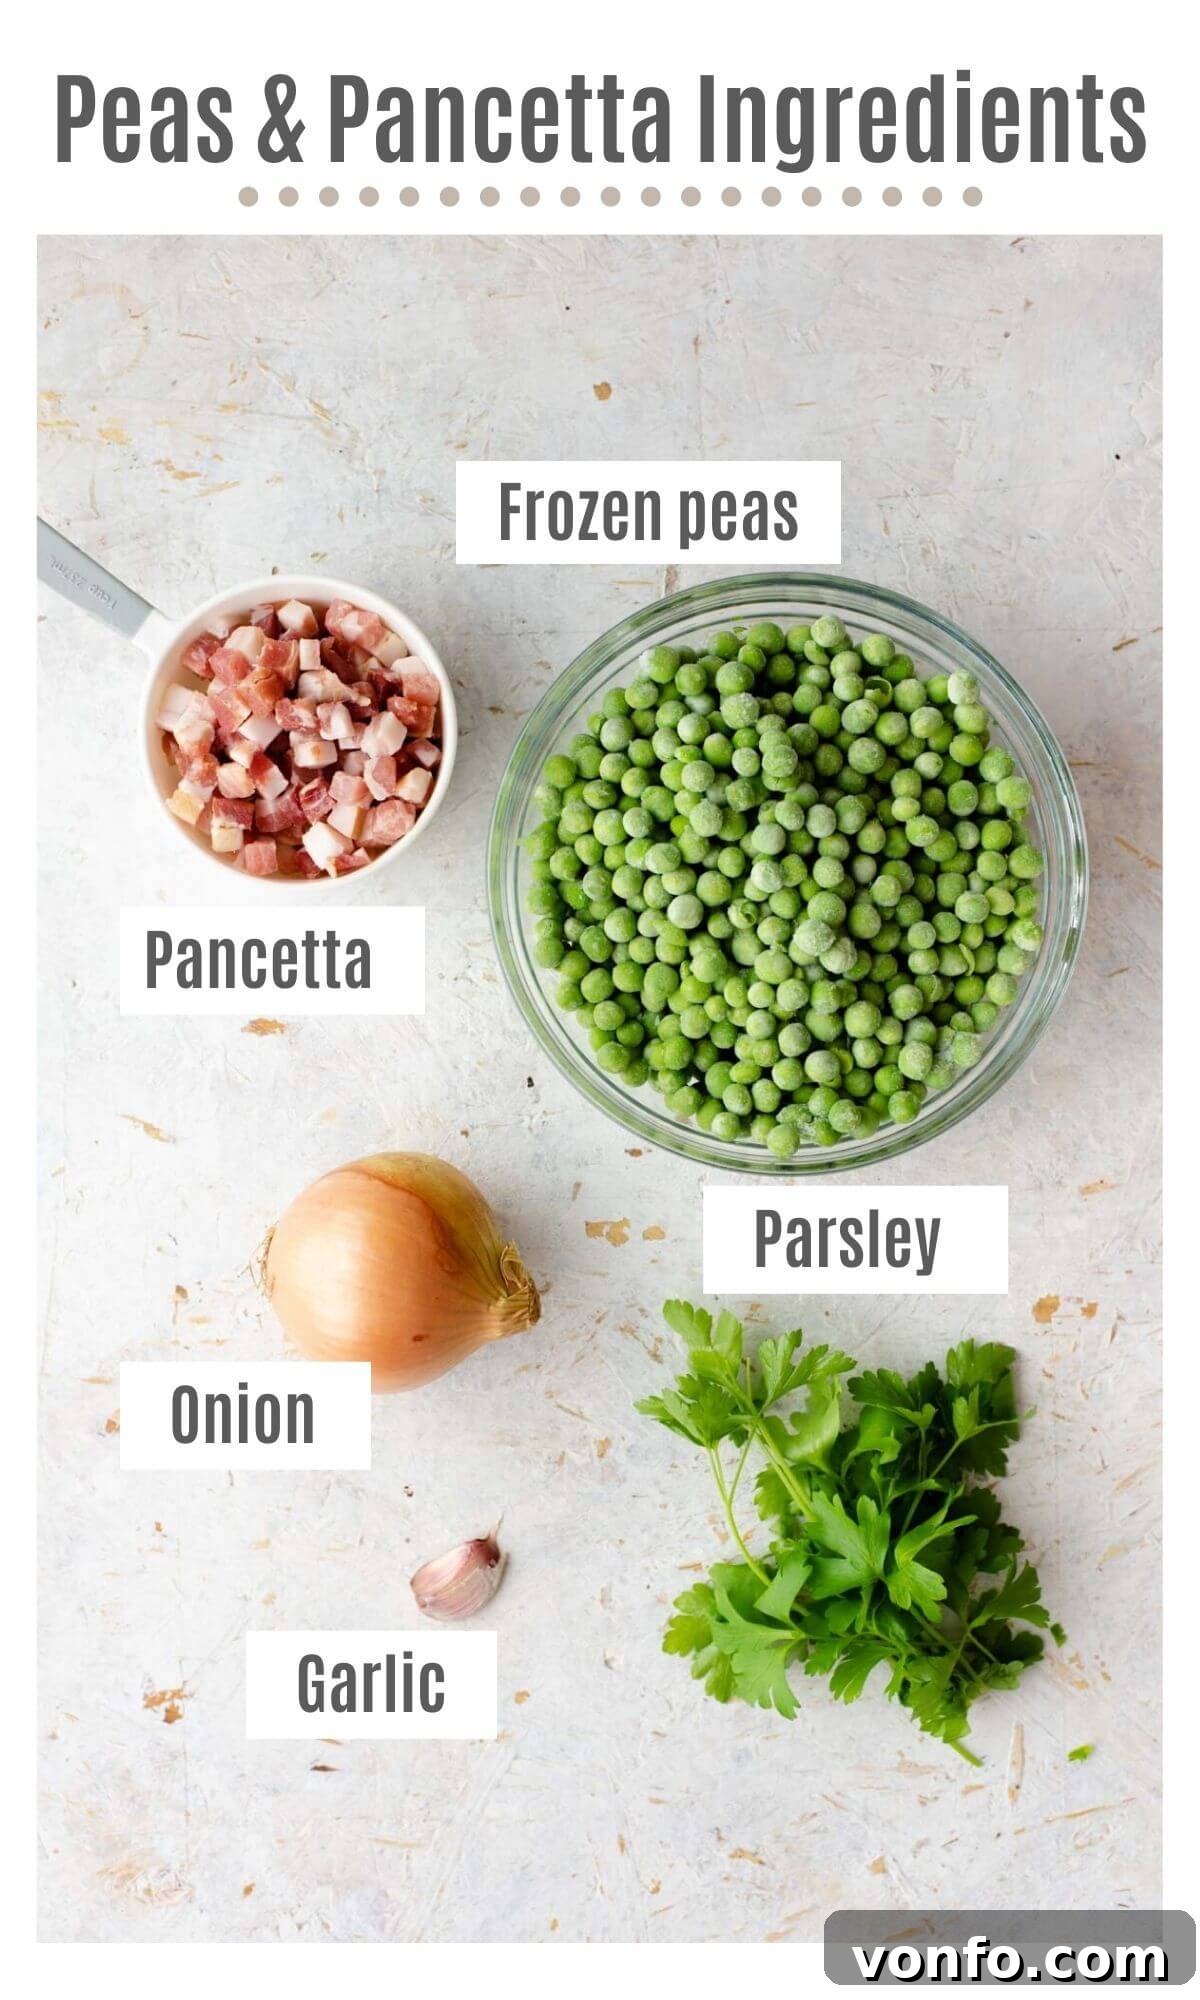
- Peas: We champion frozen peas for this recipe, making it accessible and delicious all year round. They are conveniently pre-blanched and retain their vibrant color and sweet flavor. If you opt for fresh peas, especially during their peak season, you’ll need to add a splash of liquid (water, vegetable broth, or even a dry white wine) to the pan to ensure they cook through evenly. Remember, the goal is tender, bright green peas, not mushy ones!
- Pancetta: This is the soul of the dish. Pancetta is Italian cured pork belly, offering a wonderfully savory and slightly salty flavor that transforms the peas. For the best results, seek out good quality pancetta, ideally diced or cubed, as it renders fat beautifully and crisps up perfectly. The rendered fat is crucial for sautéing the other aromatics, infusing the entire dish with its rich taste. If pancetta is unavailable, good quality thick-cut smoked bacon can be a suitable substitute, though it will impart a smokier flavor.
- Garlic: Fresh garlic is an absolute non-negotiable for this recipe. Its pungent, sweet aroma, released during sautéing, forms the foundational flavor layer. Finely slice or mince your garlic to ensure it integrates well without overpowering the other ingredients. Garlic powder simply won’t achieve the same depth of flavor.
- Onion: A finely chopped yellow or white onion adds a gentle sweetness and aromatic depth that complements the garlic and pancetta. As the onion cooks down, it becomes translucent and mellow, contributing a subtle savory base. For a slightly milder and more delicate flavor, 1-2 shallots can be used as an excellent alternative.
- Fresh Parsley: The vibrant, peppery notes of fresh flat-leaf (Italian) parsley provide a crucial burst of freshness that lifts the entire dish. Fresh herbs are paramount; dried parsley will lack the essential brightness and aromatic complexity. If you don’t have parsley, fresh basil or mint (or a combination) can offer a delightful, albeit different, aromatic twist.
- Olive Oil: You may or may not need extra virgin olive oil for this recipe. The amount of fat rendered from your pancetta will dictate if additional oil is required for sautéing the onion and garlic. If your pancetta is leaner, a tablespoon or two of good quality olive oil will ensure your aromatics cook beautifully without sticking or burning.
- Salt and Black Pepper: Essential for seasoning, but approach with caution! Pancetta can be quite salty, so it’s always best to taste the finished dish before adding extra salt. Freshly ground black pepper adds a pleasant warmth and depth.
How to Make Perfect Peas and Pancetta: A Simple Guide
Creating this delicious side dish is surprisingly straightforward, involving just a few simple steps. Follow these instructions closely for a flawless result every time.
Step 1: Crispy Pancetta is Key
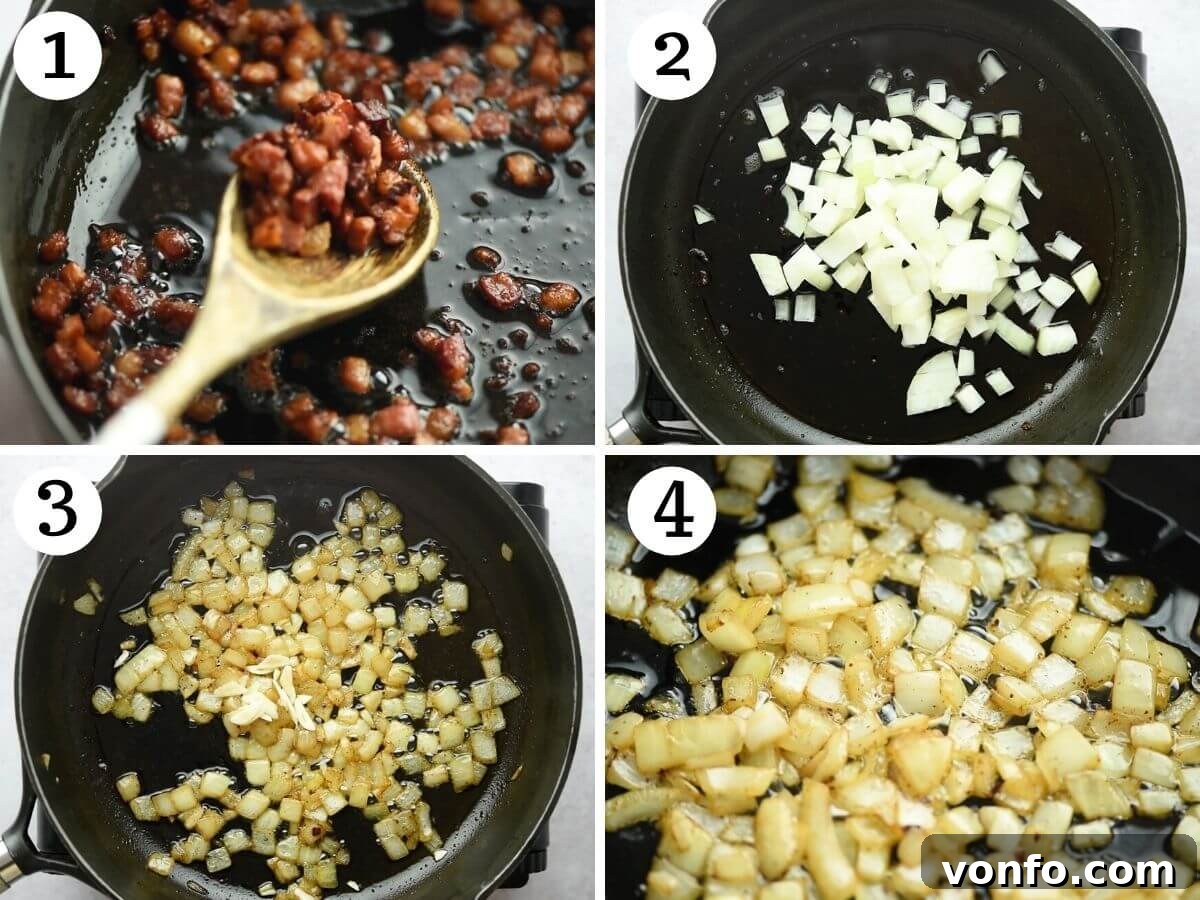
Begin by heating a large skillet or frying pan over medium-high heat. Add the diced pancetta to the hot pan. Fry the pancetta, stirring occasionally, until it becomes wonderfully crispy and its fat has rendered. This usually takes about 5-8 minutes. If your pancetta is particularly lean and doesn’t release much fat, you might need to add 1 tablespoon of olive oil to the pan to help it along. Once crispy, use a slotted spoon to remove the pancetta from the pan and set it aside on a plate lined with paper towels to drain. Leave the rendered pancetta fat in the pan – this is where the flavor truly begins!
Step 2: Sauté the Aromatics
Check the pan for the amount of rendered fat. If there isn’t enough to coat the bottom of the pan lightly (about 1 tablespoon), add 1 tablespoon of olive oil. Reduce the heat to medium. Add the finely chopped onion to the pan and sauté for 3-5 minutes, stirring occasionally, until it softens and becomes translucent. Avoid browning the onion too much. Once the onion is soft, add the thinly sliced fresh garlic. Cook for just 1 minute more, stirring constantly, until the garlic becomes fragrant. Be careful not to burn the garlic, as it can turn bitter very quickly.
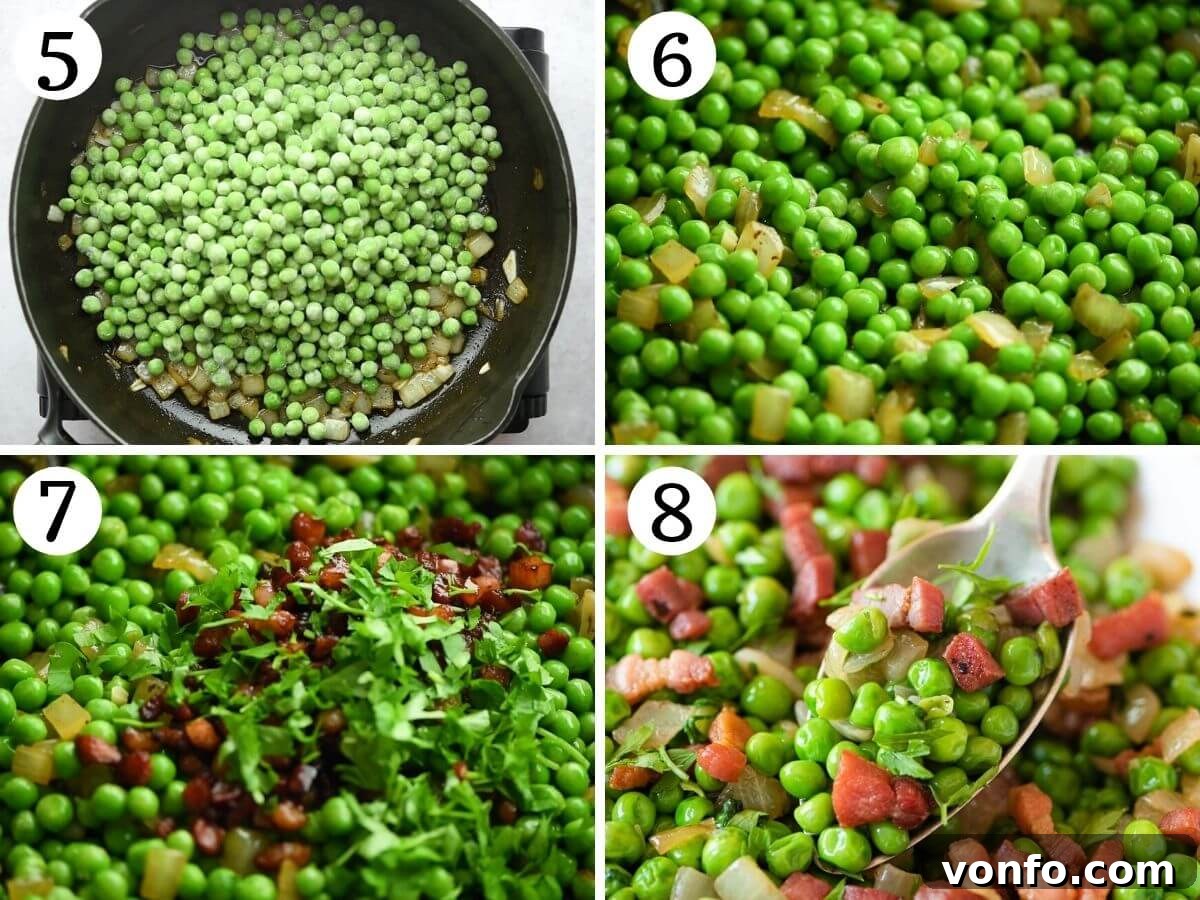
Step 3: Cook the Peas
Next, add the frozen peas directly to the pan with the softened onions and fragrant garlic. Increase the heat slightly to medium-high. Cook the peas for about 3-5 minutes, stirring often, until they are defrosted, heated through, and vibrantly green. If using fresh peas, you would add a splash of water, wine, or stock at this stage and simmer until tender. For frozen peas, the inherent moisture is usually sufficient.
Step 4: The Final Stir and Serve
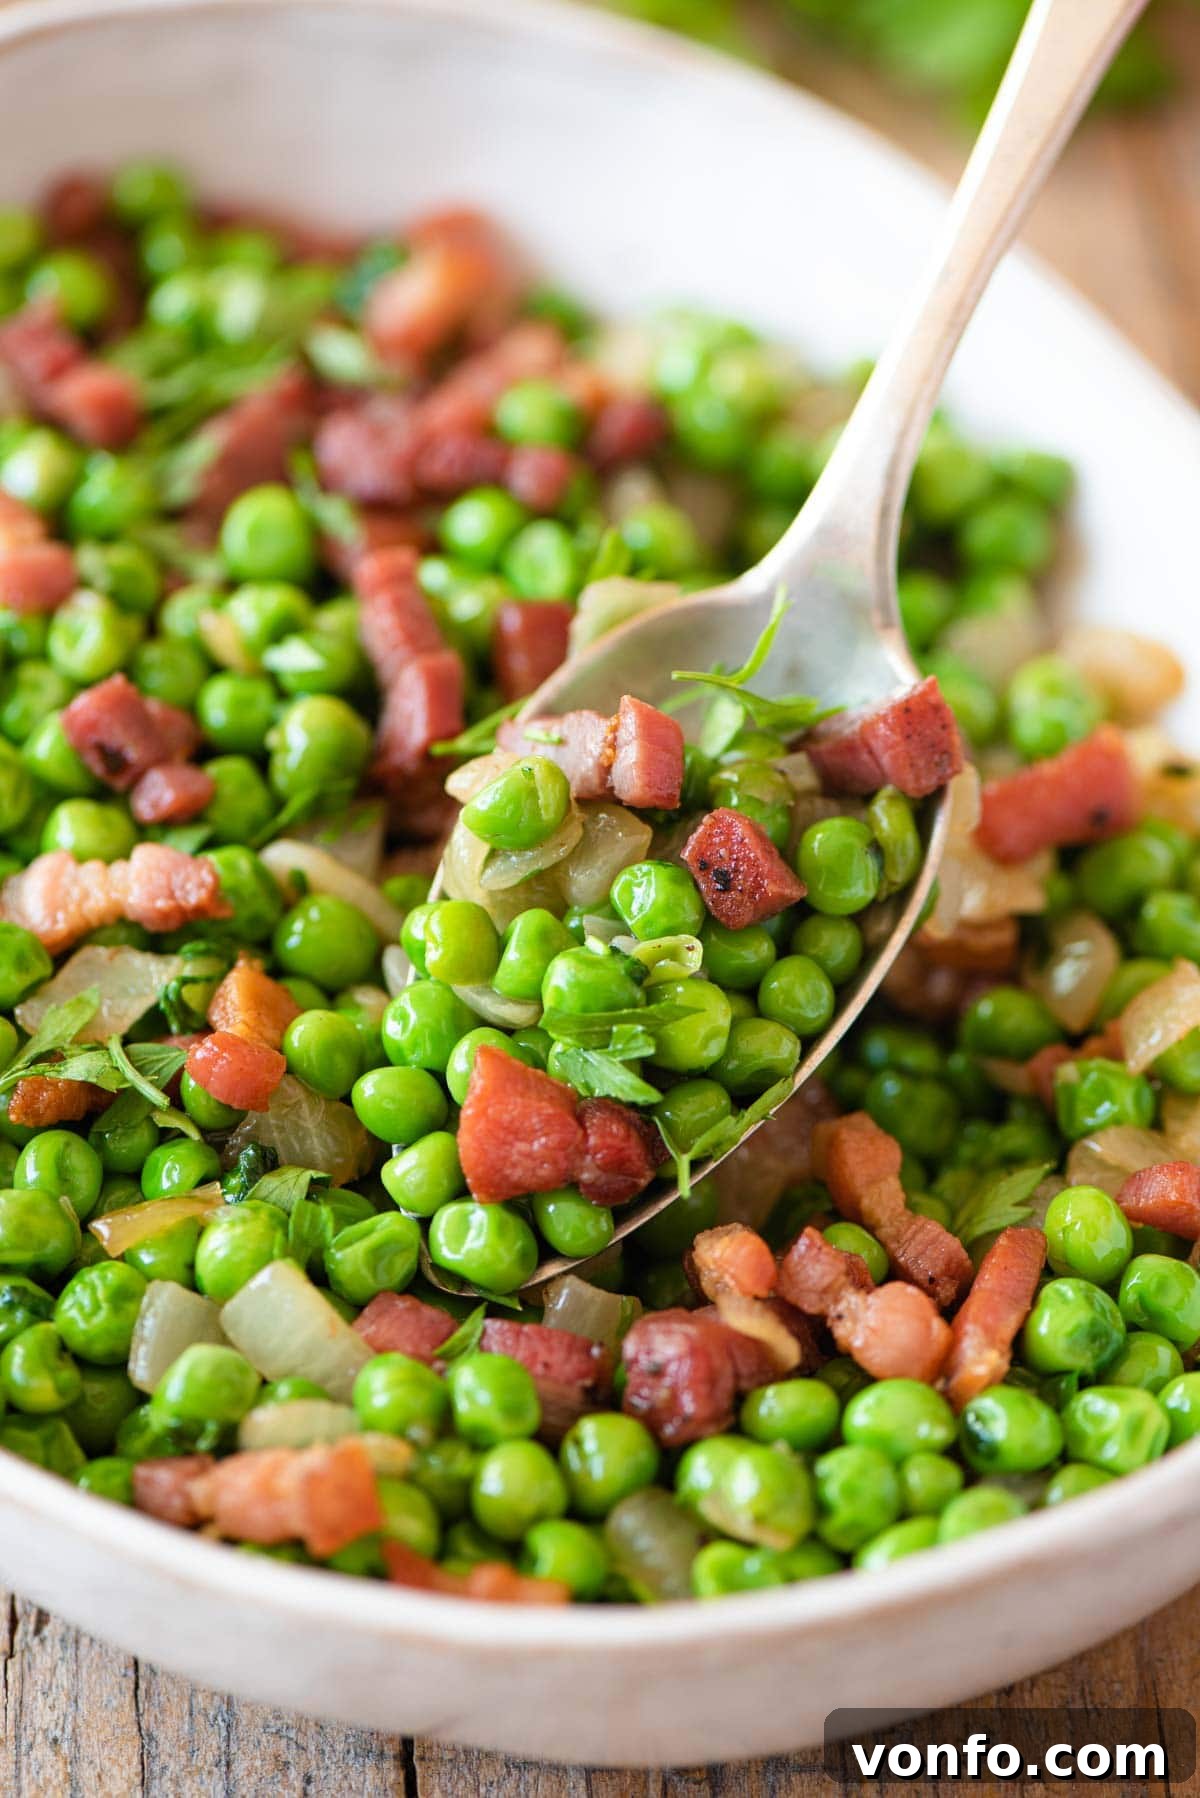
Once the peas are perfectly cooked – tender-crisp and bright green – turn off the heat. Stir through the reserved crispy pancetta and the freshly chopped parsley. Give everything a good mix to combine the flavors. Taste the dish and season with salt and freshly ground black pepper as needed. Remember, pancetta is quite salty, so you may not need to add much, if any, additional salt. Serve immediately and enjoy this simple yet spectacular Italian side!
Pro Tips for an Unforgettable Peas and Pancetta Side Dish
- Peas Cook Fast: The Golden Rule: The secret to perfectly tender and vibrant peas is to avoid overcooking them. Overcooked peas lose their bright color, shrivel, and become mushy, losing their delightful sweetness. Cook them just until they are heated through and tender-crisp. Taste one to check for doneness, then remove from the heat immediately.
- Leverage Pancetta Fat: The rendered fat from the pancetta is liquid gold for this recipe. It infuses the onions and garlic with incredible depth of flavor. Only add extra olive oil if your pancetta is particularly lean and doesn’t release sufficient fat for sautéing the aromatics.
- Season with Caution: Pancetta, being a cured meat, can be quite salty. Always taste the peas and pancetta at the very end of cooking before adding any additional salt. You might find it perfectly seasoned already, or only need a small pinch.
- Fresh vs. Frozen Peas – A Deeper Dive: While frozen peas offer ultimate convenience and allow you to make this dish all year, understanding the difference is key. Frozen peas contain excess moisture, which helps them cook without additional liquid. If you opt for fresh peas, which are fantastic when in season, you must cover them with a small amount of liquid (water, chicken stock, or dry white wine) and simmer until tender to ensure they cook properly.
- Fresh Herbs Make a Difference: The fresh parsley is not just a garnish; it adds a crucial layer of brightness and aroma. Don’t skip it, and avoid using dried herbs which lack the same vibrant punch. Consider other fresh herbs like mint or basil for a delicious variation.
- Use a Wide Skillet: A wide, shallow skillet allows for even cooking and proper browning of the pancetta, ensuring maximum crispiness. It also provides ample surface area for the peas to cook quickly and evenly without steaming.
What to Serve with Peas and Pancetta
The beauty of Peas and Pancetta lies in its incredible versatility. It’s a fantastic accompaniment that can elevate a wide array of main courses:
- Roast Meats: It’s a classic pairing for an Italian roast dinner, be it beef, pork, or lamb. The sweetness of the peas and the saltiness of the pancetta cut through the richness of the meat.
- Poultry: Serve it alongside simple chicken cutlets, roasted chicken, or pan-seared turkey for a light yet flavorful side.
- Fish: This dish is surprisingly delicious with white fish like baked cod, pan-seared snapper, or even flaky salmon.
- Pasta Dishes: A light, fresh side to complement heartier pasta dishes, or stir it directly into a creamy risotto at the end for added texture and flavor.
- Eggs: Don’t limit it to dinner! Peas and Pancetta makes a wonderful brunch or breakfast side alongside fried eggs or an omelet.
- Sandwiches & Panini: A unique and flavorful addition to gourmet sandwiches.
Get Creative: Peas and Pancetta Variations
While the classic Peas and Pancetta recipe is perfect as is, it’s also wonderfully adaptable. Feel free to experiment with these delicious variations:
- Cheesy Indulgence: For an extra layer of savory flavor, stir in a spoonful of freshly grated Parmesan or Pecorino Romano cheese just before serving.
- Spicy Kick: If you enjoy a touch of heat, add a pinch of red pepper flakes along with the garlic for a subtle spicy warmth.
- Lemon Zest Brightness: A squeeze of fresh lemon juice or a sprinkle of lemon zest at the very end can brighten the flavors and add a wonderful zing.
- Added Vegetables: Enhance the vegetable content by adding finely diced carrots or small asparagus tips to the pan when sautéing the onion.
- Wine Infusion: Deglaze the pan with a splash of dry white wine after the aromatics are cooked, letting it reduce slightly before adding the peas. This adds a sophisticated depth of flavor.
- Vegetarian Option: To make this dish vegetarian, simply omit the pancetta. Sauté the onions and garlic in olive oil, and consider adding sun-dried tomatoes, sautéed mushrooms, or smoked paprika for a touch of umami.
Storing and Enjoying Leftovers
Peas and Pancetta is best enjoyed fresh, but leftovers are still incredibly delicious and can be a fantastic meal prep option.
- Storage: Store any leftover Peas and Pancetta in an airtight container in the refrigerator for up to 3 days.
- Reheating: For the best texture, we recommend reheating leftovers in a pan or skillet over medium heat, stirring occasionally, until warmed through. This helps to re-crisp the pancetta slightly. A microwave can also be used, but the pancetta may lose some of its crispiness.
- Freezing: If you made the dish with frozen peas, you can absolutely refreeze the leftovers in suitable airtight containers. The quality will largely remain intact, though fresh peas might experience a slight change in texture upon thawing. This is a great option if you’re not planning to eat the leftovers within a few days.
Discover More Delicious Italian Side Dishes
If you’ve enjoyed the simplicity and flavor of Peas and Pancetta, you’ll love exploring other authentic Italian side dishes from our kitchen:
- Fagioli all’uccelletto – Beans in Tomato Sauce
- Italian Green Beans In Tomato Sauce
- Parmesan Roasted Potatoes and Broccoli
- La Peperonata – Bell Peppers in Tomato Sauce
- Sauteed Broccolini with Pesto, Pine Nuts & Chilli
We hope this guide inspires you to create your own delicious batch of Peas and Pancetta! It’s a testament to how simple ingredients, handled with care, can yield extraordinary results. If you’ve tried this Peas and Pancetta recipe or any other recipe on the blog, please don’t forget to rate it and share your thoughts in the comments below. We absolutely love hearing from you! You can also FOLLOW US on FACEBOOK, INSTAGRAM, and PINTEREST, or sign up for our NEWSLETTER to receive more of our delicious food straight to your inbox.
Peas and Pancetta Recipe
By Emily
Prep: 5 mins | Cook: 15 mins | Total: 20 mins
Servings: 6 servings
Ingredients
- 3 cups frozen peas (460g)
- 1 cup diced pancetta (125g)
- 1 onion, finely chopped
- 1 clove garlic, finely sliced
- 1 small bunch fresh parsley, chopped
- 1-2 tablespoons olive oil (as needed)
- Salt and pepper, to season
Instructions
- Add the pancetta to a hot pan and fry until crispy. If your pancetta isn’t fatty enough, you might need to add 1 tablespoon of olive oil.
- Once crispy, remove the pancetta from the pan and set aside. Add 1 tablespoon olive oil to the pan if needed (using the rendered pancetta fat) and fry the chopped onion for a few minutes until soft and translucent.
- Once the onion is soft, add the sliced garlic and fry for 1 minute until fragrant, being careful not to burn it.
- Next, add the frozen peas straight to the pan and cook until defrosted and hot all the way through, stirring often. This should only take a few minutes.
- Once cooked, turn off the heat and stir through the cooked crispy pancetta and fresh parsley. Taste and season with salt and pepper as needed (some pancetta can be very salty, so you may not need additional salt). Serve warm.
Notes
- Peas cook fast – don’t overcook the peas so they shrivel up and lose their color. Make sure they are just cooked (taste one to check) and remove from the heat.
- Olive oil – you may or may not need olive oil depending on how fatty your pancetta is. You can use the pancetta fat to fry the onion and garlic if there is enough.
- Adding salt – pancetta can be very salty, so taste the peas at the end of cooking and add salt as needed.
- Fresh vs frozen peas – for convenience, we use frozen peas (it also means you can make this recipe all year long) which have excess moisture in them, so no liquid is needed. If you use fresh peas, you will need to cover them with liquid (water, wine, or stock) to cook them.
- Storage and freezing – leftovers will keep well in the fridge for up to 3 days and can be reheated in a pan. You can also freeze them in suitable containers, especially if made with frozen peas.
Nutrition
Calories: 231kcal | Carbohydrates: 13g | Protein: 9g | Fat: 16g | Saturated Fat: 5g | Polyunsaturated Fat: 3g | Monounsaturated Fat: 7g | Trans Fat: 1g | Cholesterol: 26mg | Sodium: 266mg | Potassium: 285mg | Fiber: 4g | Sugar: 5g | Vitamin A: 584IU | Vitamin C: 31mg | Calcium: 25mg | Iron: 1mg
Nutrition information is automatically calculated, so should only be used as an approximation.
Helpful Info for All Recipes
- I always use extra virgin olive oil in all of my recipes unless stated otherwise.
- When I use canned or jarred tomatoes of any kind, I always use Cirio or Mutti brands for the best results and flavor.
- All vegetables are medium sized unless stated otherwise.
- All recipes are tested and developed using a fan (convection) oven.
- Find out more about how nutrition is calculated.
- Check out our must-have Italian Pantry Staples.
- You can also find all our Essential Kitchen Tools for Italian Cooking.