
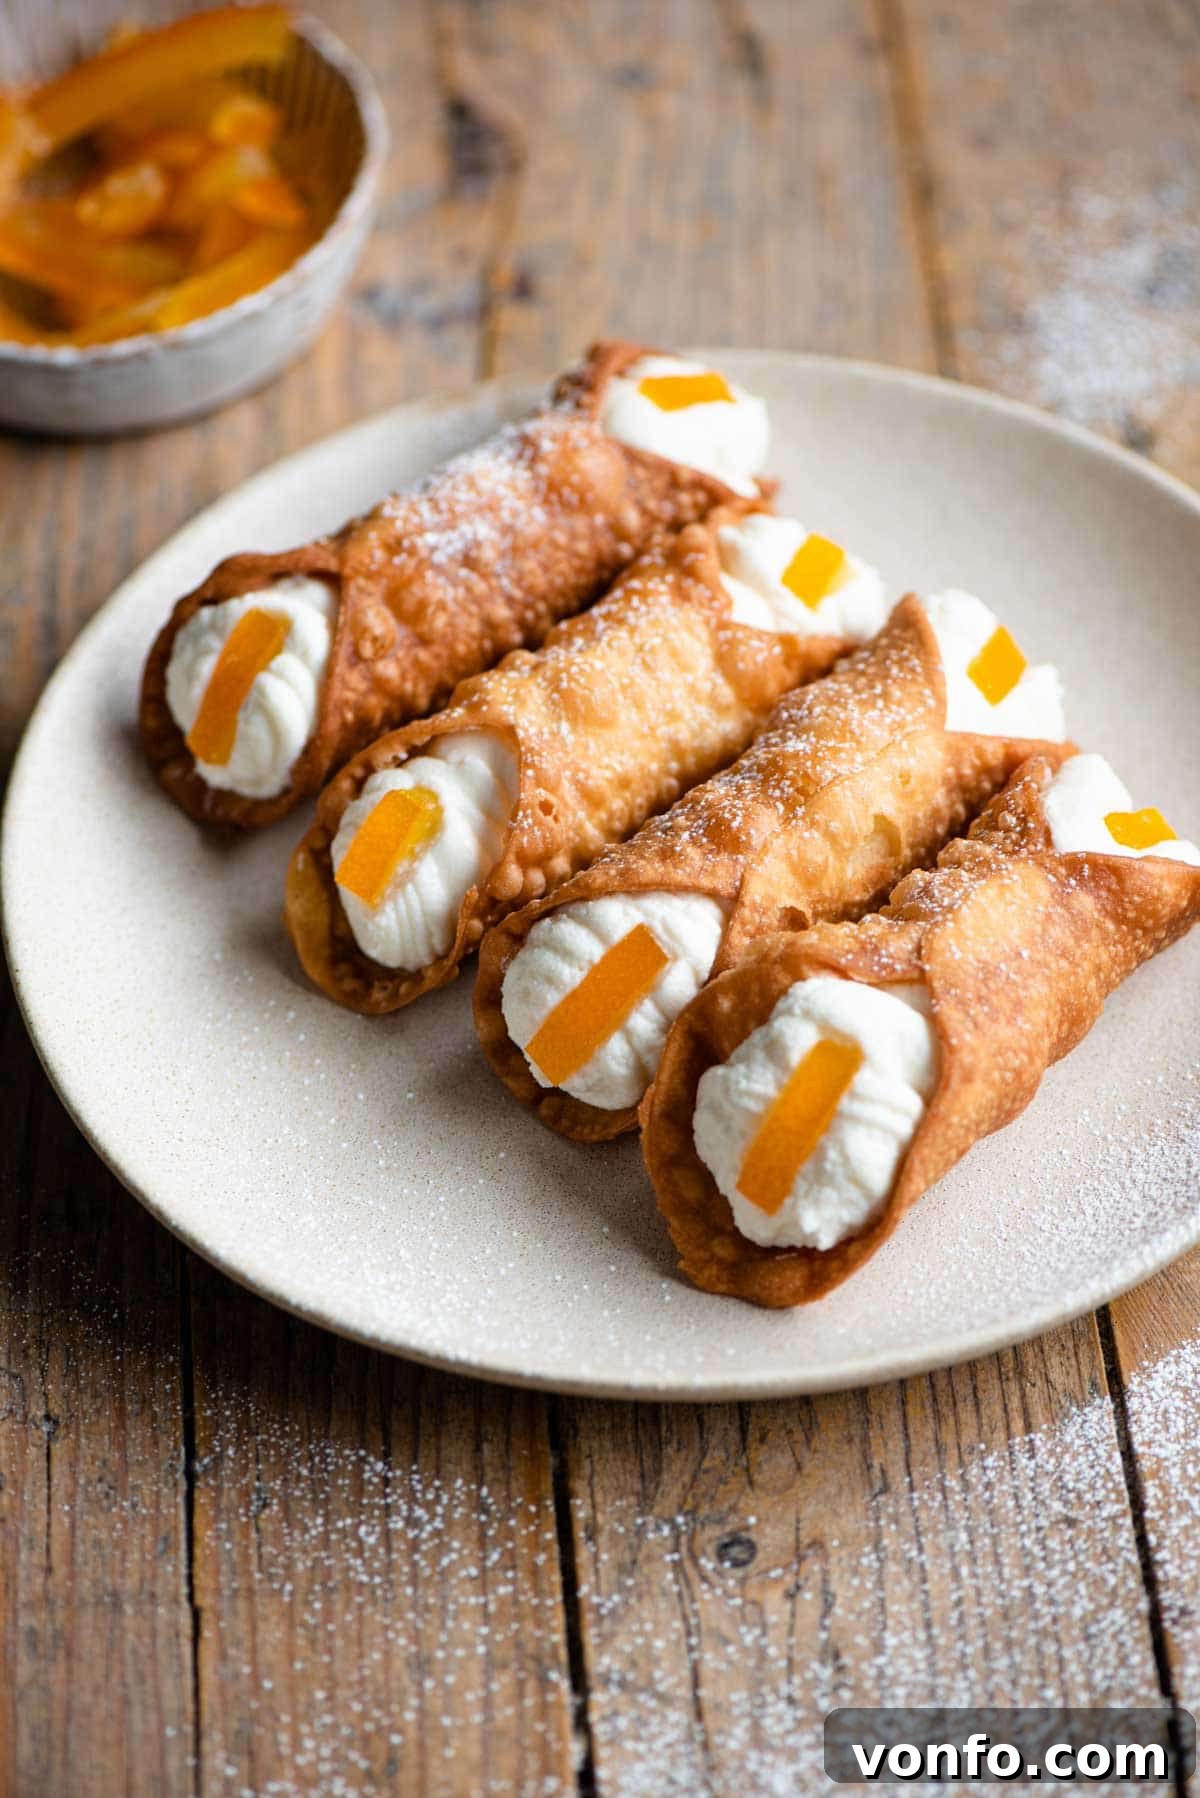
Delve into the heart of Sicilian culinary tradition by learning how to craft truly authentic Cannoli right in your own kitchen. This comprehensive recipe guides you through every step, from preparing exquisitely crispy, sweet, and perfectly bubbly homemade cannoli shells to creating a rich, classic ricotta filling that will transport your taste buds straight to Italy.
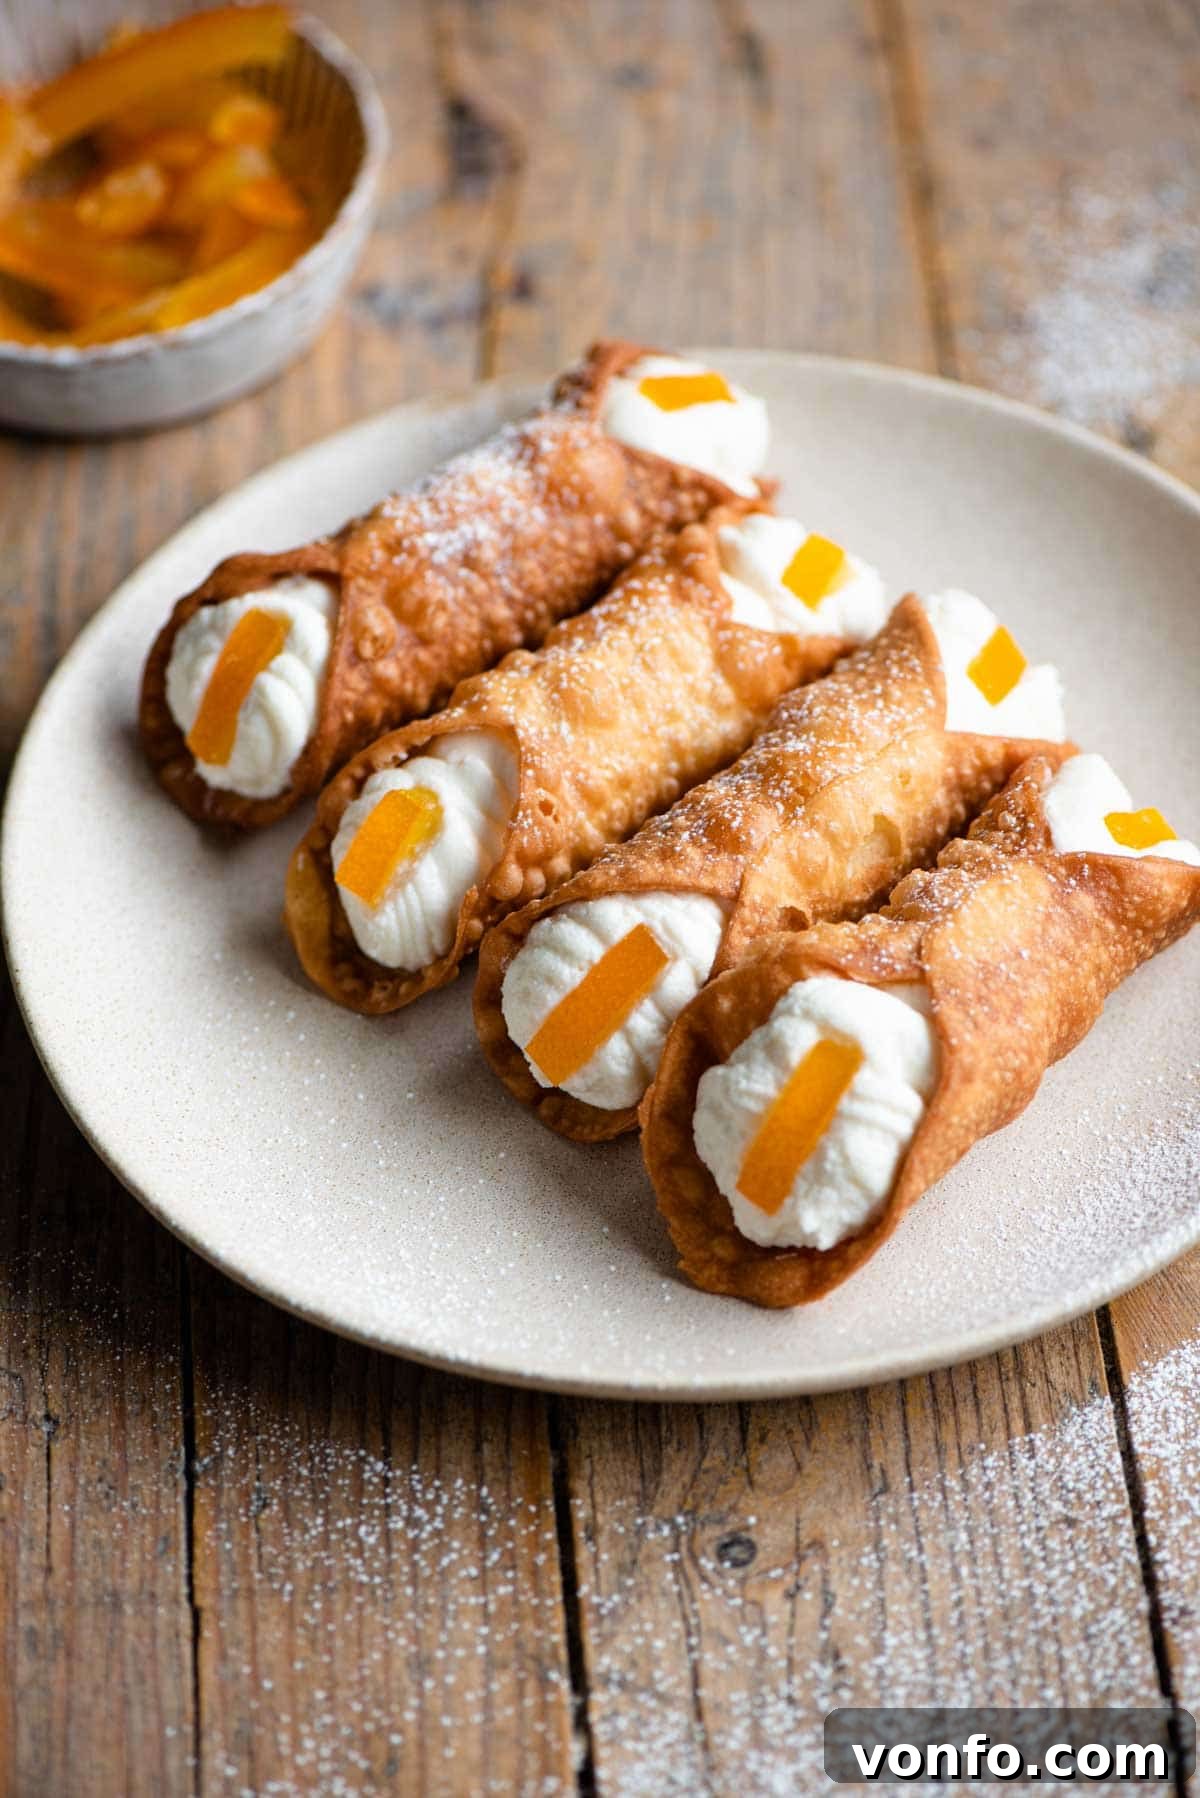
Few desserts evoke the charm and indulgence of Italy quite like freshly made cannoli. Imagine biting into a shell so impossibly crispy and flaky, fried to a golden perfection with delightful air bubbles, then discovering it’s filled with a lusciously sweet and smooth ricotta cream. This isn’t just a dessert; it’s a moment of pure culinary bliss, a true taste of Sicilian heritage.
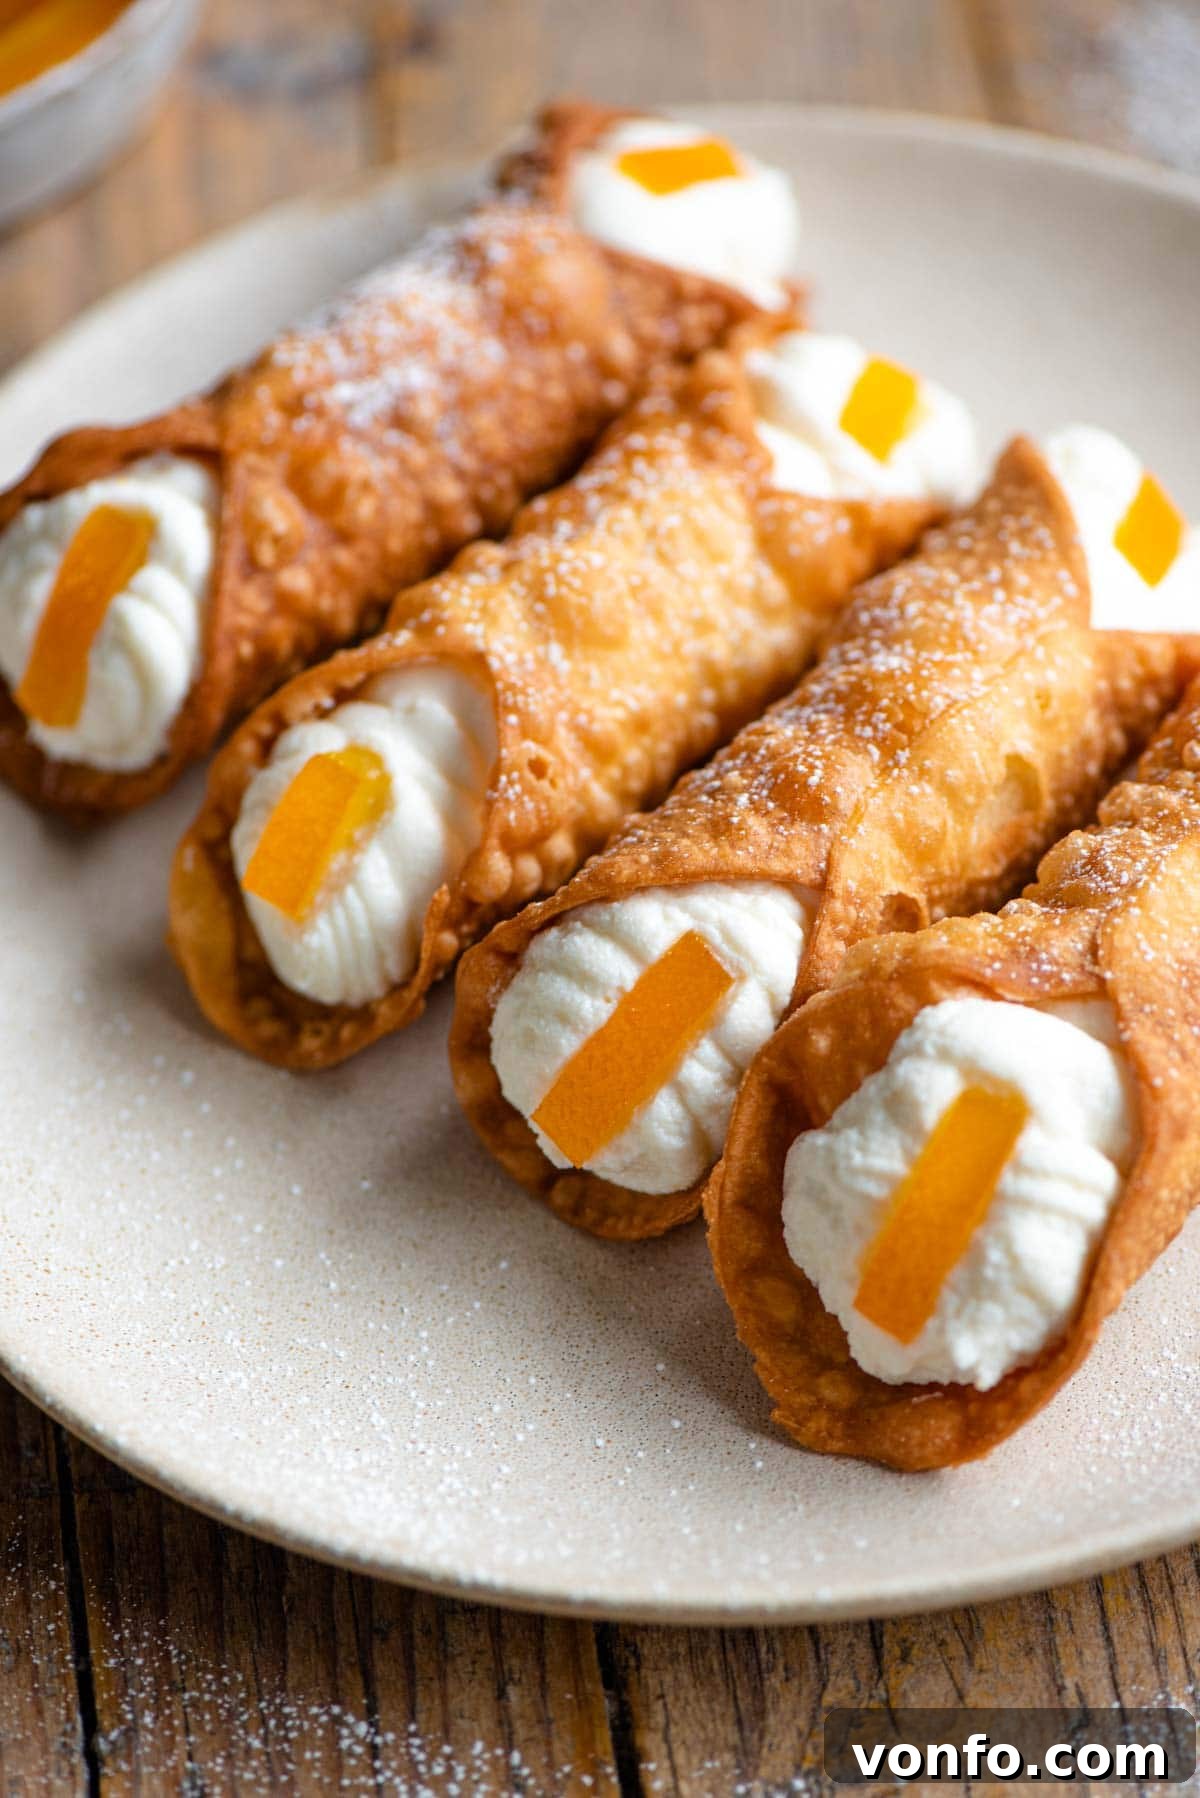
Alongside other celebrated Sicilian sweet treats such as Cassata and the intriguing Minne di Sant’Agata, cannoli stands as one of Sicily’s most iconic and beloved pastries. Its fame has spread far beyond the island’s shores, gracing the windows of Italian bakeries and patisseries across the globe. Traditionally, these exquisite treats are elegantly garnished with strips of candied orange peel at each end, offering a vibrant burst of color and citrusy sweetness. Alternatively, they might be adorned with finely chopped pistachio nuts, especially the renowned Bronte pistachios from Sicily, if you’re lucky enough to source them, adding a delightful crunch and nutty flavor.
While making cannoli from scratch, much like crafting delicious Bomboloni (Italian Doughnuts), requires a certain dedication and effort, we promise you, it is profoundly rewarding. The journey from simple ingredients to these magnificent pastries is a labor of love that is undoubtedly worth every moment. Homemade cannoli are the perfect indulgence for a special treat, a show-stopping finale to a grand family feast, or to celebrate significant occasions like Easter or Christmas, bringing an authentic touch of Italian festivity to your table.
Our comprehensive recipe provides a detailed guide to crafting both the signature crispy shells and the rich, creamy filling entirely from scratch. While the shell-making process is the most time-consuming aspect – though by no means difficult – the unparalleled crispness and depth of flavor of homemade shells make the effort truly worthwhile. However, we understand that time can be a luxury. If you find yourself pressed for time, you can certainly prepare our delicious ricotta filling and pair it with high-quality store-bought cannoli shells for a quicker, yet still delightful, dessert experience.
A Recent Update from Palermo: During a recent culinary adventure to Palermo, we had the distinct pleasure of visiting the historic Convento Santa Caterina, home to a renowned bakery operated by nuns, famous for their legendary cannoli. We are delighted to report that our homemade cannoli recipe achieves a flavor and texture remarkably similar to these iconic pastries, so much so that after tasting theirs, we felt no need to alter our tried-and-true recipe. This validation from such an esteemed source further solidifies our confidence in bringing you the most authentic Sicilian cannoli experience.
Essential Ingredients for Authentic Sicilian Cannoli
Creating perfect cannoli begins with understanding the role of each ingredient. Below, you’ll find a visual guide and important notes on all the components required for both your homemade cannoli shells and the delectable ricotta filling.
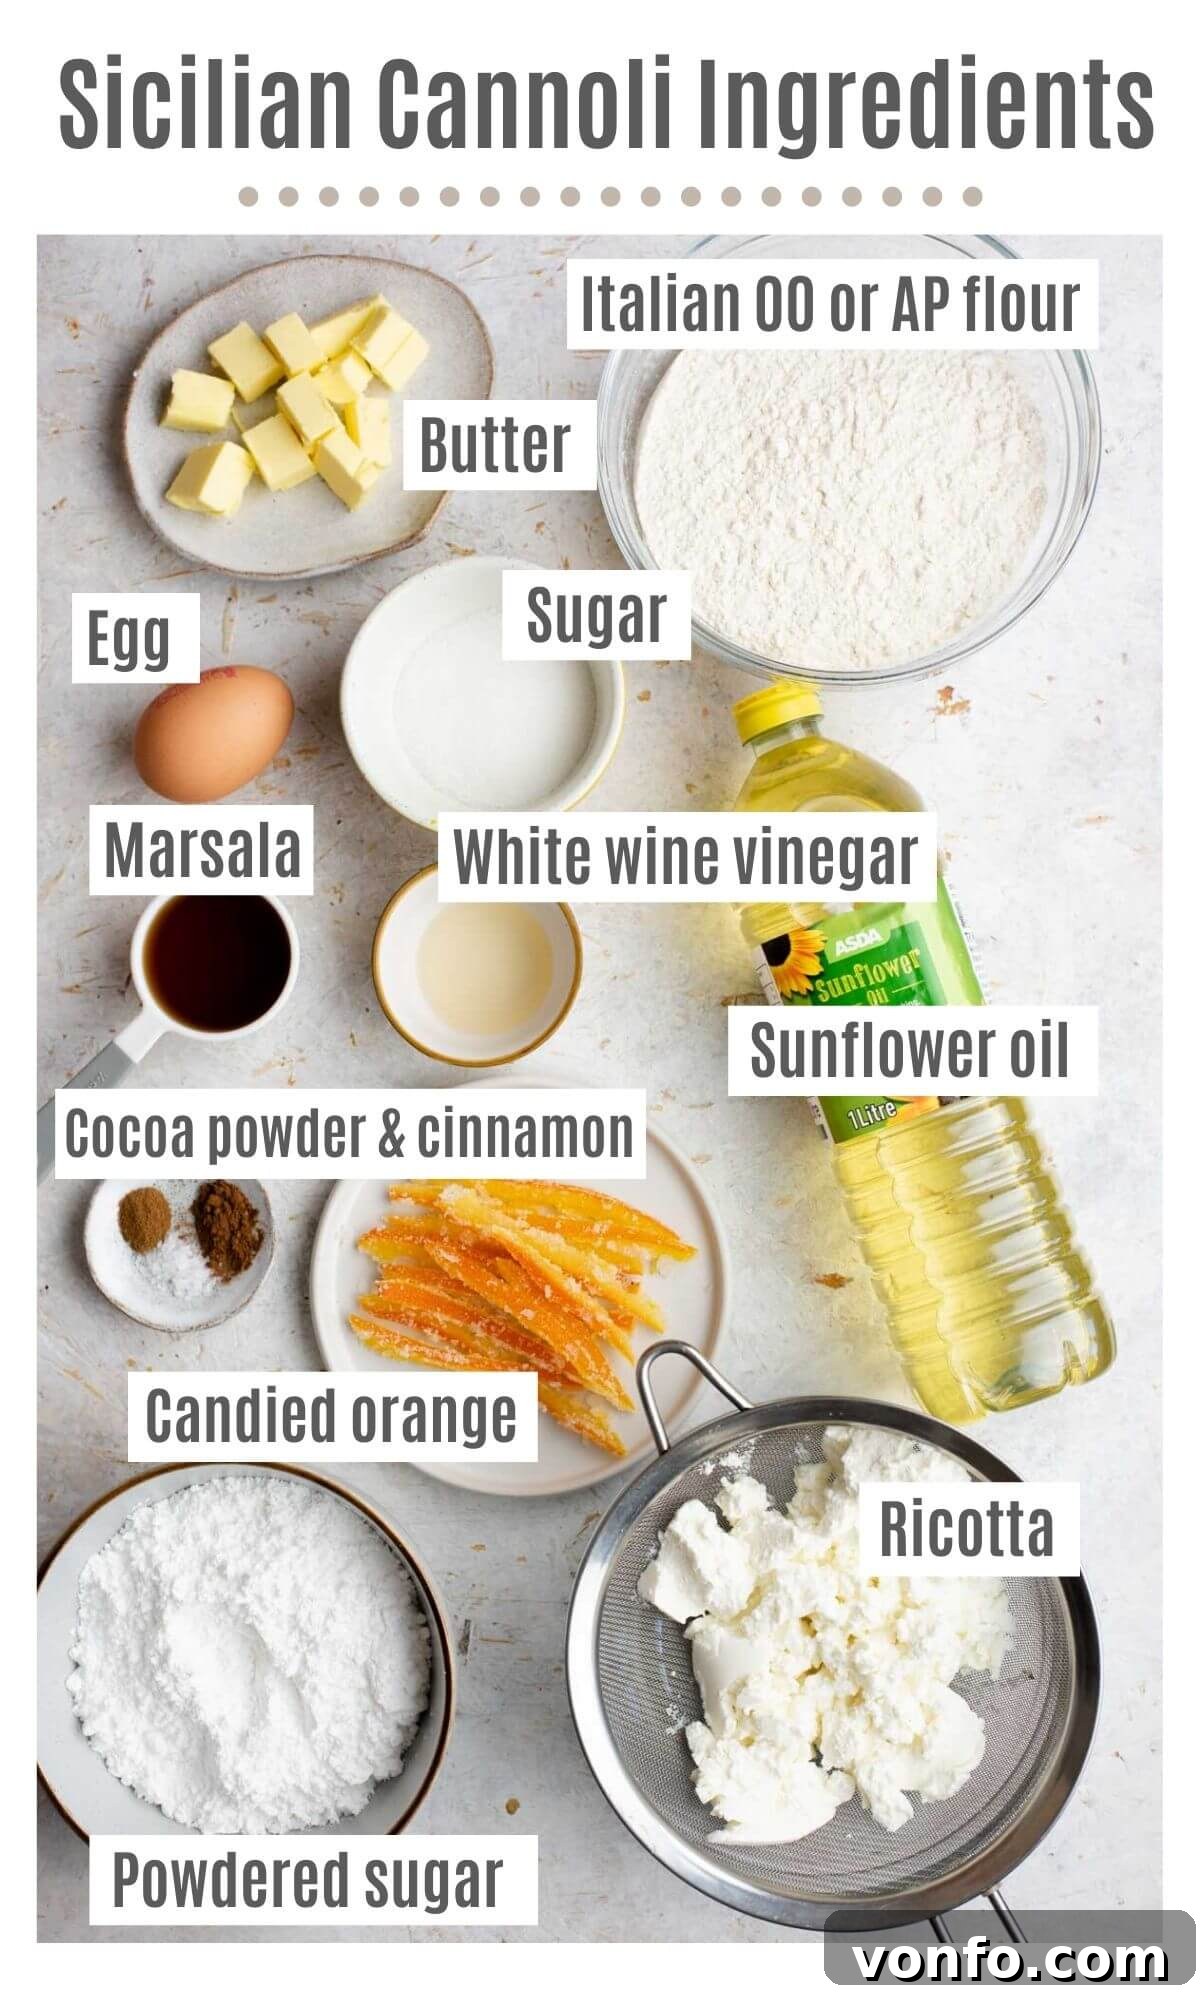
- Italian 00 Flour or All-Purpose Flour – For the shells, you can opt for traditional Italian 00 flour, known for its fine texture and ability to produce incredibly delicate pastries. Alternatively, readily available all-purpose (AP) flour works wonderfully, yielding crispy and delicious results.
- Granulated or Caster Sugar – A measured amount of white granulated or fine caster sugar adds the perfect balance of sweetness to our cannoli dough, complementing the rich filling without being overly saccharine.
- Unsweetened Cocoa Powder – Just a tiny dash of cocoa powder is incorporated into the dough, not for flavor intensity, but to impart the traditional, subtle brownish hue characteristic of classic Sicilian cannoli shells. If unavailable, you can omit it without significantly impacting the texture or primary flavor.
- Ground Cinnamon – A delicate pinch of cinnamon is a secret touch that adds a warm, aromatic depth to the cannoli shells, enhancing their overall flavor profile.
- Cold Unsalted Butter – Ensure your butter is straight from the fridge and cut into cubes. Cold butter is crucial for creating a tender, flaky dough, similar to pastry or pie crusts, which contributes to the shells’ desired crispness.
- Large Egg – A large egg provides essential structure and richness to the dough. You will also need an additional egg white for sealing the cannoli shells securely around their forms before frying.
- Marsala Wine – This fortified Sicilian wine is a cornerstone ingredient for authentic cannoli shells. It contributes a distinctive, slightly sweet, and aromatic flavor that is irreplaceable. If Marsala is not accessible, a dry white wine can be used as a substitute, though the flavor profile will differ slightly.
- White Wine Vinegar – An often-overlooked yet vital ingredient, white wine vinegar plays a key role in achieving exceptionally light, airy, and crispy cannoli shells by interacting with the gluten in the flour during frying.
- Ricotta Cheese – You’ll need a substantial amount of high-quality ricotta (approximately 4 cups or 1 kg). The absolute most critical step for the filling is to drain the ricotta thoroughly in advance. This removes excess moisture, ensuring the filling achieves the desired thick, creamy, and pipeable consistency, preventing soggy cannoli.
- Powdered Sugar (Confectioners’ Sugar) – This finely milled sugar is blended into the drained ricotta, dissolving smoothly to create a deliciously sweet filling. The amount can be easily adjusted to your personal taste preference.
- Fresh Citrus Zest – For an extra layer of bright, aromatic flavor, you have the option to incorporate the zest of a fresh lemon or orange into the ricotta filling. This adds a lovely, refreshing counterpoint to the sweetness.
- Candied Orange Peel – For a truly traditional Sicilian presentation, garnish your cannoli with elegant strips of candied orange peel at each end. Their vibrant color and sweet-tart flavor are a perfect complement.
- High-Heat Frying Oil – Sunflower oil is an excellent choice for deep frying the shells due to its neutral flavor and high smoke point. Other flavorless oils with high smoke points, such as vegetable oil or canola oil, can also be used.
Essential Equipment for Crafting Cannoli
Having the right tools will make the cannoli-making process much smoother and ensure professional-quality results. Here’s what you’ll need:
- Cannoli Tubes – These metal cylinders are indispensable for shaping the dough into the iconic cannoli form. You can readily find them online or at specialty kitchen stores.
- Candy or Deep-Fry Thermometer – Maintaining a consistent oil temperature is paramount for perfect cannoli shells. A thermometer ensures the oil is neither too hot (causing burning) nor too cool (leading to greasy shells), guaranteeing optimal crispness.
- Pasta Machine or Rolling Pin – A pasta machine simplifies the process of rolling the dough to the necessary thinness, ensuring uniform results. However, a good old-fashioned rolling pin can achieve the same thinness with a bit more manual effort.
- Kitchen Paper (Paper Towels) – Essential for draining excess oil from the freshly fried cannoli shells, keeping them crisp and non-greasy.
- Tongs – A sturdy pair of tongs is necessary for safely adding and removing the cannoli shells from the hot frying oil.
Detailed Walk-Through: Making Sicilian Cannoli from Scratch
Follow this comprehensive step-by-step guide to create exquisite homemade cannoli. For a concise recipe format, along with our top tips and additional details, please refer to the recipe card further down this page.
Crucial Preparatory Tip! Before you begin any other step, it is absolutely vital to prepare your ricotta cheese. Place the ricotta in a fine-mesh sieve set over a bowl. This setup allows excess liquid to drain away. Store the ricotta in the refrigerator for a minimum of 4 hours, or ideally, overnight. This draining process is critical; insufficient draining will result in a watery filling that is too soft to properly fill the cannoli shells once mixed with sugar, potentially leading to soggy pastries.
Step-by-Step: Crafting the Crispy Cannoli Dough
Begin by combining your dry ingredients. In a large mixing bowl, add the Italian 00 or all-purpose flour, granulated or caster sugar, a pinch of ground cinnamon, and the cocoa powder. Whisk or mix these ingredients thoroughly until they are uniformly combined, ensuring an even distribution of flavor and color throughout the dough (refer to photo 1 for visual guidance).
Next, introduce the cold butter. Cut the cold butter into small cubes, then add them to the flour mixture. Using your fingertips, work the butter into the flour. Rub the butter and flour together until the mixture resembles coarse breadcrumbs. This technique helps create pockets of butter that will yield a flaky texture when fried (see photos 2 & 3 for illustration).
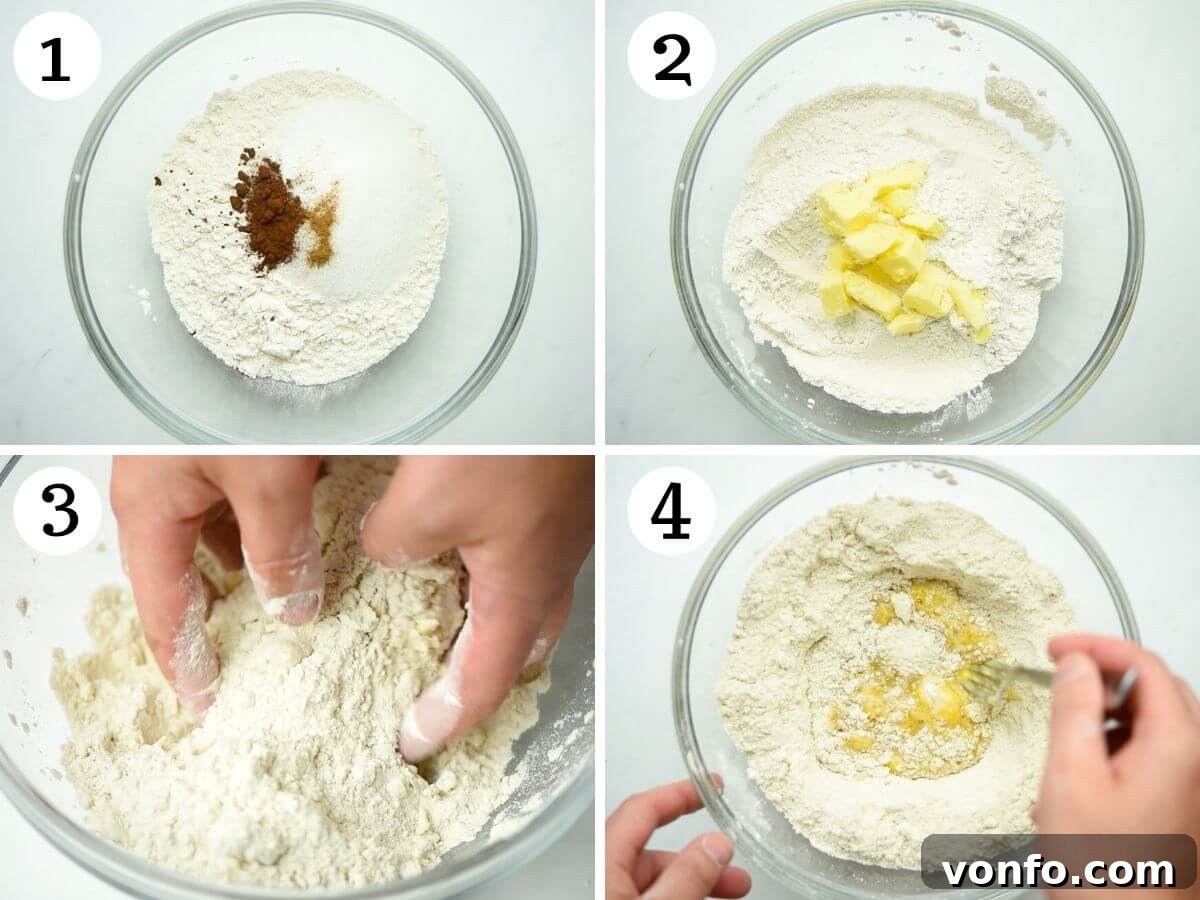
Create a well in the center of the flour and butter mixture. Into this well, pour the beaten large egg, white wine vinegar, and Marsala wine. Using a fork, gradually mix the wet ingredients into the dry, drawing in flour from the sides, until a rough, shaggy dough begins to form. Do not overmix at this stage (photo 4 demonstrates this step).
Transfer the rough dough onto a clean, lightly floured work surface. Now, it’s time for the secret to those coveted air bubbles: kneading. Knead the dough vigorously for 7 to 10 minutes. This extensive kneading develops the gluten, creating tiny air pockets within the dough that will expand and bubble beautifully when the shells are fried, resulting in an incredibly crispy and light texture (observe photo 5 for the proper kneading technique).
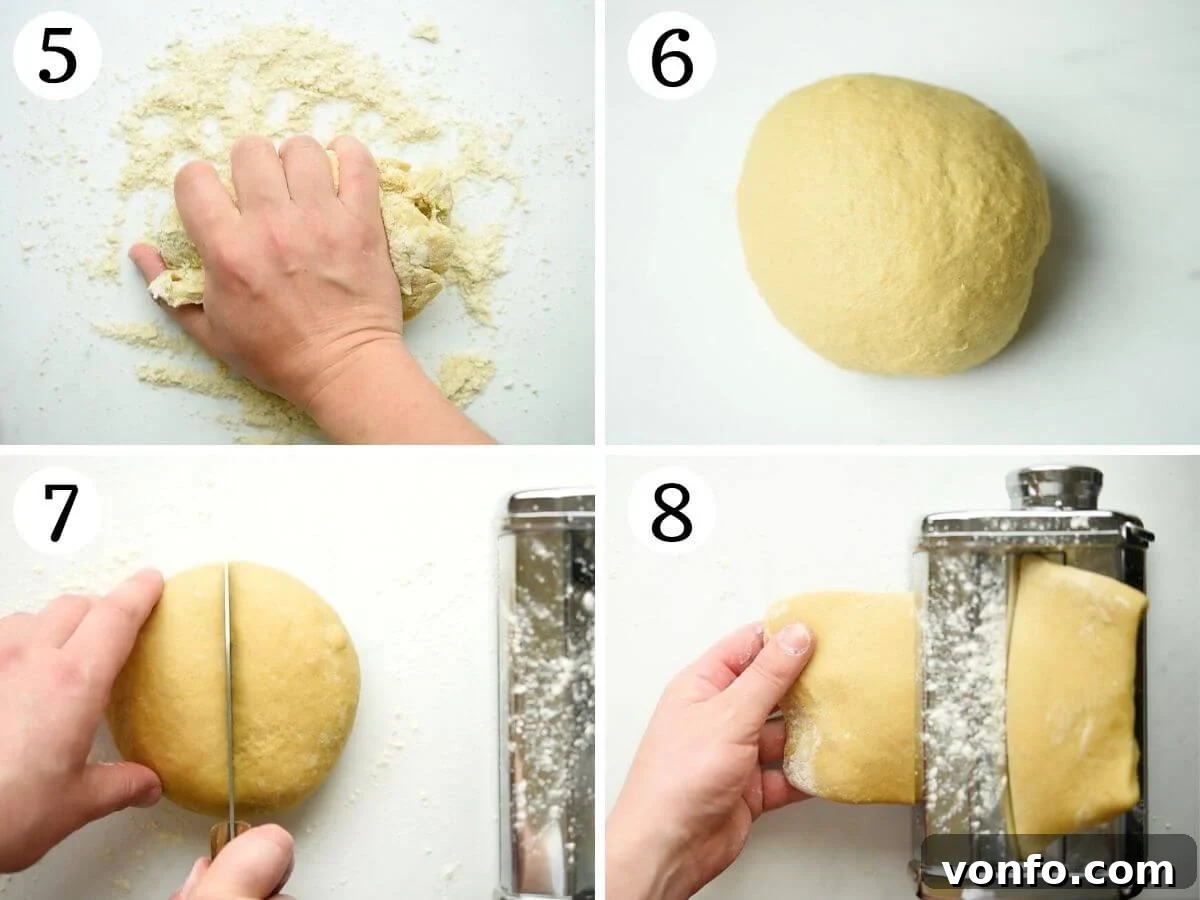
Once the dough is smooth and elastic from kneading, wrap it tightly in plastic wrap. Place the wrapped dough in the refrigerator to chill for at least 30 minutes to 1 hour. This chilling period is essential; it allows the gluten to relax, making the dough much easier to roll out thinly without shrinking back. You can also prepare the dough ahead of time and leave it in the fridge overnight for convenience (photo 6 shows the wrapped dough ready for chilling).
Before you begin rolling, set up your pasta machine if you are using one. Simultaneously, prepare your frying station: heat a large, heavy-bottomed pot filled with 2-3 inches of sunflower or other neutral oil to precisely 356°F (180°C), monitoring the temperature carefully with a candy or deep-fry thermometer. Maintaining a consistent temperature is key to perfectly fried shells.
Lightly dust your work surface and your pasta machine with a small amount of flour to prevent sticking. Divide your chilled dough in half. Take one half and flatten it into an oval or rectangle shape that is narrow enough to fit through the widest setting of your pasta machine (typically setting number 0).
Achieving Perfect Thinness: Rolling Out the Cannoli Dough
Pass the flattened dough through the widest setting of your pasta machine. Once it emerges, fold one end of the dough over the other, effectively tri-folding it (refer to photos 8 & 9). Pass the folded dough through the widest setting again. Repeat this folding and passing process 3-4 times. This technique laminates the dough slightly, further developing the layers and contributing to the signature bubbly texture of the shells (photo 10 illustrates the repeated folding and passing).
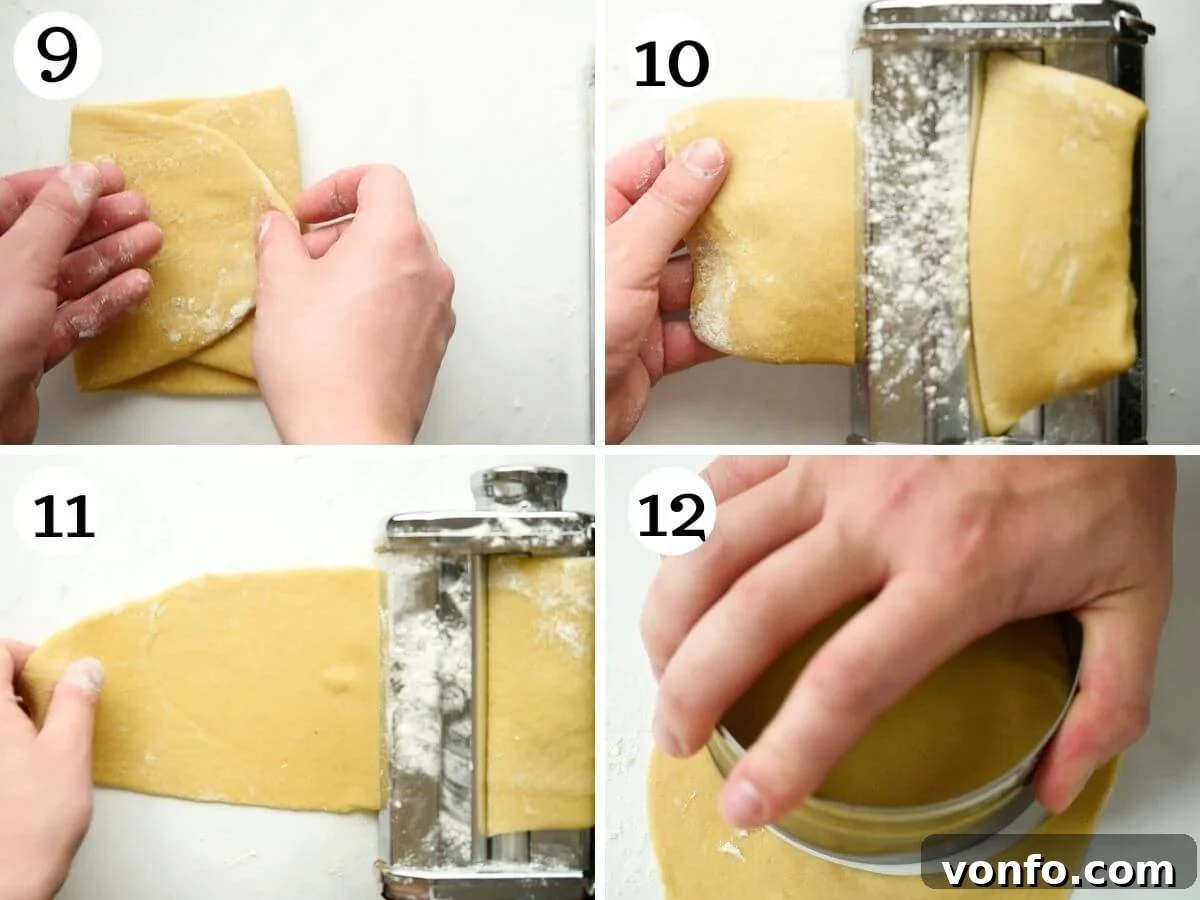
Now that your dough is conditioned, it’s ready for its final roll to thinness. Gradually decrease the setting on your pasta machine. Pass the dough through the second widest setting (usually number 1), then continue to pass it through progressively narrower settings until the dough is incredibly thin, about ⅛ inch (2mm) thick. For those using a Marcato Atlas pasta machine, this desired thickness corresponds to setting number 6 (photos 10 & 11 show the dough becoming progressively thinner). The thinness of the dough is paramount for achieving crisp, light shells; thick dough will result in a chewier, less desirable texture.
Alternative Method: Rolling Dough with a Rolling Pin (Optional)
If you don’t possess a pasta machine, don’t despair! You can still achieve perfectly thin cannoli dough using a rolling pin. On a lightly floured clean work surface, use your rolling pin to roll out the dough evenly in all directions. Continue rolling until the dough is as thin as possible, aiming for that crucial ⅛ inch (2mm) thickness. This requires a bit more elbow grease and attention to evenness, but it is entirely achievable.
Shaping and Frying the Cannoli Shells to Golden Perfection
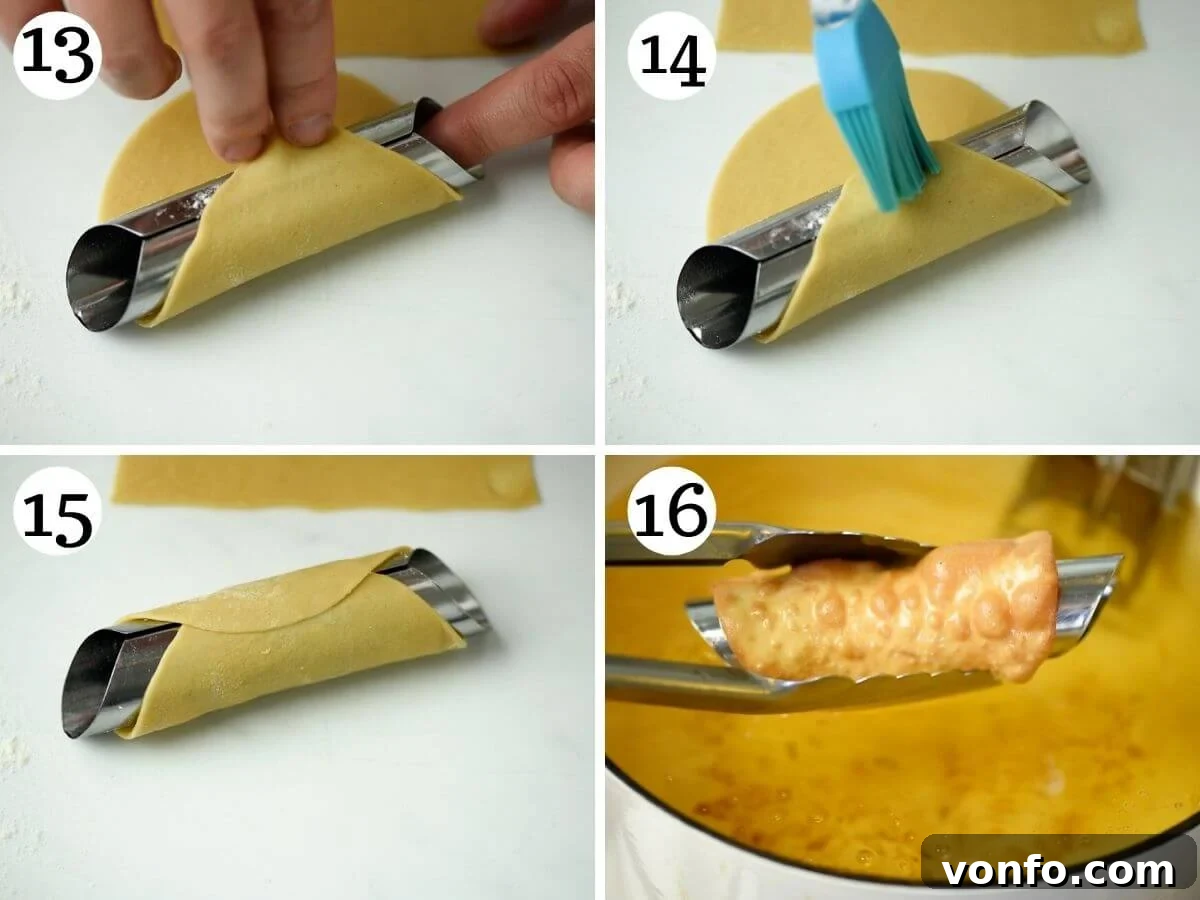
Using a 4-5 inch round cutter, cut out circular pieces of dough. You have the flexibility to adjust the size of your cannoli by using smaller or larger cutters if you prefer. Work in manageable batches to prevent the dough from drying out. Take one cut-out dough round and carefully wrap it around a cannoli tube. Lightly moisten one edge of the dough with a tiny dot of beaten egg white, then press it firmly to the opposite edge to create a secure seal around the tube. Ensure the seal is tight to prevent the dough from unwrapping during frying (photos 12-14 illustrate the shaping process).
Once shaped, it’s time to fry. Carefully lower the cannoli-wrapped tubes into the preheated hot oil (remembering the ideal temperature of 356°F/180°C). Fry in small batches to avoid overcrowding the pot, which can lower the oil temperature. Fry until the shells are beautifully golden brown and visibly puffed up with those desirable air bubbles. This usually takes only a minute or two per side. Using tongs, carefully remove the fried cannoli from the oil and place them on a tray lined with several layers of kitchen paper to drain any excess oil. If you have a limited number of cannoli tubes, allow them to cool slightly before attempting to remove the fried shells and reuse them, as hot tubes can be difficult to handle and may cause sticking (photos 15 & 16 show the frying and draining steps).
Preparing the Classic Sweet Ricotta Filling
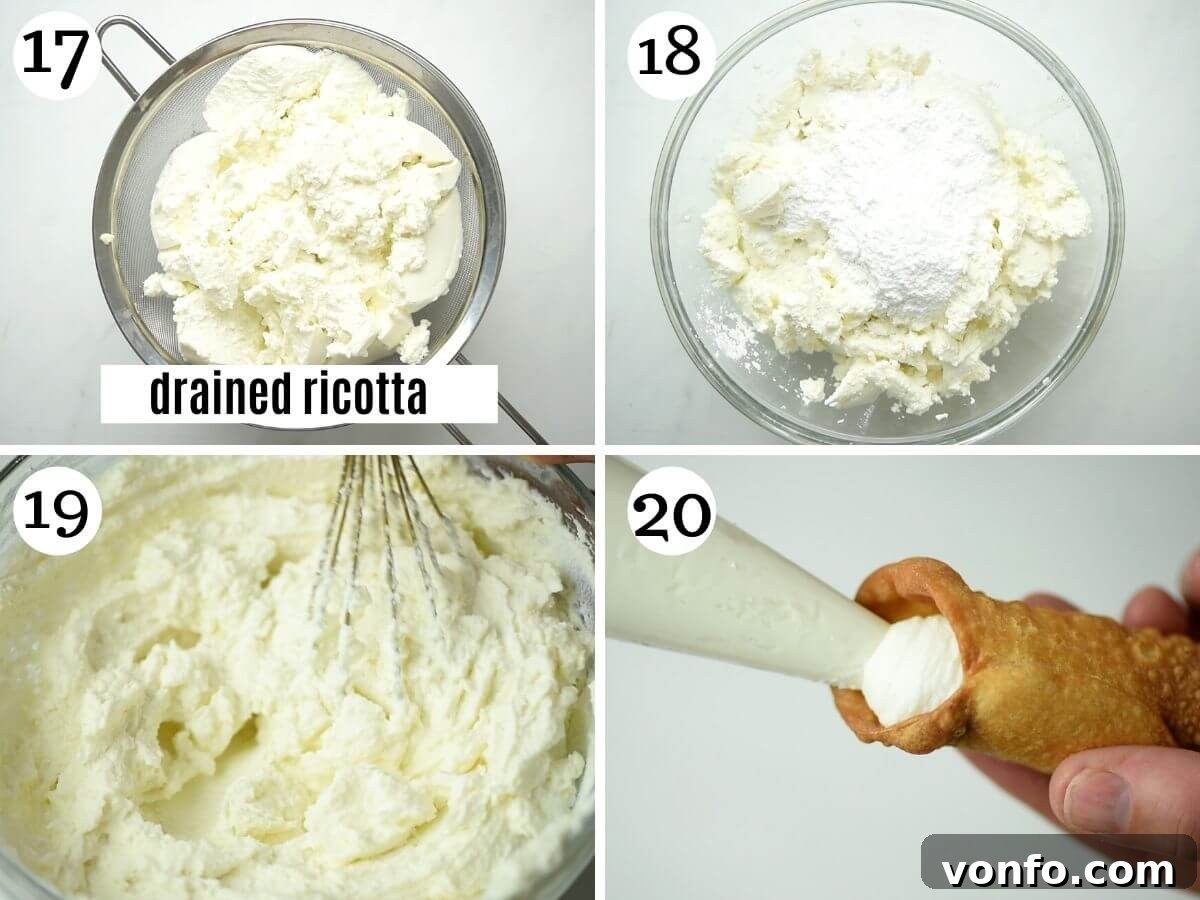
Once your ricotta has been thoroughly drained as instructed earlier, transfer the firm, dry ricotta cheese into a mixing bowl. Add the powdered sugar to the bowl. Using a spoon or a whisk, mix the ricotta and powdered sugar together until they are well combined and the mixture is smooth and creamy. Avoid overmixing, as this can make the ricotta too soft again (photos 17-19 demonstrate the filling preparation).
To fill your cannoli, scoop the ricotta mixture into a piping bag fitted with a wide round or star tip. If you don’t have a piping bag, you can use a sturdy Ziploc bag with one corner snipped off. Carefully pipe the creamy filling into each cannoli shell from both ends, ensuring it’s generously filled throughout. For a traditional finish, add a slice of candied orange peel to each end of the filled cannoli. Serve immediately to enjoy the shells at their crispiest (photo 20 illustrates the piping and garnishing).
Exciting Filling Options and Creative Variations for Your Cannoli
While the classic ricotta filling, with its subtle sweetness and optional hint of orange or lemon zest, is undeniably delicious, there are numerous ways to customize your homemade cannoli to suit various tastes. Feel free to get creative with your additions!
For a delightful twist, you can gently fold a generous amount of mini chocolate chips into the ricotta filling before piping. The chocolate melts slightly when it encounters the freshly fried shell, creating a wonderfully decadent experience. Alternatively, for a burst of color and chewy texture, finely chopped candied fruit (such as candied cherries or citron) can be incorporated. If you prefer a nutty crunch, consider adding finely chopped nuts like pistachios, almonds, or hazelnuts to the ricotta mixture.
Beyond the filling itself, you can also elevate the cannoli shells with decorative finishes. A popular variation involves dipping the ends of the fried cannoli shells into melted chocolate – dark, milk, or white chocolate all work beautifully. This adds an extra layer of sweetness and a satisfying snap. As demonstrated in our popular mini cannoli recipe, once the chocolate is dipped, you can immediately roll the chocolate-coated ends in a variety of chopped nuts, such as bright green pistachios (a Sicilian favorite) or toasted hazelnuts, for added texture and visual appeal. These variations make cannoli perfect for parties and special occasions, offering a range of flavors and presentations.
Frequently Asked Questions About Homemade Cannoli
The secret to delightfully bubbly and crispy cannoli shells lies in thorough kneading of the dough. Just as you would with homemade pasta dough, kneading for approximately 7-10 minutes develops the gluten structure. This process creates tiny air pockets throughout the dough that expand dramatically during frying, resulting in the desired light, airy, and textured finish.
Absolutely! You can prepare many components of your cannoli ahead of time. The cannoli dough can be made a day in advance and stored tightly wrapped in the refrigerator. The ricotta filling can also be prepared up to 3 days beforehand and kept chilled in an airtight container. The fried cannoli shells will remain crisp for 1-2 weeks in a sealed container. However, for the very best experience, it is crucial not to fill the cannoli shells more than 30 minutes to 1 hour before you plan to serve them. Filling them too far in advance will cause the shells to absorb moisture from the ricotta and become soft.
Unfilled cannoli shells, once completely cooled, can be stored in an airtight container at room temperature for up to 1-2 weeks. This makes them an excellent make-ahead component for entertaining.
To ensure your cannoli shells remain wonderfully crispy and crunchy, there are a few key practices to follow. First, ensure your dough is rolled extremely thin and your oil is at the correct, consistent temperature for frying. Second, and most importantly, only fill your cannoli shells right before serving. The moment the creamy ricotta filling touches the crispy shell, it begins to absorb moisture. We recommend keeping your prepared filling in a piping bag in the refrigerator and filling each cannoli individually just minutes before presenting them.
Explore More Irresistible Italian Desserts
If you’ve enjoyed mastering the art of cannoli, we invite you to discover other delectable Italian sweets from our kitchen:
- Cenci di Carnevale (Chiacchiere, Crostoli, Bugie) Italian Fried Pastries
- Struffoli – Italian Honey Balls
- Tiramisu – Authentic Recipe!
- Crostata di Frutta (Italian Fruit Tart)
- White Chocolate Panna Cotta
- Pignoli Cookies (Biscotti ai Pinoli)
We love hearing about your culinary successes! If you’ve tried this Authentic Sicilian Cannoli recipe or any other delightful recipe from our collection, please don’t hesitate to rate the recipe and share your experience in the comments section below. Your feedback truly brightens our day! For more delicious food inspiration and updates, we encourage you to FOLLOW US on FACEBOOK, INSTAGRAM, and PINTEREST, or sign up for our exclusive NEWSLETTER.
Step By Step Photos Above
Many of our recipes feature detailed step-by-step photos, along with helpful tips and tricks to ensure perfect results on your very first attempt!
Homemade Sicilian Cannoli
By Emily

Equipment
-
Cannoli tubes, for shaping
-
Pasta machine or rolling pin
-
Candy thermometer
-
Kitchen paper, for draining
-
Tongs, for safe frying
Ingredients
For the Cannoli Shells
- ▢ 1 3/4 cups plus 1 tablespoon Italian 00 flour or all-purpose flour, (250g)
- ▢ 4 tbsp cold butter, (55g, unsalted)
- ▢ 1 large egg, beaten (plus 1 egg white for sealing the cannoli)
- ▢ ¼ cup sugar, (50g) granulated or caster sugar
- ▢ ¼ cup Marsala wine, (60ml, or dry white wine)
- ▢ Pinch of ground cinnamon
- ▢ ½ tsp unsweetened cocoa powder
- ▢ 1 tbsp white wine vinegar
- ▢ Sunflower oil, for deep frying (or other neutral, high smoke point oil)
For the Ricotta Filling & Garnish
- ▢ 4 cups ricotta cheese, thoroughly drained (1 kg, high-quality full-fat)
- ▢ 1 cup powdered sugar, (confectioners’ sugar, adjust to taste)
- ▢ Zest of 1 lemon or orange, (optional, for added flavor)
- ▢ Candied orange peel, chopped nuts (e.g., pistachios), or chocolate chips, for garnish
Instructions
Preparation: Ricotta Draining (Essential First Step)
-
To begin, place the entire quantity of ricotta cheese in a fine-mesh sieve that is set over a large bowl. This allows any excess liquid to drip away. Store this setup in the refrigerator for a minimum of 4 hours, or ideally, overnight. Draining the ricotta is a critical step to ensure your filling is thick and creamy, preventing soggy cannoli shells.
Making the Cannoli Dough
-
In a large mixing bowl, combine the flour, sugar, ground cinnamon, and cocoa powder. Mix these dry ingredients thoroughly until they are well combined.
-
Cut the cold butter into small cubes. Add the butter to the flour mixture and, using your fingertips, work it into the flour until the mixture resembles coarse breadcrumbs.
-
Form a well in the center of the flour mixture. Add the beaten egg, white wine vinegar, and Marsala wine into the well. Using a fork, gradually mix the wet ingredients into the dry until a rough, shaggy dough forms.
-
Transfer the dough onto a clean, lightly floured work surface. Knead the dough vigorously for 7-10 minutes. This extensive kneading is crucial for developing gluten, which creates the tiny air bubbles that make the cannoli shells wonderfully crispy.
-
Once kneaded and smooth, wrap the dough tightly in plastic wrap. Place it in the refrigerator to chill for 30 minutes to 1 hour. This chilling period relaxes the gluten, making the dough easier to roll out. The dough can also be chilled overnight.
Rolling Out the Dough (Using a Pasta Machine)
-
Set up your pasta machine. In a large, heavy-bottomed pot, heat 2-3 inches of sunflower oil to a consistent temperature of 356°F (180°C), using a candy thermometer for accuracy.
-
Lightly dust your work surface and the pasta machine with flour. Cut the chilled dough in half. Take one half and flatten it into a shape that will fit through the widest setting of your pasta machine (typically setting number 0).
-
Pass the dough through the widest setting. Once it emerges, fold one end of the dough over the other (tri-fold it, similar to folding a letter). Pass the folded dough through the widest setting again. Repeat this folding and passing process 3-4 times to develop layers and create bubbles.
-
Now, gradually decrease the setting on your pasta machine. Pass the dough through the second widest setting (usually number 1) and continue passing it through progressively narrower settings until the dough is incredibly thin, about ⅛ inch (2mm) thick. (For a Marcato Atlas machine, this is setting number 6). The thinness is crucial for crispy shells.
Rolling Pin Method (Optional Alternative)
-
If you do not have a pasta machine, you can achieve the desired thinness using a rolling pin. On a lightly floured surface, roll out the dough evenly until it is very thin, aiming for approximately ⅛ inch (2mm) thickness. Ensure evenness to prevent some shells from being thicker than others.
Shaping and Frying the Shells
-
Using a 4-5 inch round cutter (or cut into squares), cut out circles from the thin dough. Working in small batches, wrap each cut-out dough piece around a metal cannoli tube. Moisten one edge of the dough with a tiny dab of beaten egg white and press it firmly to the opposite edge to seal the dough around the tube. Ensure a tight seal.
-
Carefully lower the cannoli-wrapped tubes into the hot oil (356°F/180°C). Fry them in batches until they are golden brown and visibly puffed up with air bubbles. Remove with tongs and drain on several layers of kitchen paper to absorb excess oil. If reusing tubes, allow them to cool slightly before handling.
Making the Ricotta Filling & Assembling
-
Place the thoroughly drained ricotta cheese and powdered sugar into a mixing bowl. Mix them together until the filling is smooth, creamy, and well combined. If using, fold in the optional lemon or orange zest.
-
Scoop the ricotta mixture into a piping bag fitted with your preferred tip (a wide round or star tip works well). Pipe the filling generously into each cannoli shell from both ends until fully filled. Garnish each end with a slice of candied orange peel, chopped nuts, or chocolate chips. Serve immediately to enjoy the ultimate crispness.
Filling Options and Customization
-
Feel free to personalize your cannoli! You can fold chocolate chips, finely chopped candied fruit, or various nuts (like pistachios or hazelnuts) directly into the ricotta filling for added flavor and texture. Alternatively, dip the ends of the fried cannoli shells into melted chocolate and then roll them in chopped nuts for a beautiful and delicious finish.
Video Guide
Chef’s Notes & Expert Tips
- Accurate Flour Measurement – If you are measuring flour using cups instead of a kitchen scale, always spoon the flour gently into the measuring cup and then level it off with a straight edge or knife. Scooping directly can pack too much flour, affecting dough consistency.
- Dough Resting is Key – Do not skip the resting period for the dough in the refrigerator (30 minutes to 1 hour, or overnight). This allows the gluten to relax, making the dough much more pliable and preventing it from snapping back when you roll it out thinly.
- Roll Dough Exceptionally Thin – This is one of the most critical steps for truly crispy cannoli shells. If the dough is too thick, your shells will be chewy and dense instead of light and bubbly. Aim for about ⅛ inch (2mm) in thickness.
- Choosing the Right Size and Shape – A 4-5 inch round cutter is generally ideal for standard-sized cannoli. However, if you don’t have a round cutter, you can easily cut the dough into squares of similar dimensions. This works equally well and still produces delicious cannoli.
- Securely Sealing the Edges – When wrapping the dough around the cannoli tubes, use only a tiny amount of egg white to seal the edges. Be very careful not to get any egg white on the metal cannoli tube itself, as this can cause the dough to stick, making it difficult to remove the fried shells.
- Fry in Small Batches – To maintain the optimal oil temperature and ensure even cooking, always fry your cannoli shells in small batches. Overcrowding the pot will significantly drop the oil temperature, leading to greasy, undercooked shells.
- Prepare Components in Advance – For convenience, you can prepare the cannoli dough a day ahead and store the ricotta filling in the fridge for up to 3 days. However, remember the golden rule: fill the cannoli shells no more than 30 minutes to 1 hour before serving. This ensures the shells remain at their crispiest.
- Storing Leftover Shells – Any leftover, unfilled cannoli shells will stay fresh and crispy for approximately 2 weeks when stored in an airtight container at room temperature.
Helpful Information for All Our Recipes
- Unless otherwise specified, we always use high-quality extra virgin olive oil in all our recipes for superior flavor.
- When canned or jarred tomatoes are called for, we consistently recommend using premium brands like Cirio or Mutti for the best possible flavor and consistency in your dishes.
- All vegetables in our recipes are assumed to be medium-sized unless a different size is explicitly stated.
- Our recipes are meticulously tested and developed using a fan (convection) oven to ensure reliable results.
- Discover more about how nutrition information is calculated for our recipes.
- Explore our essential list of Italian Pantry Staples to keep your kitchen well-stocked.
- Find all the must-have Essential Kitchen Tools for Italian Cooking to elevate your culinary skills.
Nutrition Information (per serving)
Nutrition information is automatically calculated, so should only be used as an approximation. Individual results may vary.