
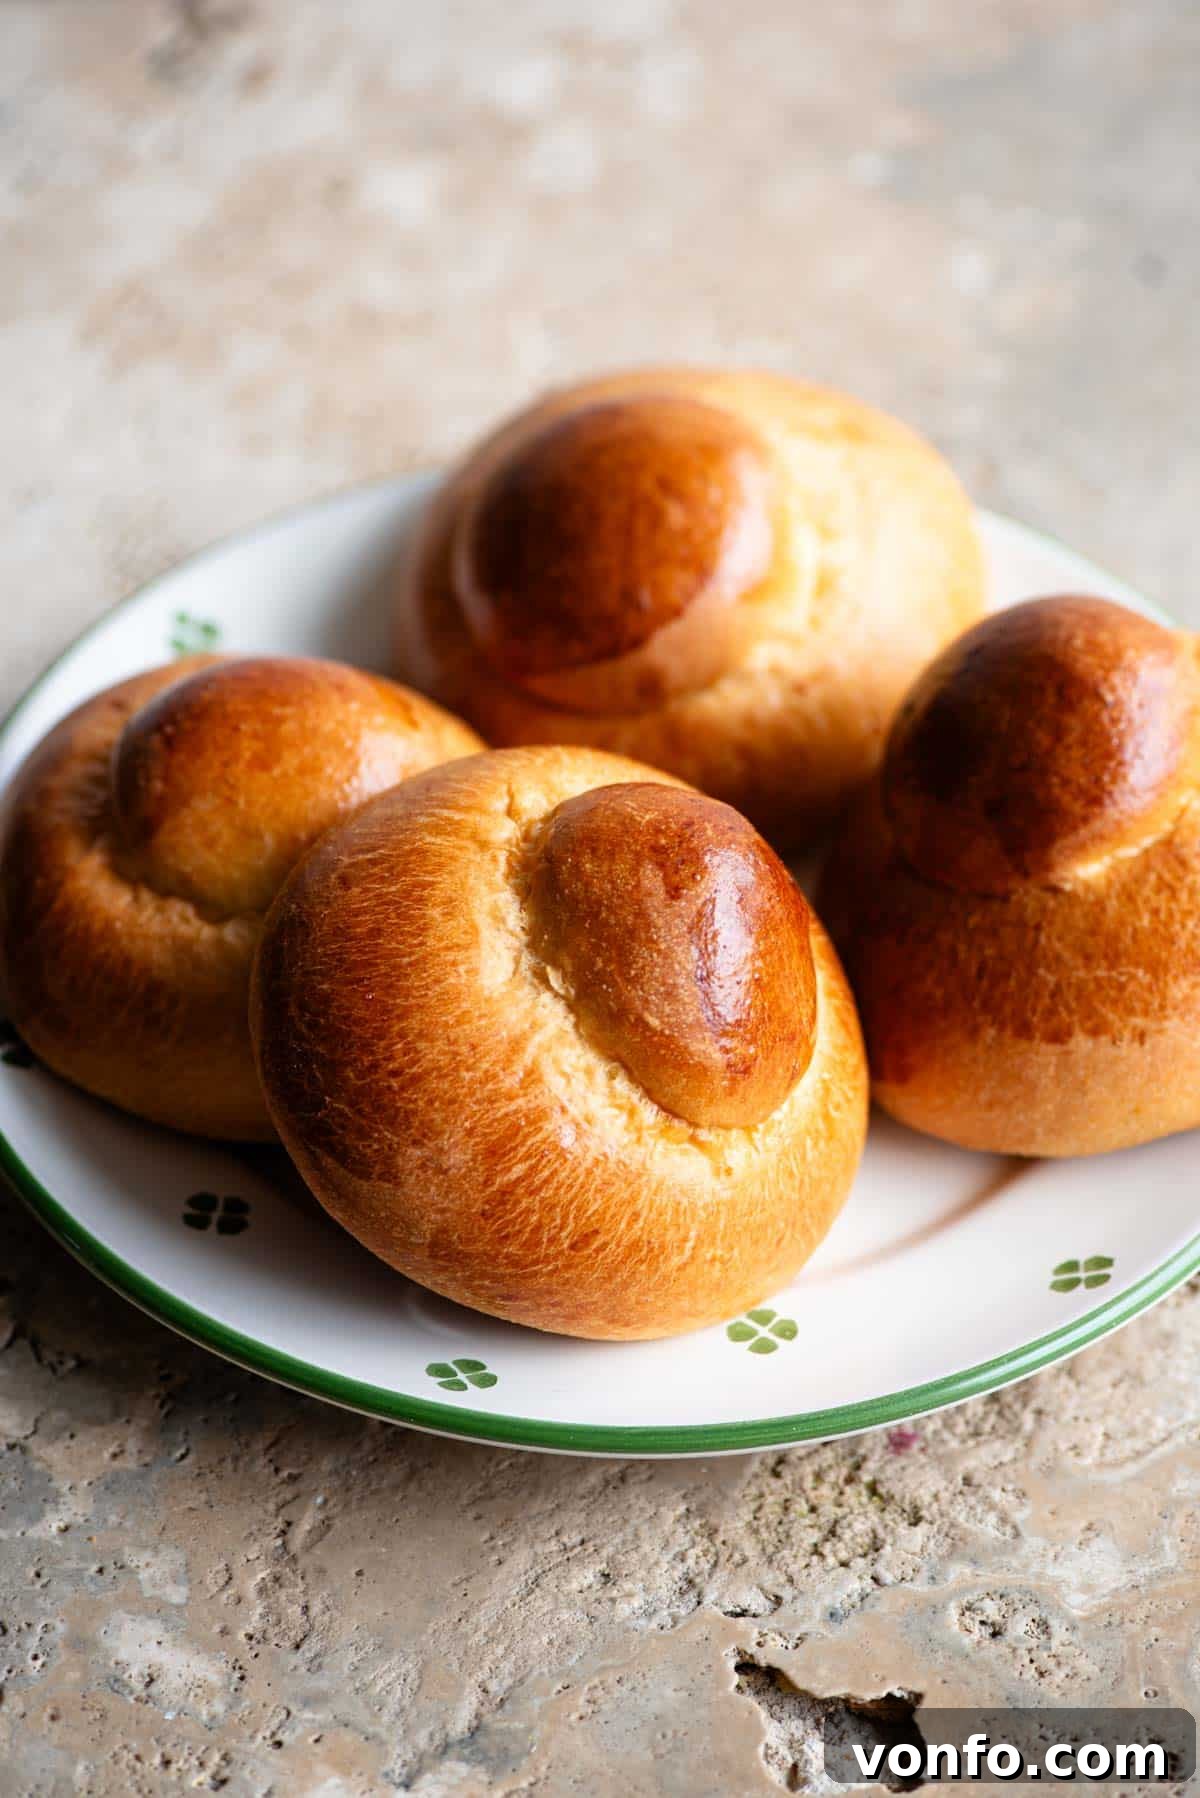
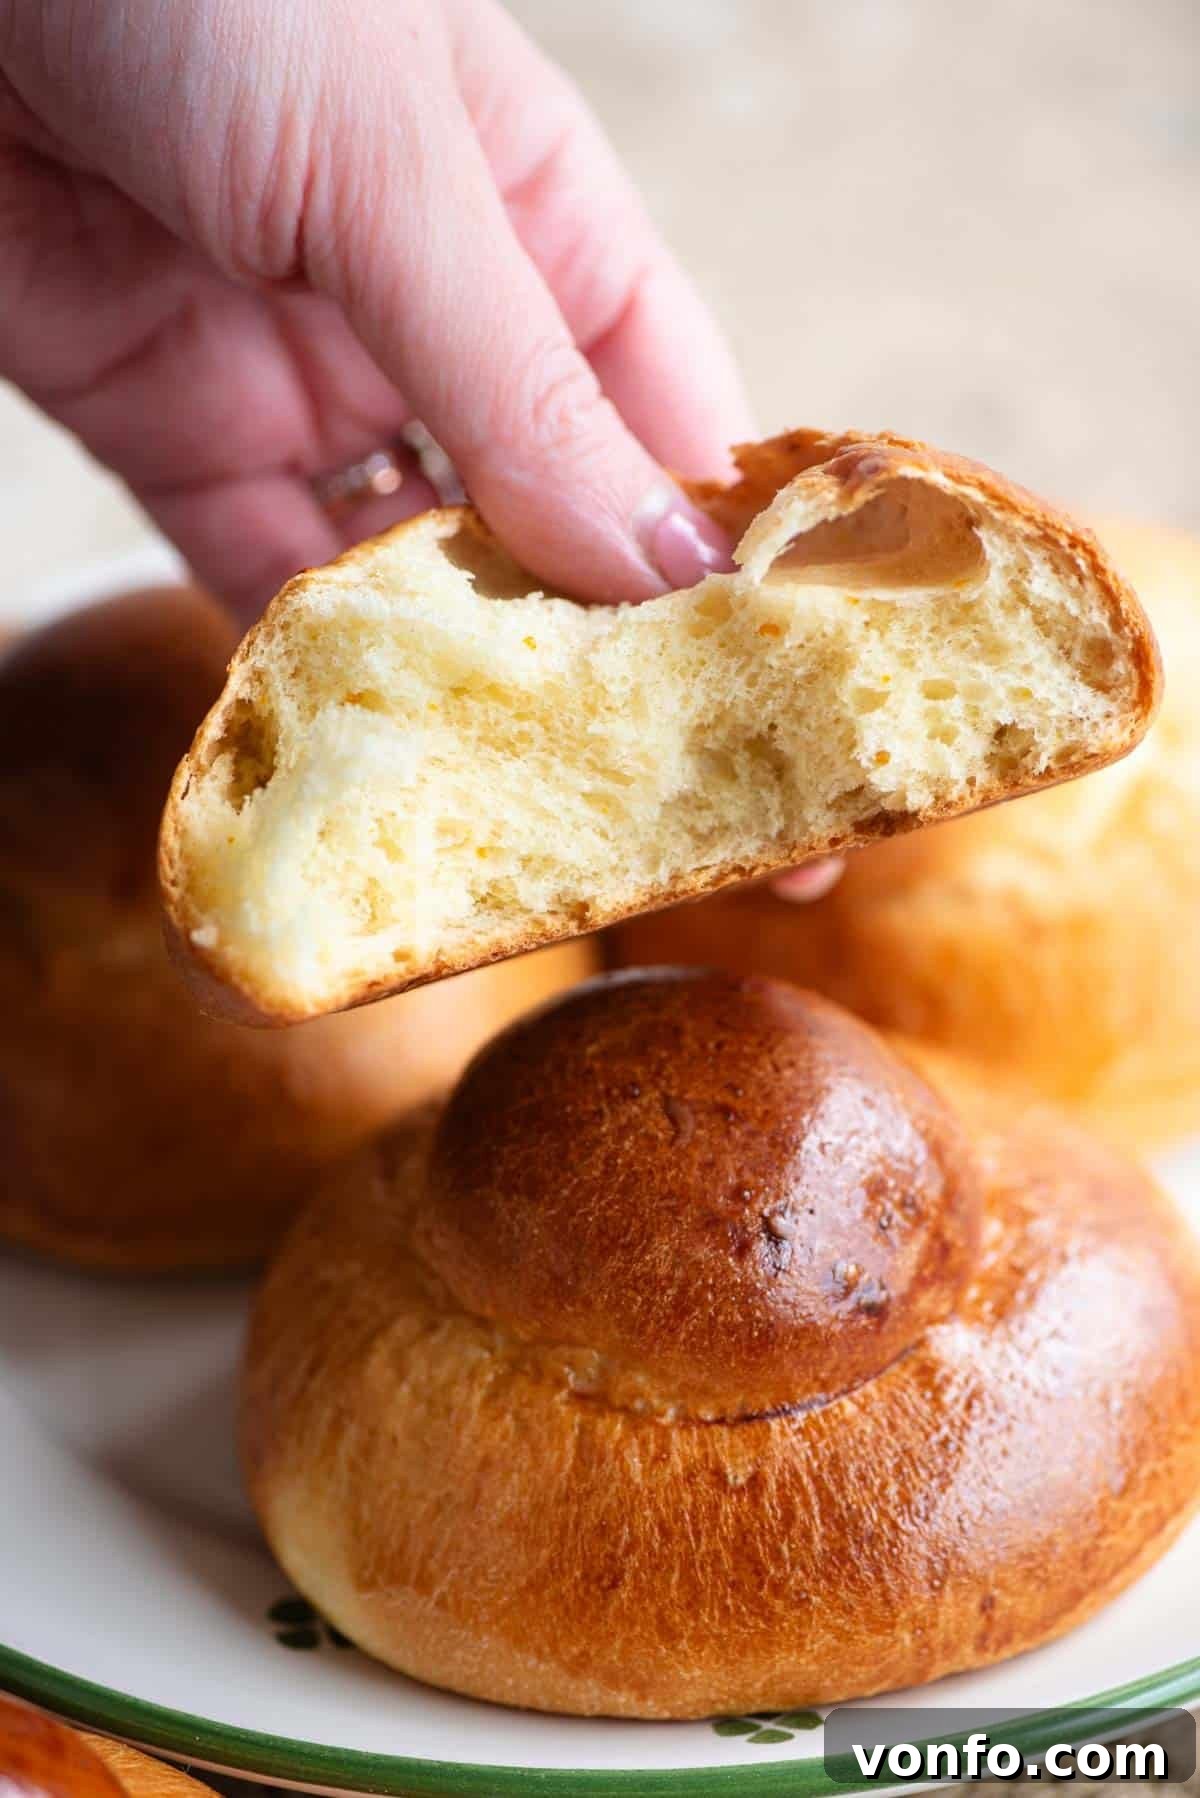
Embark on a delightful culinary journey to the sun-kissed island of Sicily with these incredibly soft, rich, and undeniably delicious Sicilian Brioche Buns, affectionately known as Brioche col Tuppo. These golden-hued buns are delicately sweet, infused with the vibrant aroma of fresh orange zest and a hint of warm vanilla. More than just a pastry, they are a beloved staple of Sicilian breakfast, traditionally enjoyed alongside a refreshing Sicilian granita.
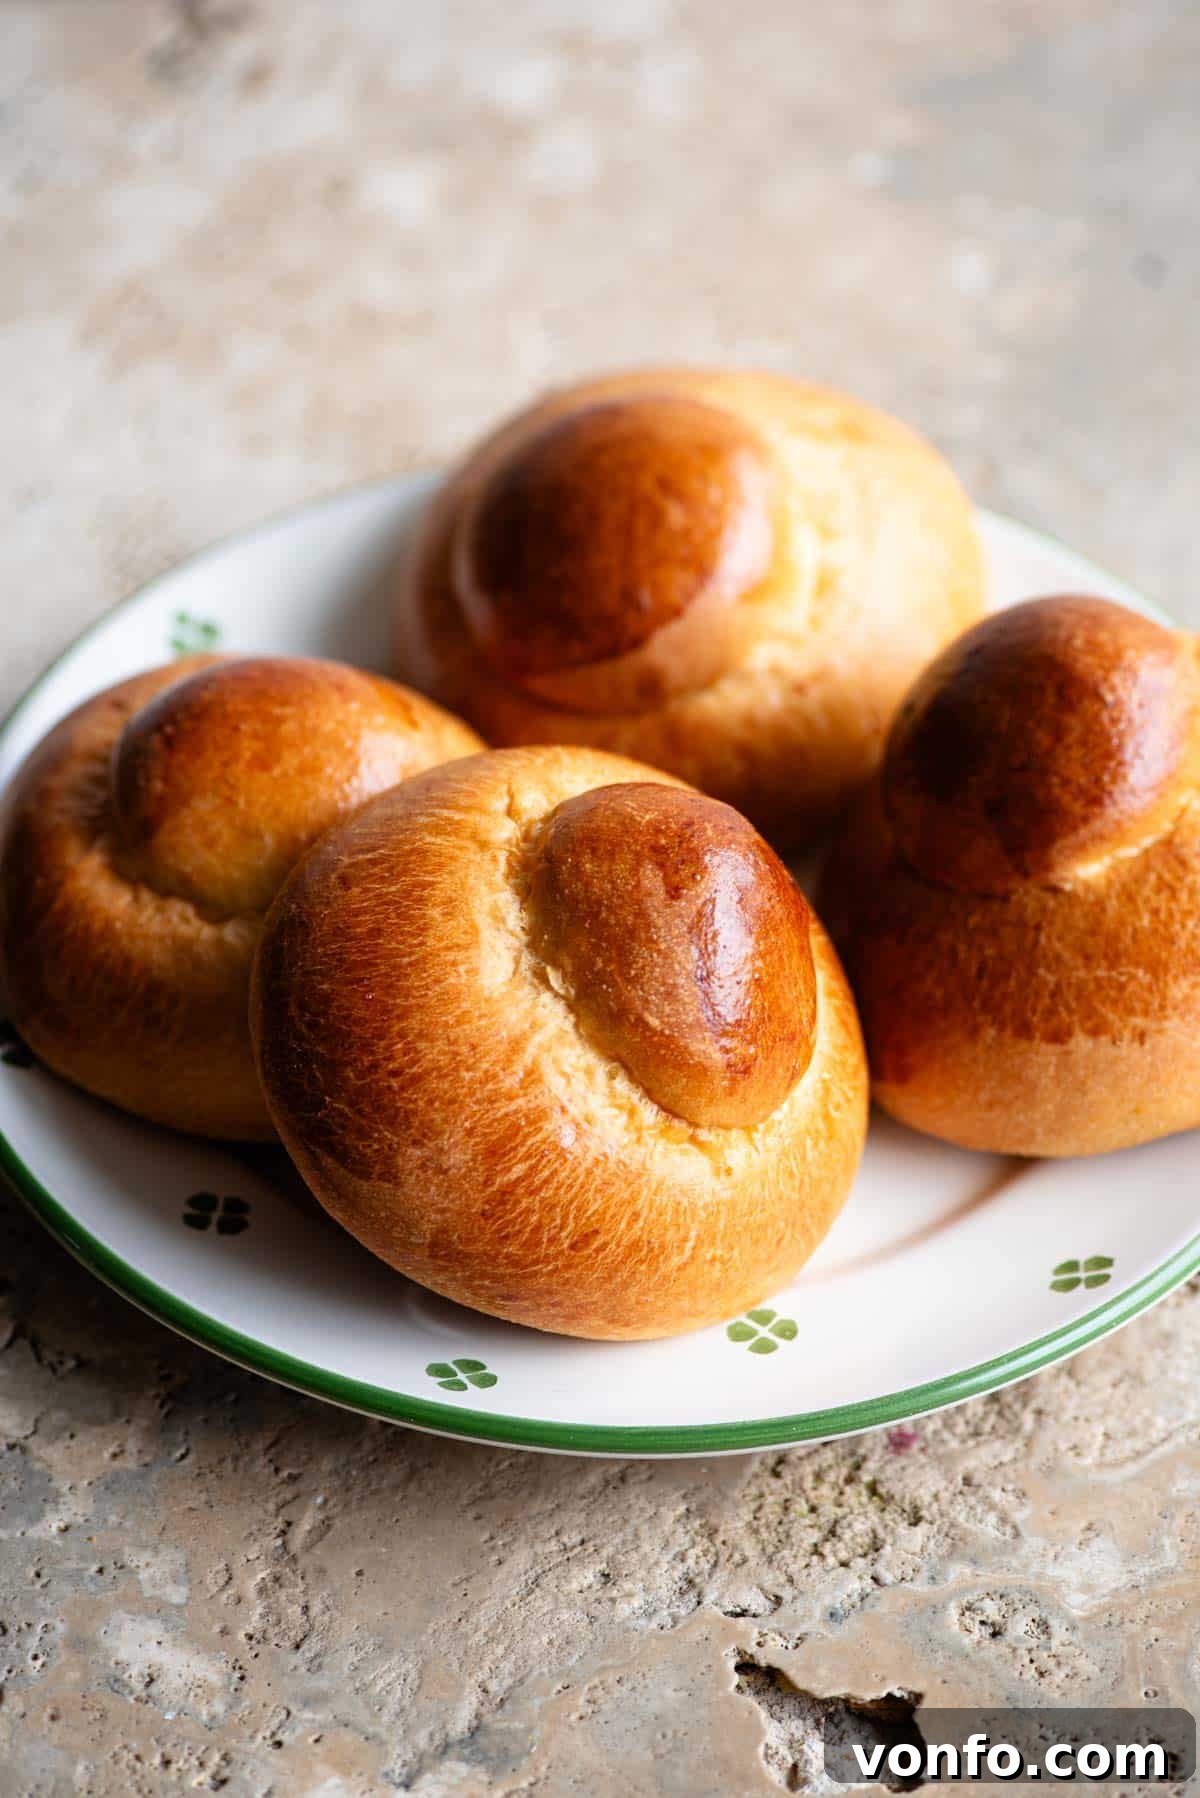
Experience the Quintessential Sicilian Breakfast
Imagine waking up on a warm summer morning in Sicily, greeted by the promise of an ice-cold, invigorating granita, often crowned with fresh whipped cream, and accompanied by a tender, buttery brioche bun, just waiting to be dipped. This isn’t merely breakfast; it’s an experience, a ritual that perfectly encapsulates the simple joys of Sicilian life. The contrast between the icy, flavorful granita and the soft, slightly sweet brioche is nothing short of magical.
Having savored this dreamy morning ritual during my travels through Sicily, I was inspired to recreate it in my own kitchen. The outcome surpassed all expectations, transporting me straight back to the charming streets and vibrant flavors of the island. Now, you too can bring this authentic taste of Italy into your home with this meticulously crafted Brioche col Tuppo recipe.
Mastering the Art of Homemade Brioche
While the prospect of baking brioche might seem daunting, rest assured that these Sicilian Brioche Buns are surprisingly straightforward to make. The key to success lies in patience, particularly during the kneading process. Brioche dough is notoriously wet and sticky, requiring thorough kneading to develop its signature light and airy texture. For this reason, I highly recommend using a stand mixer equipped with a dough hook; it will make the process much more manageable and ensure optimal gluten development.
There’s nothing quite like a freshly baked brioche bun, still warm from the oven. While traditionally paired with granita, these versatile buns offer a myriad of serving possibilities. For a truly decadent treat, slice them open and fill them with your favorite gelato, creating a delightful brioche gelato sandwich – a popular Sicilian indulgence. Alternatively, they’re perfect spread with a rich chocolate hazelnut spread, homemade jam, or simply a generous dollop of sweetened whipped cream. The possibilities are endless for these irresistible sweet brioche buns!
Table of Contents
- Ingredient Notes
- Visual Walk-through of the Recipe
- Recipe Tips and FAQs
- Granita and Gelato to Serve with Your Brioche
- Full Recipe
Essential Ingredient Notes for Perfect Brioche
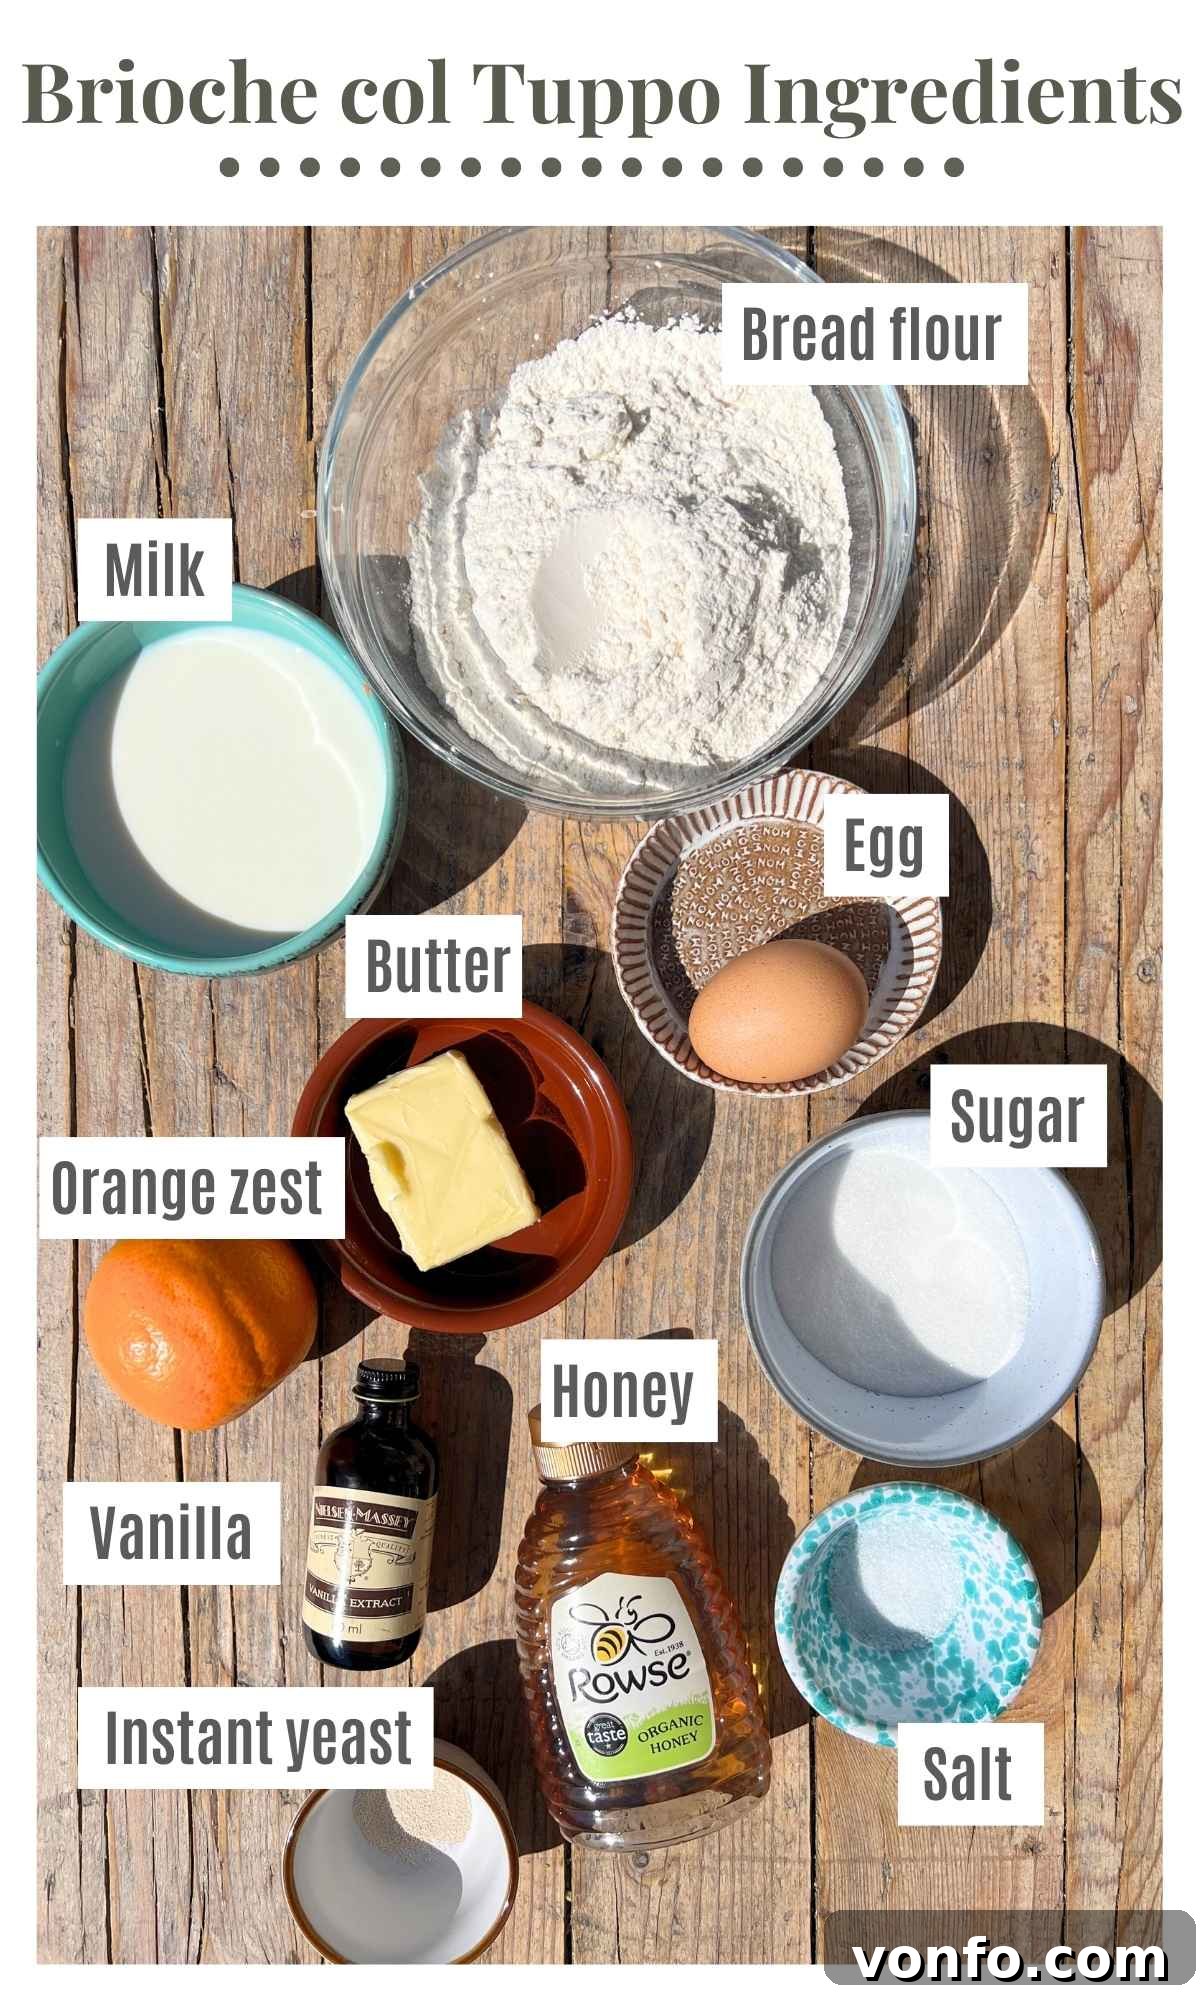
- Unsalted Butter: This is the star ingredient for that signature rich, buttery flavor and tender crumb. It’s crucial that your butter is at **room temperature**, soft enough to easily indent with your finger but not melted. If you only have salted butter, omit the additional salt from the recipe. (Please note: This recipe has been developed and tested with unsalted butter for optimal flavor balance.)
- Orange Zest: The essence of Sicilian sunshine! Freshly grated orange zest provides a beautiful, aromatic lift to the brioche, distinguishing it from other varieties. While you can substitute with lemon zest for a different citrusy note, or even omit it if preferred, the orange zest truly enhances the authentic Sicilian profile.
- Vanilla Extract: For the best results, always opt for a high-quality vanilla extract, not artificial vanilla essence. Pure vanilla extract contributes a depth of flavor that complements the orange zest and rich butter. As an alternative, you can use vanilla bean paste or scrape the seeds from a whole vanilla bean for an even more intense vanilla aroma.
- Bread Flour: Using bread flour, with its higher protein content, is essential for developing strong gluten. This gluten structure is what gives brioche its characteristic chewiness and helps it rise beautifully, creating that desired airy texture.
- Instant Yeast: This recipe calls for instant yeast, which can be mixed directly with your dry ingredients. Always check your yeast packet instructions, as some varieties may require activation in warm liquid first. Ensure your yeast is fresh and active for a successful rise.
- Milk: Lukewarm milk is key for activating the yeast without scalding it or cooking the egg. It should feel slightly warm to the touch, not hot or cold.
- Large Egg: The egg adds richness, helps with structure, and contributes to the golden color of the brioche. Ensure your egg is at room temperature to prevent it from seizing up when mixed with other ingredients.
- Caster Sugar (Superfine Sugar): Caster sugar dissolves easily, ensuring even sweetness throughout the dough. Granulated sugar can also be used, but caster sugar will integrate more smoothly.
- Fine Salt: A pinch of salt is vital for balancing the sweetness and enhancing the overall flavor of the brioche, as well as strengthening the gluten network.
- Honey: A touch of honey not only adds subtle sweetness but also contributes to the brioche’s beautiful golden crust and soft texture, acting as a natural humectant.
Step-by-Step Visual Guide to Baking Sicilian Brioche
Follow these detailed steps to create flawless Brioche col Tuppo, complete with visual cues to guide you through each stage.
Step 1: Combining the Initial Dough Ingredients. In the bowl of your stand mixer fitted with the dough hook, combine the bread flour, instant yeast, lukewarm milk, room temperature egg, vibrant orange zest, fragrant vanilla extract, and honey. Mix on a low speed until these ingredients come together to form a shaggy, rough dough. Next, add the pre-measured sugar and fine salt to the mixer. Continue mixing on low speed until these additions are fully incorporated into the dough, which will still be quite sticky at this stage (refer to photos 1-3 for visual guidance).
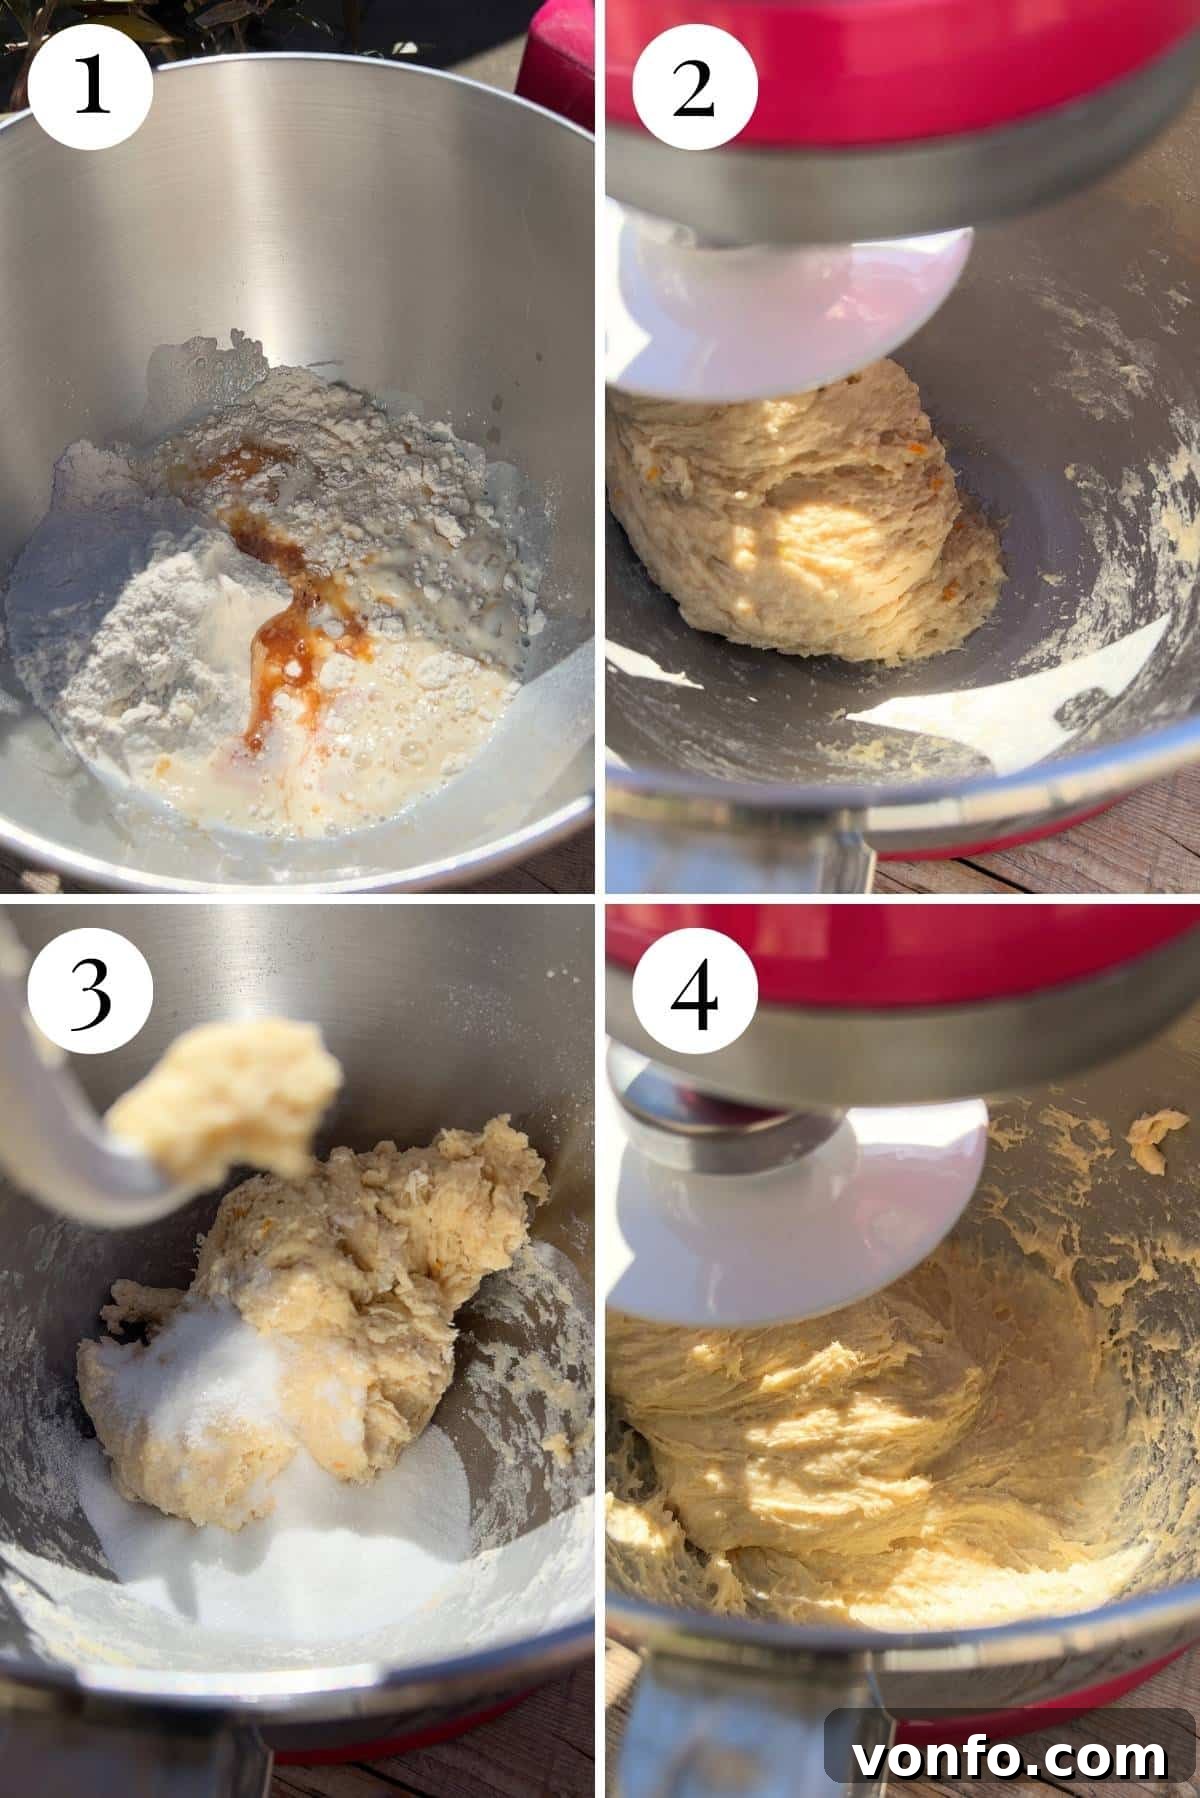
Step 2: Incorporating the Butter and Kneading to Perfection. Increase your mixer speed to medium (typically setting 4 on a KitchenAid). Begin adding the room temperature unsalted butter, one tablespoon at a time. It’s essential to wait until each addition of butter is completely absorbed into the dough before adding the next. This gradual process ensures the butter is fully emulsified, creating a smooth, rich dough. Once all the butter has been incorporated, set a timer and continue kneading the dough on medium speed for a full 20 minutes. This extensive kneading is vital for developing the strong gluten network that gives brioche its characteristic elasticity and ethereal texture. After 20 minutes, the dough should appear smooth, glossy, and noticeably less sticky, pulling away cleanly from the sides of the bowl and your fingers (as shown in photos 4 and 5).
Step 3: The First Proof – Allowing the Dough to Double. Lightly grease a large mixing bowl with either olive oil or butter to prevent sticking. Carefully transfer your beautifully kneaded brioche dough into this bowl. Cover the bowl tightly with plastic wrap, ensuring an airtight seal. Allow the dough to proof at room temperature until it has visibly doubled in size. This process typically takes about 4-6 hours, though the exact timing will vary depending on your ambient room temperature. A warmer environment will result in a faster rise (see photo 6 for an example of proofed dough).
Step 4: Dividing and Preparing for Shaping. Once your dough has completed its first proof and doubled in size, gently turn it out onto a clean, lightly floured work surface. Divide the dough into 6 equal pieces. From each of these larger pieces, cut a small portion to form the “tuppo” (the distinctive top knot of the brioche). For precise results, you can weigh them: aim for 6 larger balls of approximately 78g each for the base, and 6 smaller balls of about 20g each for the tuppo.
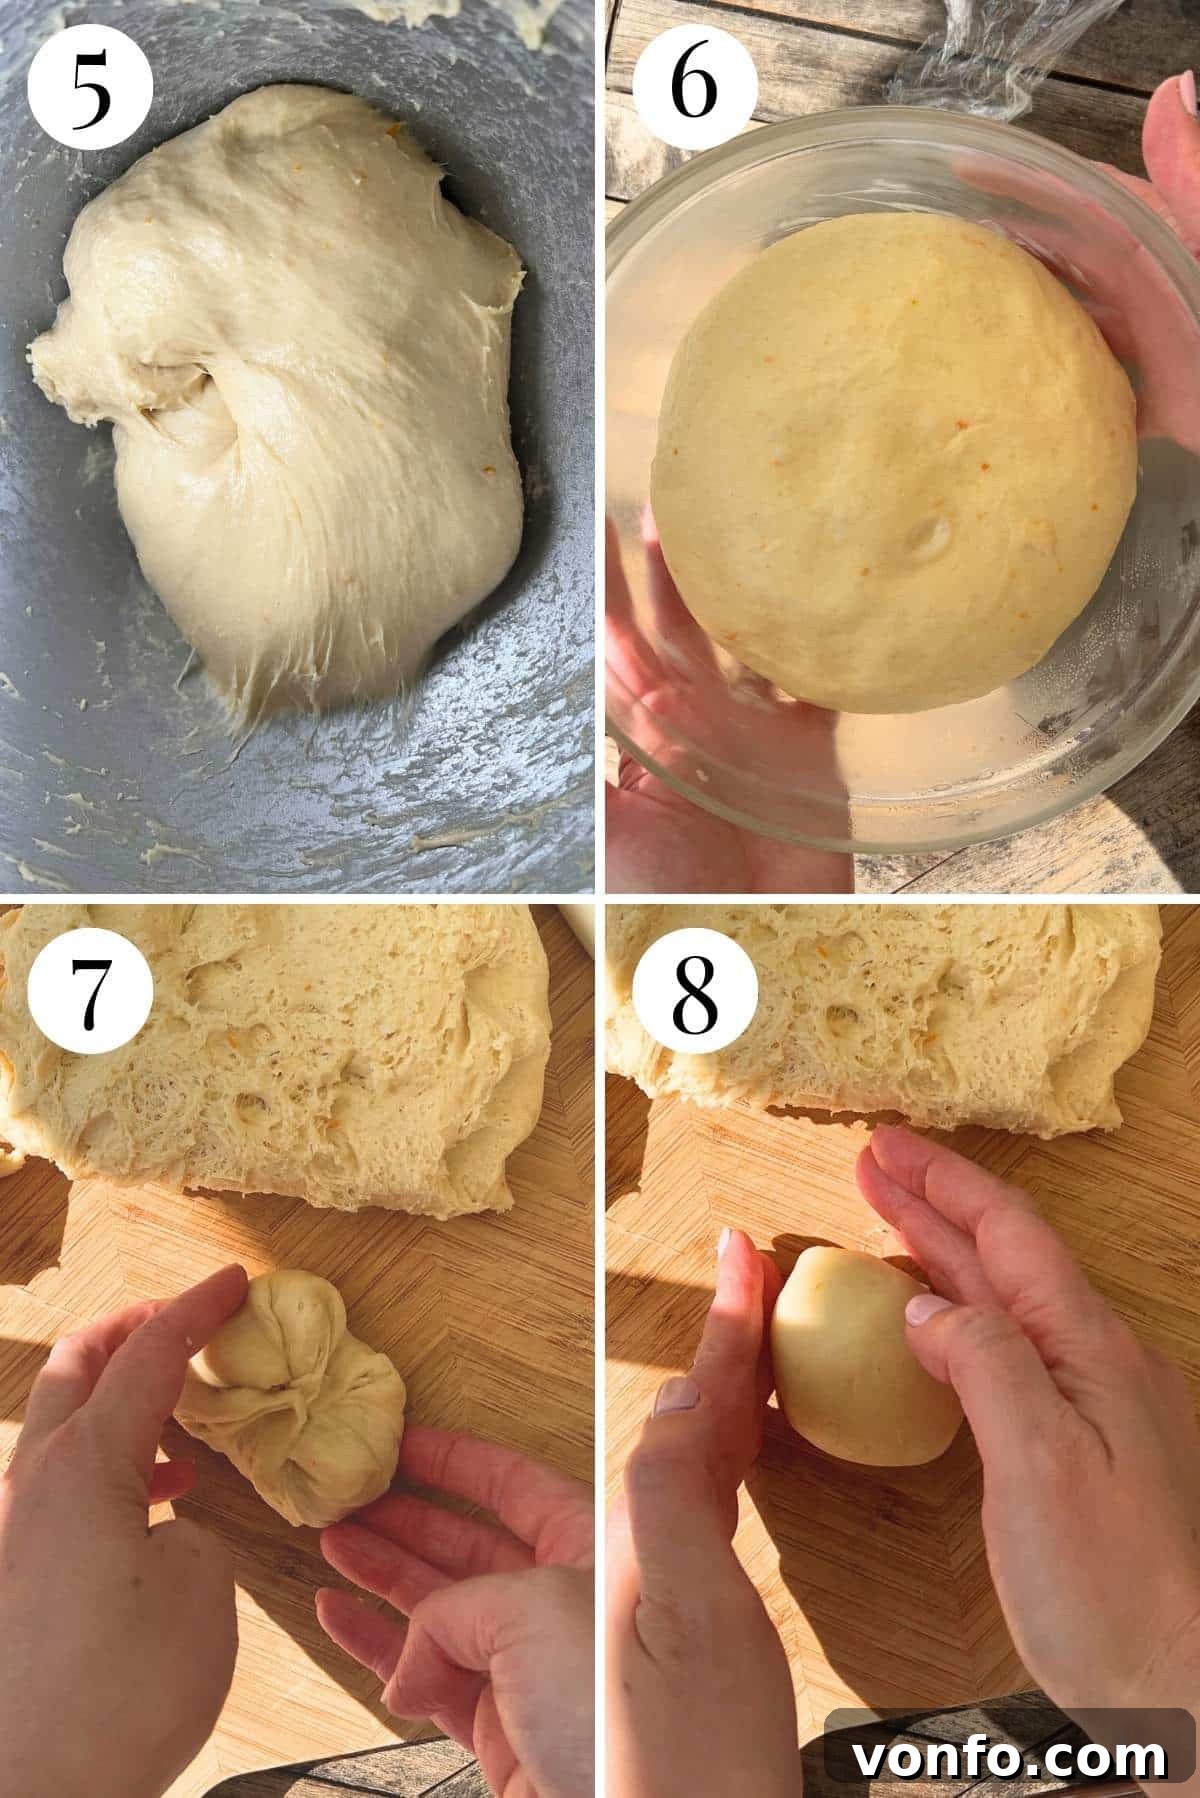
Step 5: Expert Shaping for a Smooth Finish. To shape each individual ball of dough (both the larger base and the smaller tuppo), gently gather and pinch the edges of the dough towards the center. This technique builds surface tension, resulting in a smooth, taut exterior. Once the edges are tucked, flip the ball over so the seam side is down. Cup your hands around the dough and gently rotate it in a circular motion on your work surface, continuing to tuck the edges underneath. This action will create a perfectly smooth, round ball (refer to photos 7 and 8 for a visual guide to this technique).
Step 6: Assembling the Brioche col Tuppo. Line a baking tray with parchment paper. Place the larger, shaped brioche balls onto the prepared tray, ensuring they have enough space to expand. Using two fingers, gently press down in the center of each large bun to create a distinct indent. Take the small, shaped balls (the tuppo) and carefully place them into the indents on top of the larger buns. This creates the classic look of Brioche col Tuppo (photos 9 and 10 provide clear instructions).
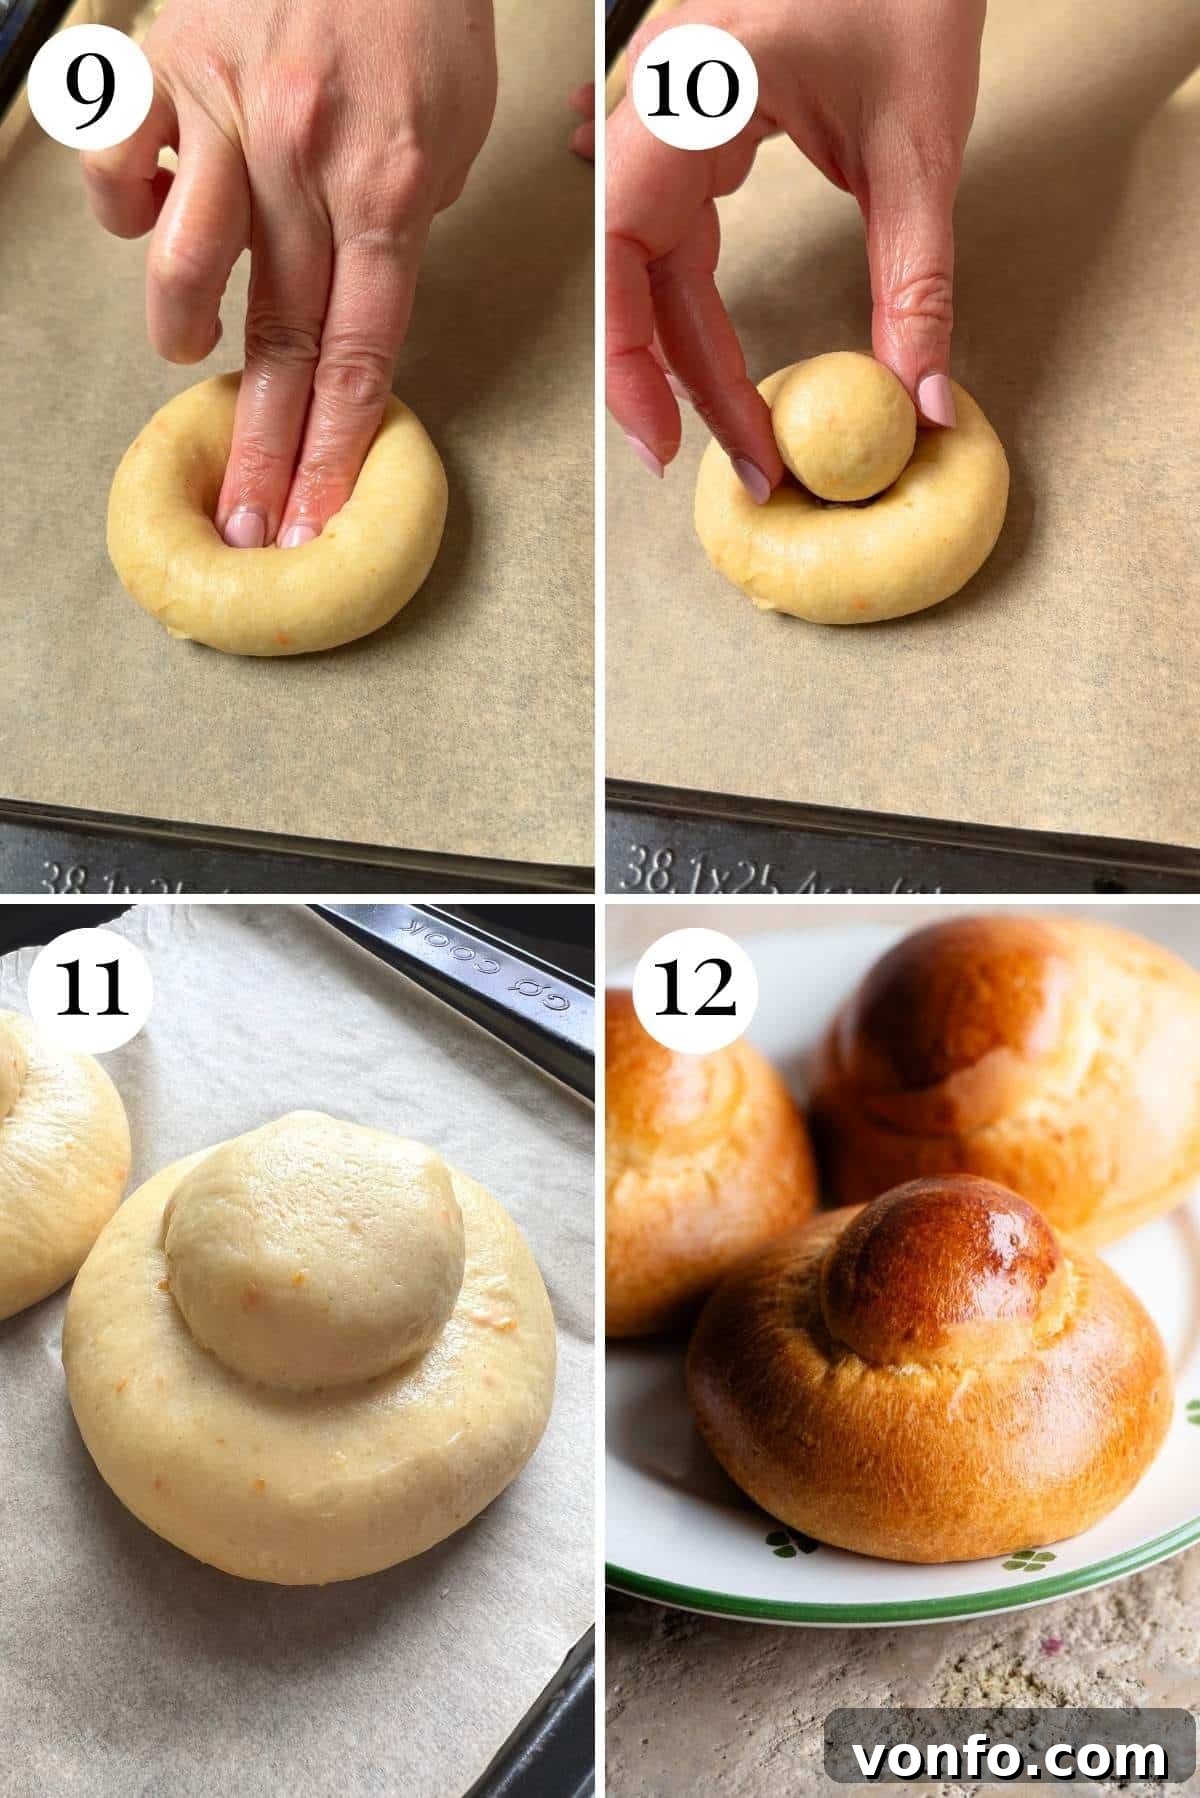
Step 7: The Crucial Second Proof – Overnight or Same-Day. Loosely cover the assembled brioche buns on the baking tray with plastic wrap. For superior flavor development and an exquisitely soft texture, I highly recommend allowing them to proof overnight in the refrigerator. This slow, cold fermentation significantly enhances the depth of flavor and improves the crumb. If opting for the overnight proof, remove the tray from the fridge 1-2 hours before you plan to bake, allowing the buns to come to room temperature and double in size (as depicted in photo 11).
To Bake the Same Day: If time is of the essence, you can certainly skip the overnight refrigeration. Instead, let the buns proof at room temperature for an additional 1-2 hours, or until they have visibly doubled in size, before proceeding to baking. While the overnight method yields the best results, same-day brioche will still be wonderfully delicious!
Step 8: Baking Your Golden Brioche. Preheat your oven to 170°C (340°F) for a fan/convection oven, or 190°C (375°F) for a static oven. Whisk another egg to create an egg wash, then gently brush the tops of the proofed brioche buns. This egg wash will give them that beautiful, glossy golden-brown crust. Bake in the preheated oven for 15-20 minutes, or until they are deeply golden all over. Remove from the oven and either enjoy them warm, or allow them to cool completely before storing them in an airtight container to maintain freshness.
Pro-Tips & Frequently Asked Questions for Brioche Success
- The Magic of Overnight Proofing: Through extensive testing, I’ve found that an overnight cold fermentation truly elevates these Sicilian Brioche Buns. While a same-day option is provided, the overnight method results in a noticeably softer texture, a more complex flavor profile, and improved digestibility. If you have the time, it’s an investment well worth making for a superior brioche.
- Simplified Shaping: If you prefer a simpler shaping process or are short on time, you can omit the “tuppo” (small top knot) and simply shape the dough into 6 larger, smooth round buns. They will still be incredibly delicious!
- Creative Serving Suggestions: Beyond the classic granita pairing, unleash your creativity!
- Gelato Sandwiches: Slice the brioche in half horizontally and fill it generously with your favorite gelato for an authentic Sicilian treat.
- Sweet Spreads: Enjoy them split and slathered with homemade jam, fresh whipped cream, rich hazelnut chocolate spread, or decadent pistachio cream.
- Savory Twist: For an unexpected delight, some even enjoy brioche with savory fillings like cured meats and cheeses, offering a delightful contrast.
- Dealing with Sticky Dough: Brioche dough is naturally sticky due to its high butter and egg content. Resist the urge to add too much extra flour during kneading or shaping, as this will make the buns dry and tough. A lightly oiled hand or a bench scraper can be very helpful during handling. Trust the kneading time; the dough will become smoother and more manageable.
- Yeast Activity: Ensure your yeast is fresh. If your dough isn’t rising, your yeast might be old or the milk was too hot or too cold.
Yes, it is possible to knead brioche dough by hand, but be prepared for a more challenging workout! Brioche dough is indeed very wet and sticky, making it difficult to handle manually. To properly develop the gluten by hand, you’ll need to employ a “slapping and folding” technique. This method involves repeatedly lifting the dough, slapping it onto your work surface, and folding it over itself. It typically takes about 20-25 minutes of continuous hand kneading to achieve the desired smooth, elastic, and glossy consistency. For an excellent visual demonstration, I highly recommend watching this tutorial by Richard Bertinet on hand-kneading sticky doughs.
A well-kneaded brioche dough will be smooth, elastic, and glossy. It should pass the “windowpane test”: take a small piece of dough and gently stretch it with your fingers. If you can stretch it thin enough to see light through it without tearing, the gluten has developed sufficiently. The dough should also be tacky to the touch but not stick stubbornly to your hands or the sides of the bowl.
Several factors can inhibit brioche from rising. The most common issues include inactive or expired yeast, liquid (milk) that was too hot (killing the yeast) or too cold (slowing yeast activity), insufficient kneading time to develop gluten, or a proofing environment that is too cold. Ensure your yeast is fresh, your milk is lukewarm, and you’ve kneaded for the recommended duration. Also, patience during proofing is crucial – don’t rush the process!
Perfect Pairings: Granita and Gelato to Serve with Your Brioche
Complete your authentic Sicilian experience by pairing your freshly baked Brioche col Tuppo with these delightful frozen treats. They are truly made for each other!
Italian Desserts
Sicilian Pistachio Granita
Italian Desserts
Granita al Caffè con Panna (Coffee Granita)
Italian Desserts
Aperol Spritz Granita
Italian Desserts
Pistachio Ice Cream (Gelato al Pistacchio)
I hope you thoroughly enjoy baking and savoring these authentic Sicilian Brioche Buns (Brioche col Tuppo)! If you’ve tried this recipe or any other delightful dish from our blog, please don’t hesitate to rate it and share your experiences in the comments section below – I always love hearing from you! To stay updated with our latest delicious creations and culinary adventures, you can also follow us on Facebook, Instagram, and Pinterest.
Step By Step Photos Above
Most of our recipes come with step by step photos, helpful tips and tricks to make it perfectly first time and even video!
Sicilian Brioche Buns (Brioche col tuppo)
By Emily
45
20
16
17
5
6 brioche buns

Equipment
-
Stand mixer
-
Dough hook
-
Large mixing bowl
-
Baking tray
-
Parchment paper
-
Plastic wrap (cling film)
Ingredients
- 275 g (2 cups) bread flour
- 1 large egg, at room temperature (plus another 1 for egg wash)
- 1 orange zest
- 1 tablespoon honey
- 1 teaspoon vanilla extract
- 125 ml (1/2 cup) milk, slightly warmed
- 70 g (5 tablespoons) unsalted butter, at room temperature
- 1/2 teaspoon fine salt
- 2 g (1/2 teaspoon) instant yeast
- 45 g (scant 1/4 cup) caster sugar, (can also use granulated)
Instructions
Important notes before starting
-
The instant yeast we used can be added straight to dry ingredients, but not all yeast is the same. Check your packet instructions, and if it needs to be activated in liquid first, do this in some of the milk needed in the recipe.
-
I recommend gently warming the milk so it’s not fridge cold. Make sure it’s not hot or too warm, or it’ll scramble the egg and melt the butter.
Make the dough
-
Put the flour, yeast, milk, egg, orange zest, honey and vanilla in the bowl of a stand mixer with the dough hook attached and mix on a low speed until a rough dough is formed.
-
Combine the sugar and salt and add them to the mixer. Keep mixing until fully incorporated.
-
Next, with the mixer on a medium speed (number 4 on a KitchenAid) add around 1 tablespoon of butter at a time, allowing it to fully incorporate into the dough before you add more.
-
When all the butter has been added, put a timer on a knead the dough for 20 minutes on a medium speed. After 20 minutes, the dough should be glossy and smooth, tacky but not stick to your hands, and most of the bowl should be clean.
-
Lightly grease a large mixing bowl with butter or olive oil and transfer the dough to the bowl. Cover with plastic wrap and let the dough proof at room temperature until doubled in size (about 4-6 hours).
-
After the first proof, tip the dough out onto a clean work surface. Cut the dough into 6 equal pieces and cut a small piece off of each for the tops. If weighing the dough, cut 78g for the base and 20g for the tops.
Shaping the dough
-
To shape each ball (bottom and tops) gently pinch the edges of the dough into the middle (this helps build tension underneath). Flip it over so it’s seam side down, Cup your hands around the dough and gently rotate it in a circular motion, keeping the edges tucked under to form a smooth ball.
-
Place the large balls on a baking tray lined with parchment paper and press them in the middle with two fingers to create an indent. Shape the small balls the same way and place them on top inside the indent.
Second proof
-
Cover the tray with plastic wrap. I recommend placing the brioche in the fridge overnight for a second proof, as I found this really improves flavour and texture, but you can let the buns proof again at room temperature until doubled in size and bake on the same day.
-
If proofing overnight, remove them from the fridge and let them come to room temperature before baking (1-2 hours). They should double in size in that time.
Baking
-
Preheat the oven to 170C/340F fan 190C/375F static.
-
Brush the brioche with a beaten egg and bake in the oven for 15-20 minutes until golden brown all over.
Notes
Helpful Info for All Recipes
- I always use extra virgin olive oil in all of my recipes unless stated otherwise
- When I use canned or jarred tomatoes of any kind I always use Cirio or Mutti brands for the best results and flavour.
- All vegetables are medium sized unless stated otherwise
- All recipes are tested and developed using a fan (convection) oven
- Find out more about how nutrition is calculated.
- Check out our must have Italian Pantry Staples.
- You can also find all our Essential Kitchen Tools for Italian Cooking.
Nutrition
Calories:
272kcal
|
Carbohydrates:
46g
|
Protein:
9g
|
Fat:
5g
|
Saturated Fat:
2g
|
Polyunsaturated Fat:
1g
|
Monounsaturated Fat:
2g
|
Trans Fat:
0.003g
|
Cholesterol:
160mg
|
Sodium:
221mg
|
Potassium:
112mg
|
Fiber:
1g
|
Sugar:
12g
|
Vitamin A:
256IU
|
Vitamin C:
3mg
|
Calcium:
56mg
|
Iron:
1mg
Nutrition information is automatically calculated, so should only be used as an approximation.
Did you try this recipe?
Leave a comment below!