
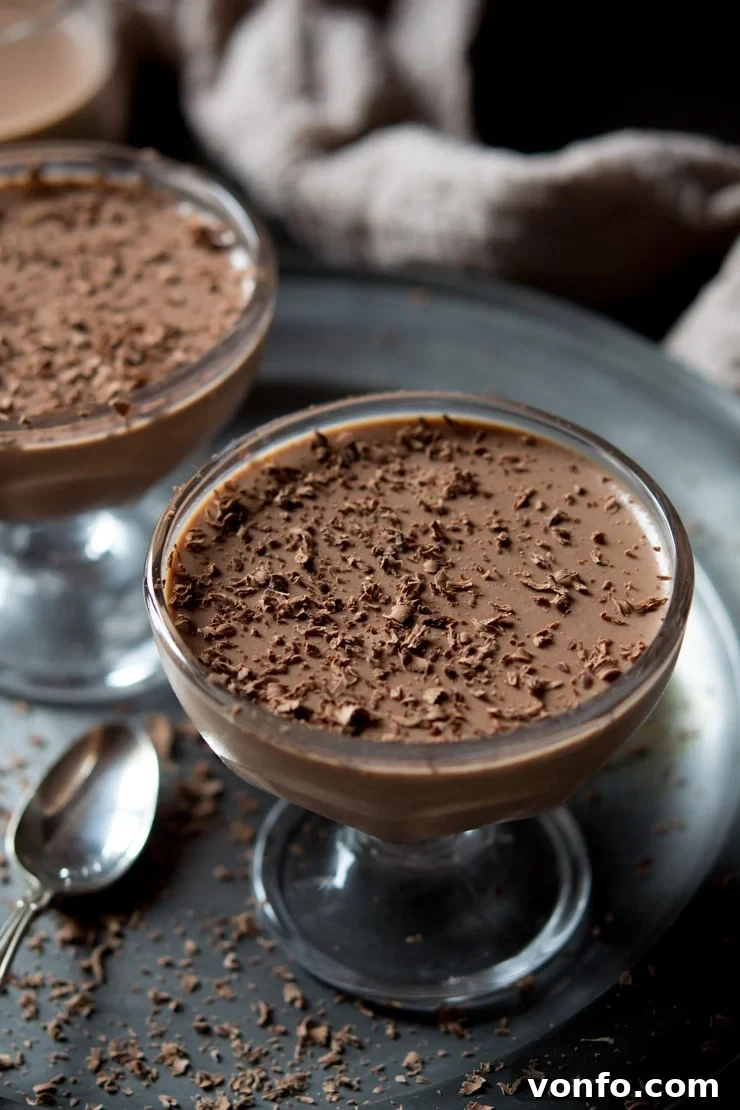
Indulge in the luxurious simplicity of **Chocolate Panna Cotta**, a dessert that perfectly marries creamy texture with profound chocolate flavor. Effortlessly prepared and requiring only a period of chilling, it stands as an exemplary make-ahead treat, ideal for elegant dinner parties, relaxed weekends, or any special occasion demanding a touch of sophistication.
The Allure of Chocolate Panna Cotta: A Timeless Italian Delight
Panna Cotta, an iconic traditional Italian dessert, literally translates to “cooked cream.” Its enduring popularity stems from its incredible simplicity and versatility, allowing for an endless array of flavor adaptations. While classic vanilla remains a favorite, the base recipe elegantly welcomes infusions of lemon, strawberry, and, most decadently, chocolate. Our chocolate variation elevates this humble dessert into a truly unforgettable culinary experience, offering a rich, smooth, and deeply satisfying treat that’s surprisingly light.
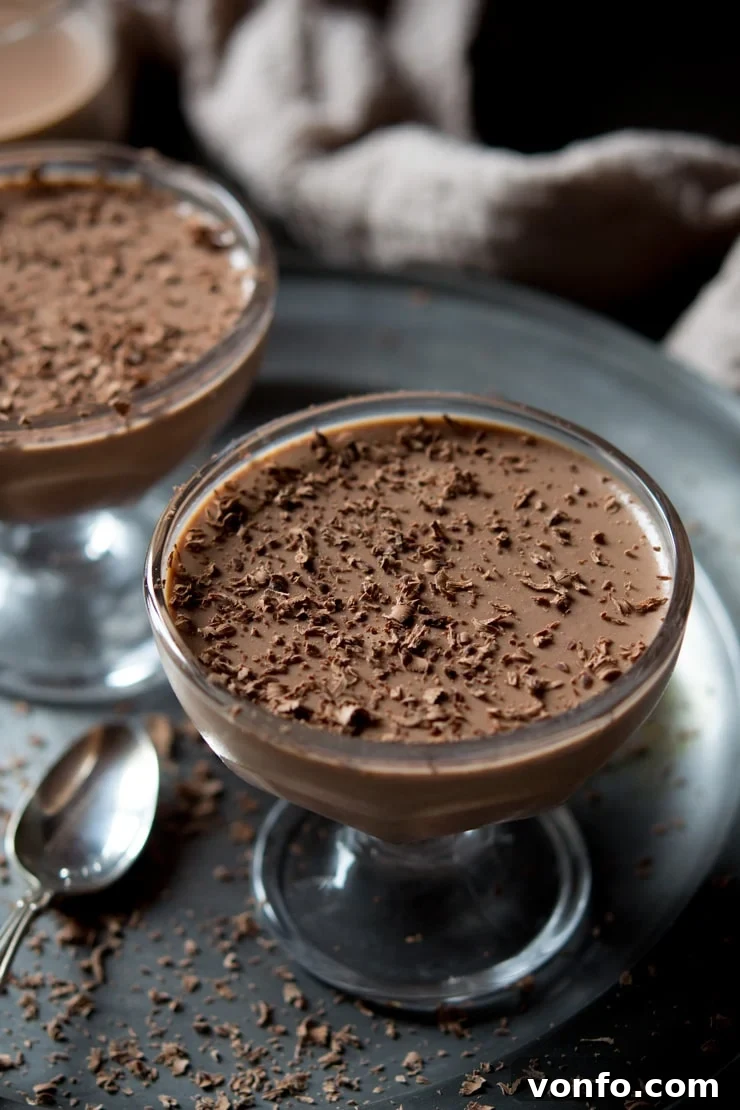
Choosing the Perfect Chocolate for Panna Cotta
The type of chocolate you select is paramount to the success and flavor profile of your panna cotta. For this particular recipe, dark chocolate is highly recommended, ideally with a cacao percentage of at least 70%. The natural bitterness and depth of high-quality dark chocolate beautifully balance the sweetness of the cream and milk, resulting in a rich, intense chocolate flavor that is truly irresistible. Using milk chocolate, while tempting for its sweetness, would lead to a much sweeter dessert that lacks the complex, profound chocolate notes that make this panna cotta so special.
Incorporating dark chocolate also imparts a unique, almost mousse-like texture to the panna cotta. It becomes incredibly smooth, luxuriously creamy, and possesses a subtle fluffiness that melts in your mouth. This delightful consistency, combined with the robust chocolate flavor, makes it an exceptionally delicious and surprisingly light dessert, perfect for concluding any meal without feeling overly heavy. It’s an elegant contrast to heavier chocolate cakes or fudgy brownies, offering a refreshing and sophisticated option.
Understanding Cacao Percentages
When selecting your dark chocolate, consider that a higher cacao percentage generally means less sugar and a more intense chocolate flavor. While 70% is a fantastic starting point, adventurous palates might experiment with 80% or even 85% for an even deeper, more sophisticated bitterness. Conversely, if you prefer a slightly milder chocolate note, a good quality semi-sweet chocolate (around 50-60% cacao) could be used, though adjustments to sugar content might be necessary to maintain balance. Always opt for baking chocolate or chocolate bars over chocolate chips, as chips often contain stabilizers that prevent smooth melting and can affect the final texture.
How To Master Chocolate Panna Cotta – Step By Step Guide
Crafting this elegant dessert is surprisingly straightforward, involving just a few key steps. Precision in preparation and attention to detail will ensure a perfectly set, silky smooth panna cotta every time.
-
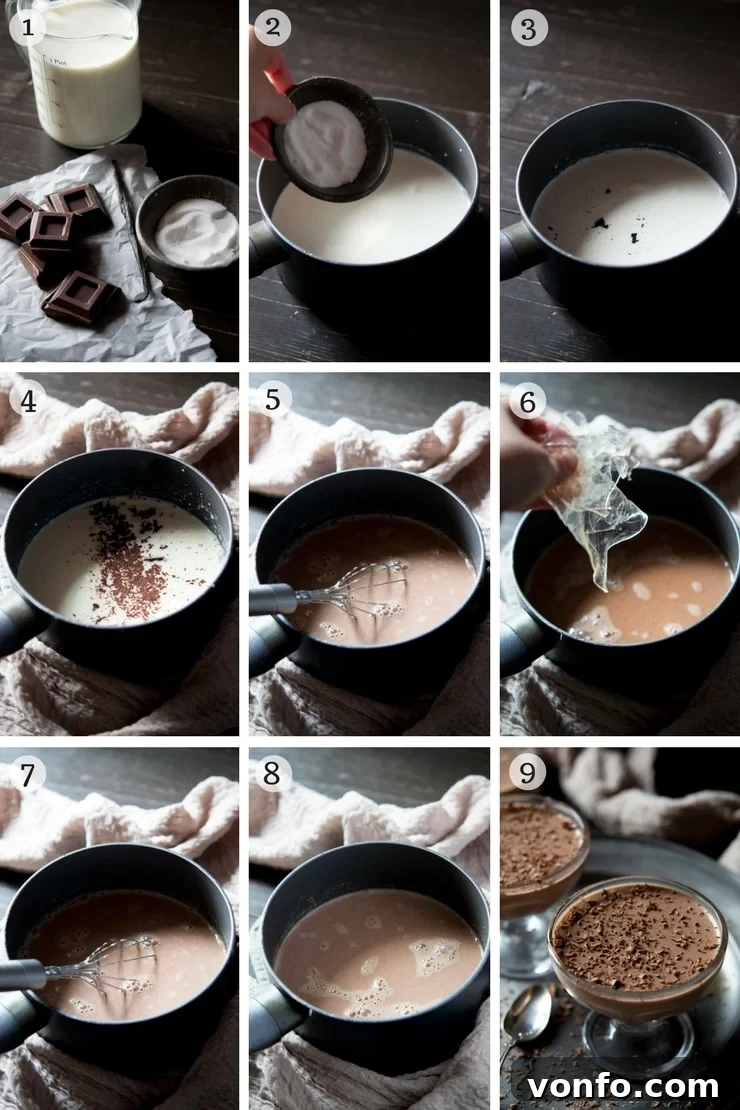
Bloom the Gelatin: Begin by placing the gelatin leaves in a bowl of very cold water. Allow them to soak for approximately 10 minutes, or until they become completely soft and pliable. This crucial step, known as blooming, ensures the gelatin dissolves smoothly into the warm liquid without clumping, which is vital for a flawless texture. If using powdered gelatin, follow package instructions for blooming, typically dissolving it in a small amount of cold water before adding to the hot cream mixture.
-
Prepare the Cream Base: In a medium saucepan, combine the heavy cream, whole milk, and sugar. Next, carefully scrape the fragrant vanilla seeds from inside the vanilla pod and add them to the saucepan. Place the saucepan over medium-low heat. Gently warm the mixture, stirring occasionally, until the sugar has completely dissolved. It’s important not to boil the mixture; aim for a gentle simmer, just until small bubbles begin to form around the edges of the pan. Once simmering, remove the saucepan from the heat immediately.
Chef’s Tip: Don’t discard your used vanilla pod! Rinse it lightly and place it in a jar of granulated sugar. Over time, the pod will infuse the sugar with a beautiful, natural vanilla aroma, creating a homemade vanilla sugar perfect for future baking projects.
-
Melt the Chocolate: Add the finely chopped dark chocolate (or high-quality dark chocolate chips) to the warm milk and cream mixture in the saucepan. Allow the chocolate to sit for a minute or two to soften slightly from the residual heat, then stir slowly and continuously until the chocolate has completely melted and the mixture is smooth and homogenous. Ensure there are no lumps of chocolate remaining. This slow, gentle melting process prevents the chocolate from seizing and ensures a silky texture.

Visual guide showing the chocolate melting into the warm cream mixture. -
Incorporate the Gelatin: Once the chocolate is fully melted and incorporated, firmly squeeze the softened gelatin leaves to remove as much excess water as possible. Add the squeezed gelatin directly into the hot cream and chocolate mixture. Whisk constantly for about 1-2 minutes until the gelatin has completely dissolved and no granules remain. The warmth of the mixture will aid in this process. Once dissolved, set the saucepan aside and allow the mixture to cool slightly at room temperature for about 10-15 minutes before proceeding.
-
Strain and Chill: To ensure the smoothest possible texture and remove any lingering vanilla pod pieces or undissolved gelatin bits, carefully strain the cooled panna cotta mixture through a fine-mesh sieve into your chosen individual serving glasses or ramekins. Fill them evenly. Once portioned, carefully transfer the glasses to the refrigerator to set. Allow the panna cotta to chill for at least 2-3 hours, or preferably overnight, to ensure it is perfectly firm and set before serving.
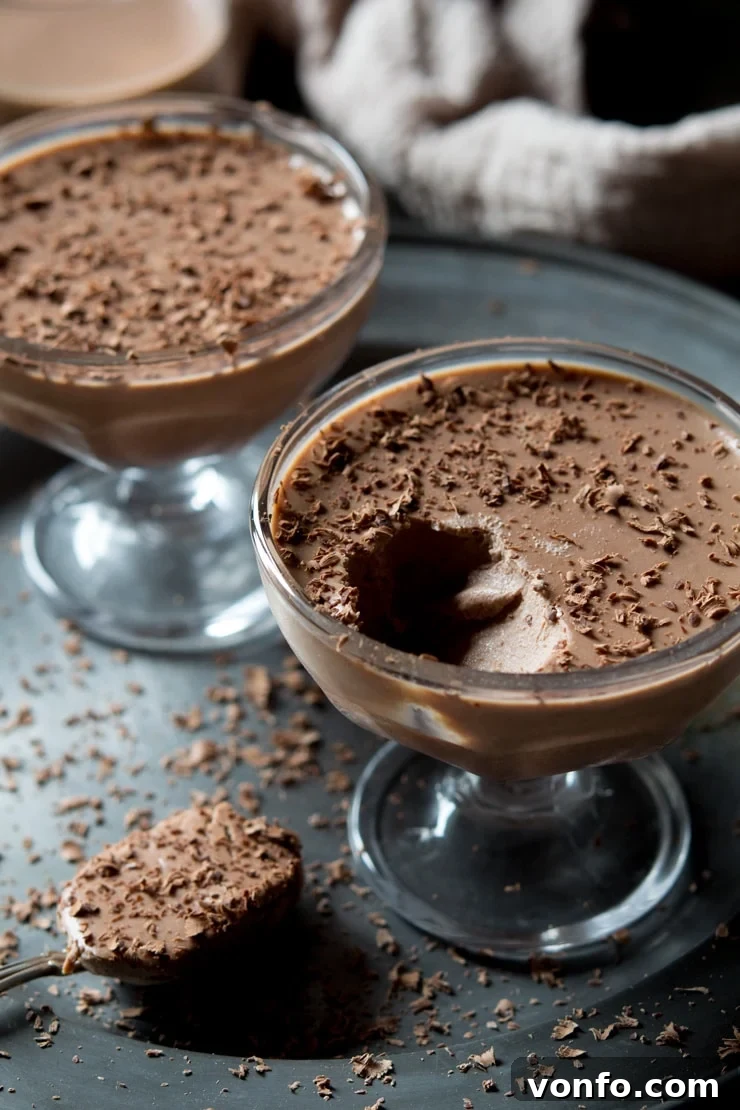
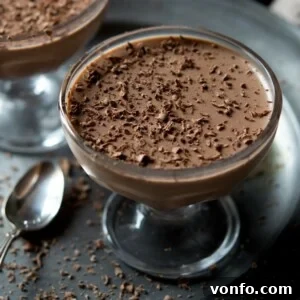
The silky smooth texture of set chocolate panna cotta, ready to be enjoyed.
Tips for a Flawless Chocolate Panna Cotta
- Don’t Overheat: Boiling the cream mixture can cause the dairy to curdle or affect the gelatin’s setting power. A gentle simmer is all you need.
- Chop Chocolate Finely: Small pieces melt more easily and evenly, preventing lumps.
- Ensure Gelatin Dissolves: Whisking well after adding gelatin is key. If you suspect any undissolved bits, strain the mixture.
- Cool Before Chilling: Letting the mixture cool slightly at room temperature before refrigerating can help prevent separation and ensure a more uniform set.
- Gentle Straining: Strain slowly to avoid introducing air bubbles, which can lead to a less smooth texture.
- Patience is Key: Don’t rush the chilling process. A properly set panna cotta is firm yet still wobbly.
Serving and Garnishing Your Panna Cotta
Chocolate Panna Cotta is a dessert that shines with elegant simplicity, yet it also welcomes creative garnishes. A dusting of high-quality cocoa powder, a sprinkle of sea salt flakes to enhance the chocolate’s depth, or a few fresh raspberries or strawberries provide a delightful contrast in flavor and color. A dollop of lightly sweetened whipped cream, a sprig of fresh mint, or even a drizzle of raspberry coulis can further elevate the presentation and taste. For an adult twist, a shot of espresso or a splash of orange liqueur can be incorporated into the mixture or served alongside.
Make-Ahead & Storage
One of the greatest advantages of panna cotta is its make-ahead nature. You can prepare it up to 2-3 days in advance, keeping it covered in the refrigerator. This makes it an ideal dessert for entertaining, as it frees you up to focus on other aspects of your meal. Store any leftover panna cotta tightly covered in the refrigerator for up to 3 days. Its texture holds beautifully, often becoming even more refined after a longer chill.
Troubleshooting Common Panna Cotta Issues
- Panna Cotta is too soft: This is usually due to insufficient gelatin or the gelatin not being fully bloomed or dissolved. Ensure proper measurements and gentle whisking.
- Panna Cotta is too firm/rubbery: Too much gelatin is the culprit here. Stick to the recipe’s recommended amount.
- Grainy texture: Undissolved sugar or gelatin can cause this. Always ensure sugar is fully melted and gelatin is completely whisked in. Straining the mixture can also help.
- Separation: This can occur if the mixture is chilled too quickly or if the cream base and chocolate aren’t fully emulsified. Let it cool slightly before chilling and ensure thorough mixing.
More Irresistible Italian Desserts To Try
Explore More Italian Dessert Favorites
Italian Desserts
Classic Vanilla Panna Cotta
Italian Desserts
Boozy Bailey’s Panna Cotta
Italian Desserts
White Chocolate Panna Cotta
Italian Desserts
Decadent Chocolate Semifreddo
Other Sweet Treats You Might Enjoy:
- Orange Chocolate Cantucci Biscuits
- Pandoro Christmas Cake with Pistachios and White Chocolate
- Tiramisu Ice Cream
- Apple Olive Oil Cake
- Chocolate Hazelnut Ice Cream
We hope you enjoy this divine Chocolate Panna Cotta recipe! If you’ve tried this or any other recipe from our collection, we’d love to hear from you. Please take a moment to rate the recipe and share your feedback in the comments below. Your thoughts are invaluable! You can also connect with us and discover more delicious food by following us on Facebook, Instagram, and Pinterest.
Chocolate Panna Cotta Recipe
A classic Italian dessert with a decadent chocolate twist. Creamy, smooth, and wonderfully rich.
Author: Emily
Prep Time: 10 mins
Cook Time: 10 mins
Total Time: 20 mins (plus chilling)
Servings: 6 people
Pin Recipe |
Print Recipe
Ingredients
- 1 1/4 cup (300ml) heavy cream
- 1 1/8 cup (250ml) whole milk
- 3 gelatin leaves (or 1 tbsp powdered gelatin – see notes)
- 1 1/2 tbsp (20g) granulated sugar
- 3.5 oz (100g) dark chocolate (70% cacao), finely chopped or dark chocolate chips
- 1/2 vanilla pod, split lengthwise (or 1 tsp vanilla extract)
Instructions
- Add the gelatin leaves to a bowl of cold water and let them sit for 10 minutes until soft and pliable.
- In a saucepan, combine the cream, milk, and sugar. Scrape the vanilla seeds from the pod and add them to the saucepan. Heat over medium-low heat, stirring, until the sugar has dissolved and the mixture reaches a gentle simmer. Remove from heat.
- Add the finely chopped dark chocolate to the warm cream mixture. Stir slowly and continuously until the chocolate has completely melted and the mixture is smooth.
- Squeeze the bloomed gelatin leaves to remove as much water as possible. Add the squeezed gelatin to the hot cream and chocolate mixture. Whisk constantly until the gelatin has completely dissolved. Set the saucepan aside to cool slightly.
- Once cooled slightly, strain the mixture through a fine-mesh sieve into individual serving glasses or ramekins. Place in the fridge to set for at least 2-3 hours, or until firm.
Notes
- You can substitute 3 gelatin leaves for 1 tablespoon of powdered gelatin. Please note this recipe has been primarily tested with gelatin leaves.
- For an extra smooth finish, ensure all ingredients are well combined and strain the mixture before chilling.
- Garnish with grated chocolate, fresh berries, or a dollop of whipped cream before serving.
Nutrition
Calories: 355 kcal
Nutrition information is automatically calculated and should be used as an approximation.
Helpful Information for All Recipes
- We recommend using extra virgin olive oil in all our recipes unless otherwise specified.
- For canned or jarred tomatoes, we consistently use Cirio or Mutti brands for optimal flavor and results.
- All vegetables are assumed to be medium-sized unless specifically stated otherwise.
- All recipes on this site are tested and developed using a fan (convection) oven.
- Find out more about how nutrition is calculated for our recipes.
- Discover our essential Italian Pantry Staples to stock your kitchen.
- Explore all our recommended Essential Kitchen Tools for Italian Cooking.