
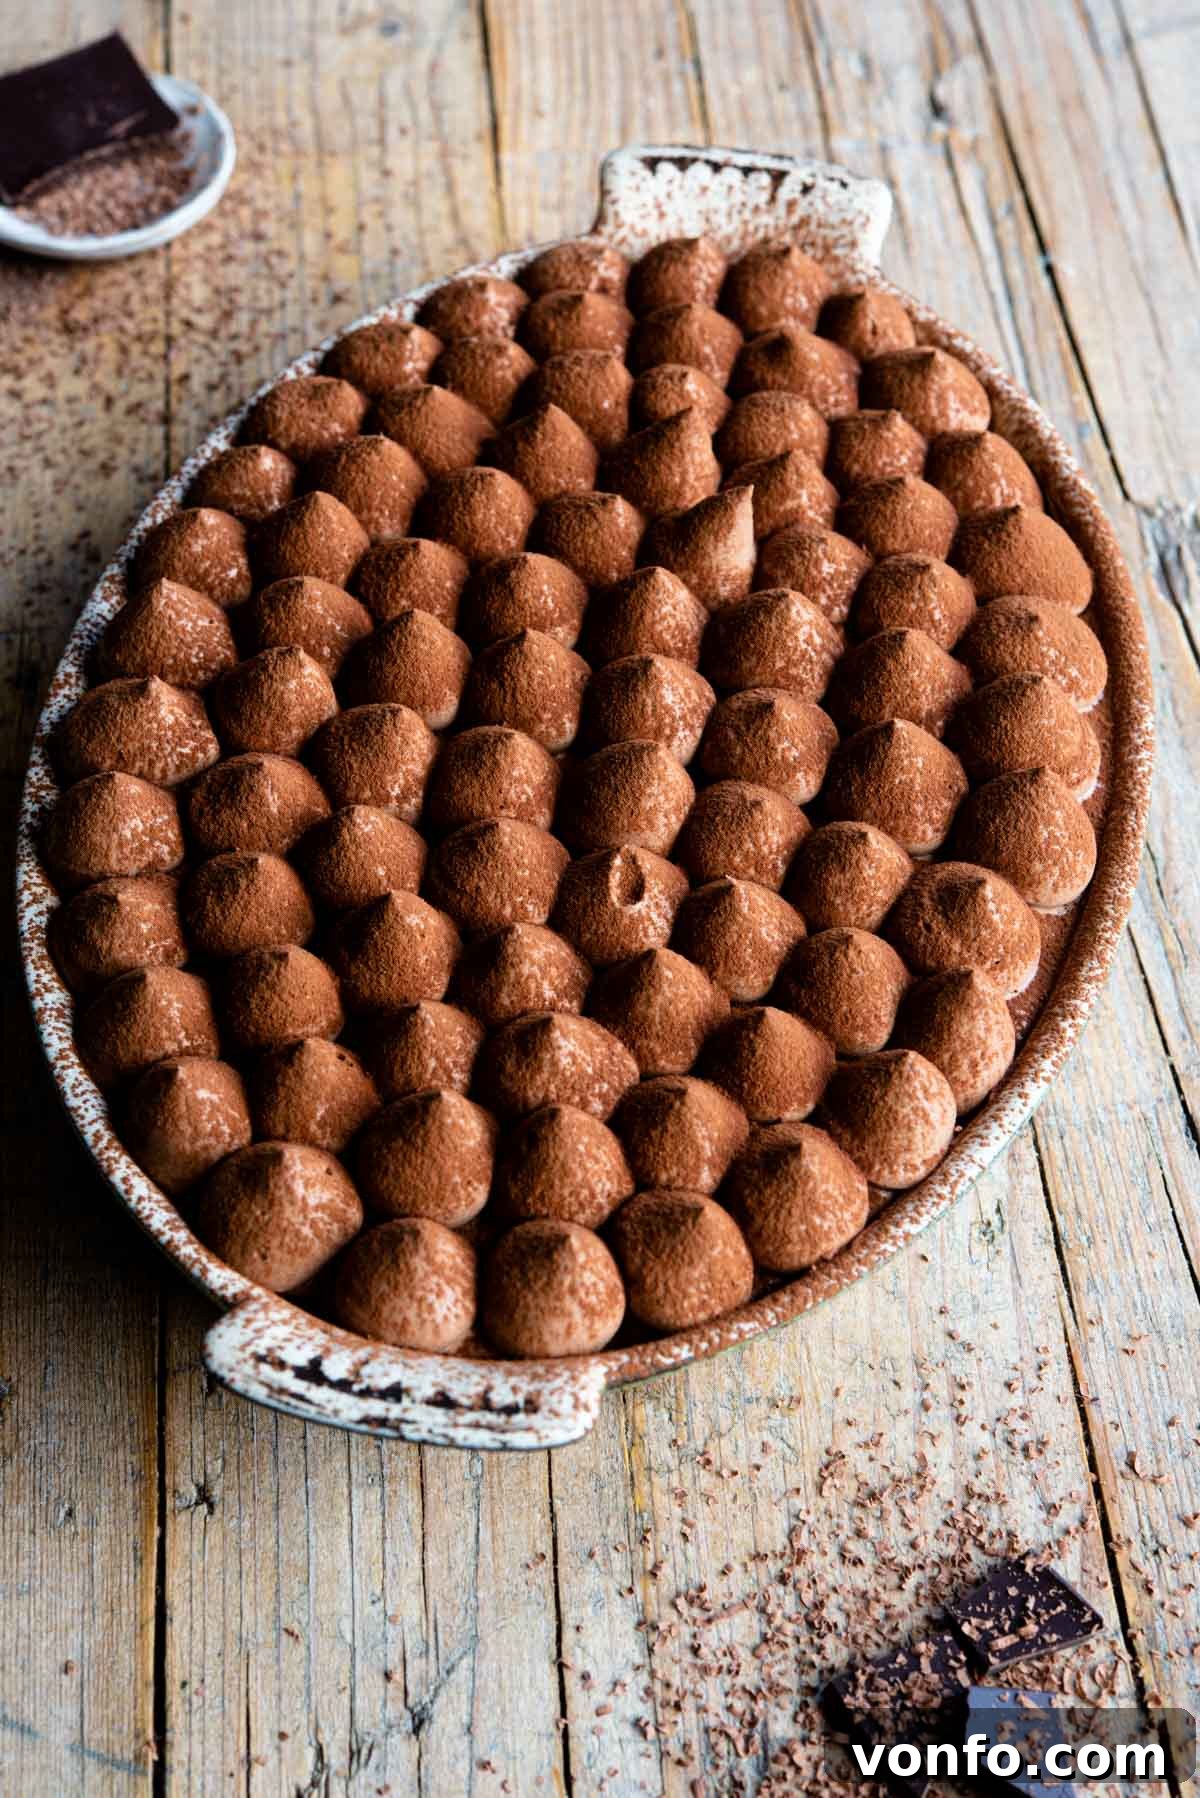
Decadent Chocolate Tiramisu: The Ultimate No-Bake Dessert
Prepare to be captivated by the magic of an utterly irresistible and profoundly decadent Chocolate Tiramisu. This isn’t just any dessert; it’s a sublime culinary experience crafted from delicate Savoiardi biscuits (also known as ladyfingers), each lovingly dipped in a rich chocolate mixture, then meticulously layered with a silky-smooth, intensely chocolate-flavored cream. This recipe offers a delightful and accessible journey into creating a show-stopping dessert that promises to become a firm favorite.
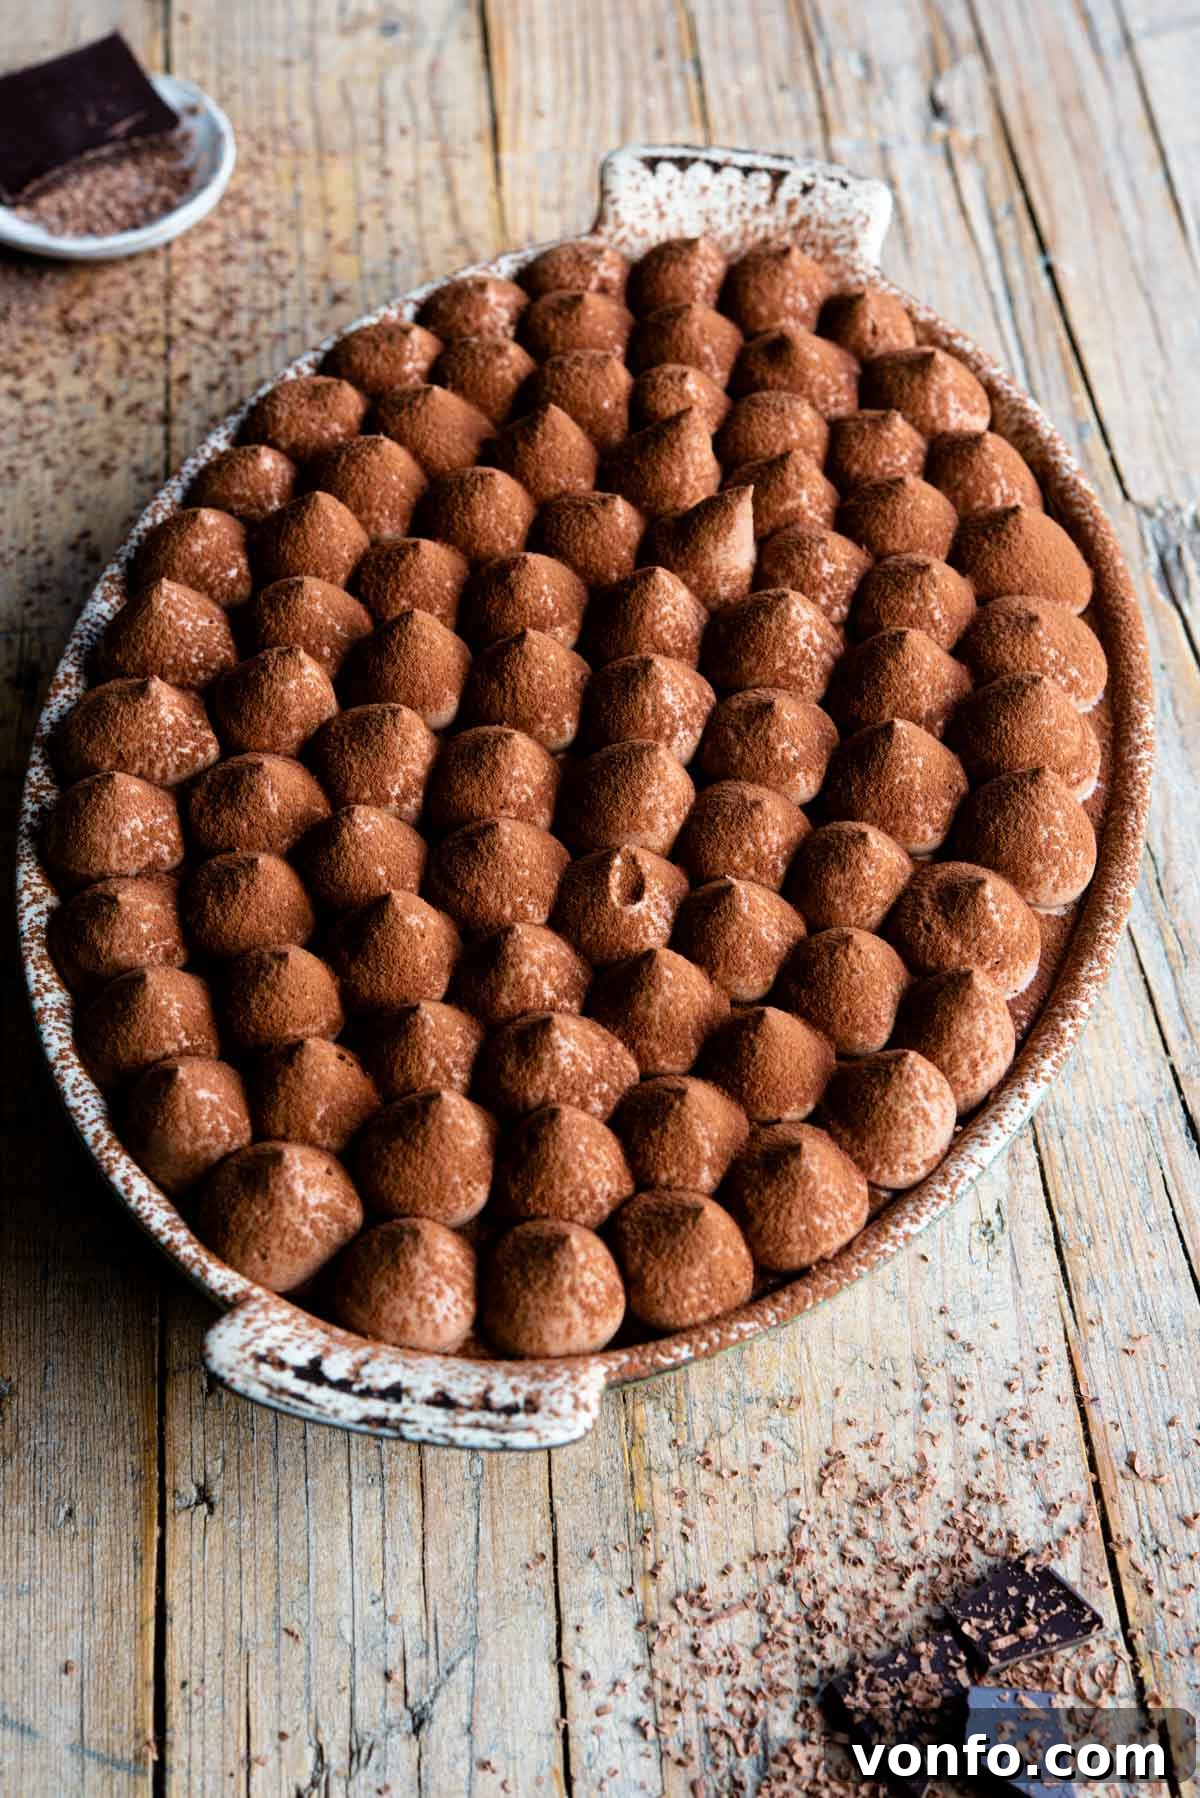
For anyone who considers themselves a true devotee of chocolate, this dessert is more than just a treat—it’s an absolute revelation. It takes the beloved structure of a classic Italian tiramisu and infuses it with a deep, luxurious chocolate essence, transforming it into something uniquely special. What truly sets our recipe apart is its thoughtful adaptation: it’s crafted without raw eggs, coffee, or alcohol, making it a perfect choice for a wider audience, including children or those with dietary preferences.
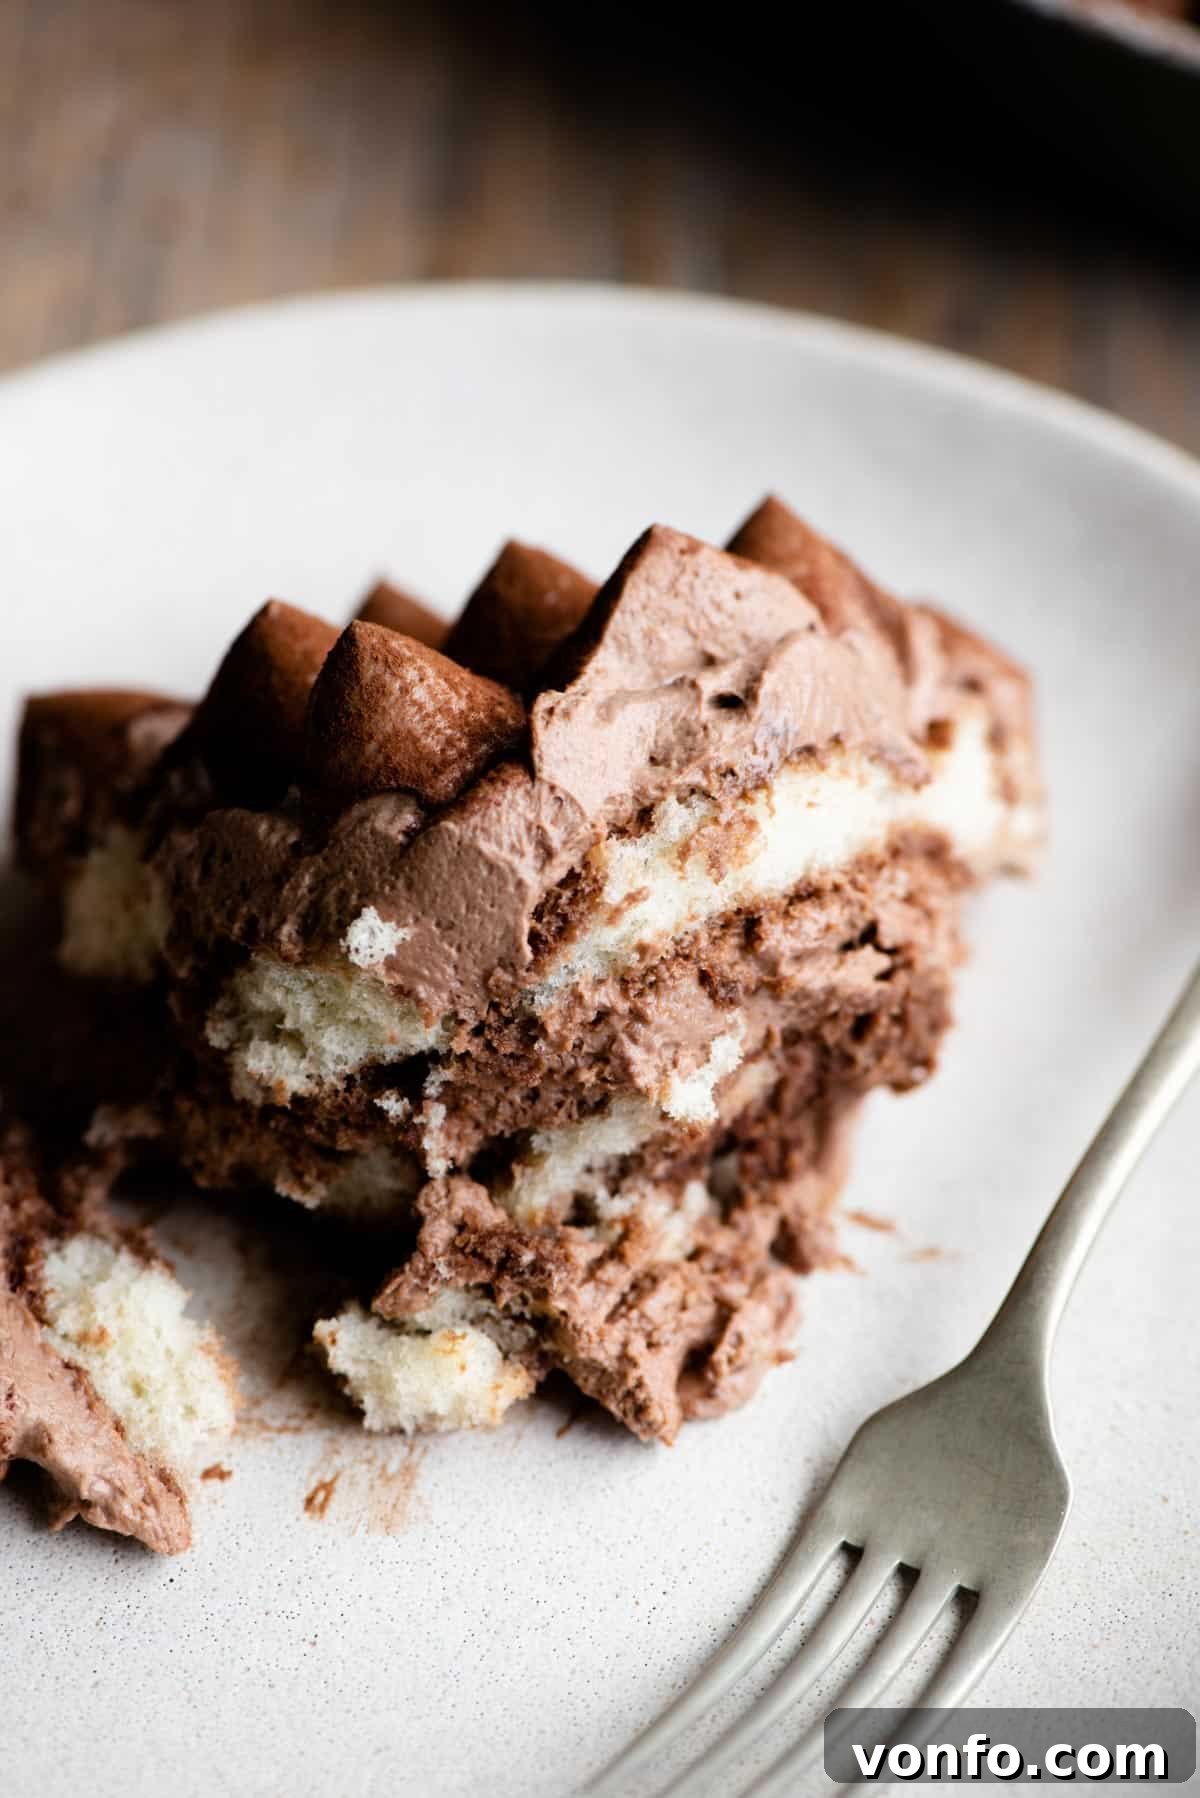
Each spoonful of this Chocolate Tiramisu delivers a symphony of textures and flavors. It’s incredibly rich, wonderfully smooth, and undeniably decadent—a combination so utterly addictive that you’ll find yourself reaching for another slice before you know it. While the recipe might feature several step-by-step photos to guide you, rest assured, the process itself is surprisingly simple and straightforward. The most significant commitment of your time will be the essential chilling period, but we promise, the anticipation is absolutely worth it for the exquisite results.
Dive into the complete recipe details below, including comprehensive notes on ingredients, illustrative step-by-step photos, expert tips, exciting variations, and a helpful video tutorial. For a convenient printable version of the recipe, simply scroll to the very bottom of this page or click on the dedicated recipe link.
Essential Ingredients for Your Chocolate Tiramisu
Crafting this magnificent Chocolate Tiramisu begins with selecting the right components. Below, you’ll find a detailed list of every ingredient you’ll need, along with valuable insights, preparation tips, and potential substitutions to ensure your dessert turns out perfectly.
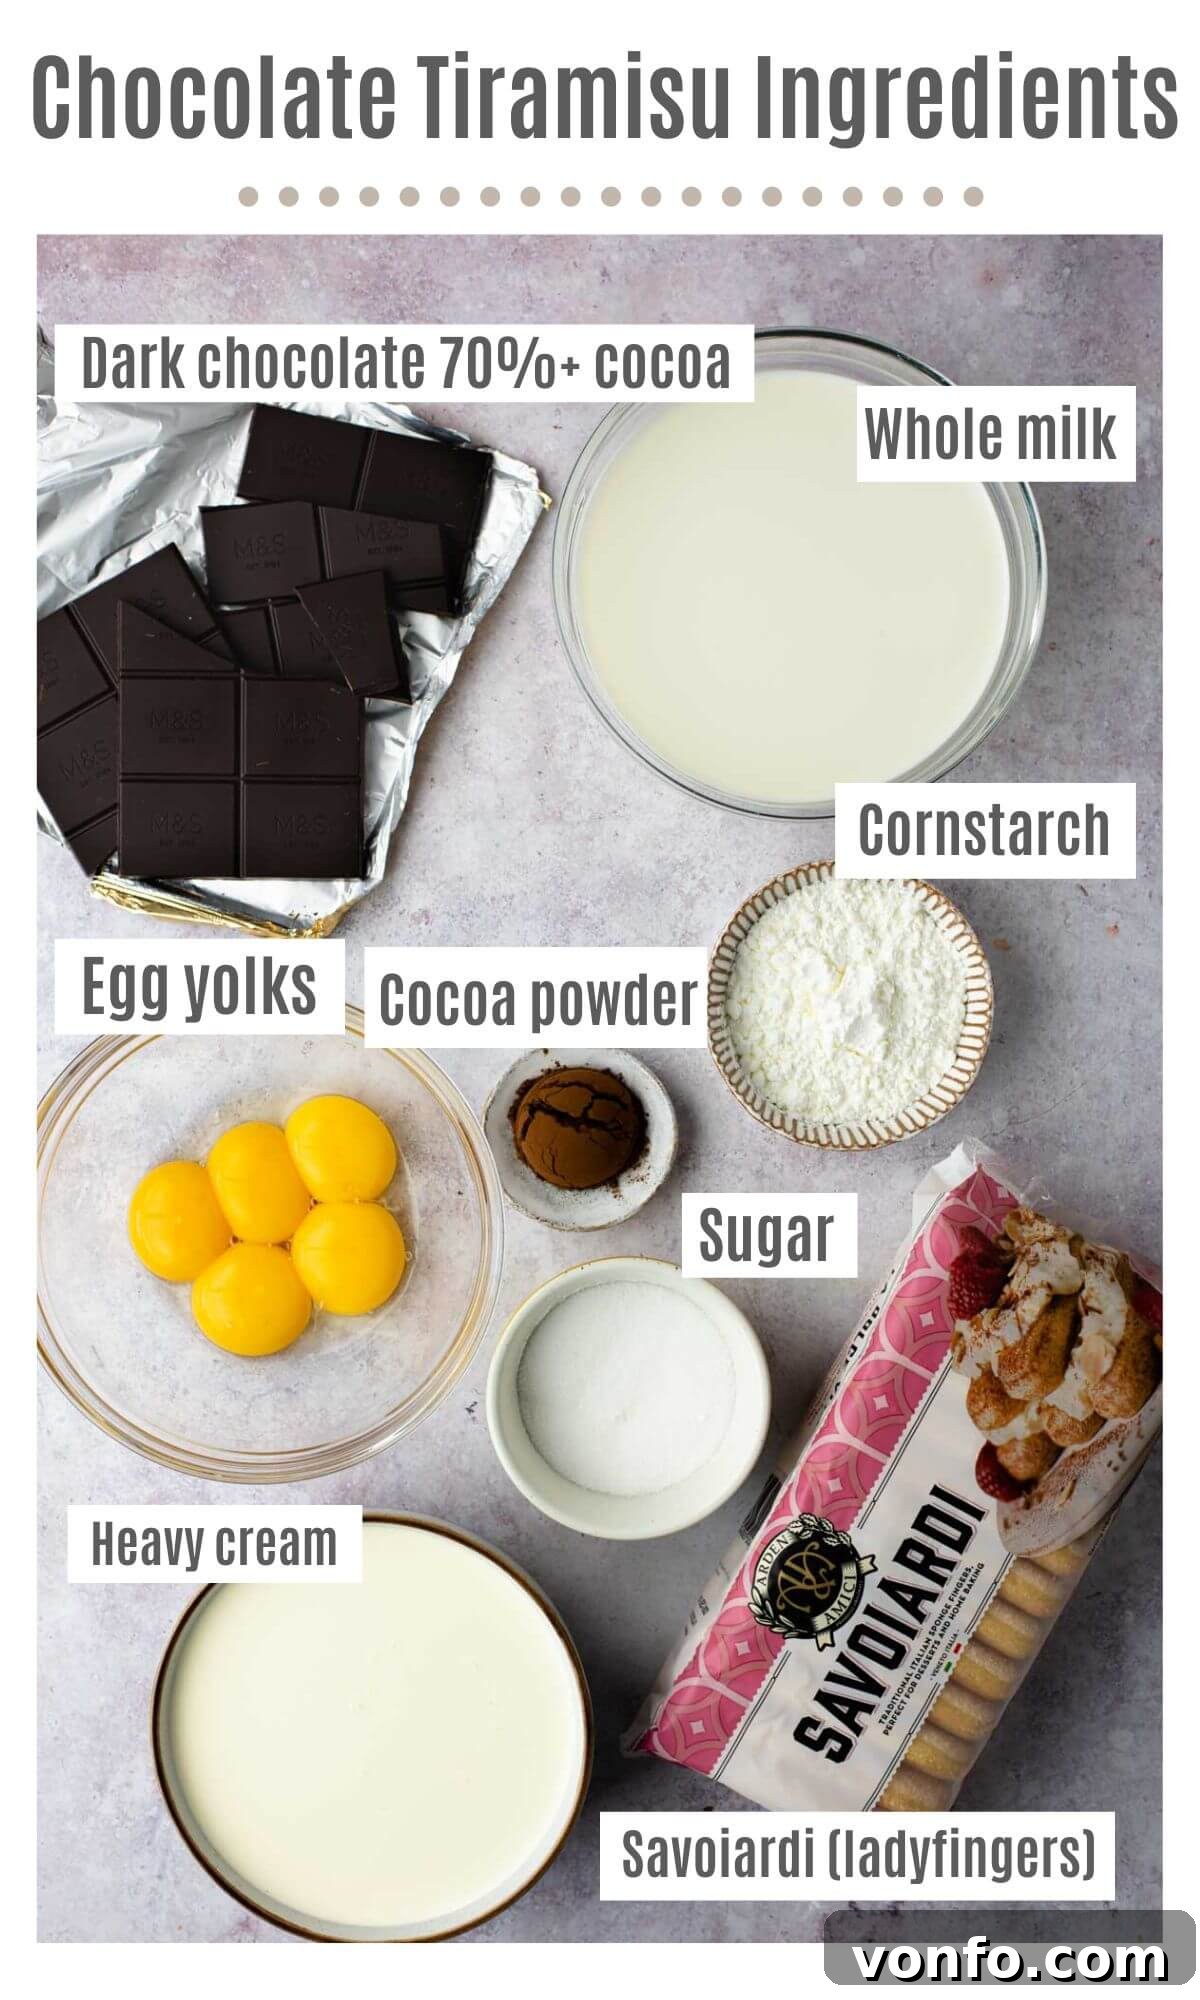
- Chocolate Custard Base: This forms the luxurious heart of our tiramisu. It’s meticulously prepared with high-quality whole milk, ensuring a creamy texture and rich flavor. We use fresh egg yolks to provide body and richness, balanced with sugar for sweetness and cornstarch as a thickening agent. The star ingredient here is a generous amount of dark chocolate (70%+ cacao), which imparts a deep, complex chocolate flavor. It’s crucial to allow this custard to cool completely before proceeding with the rest of the recipe to achieve the perfect consistency.
- Savoiardi Biscuits (Ladyfingers): The foundation of any tiramisu, these light and airy sponge biscuits are ideal for soaking up flavor without becoming overly soggy. While commonly referred to as “ladyfingers,” authentic Italian Savoiardi biscuits are preferred for their superior texture and absorption qualities; they are typically larger and less dense. If you can only find standard ladyfingers, be prepared to soak them for a slightly longer duration as they tend to be denser. The quality of your biscuits will significantly impact the final texture of your tiramisu.
- Heavy Cream (Double Cream UK): This is whipped to create the light and airy component of our chocolate cream. It’s essential to use cold heavy cream with a high fat content for optimal whipping. A key tip is to be mindful not to overwhip the cream; aim for soft peaks that hold their shape but remain light and airy. Overwhipping can lead to a grainy texture, which we want to avoid for that signature smooth tiramisu mouthfeel.
- Chocolate Dipping Mixture: Instead of the traditional coffee or espresso, we create a simple yet incredibly flavorful dipping liquid for our Savoiardi. This mixture consists of premium cocoa powder and sugar dissolved in hot water. This creates a sweet, intensely chocolatey bath for the biscuits, perfectly complementing the custard. Alternatively, for a quick and easy option, you could use a high-quality hot chocolate mix, ensuring it’s well-dissolved and free of lumps.
Step-by-Step Guide to Crafting Your Chocolate Tiramisu
Creating this magnificent Chocolate Tiramisu is a rewarding process, and we’ve broken it down into clear, manageable steps. Follow these instructions carefully to ensure a perfect dessert every time. Visual aids are included to guide you through each stage.
Phase 1: Preparing the Silky Chocolate Custard
This rich custard forms the creamy backbone of your tiramisu. Precision at this stage is key for a smooth, lump-free result.
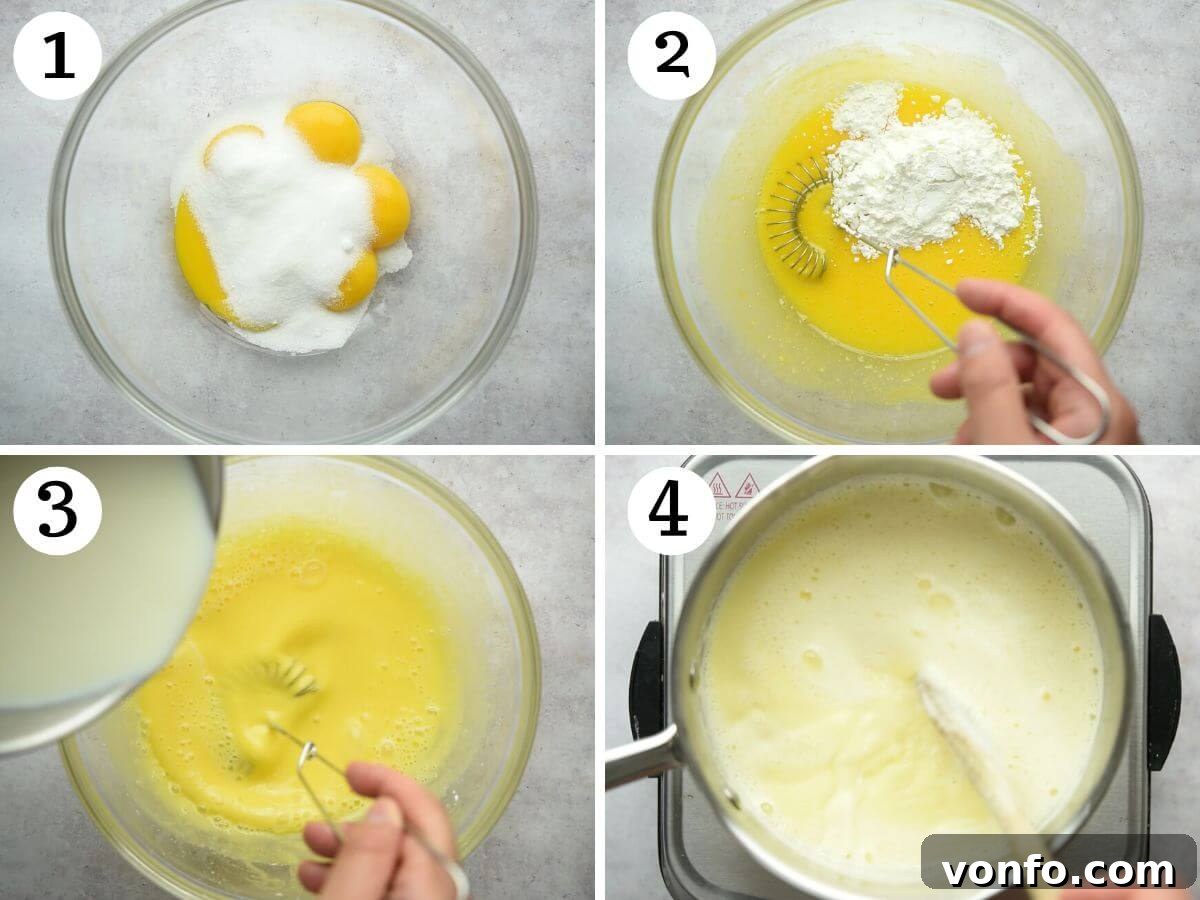
- Gently Heat the Milk: Begin by pouring the whole milk into a saucepan. Heat it over medium heat until it just reaches a simmer, with small bubbles forming around the edges. As soon as it simmers, remove it from the heat and set it aside to keep warm.
- Create the Egg Mixture: In a separate, large mixing bowl, combine the egg yolks with the granulated sugar. Whisk these together vigorously until the mixture becomes pale and creamy, taking on a light yellow hue. Next, incorporate the cornstarch, mixing until it’s fully blended and there are no visible lumps. This ensures a smooth custard later on.
- Temper the Eggs with Warm Milk: Gradually, and very slowly, pour the warm milk into the egg yolk mixture while continuously whisking. This crucial step, known as tempering, prevents the eggs from scrambling. Once all the milk has been incorporated and the mixture is smooth, pour it back into the same saucepan.
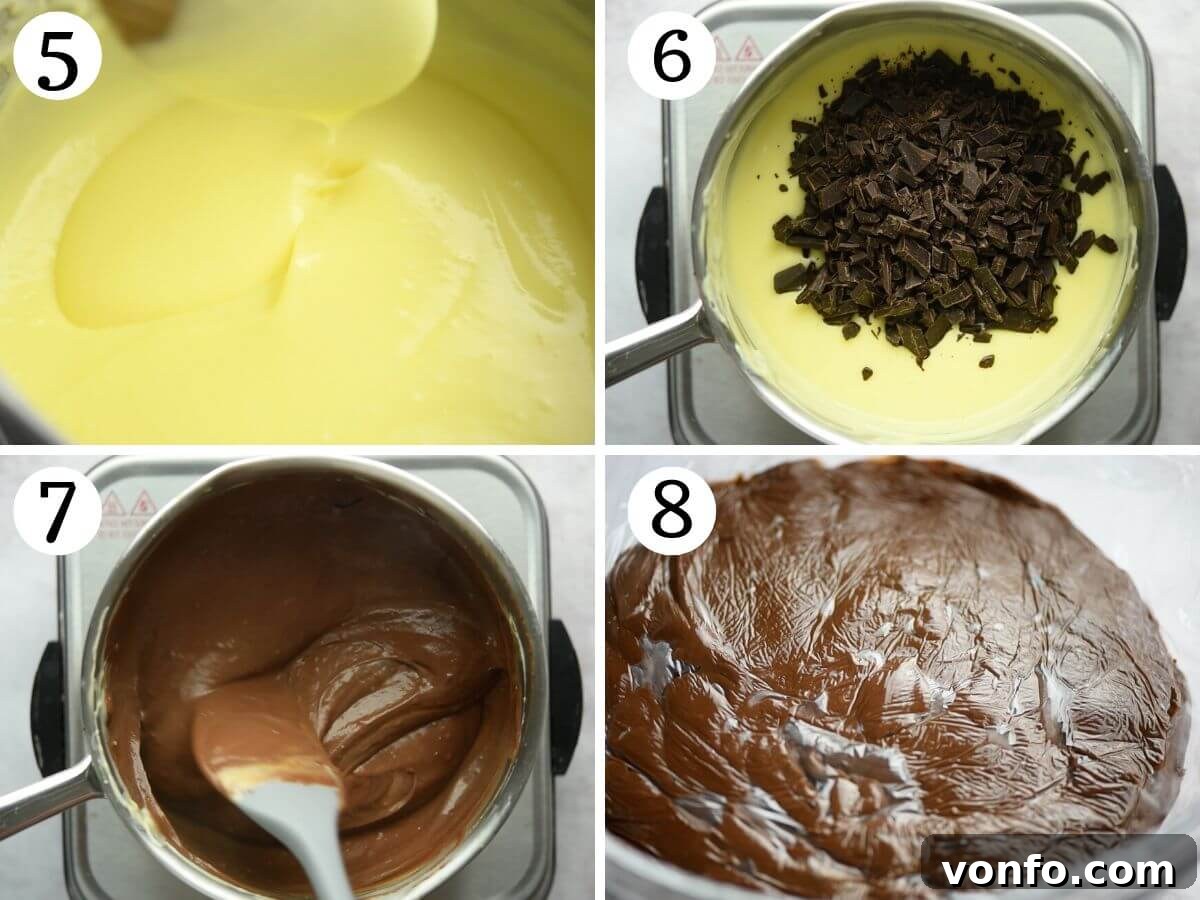
- Thicken to a Perfect Custard: Return the saucepan to a medium-low heat. Continue to stir the mixture constantly with a wooden spoon or a heat-proof spatula. The custard will gradually thicken. Keep stirring until it’s thick enough to coat the back of your spoon without dripping off immediately. This typically takes about 5-10 minutes. If you notice any small lumps starting to form, immediately switch to a whisk and reduce the heat slightly to smooth them out.
- Infuse with Chocolate: Once your custard has reached the desired thickness, remove it from the heat. Add the roughly chopped dark chocolate to the hot custard. Stir gently but continuously until the chocolate is completely melted and smoothly combined with the custard, leaving no streaks.
- Cool and Chill the Custard: Transfer the warm chocolate custard to a clean bowl. To prevent a skin from forming, cover the surface of the custard directly with plastic wrap (cling film), ensuring it touches the entire surface. Allow it to cool at room temperature, then refrigerate for a minimum of 1-2 hours, or ideally, overnight. You can even prepare this custard 1-2 days in advance. Remember to remove it from the fridge about 30 minutes before you plan to use it for assembly, allowing it to soften slightly.
Phase 2: Preparing the Dipping Liquid and Whipped Cream
These two components are vital for flavoring the biscuits and creating the light, airy chocolate cream.
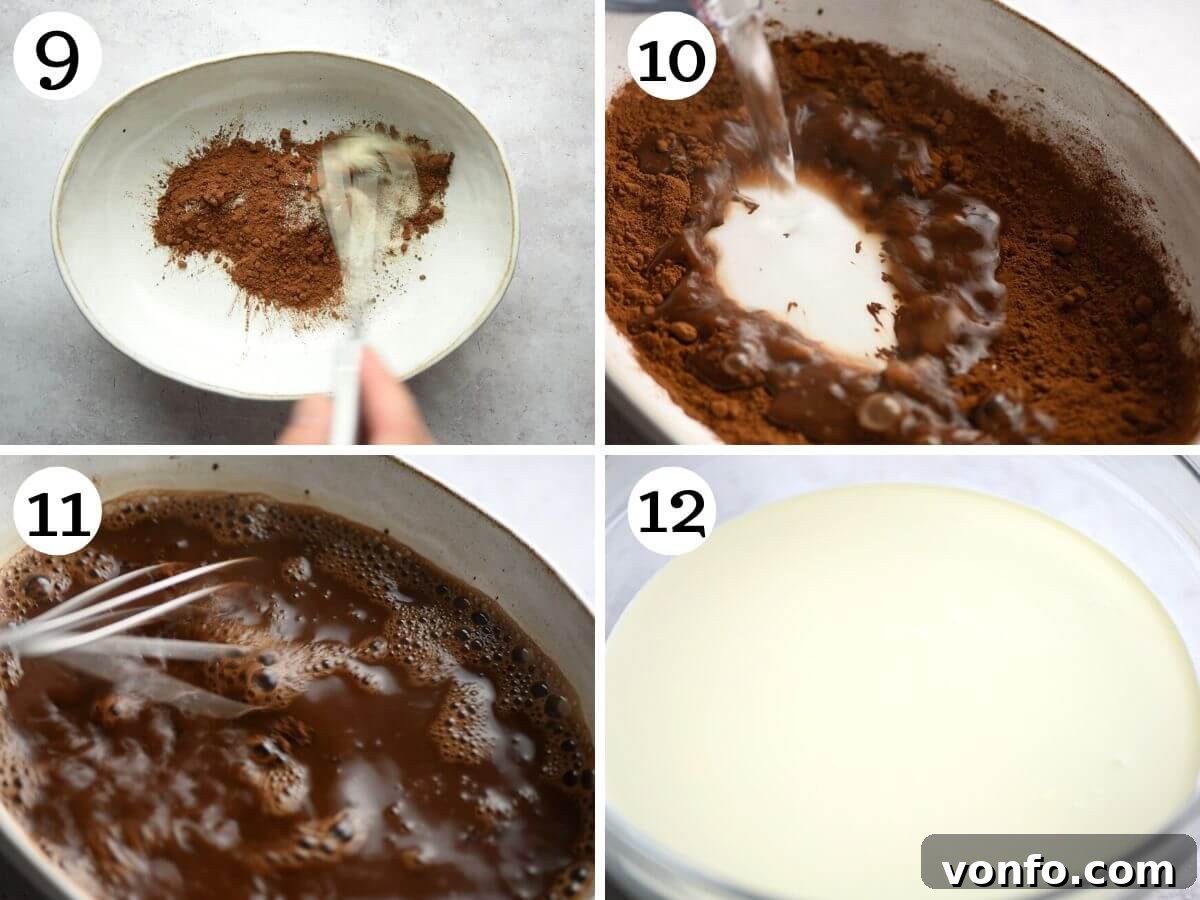
- Prepare the Chocolate Dipping Liquid: In a wide, shallow bowl or dish, combine the cocoa powder and sugar. Pour in the hot water and whisk thoroughly until both the cocoa and sugar are fully dissolved, and the mixture is smooth and lump-free. Set this aside to cool slightly.
- Whip the Heavy Cream: Pour the cold heavy cream into a large mixing bowl. Using an electric whisk (or a stand mixer with a whisk attachment), whisk the cream until it forms soft peaks. Be careful not to overwhip; you want it to be light and airy, not stiff or curdled.
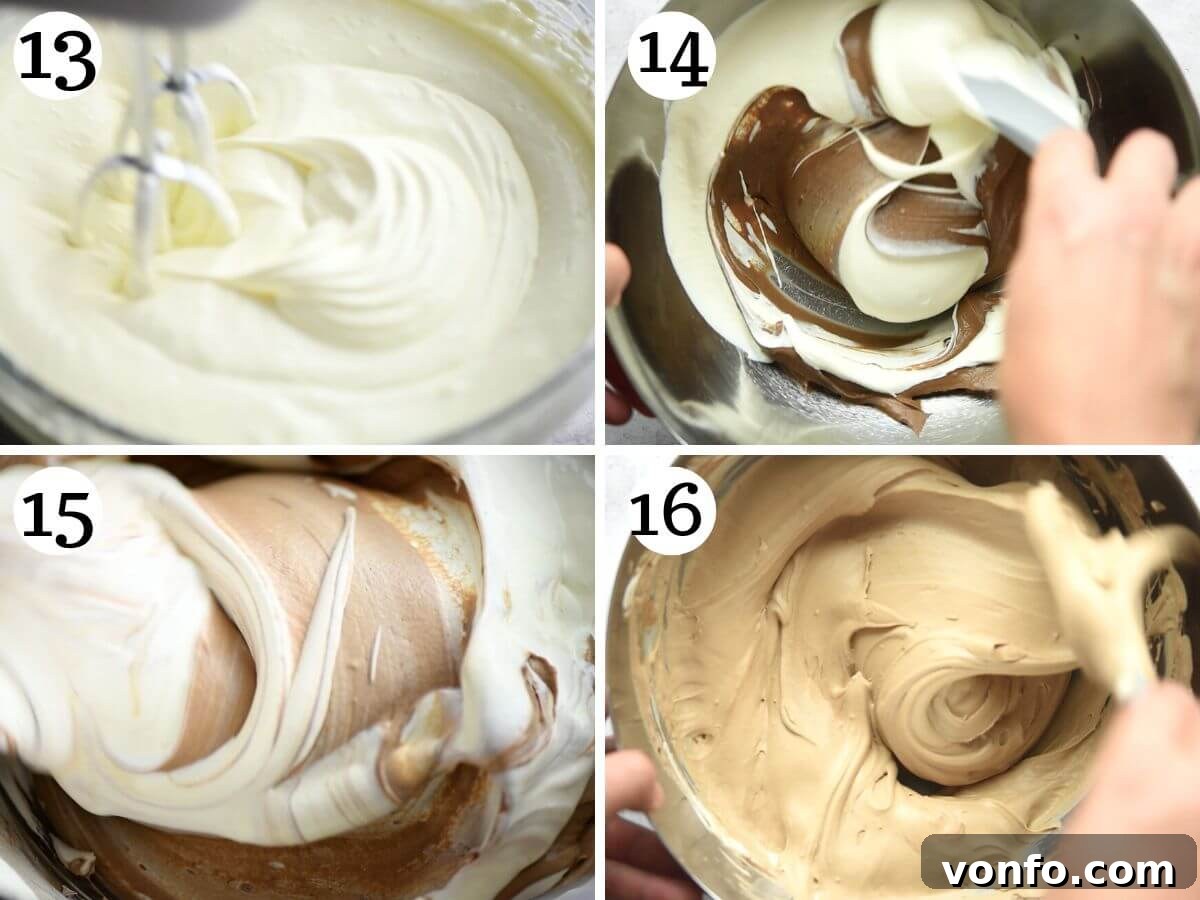
- Combine Custard and Whipped Cream: Transfer your chilled chocolate custard to a large bowl, spacious enough to comfortably mix in the whipped cream. Give the custard a quick whisk to ensure it’s extra smooth and uniform. Gently fold in half of the whipped cream into the custard until just combined. Then, add the remaining whipped cream and continue to fold carefully until the mixture is thoroughly combined and boasts a light, uniform chocolate cream consistency. Avoid overmixing, as this can deflate the cream.
Phase 3: Assembling Your Chocolate Tiramisu
This is where all your prepared components come together to form the beautiful layers of tiramisu.
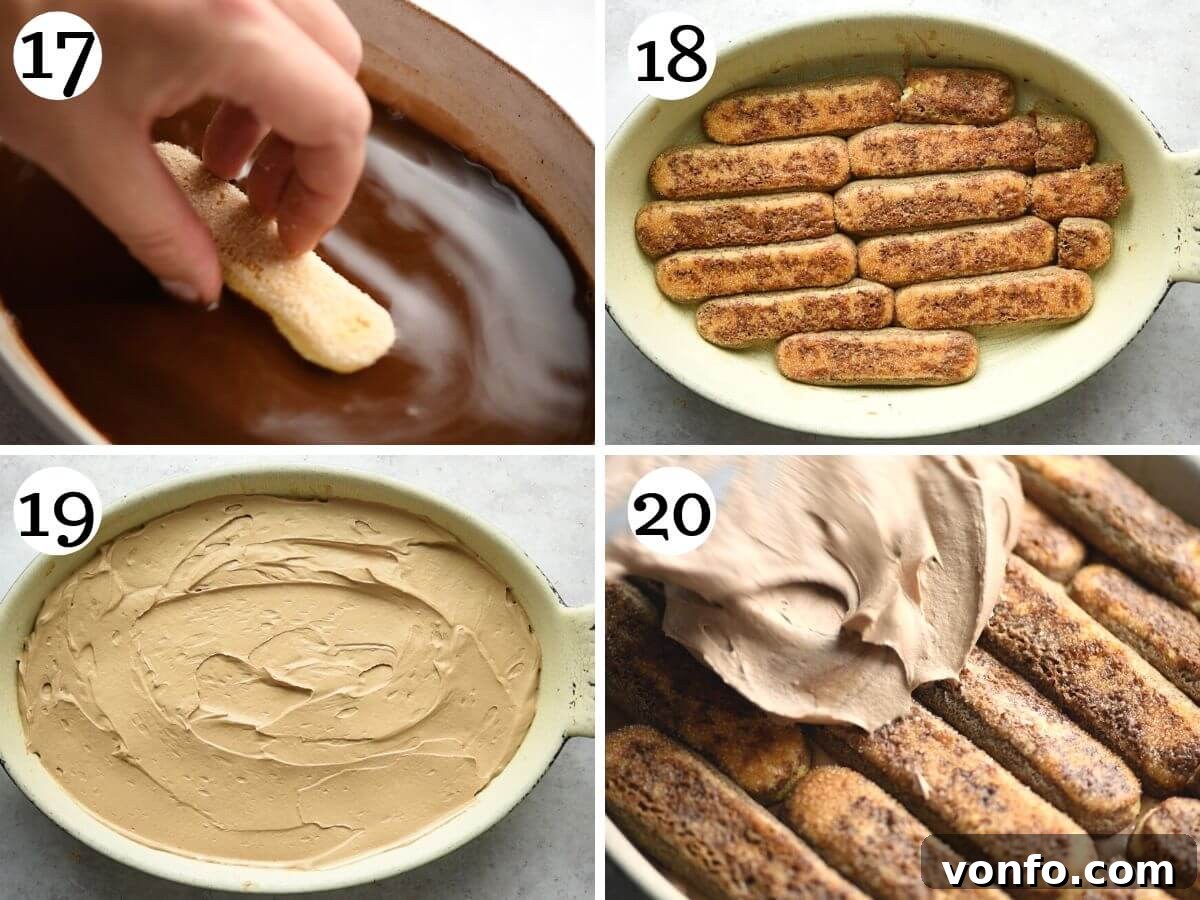
- Layer the First Biscuits: Take your Savoiardi biscuits and quickly dip each one into the chocolate dipping liquid for just a second on each side. It’s important not to over-soak them, or they will become too mushy. Arrange these dipped biscuits in a single, even layer at the bottom of your chosen serving dish. If necessary, you can gently break some biscuits to fit the contours of your dish perfectly.
- Add the First Cream Layer: Spoon just under half of your prepared chocolate cream mixture over the layer of soaked Savoiardi biscuits. Carefully spread it out evenly with a spatula, ensuring it covers all the biscuits.
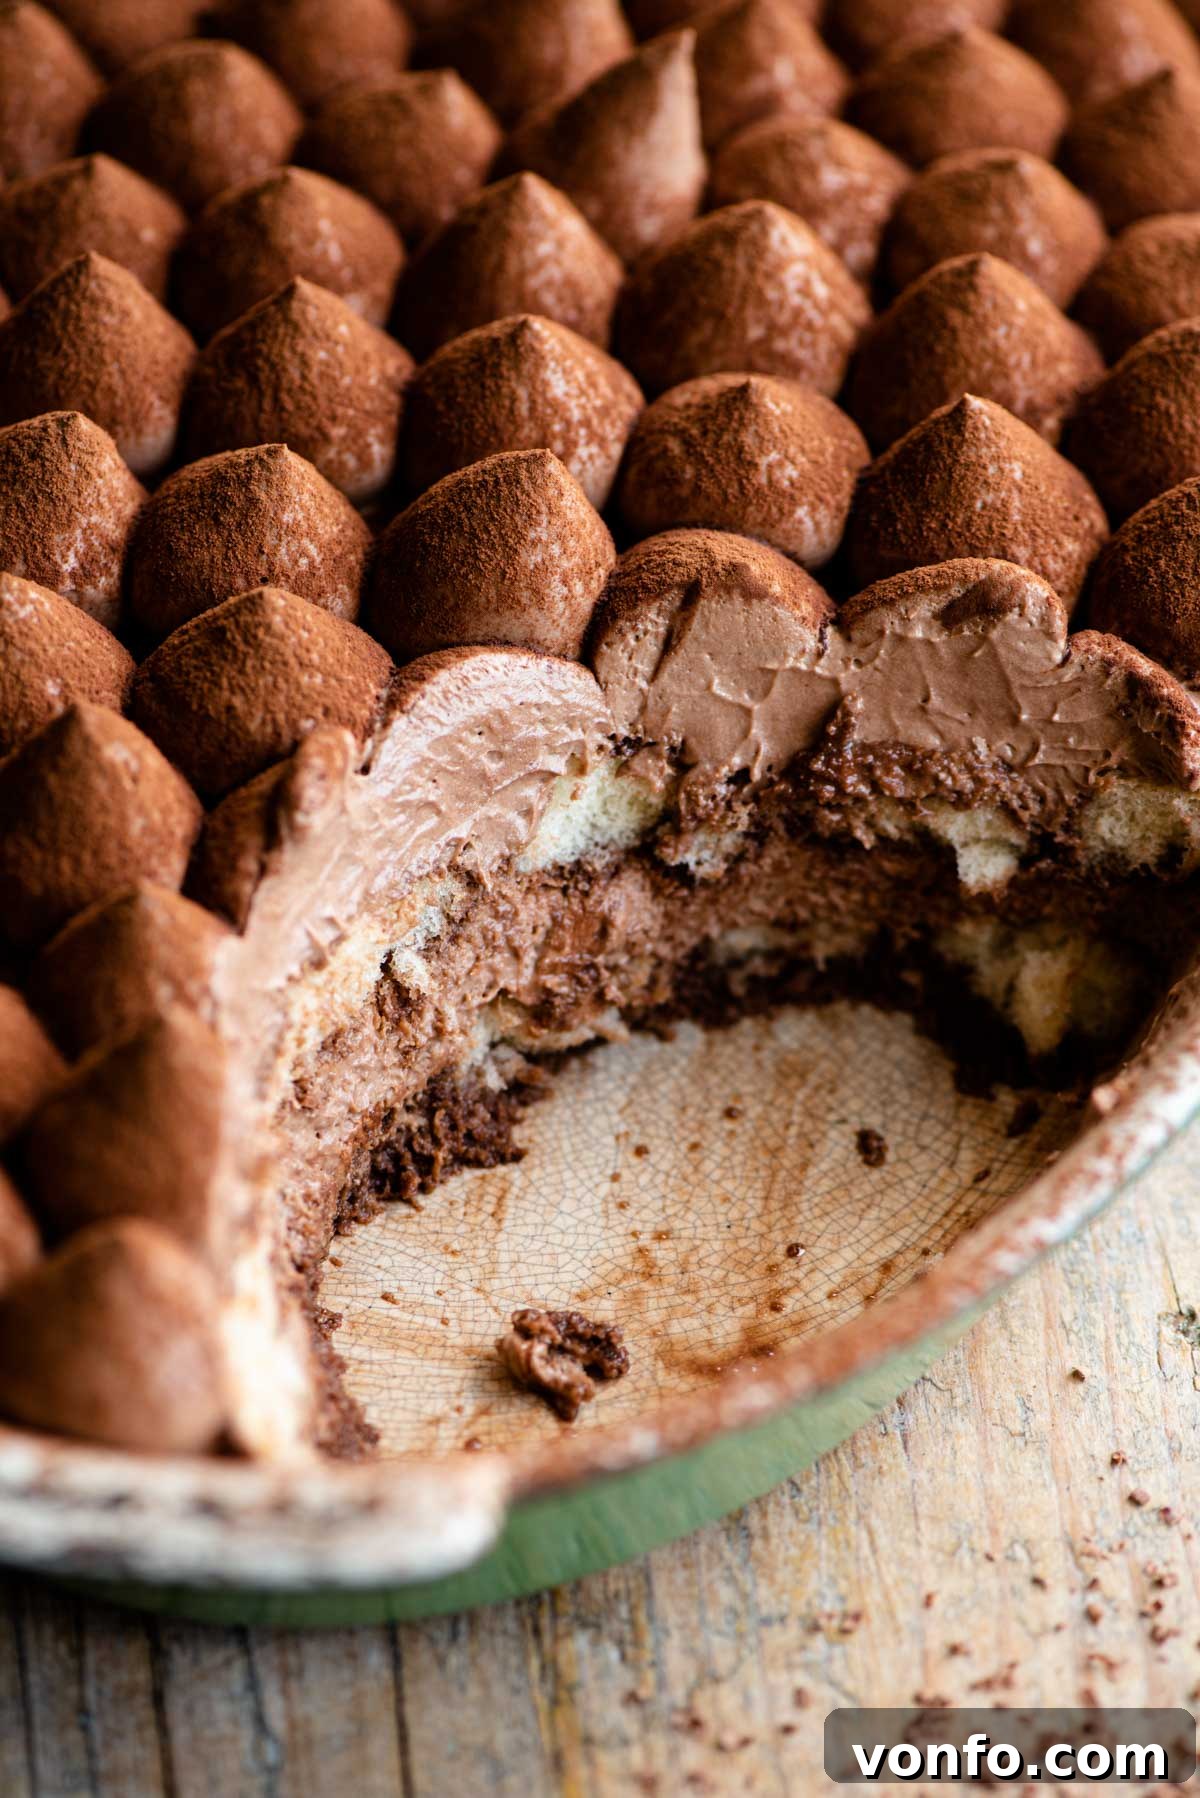
- Second Biscuit and Cream Layer: Create a second layer of soaked Savoiardi biscuits over the chocolate cream. Follow this with the remaining chocolate cream mixture. You have two options here: you can simply spread the remaining cream evenly over the top, or for a more decorative finish, follow the piping instructions below.
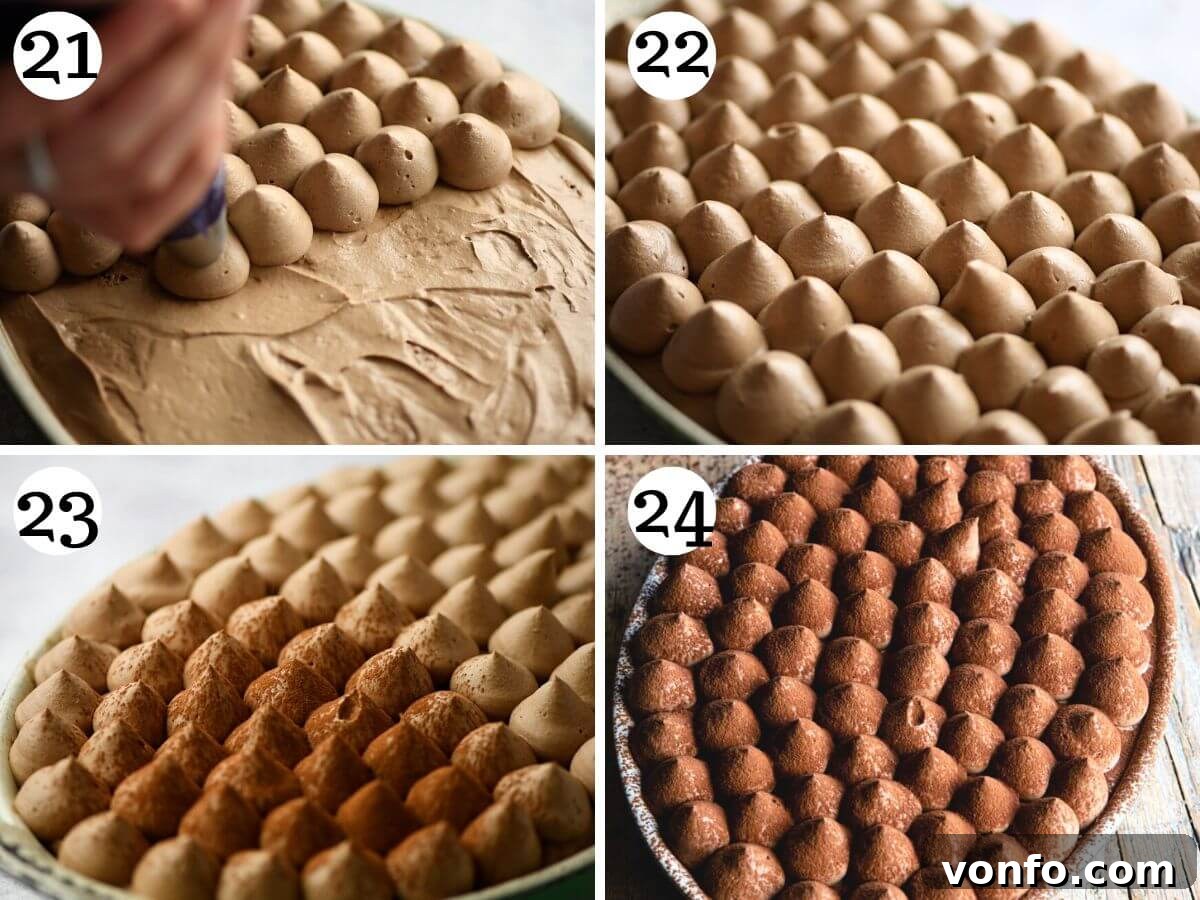
- Optional: Piping the Topping: If you desire an elegant, piped finish, first spread a thin, even layer of chocolate cream over the top. Then, fill a piping bag fitted with a round nozzle with the remaining cream. Pipe decorative rosettes or swirls all over the top surface of the tiramisu. This adds a beautiful visual appeal.
Phase 4: Chilling and Serving Your Masterpiece
Patience is key for the perfect tiramisu; chilling allows the flavors to meld and the dessert to set beautifully.
- Refrigerate for Setting: Once assembled, cover the dish loosely with plastic wrap. Transfer the Chocolate Tiramisu to the refrigerator and chill for at least 6-8 hours, or ideally, overnight. This chilling time is essential for the biscuits to fully soften, for the cream to set, and for all the incredible chocolate flavors to deepen and harmonize.
- Serve with a Dusting of Cocoa: Just before serving, lightly dust the top of your chilled tiramisu with a fine layer of unsweetened cocoa powder. This adds a beautiful finishing touch and a slight bitter contrast to the sweet, rich chocolate. Serve chilled and enjoy!
Recipe Tips, Creative Variations, and Frequently Asked Questions
Enhance your Chocolate Tiramisu experience with these expert tips and explore exciting ways to customize this delightful dessert. We also address common questions to help you master this recipe.
- Introduce a Liqueur Twist: For adults seeking an extra layer of flavor and a subtle kick, consider adding 2-3 tablespoons of your favorite liqueur to the chocolate dipping mixture. Excellent choices include Baileys Irish Cream for a creamy richness, Kahlúa for a deeper coffee-like note, Frangelico for a hint of hazelnut, or the classic Marsala wine for an authentic Italian touch. Experiment to find your perfect pairing!
- The Importance of Quality Chocolate: The quality of your dark chocolate significantly impacts the depth and richness of your tiramisu. Whenever possible, opt for a high-quality chocolate with a cacao content of 70% or higher. While this might seem intense, remember it’s blended with cream and sugar, which mellows its bitterness and creates a beautifully balanced, sweet, and complex flavor. Anything above 50% cacao will yield delicious results.
- Savoiardi vs. Ladyfingers – A Key Distinction: If you’re fortunate enough to find Italian biscuits specifically labeled as “Savoiardi,” they are the ideal choice due to their light, airy texture and excellent absorption capabilities. If you can only find generic “ladyfingers,” which are often denser, you’ll need to adjust your dipping time. Soak them for a couple of seconds longer on each side to ensure they absorb enough of the chocolate liquid without becoming overly soggy.
- Smart Prep for Easier Baking: This tiramisu is an excellent make-ahead dessert. The chocolate custard, which requires chilling, can be prepared 1-2 days in advance. Simply store it covered with plastic wrap directly on its surface in the refrigerator until you’re ready to assemble. Just remember to take it out of the fridge approximately 30 minutes before use, allowing it to slightly soften for easier mixing.
- Optimal Chilling Time is Crucial: While 6-8 hours is the minimum, chilling your Chocolate Tiramisu overnight (12+ hours) allows the flavors to fully meld, and the layers to set perfectly. This results in a more cohesive and intensely flavored dessert. Don’t rush this step!
- Serving Temperature: Tiramisu is best served well-chilled, directly from the refrigerator. This maintains its firm yet creamy texture.
- Decorating Ideas: Beyond a simple cocoa dusting, consider garnishing your tiramisu with chocolate shavings, fresh raspberries, or even a few chocolate-covered espresso beans for an extra touch of elegance.
Frequently Asked Questions (FAQs)
We successfully made our Chocolate Tiramisu in a 12×8 inch oval dish. However, you can easily use any similar-sized rectangular or square dish that accommodates the layers comfortably. The exact dimensions aren’t as critical as having enough surface area for the biscuit layers and depth for the cream.
This delectable Chocolate Tiramisu will stay fresh and delicious when stored properly in an airtight container in the refrigerator for 2-3 days. Its flavors tend to deepen and improve slightly on the second day!
Unfortunately, we do not recommend freezing this dessert. The delicate texture of the custard and whipped cream can significantly change once frozen and then thawed, potentially becoming watery or grainy. It’s best enjoyed fresh after its essential chilling period.
If you have tried this amazing Chocolate Tiramisu recipe or any other delightful recipe from our blog, we would absolutely love to hear from you! Please don’t hesitate to rate the recipe and share your experience in the comments section below – your feedback is invaluable to us. You can also FOLLOW US for more delicious food inspiration and updates on FACEBOOK, INSTAGRAM, and PINTEREST. For exclusive content and new recipes delivered straight to your inbox, be sure to sign up for our NEWSLETTER!
Refer to the Step-By-Step Photos Above for detailed visual guidance!
Many of our recipes include helpful step-by-step photos, expert tips, and tricks to ensure perfect results on your first attempt, and even a video tutorial!
Chocolate Tiramisu Recipe
By Emily
45 mins
10 mins
8 hrs
8 hrs 55 mins
8 servings

Equipment
-
12×8 inch dish
-
Piping bag and round tip nozzle (optional)
Ingredients
For the Chocolate Custard
- 5 egg yolks
- ⅓ cup sugar, (70g)
- ¼ cup cornstarch, (30g)
- 2.5 cups whole milk, (590ml)
- 5.5 ounces dark chocolate 70% cocoa, roughly chopped (150g)
For the Tiramisu Assembly
- 25-30 Savoiardi biscuits, (ladyfingers)
- 2 + ¾ cups heavy cream, double cream UK (600ml)
- 2 tablespoons cocoa powder
- 2 teaspoons sugar
- 1.5 cups hot water
Instructions
To Make the Chocolate Custard
-
Heat the milk in a saucepan until it begins to simmer, then turn off the heat and set aside.
-
In a large bowl, combine the egg yolks and sugar, mixing until well combined. Stir in the cornstarch until thoroughly blended.
-
Slowly pour the warm milk into the egg yolk mixture, whisking continuously to prevent lumps. Transfer the combined mixture back to the saucepan and heat on medium-low. Stir with a wooden spoon until it thickens enough to coat the back of the spoon (5-10 minutes).
-
*Tip* If your custard is taking longer to thicken, you can slightly increase the heat.
-
Once thickened, add the chopped dark chocolate and stir until it’s completely melted and smoothly incorporated without streaks.
-
Transfer the custard to a bowl, cover its surface directly with plastic wrap (cling film), and let it cool. Refrigerate for 1-2 hours (or prepare 1-2 days in advance).
-
Remove the custard from the fridge 30 minutes before continuing with the next steps.
To Assemble the Tiramisu
-
In a bowl, mix the cocoa powder and sugar, then whisk in the hot water until smooth and lump-free.
-
In a large mixing bowl, whisk the heavy cream with an electric whisk until it forms soft peaks.
-
Give the chocolate custard a quick whisk to ensure it’s smooth. Gently fold half of the whipped cream into the chocolate custard. Once combined, fold in the remaining half until uniformly blended.
-
Dip the Savoiardi biscuits into the cocoa liquid for 1-2 seconds on each side. Arrange them in a single layer in your dish, breaking some if needed to fit.
-
Spread just under half of the chocolate cream mixture over the first layer of Savoiardi, then add another layer of dipped biscuits.
-
Spread the remaining chocolate cream over the top. Alternatively, spread a thin layer and pipe the rest using a round nozzle for a decorative finish.
-
Refrigerate the tiramisu for at least 6-8 hours or overnight. Just before serving, dust a little cocoa powder over the top.
Video Tutorial
A video tutorial demonstrating the creation of this Chocolate Tiramisu is available. Search for “Chocolate Tiramisu” on our site or preferred video platform for a visual guide.
Notes
- Prep in Advance: The chocolate custard can be made 1-2 days ahead and kept refrigerated. Always remove it from the fridge 30 minutes before use.
- Add Liqueur: Incorporate 2-3 tablespoons of your preferred liqueur (e.g., Baileys, Kahlúa, Frangelico, Marsala) into the dipping mixture for an adult twist.
- Quality Chocolate: For the best flavor, use dark chocolate with at least 50-70% cocoa content, as it balances well with the sweetness of the cream.
- Ladyfingers vs. Savoiardi: If using denser ladyfingers instead of authentic Savoiardi biscuits, increase the soaking time slightly to ensure proper absorption.
- Storage & Freezing: Chocolate Tiramisu keeps well for 2-3 days in the refrigerator. Freezing is not recommended as it can alter the dessert’s texture.
Helpful Info for All Our Recipes
- We consistently use extra virgin olive oil in all recipes unless specified otherwise.
- For canned or jarred tomatoes, we recommend Cirio or Mutti brands for optimal flavor.
- All vegetables are assumed to be medium-sized unless stated differently.
- All recipes are meticulously tested and developed using a fan (convection) oven.
- Learn more about how nutrition is calculated on our site.
- Explore our essential Italian Pantry Staples.
- Discover all our recommended Essential Kitchen Tools for Italian Cooking.
Nutrition
Per Serving (1 of 8):
- Calories: 375 kcal
- Carbohydrates: 47g
- Protein: 10g
- Fat: 17g
- Saturated Fat: 8g
- Polyunsaturated Fat: 1g
- Monounsaturated Fat: 6g
- Trans Fat: 0.01g
- Cholesterol: 208mg
- Sodium: 92mg
- Potassium: 319mg
- Fiber: 3g
- Sugar: 18g
- Vitamin A: 489 IU
- Vitamin C: 0.003mg
- Calcium: 141mg
- Iron: 4mg
Nutrition information is automatically calculated and should only be used as an approximation.
Did you try this recipe?
Leave a comment below!