
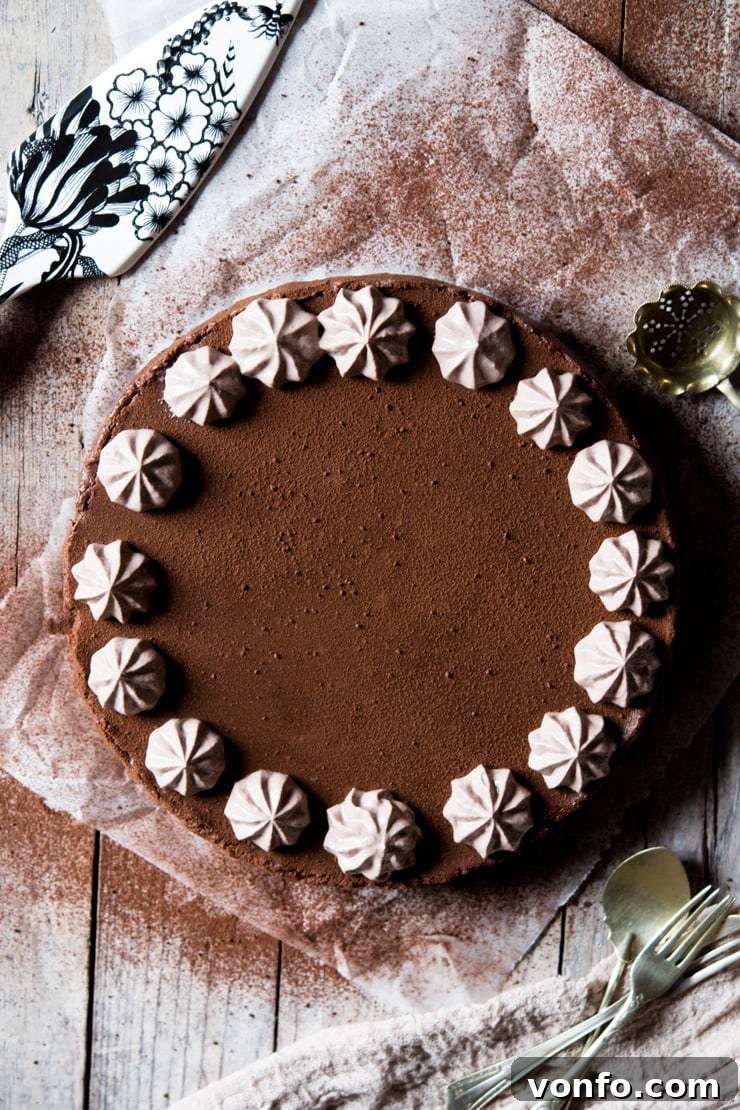
Indulge in the Ultimate No-Bake Chocolate Cheesecake with Oreo Crust
Prepare to be captivated by this incredibly rich, velvety, and utterly indulgent no-bake chocolate cheesecake. Featuring a delightful Oreo cookie crust, premium dark chocolate, creamy mascarpone cheese, fluffy marshmallows, and a subtle hint of coffee, this dessert is a true masterpiece. It’s incredibly easy to make, requires no oven, and promises a completely foolproof experience for bakers of all levels.
Because, let’s be honest, who doesn’t love a decadent chocolate treat from time to time?
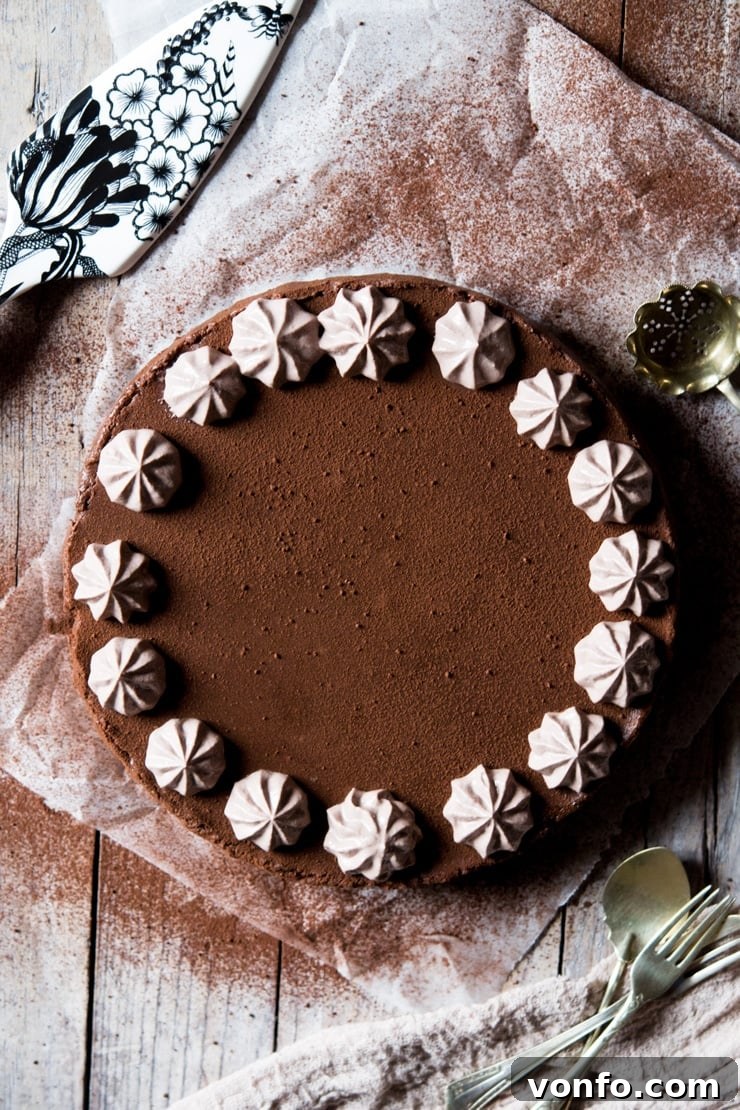
Why You’ll Fall in Love with This Easy No-Bake Chocolate Cheesecake
As a passionate admirer of no-bake desserts, I can confidently say they offer a unique combination of creamy textures, minimal effort, and explosive flavors. My definition of “no-bake” is simple: a recipe that requires no oven and is generally straightforward to prepare. If it involves melting some chocolate and butter over a stovetop, that’s perfectly fine with me – it’s still incredibly easy and keeps your kitchen cool, making it ideal for warm weather or busy schedules!
While I lovingly call this a “no-bake chocolate cheesecake,” it actually takes a delightful detour from traditional cream cheese, opting instead for the luxurious creaminess of mascarpone. This Italian cheese is folded in at the very end, contributing a silky smoothness and a richness that’s simply irresistible. But the real secret ingredient that I absolutely adore and that truly sets this recipe apart? Marshmallows!
These humble marshmallows melt seamlessly into the premium dark chocolate mixture, creating a rich, thick, and deeply indulgent filling with a lovely vanilla essence and a remarkably smooth consistency. It’s truly delicious! And because we cherish all things Italian and appreciate a complex flavor profile, I’ve infused this cheesecake with a touch of strong espresso. This addition provides a fantastic depth of flavor and a subtle, invigorating kick that perfectly complements the chocolate, elevating the dessert to a new level of sophistication.
Chef’s Tip for Customization: If coffee isn’t your preference, or you’d like to cater to those who prefer a purely chocolate experience, simply substitute the espresso with an equal amount of water. The result will be an intensely flavored, pure chocolate cheesecake that is equally divine. I’ve tested it both ways, and both versions are equally delicious and satisfying, ensuring everyone can enjoy a slice of this magnificent dessert.
Crafting Your Dream Dessert: Step-by-Step Guide to the Ultimate No-Bake Chocolate Cheesecake
Creating this show-stopping dessert is surprisingly simple and requires very little active time. Follow these straightforward steps to achieve a perfectly set, deliciously rich chocolate cheesecake that will impress everyone.
Step 1: Prepare the Irresistible Oreo Cookie Crust Foundation
The foundation of our no-bake chocolate cheesecake is a wonderfully crunchy, buttery, and incredibly flavorful Oreo crust. This base provides a perfect contrast to the smooth, rich filling.
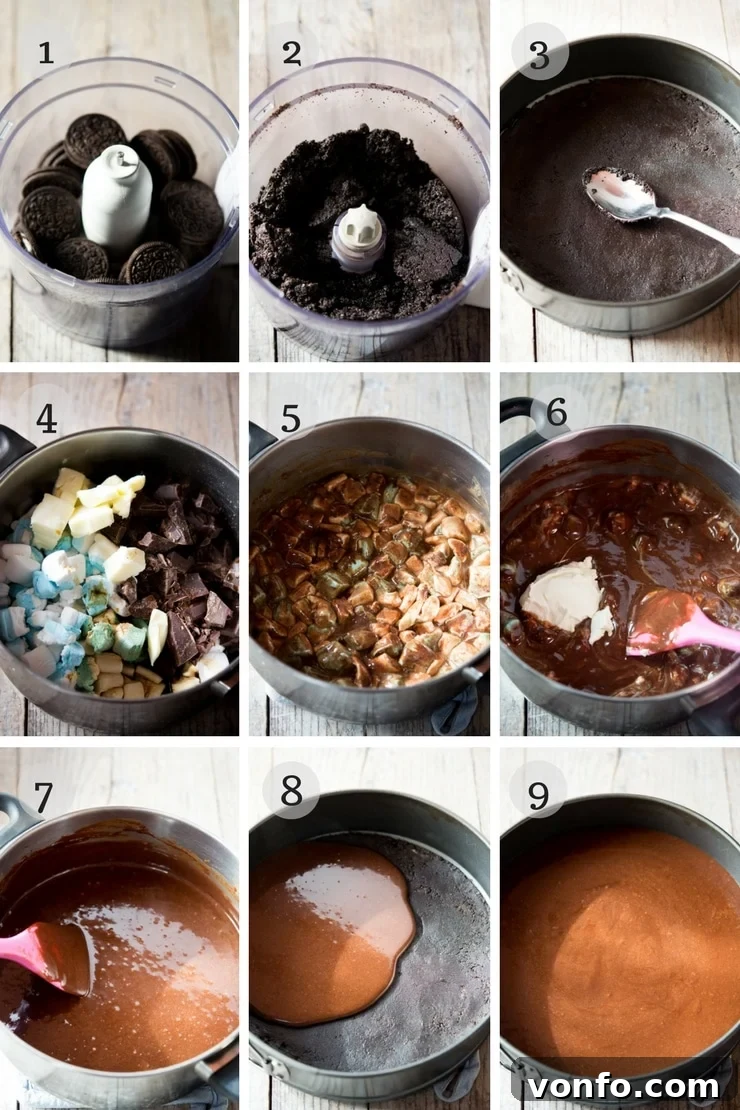
- Begin by melting half of the butter (70g) in a small saucepan over low heat. Keep a close eye on it to prevent burning.
- Meanwhile, place all 24 Oreo cookies – yes, the whole cookies, creamy white filling included! – into a food processor. The filling adds extra flavor and helps bind the crust.
- Blitz the cookies until they form a fine, sandy crumb. Ensure there are no large chunks remaining for a smooth crust.
- As the food processor runs, gradually drizzle in the melted butter. Continue to process until the crumbs are thoroughly moistened and resemble wet sand, indicating they are ready to form a cohesive crust.
- Transfer these buttery crumbs to a lined 8.5-inch (22cm) cake tin. A springform tin is ideal for easy unmolding.
- Using the back of a metal spoon or a flat-bottomed glass, firmly press the crumbs down to create an even, compact layer across the bottom of the tin. This firm pressing is crucial for a stable crust that won’t crumble when sliced.
- Once pressed, place the tin in the refrigerator to chill and set while you prepare the glorious chocolate filling. Chilling helps the butter solidify and hold the crust together.
Step 2: Crafting the Velvety Chocolate Marshmallow Filling
Next, let’s assemble the star of the show: the rich, smooth, and utterly dreamy chocolate filling, made extra special with marshmallows and mascarpone.
- Begin by preparing your key ingredients: cut the 6.1 oz (175g) marshmallows into smaller pieces to help them melt more evenly and quickly. Break the 10.5 oz (300g) dark chocolate into small chunks for the same reason.
- In a large saucepan, combine the remaining cubed butter (70g), the prepared marshmallows, dark chocolate chunks, 1/3 cup (80ml) water, and the 2 tablespoons of strong espresso (if using). If omitting coffee, use 2 tablespoons of water instead.
- Place the saucepan over a low to medium heat. Stir the mixture continuously as it heats. The goal is to melt all the ingredients completely into a smooth, glossy liquid. Be patient and keep stirring to prevent any scorching at the bottom of the pan.
- Once everything has almost completely melted, with only a few small, dissolving lumps of marshmallows remaining, remove the saucepan from the heat.
- Now, add the 1/2 cup (110g) mascarpone cheese. Gently fold the mascarpone into the warm chocolate mixture using a spatula until it is fully combined and the filling is uniform and smooth. The residual heat will help the mascarpone blend beautifully without curdling.
- Expert Tip for Lumps: If you find a few stubborn marshmallow lumps still lingering after adding the mascarpone, simply return the saucepan to very low heat for a few more seconds, stirring constantly until they fully dissolve. Be careful not to overheat, as prolonged high heat can affect the texture of the mascarpone.
- Flavor Enhancer: A tiny pinch of smoked sea salt flakes (or regular sea salt) added to the chocolate mixture truly elevates the flavor, intensifying the chocolate notes and making it extra delicious. This is a small step with a big impact on the overall taste profile!
Step 3: Assemble and Chill to Perfection
The final steps involve combining the prepared crust and filling, followed by the essential chilling process that transforms this mixture into a sliceable cheesecake.
- Retrieve your chilled Oreo cookie base from the refrigerator.
- Carefully pour the warm, luscious chocolate filling over the crust. Use a spatula to spread it evenly if necessary, ensuring a smooth top surface.
- Once the filling is in place, return the cake tin to the refrigerator. Allow the cheesecake to set for at least 1 hour, though 2-3 hours (or even better, overnight) is preferable for the firmest, most sliceable results. The longer it chills, the better the texture will be.
- Before serving, you can optionally dust the top with a layer of unsweetened cocoa powder for a sophisticated finish, or proceed with the optional ricotta frosting.
Optional Topping: Light and Tangy Ricotta Frosting
For an extra touch of elegance and a lovely contrast to the rich chocolate, consider adding a light and subtly tangy ricotta frosting. This optional topping adds a delicate creaminess and a beautiful visual appeal that makes the cheesecake even more impressive.
- In a mixing bowl, add 4 heaped tablespoons of ricotta cheese. Use a whisk to whip it until it becomes smooth and creamy, removing any lumps.
- Add 3 tablespoons of fine granulated sugar and sieve in 2 tablespoons of unsweetened cocoa powder. Sifting the cocoa powder prevents lumps in the frosting.
- Mix everything together gently until well combined and the frosting is uniform. Taste and adjust the sugar if you prefer a sweeter or less sweet frosting.
- For a professional and decorative look, transfer the mixture to a piping bag fitted with a large star-shaped nozzle. Pipe the frosting artistically around the edge of the cheesecake, or create swirls in the center, before serving.
P.S. The slightly uneven spaces of frosting around the cheesecake in some photos were truly driving me crazy, but I KNEW if I tried to correct it, I would have been left with a big brown, sticky mess (yeah, nice) and I probably would’ve cried. Sometimes, embracing the rustic charm and handmade touch is key!
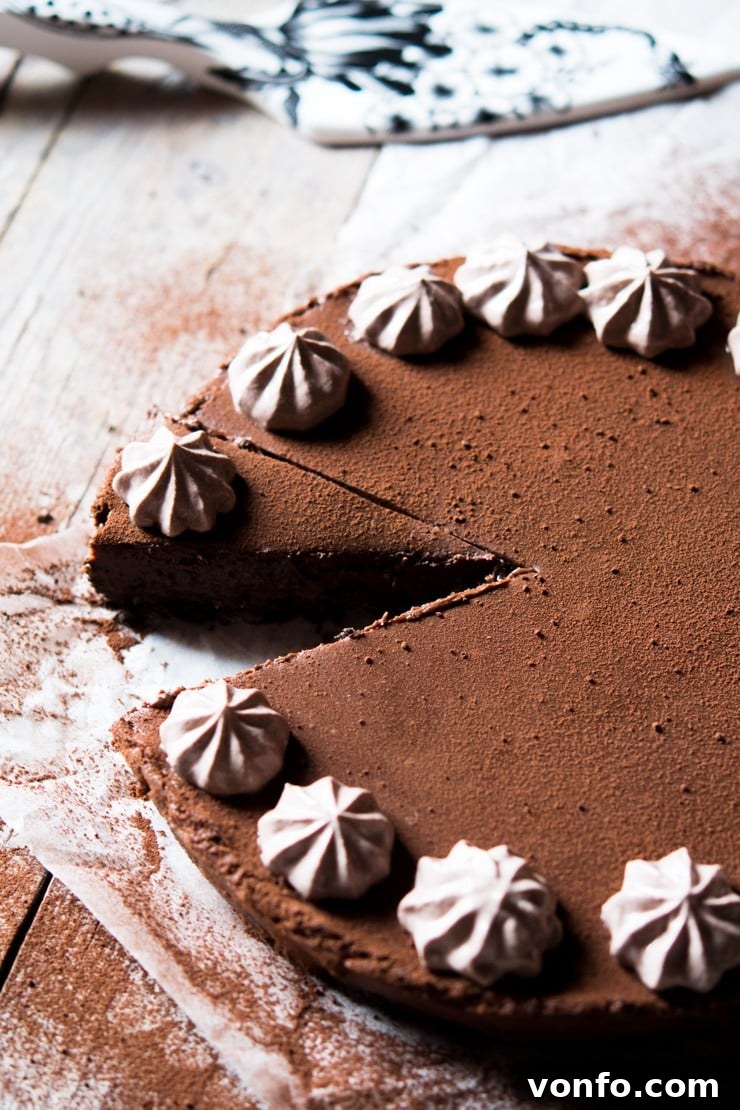
Tips for No-Bake Cheesecake Success & Creative Variations
This no-bake chocolate cheesecake recipe is incredibly versatile and forgiving. Here are some extra tips and ideas to make it truly your own, ensuring a perfect dessert every time:
- Endless Flavor Infusions: Don’t limit yourself to coffee! Experiment with adding other flavorings to your chocolate mixture. Orange zest offers a bright, citrusy counterpoint, a drop of peppermint extract provides a refreshing kick, or a splash of pure vanilla extract can deepen the overall sweetness and aroma. Almond extract is another delightful option for a subtle nutty note. Consider a hint of chili powder for a Mexican-inspired chocolate flavor!
- Coffee-Free Option: As previously mentioned, if you’re not a fan of coffee, simply replace the espresso with an equal amount of water for a pure, intense chocolate flavor. You could also use a decaffeinated espresso if you prefer the flavor without the caffeine kick.
- Chill Time is Key: While the active prep and cook times are wonderfully minimal, remember that the setting time in the refrigerator is absolutely essential for the cheesecake to firm up properly. For the best results and clean, elegant slices, allow at least 2-3 hours, or even better, chill it overnight. Patience truly pays off here.
- Freezing for Later Enjoyment: This cheesecake freezes beautifully, making it an excellent make-ahead dessert! To freeze, cut it into individual portions before chilling fully for easy serving later. Wrap each slice tightly in baking parchment, then place them in an airtight container or freezer-safe bag. Thaw completely in the refrigerator for several hours or overnight before enjoying.
- Creative Cookie Base Variations: While Oreos are a classic and delicious choice, feel free to experiment with other cookie crumbs for the base. Graham crackers, digestive biscuits, speculoos cookies, or even shortbread cookies would work wonderfully. Just remember to adjust the butter quantity as needed to achieve that ideal “wet sand” consistency.
- Elegant Decorating Ideas: Beyond a simple dusting of cocoa powder or our suggested ricotta frosting, consider elevating your cheesecake’s presentation. Garnish with fresh berries (raspberries or strawberries are excellent choices, offering a tart contrast), delicate chocolate shavings, a luscious drizzle of homemade caramel sauce, or a sprinkle of toasted, chopped nuts like hazelnuts or almonds.
Essential Equipment for Mastering This Recipe:
- An 8.5-inch (22cm) cake tin (springform tins are highly recommended as they make unmolding your beautiful cheesecake effortlessly simple!).
- A reliable spatula (like my very favorite pink one!) for smoothly folding ingredients and scraping every last bit of deliciousness from your bowls and pans.
- A food processor is essential for quickly and efficiently pulverizing the cookie crumbs for the base.
- A large saucepan for melting and combining the filling ingredients.
*This post contains affiliate links, which means I may earn a small commission if you purchase through them, at no extra cost to you. See my privacy policy for more info.
More Irresistible Chocolate Dessert Recipes to Explore
If you’re a true chocolate lover, then you’ve certainly come to the right place! After mastering this incredibly easy no-bake chocolate cheesecake, why not delve into some of these other fantastic chocolate creations from our kitchen? Each recipe promises indulgence and delight:
- Chocolate Panna Cotta: A silky, elegant Italian classic reimagined with a deep, rich chocolate twist. Perfect for a sophisticated dinner party.
- Homemade Nutella Chocolate Spread: Forget the store-bought version; this homemade spread is rich, hazelnutty, and incredibly satisfying. Perfect for spreading on toast, baking, or eating by the spoonful!
- Italian Hot Chocolate: Experience hot chocolate like never before – incredibly thick, intensely rich, and utterly decadent. A true indulgence for chilly evenings.
- Chocolate Hazelnut Ice Cream: A delightful combination of two beloved flavors, blended into a creamy, dreamy ice cream. Perfect for a warm day or alongside a slice of this cheesecake.
- Tiramisu Ice Cream: The iconic Italian dessert reimagined as a creamy, dreamy ice cream. All the flavors of tiramisu in a refreshingly cold treat.
No Bake Chocolate Cheesecake Recipe
By Emily
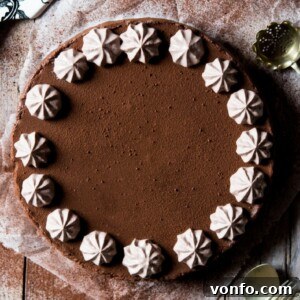
A no bake chocolate cheesecake made with an Oreo cookie base, dark chocolate, mascarpone cheese, marshmallows and a hint of coffee.
Prep Time: 20 mins | Cook Time: 10 mins | Total Time: 30 mins (Note: This excludes essential chilling time)
Servings: 16 servings
Ingredients
For the Cheesecake:
- 24 Oreo cookies (approximately 264g)
- 4.9 oz (140g) unsalted butter, divided
- 10.5 oz (300g) dark chocolate, high quality for best flavor
- 6.1 oz (175g) marshmallows, cut into small pieces
- 1/2 cup (110g) mascarpone cheese, softened
- 2 tbsp strong espresso (or water, for a coffee-free version)
- 1/3 cup (80ml) water
- 1 very small pinch smoked sea salt flakes (or regular fine sea salt)
- Unsweetened cocoa powder for dusting (optional, for garnish)
Optional Ricotta Topping:
- 4 heaped tbsp ricotta cheese
- 2 tbsp unsweetened cocoa powder
- 3 tbsp fine granulated sugar
Instructions
- Prepare the Crust: Melt half of the butter in a saucepan. Place all Oreo cookies (including filling) into a food processor. Blitz until fine crumbs form. While processing, gradually add the melted butter until crumbs are moistened.
- Form the Base: Press the buttery cookie crumbs firmly into the bottom of a lined 8.5-inch (22cm) cake tin, creating an even layer. Place the tin in the refrigerator to chill while preparing the filling.
- Melt Filling Ingredients: Cut marshmallows into small pieces and break dark chocolate into chunks. Add these to a large saucepan along with the espresso, water, and the remaining cubed butter.
- Cook the Filling: Place the saucepan over low/medium heat. Stir continuously until all ingredients are completely melted and the mixture is smooth. Once only a few small marshmallow lumps remain, remove from heat.
- Incorporate Mascarpone & Salt: Add the mascarpone cheese to the warm chocolate mixture. Stir gently until fully combined and smooth. Add a tiny pinch of sea salt flakes to enhance the chocolate flavor. If any marshmallow lumps persist, return to very low heat for a few seconds, stirring until dissolved.
- Assemble: Remove the chilled Oreo base from the fridge. Pour the warm chocolate filling over the crust and spread evenly.
- Chill Thoroughly: Return the cheesecake to the refrigerator and allow it to set for at least 1-3 hours, or ideally overnight, for the best results. Dust with unsweetened cocoa powder before serving, if desired.
- For the Optional Topping: In a mixing bowl, whisk ricotta cheese until smooth. Add sugar and sift in cocoa powder. Mix thoroughly until combined. Transfer to a piping bag with a star nozzle (if desired) and pipe the frosting around the edge of the cheesecake before serving.
Notes
Tips for Perfection:
- Flavor Variations: Enhance the chocolate with orange zest, a drop of mint extract, or extra vanilla extract.
- Coffee-Free Option: Easily replace the espresso with water for a pure, intense chocolate flavor.
- Freezing Instructions: This cheesecake freezes well. Cut into individual portions, wrap in baking parchment, and store in an airtight container. Thaw completely in the refrigerator before serving.
- Overall Time: Please note that the “Total Time” listed for the recipe card excludes the crucial chilling time needed for the cheesecake to set.
Nutrition Information (Approximate Per Serving)
The following nutritional values are automatically calculated and should be used as an approximation. They are based on 16 servings.
Calories: 325 kcal
Carbohydrates: 30 g
Protein: 3 g
Fat: 21 g
Saturated Fat: 12 g
Cholesterol: 26 mg
Sodium: 161 mg
Potassium: 171 mg
Fiber: 2 g
Sugar: 18 g
Vitamin A: 330 IU
Calcium: 30 mg
Iron: 3.8 mg
*Percent Daily Values are based on a 2000 calorie diet. Your daily values may be higher or lower depending on your calorie needs.