
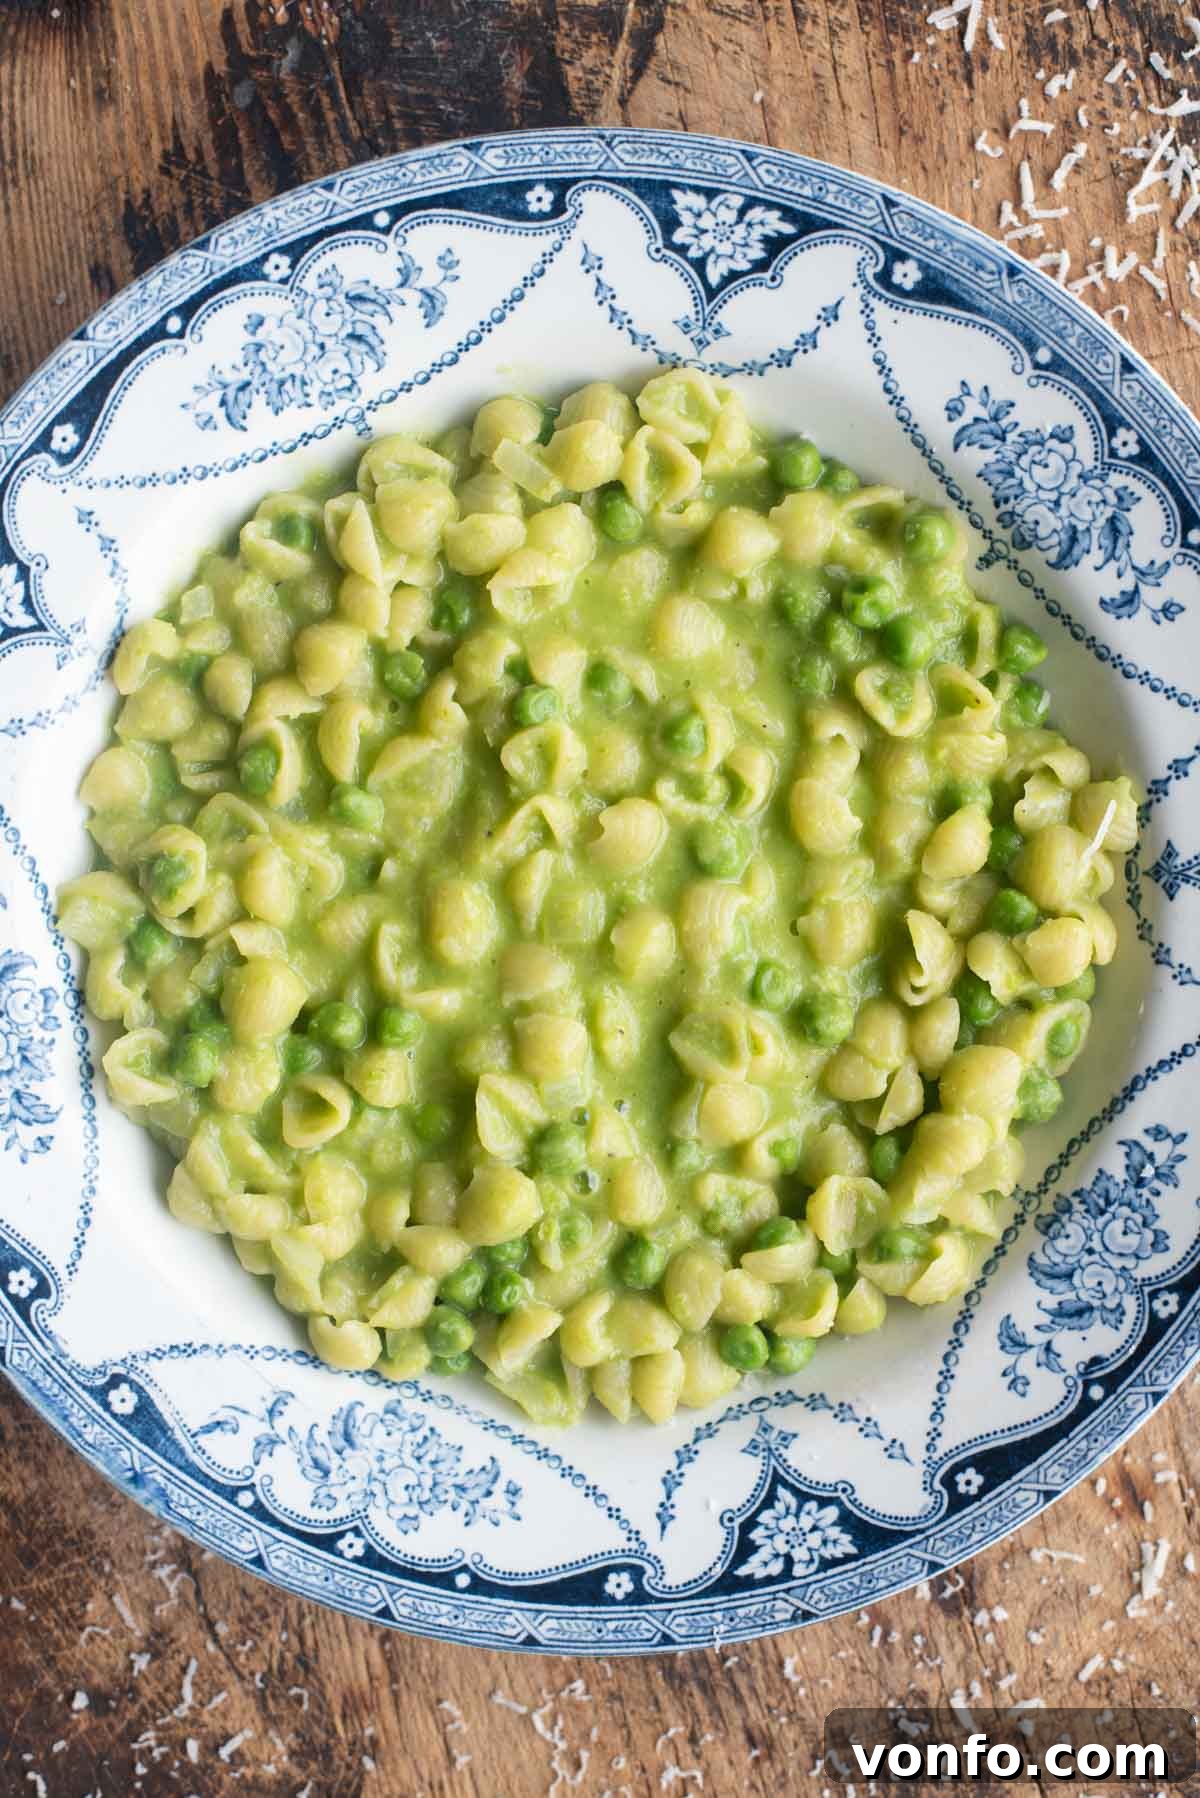
Pasta e Piselli: Your New Favorite Quick & Creamy Comfort Food
Pasta e Piselli, an Italian phrase meaning “pasta and peas,” is a wonderfully simple yet profoundly comforting dish that embodies the heart of Italian home cooking. Crafted from humble ingredients like small pasta, sweet peas, and sharp Pecorino Romano cheese, it delivers a creamy, rich flavor that is utterly delicious. What truly makes this recipe a weeknight hero is its incredible speed – it’s ready in under 30 minutes, making it the perfect solution for busy evenings when you crave something wholesome and satisfying.
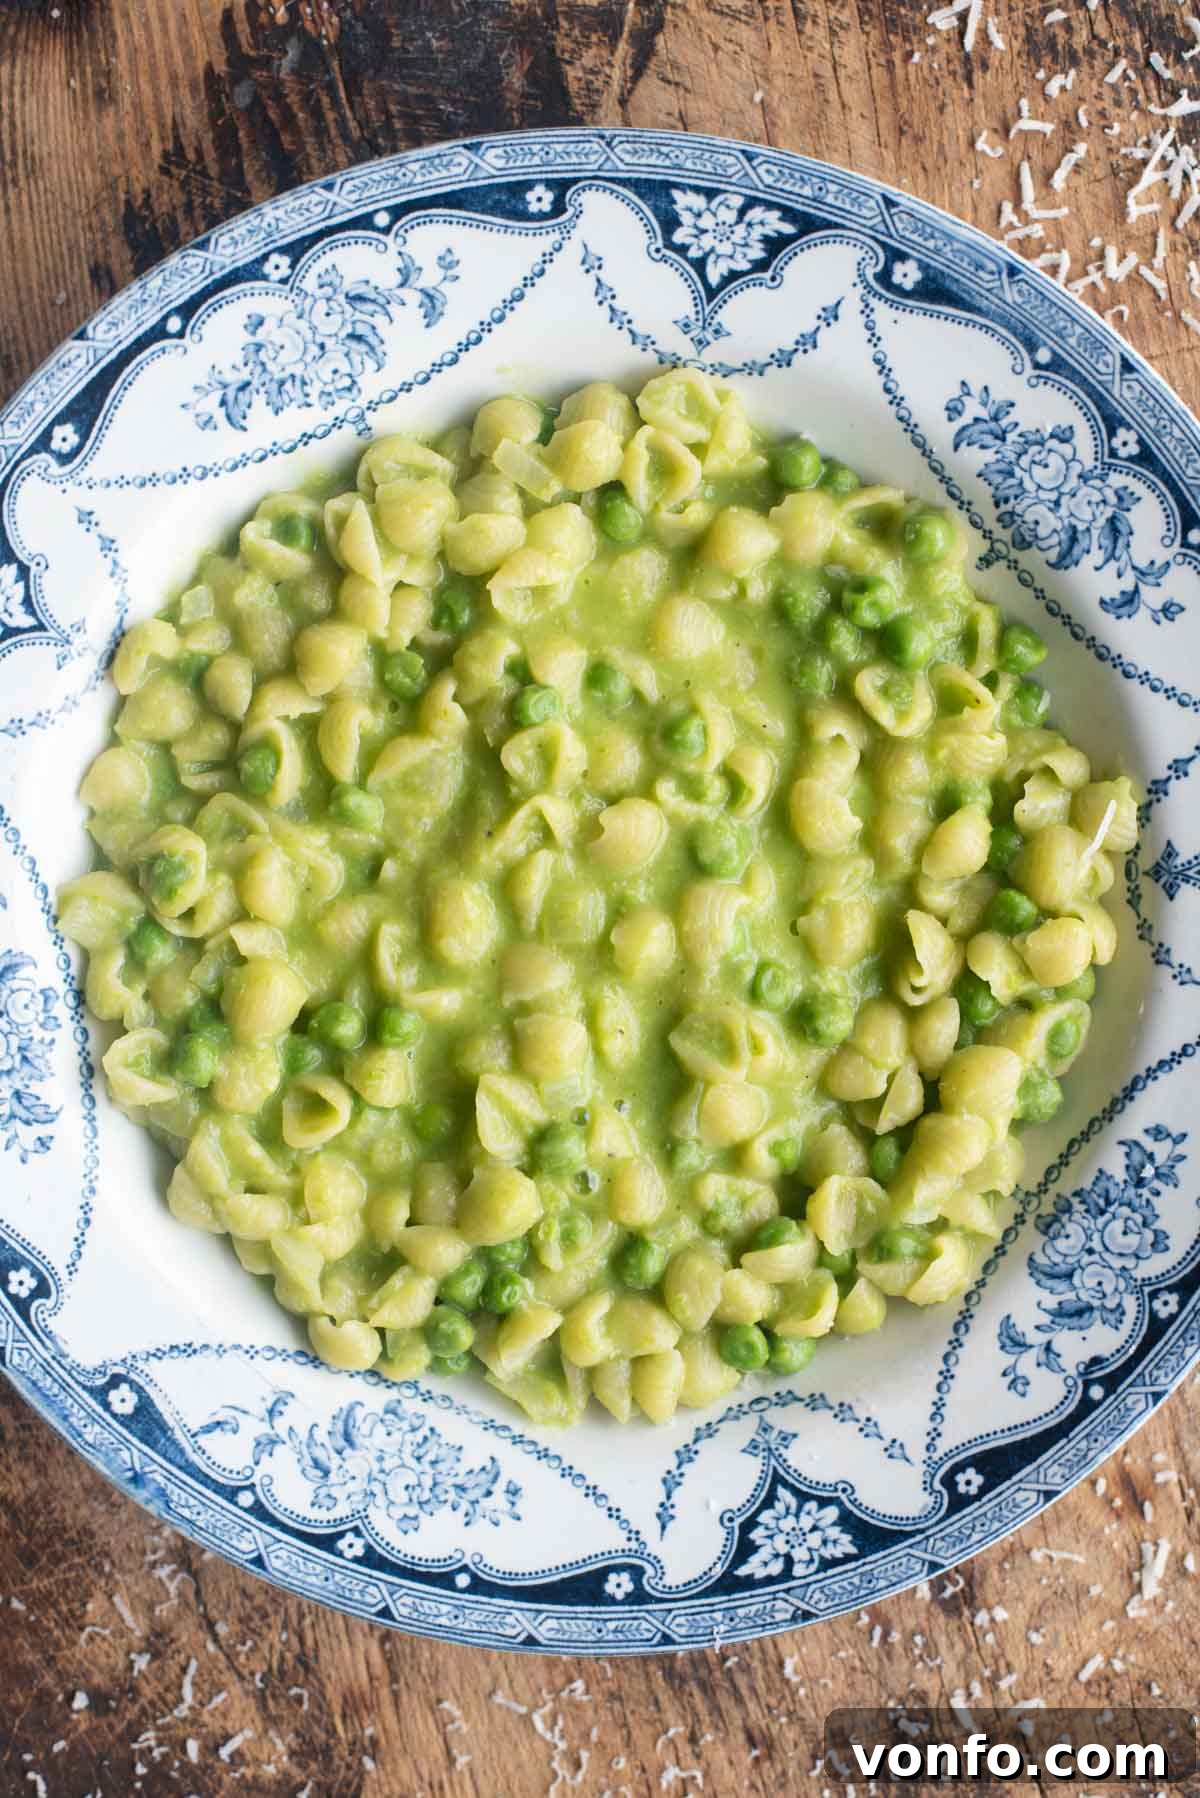
Often, when encountering a recipe this straightforward, there’s a temptation to add more – perhaps a rich stock, a medley of herbs, or even some garlic. However, the true beauty of Pasta e Piselli lies in its minimalist approach. Trust the simplicity; the dish shines brightest when its core ingredients are allowed to sing. This recipe proves that you don’t need a complicated ingredient list to create an unbelievably flavorful and deeply satisfying meal.
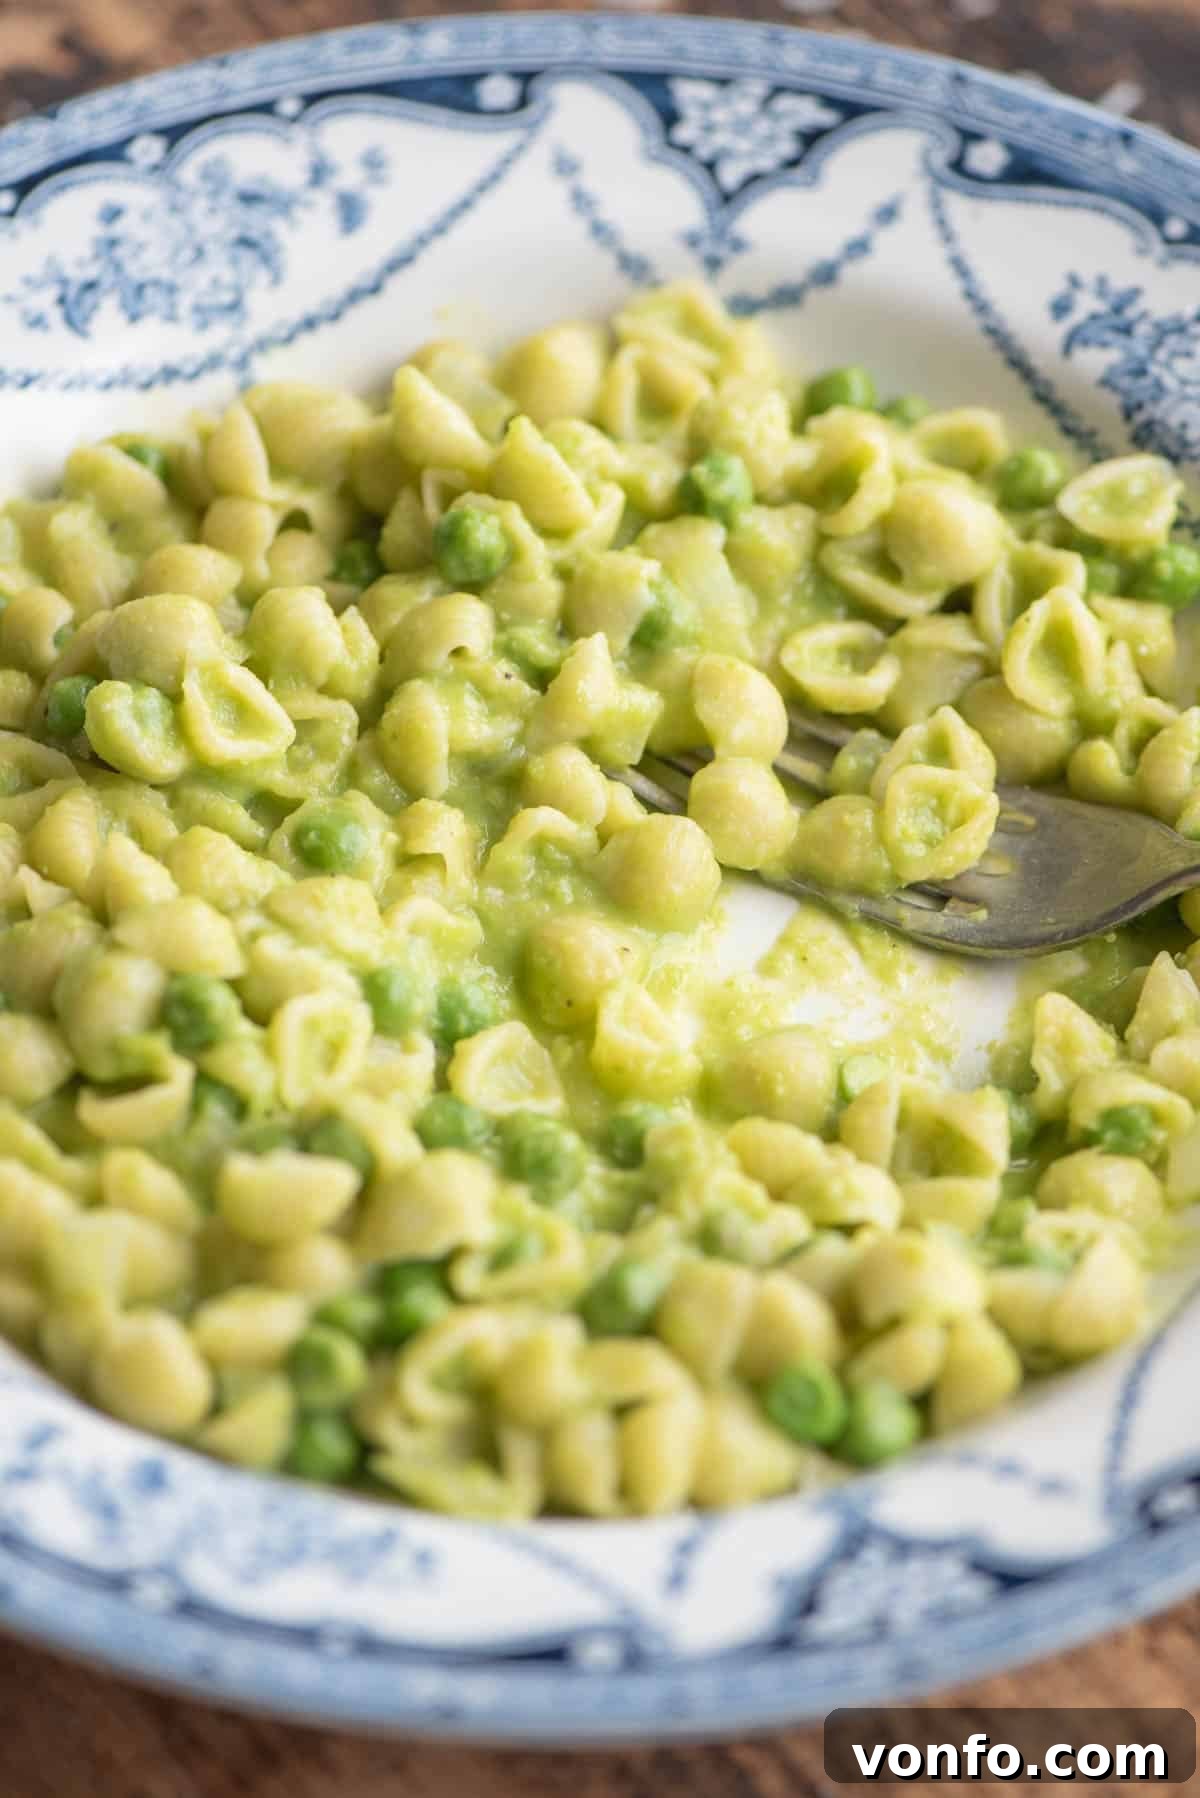
This delightful pasta creation can sometimes blur the lines between a hearty pasta dish and a luscious soup, much like other Italian classics such as Pasta e Fagioli (pasta and beans) or Pasta e Ceci (pasta and chickpeas). The exact consistency of Pasta e Piselli is entirely a matter of personal preference. Some prefer it on the thinner, more soupy side, perfect for spooning. Others, like me, enjoy it thick and saucy, clinging beautifully to every piece of pasta. Be mindful that the sauce thickens rapidly as it cools, so I highly recommend starting with a slightly looser consistency to ensure it remains wonderfully creamy when served.
While often celebrated as an ideal recipe for the freshness of Spring, the convenience of using frozen peas means this comforting dish can be savored and enjoyed throughout all four seasons. It’s a versatile and adaptable meal that brings warmth and flavor to your table, no matter the time of year.
Explore the full recipe below, complete with detailed ingredient notes, step-by-step photographs, helpful cooking tips, exciting variations, and a printable recipe card for your convenience.
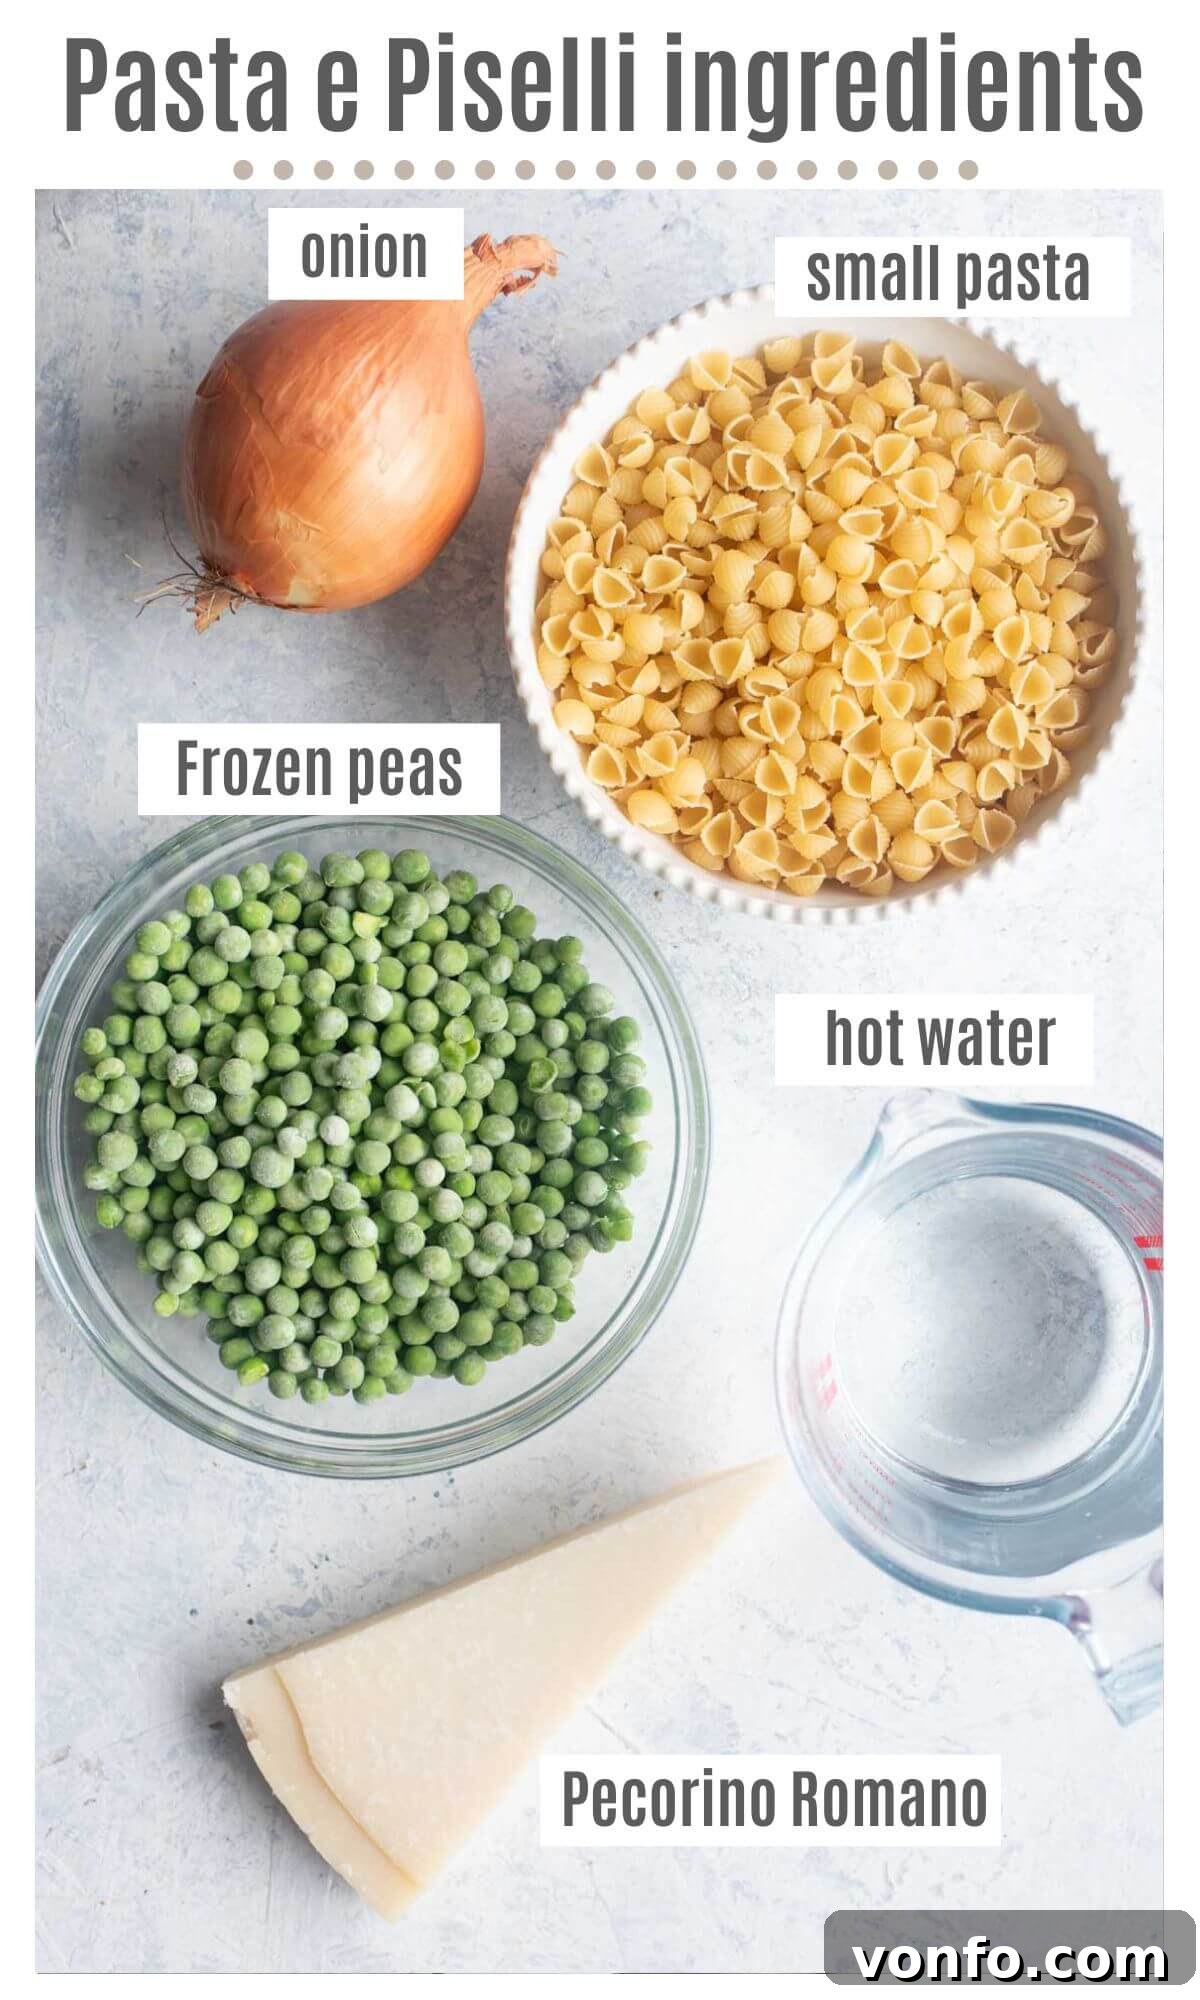
Essential Ingredients for Perfect Pasta e Piselli
Ingredient Notes and Expert Tips for the Best Flavor
Crafting the perfect Pasta e Piselli requires just a handful of quality ingredients. Here’s a closer look at what you’ll need and how to make the best choices:
- Frozen Peas: The All-Season Star – While fresh peas offer a delightful seasonal touch, frozen peas are a fantastic, economical, and readily available alternative that performs beautifully in this dish. They are often picked and flash-frozen at their peak ripeness, locking in their sweet flavor and vibrant color. Using frozen peas ensures you can enjoy this comforting meal any time of year without compromising on taste or quality. If using fresh peas, ensure they are tender and cook them slightly longer than frozen ones.
- Small Pasta Shapes: The Perfect Pairing – The choice of pasta is crucial for an authentic Pasta e Piselli experience. Opt for small, sturdy pasta shapes that can hold the creamy sauce and are similar in size to the peas themselves. Excellent choices include Ditali (small thimbles), Ditalini (even smaller thimbles), or Margheritini (tiny daisy-shaped pasta). These small shapes cook quickly and integrate seamlessly with the peas, creating a harmonious texture in every bite. Avoid long pasta strands, as they won’t absorb the sauce in the same way.
- Hot Water: The Flavorful Foundation – Starting with hot, even boiling, water significantly speeds up the cooking process for this recipe. While cold water can certainly be used, it will extend the overall cooking time as the pan needs to come to a simmer before the pasta begins to cook properly. Using hot water helps to quickly create the broth-like consistency that is characteristic of this dish and ensures the pasta cooks evenly. For an extra layer of flavor, some cooks opt for vegetable broth, though the traditional version shines with just water, letting the pea and cheese flavors dominate.
- Pecorino Romano: The Salty, Umami Kick – This hard, salty Italian cheese made from sheep’s milk is absolutely essential for the authentic taste of Pasta e Piselli. Its sharp, tangy, and intensely savory flavor beautifully complements the sweetness of the peas. Always, *always* use freshly grated Pecorino Romano for the best results; pre-grated cheeses often contain anti-caking agents that can affect the texture and melt differently. If Pecorino Romano is unavailable or you prefer a milder taste, high-quality Parmigiano Reggiano can be used as a substitute, offering a nuttier, less assertive profile.
- Onion and Olive Oil: The Aromatic Base – A finely chopped onion, gently sautéed in good quality extra virgin olive oil, forms the aromatic foundation (soffritto) for this dish. This slow cooking of the onion draws out its natural sweetness, providing a subtle depth of flavor that is key to the dish’s overall balance. Don’t rush this step!
- Salt and Freshly Ground Black Pepper: Seasoning to Taste – Simple yet vital for enhancing all the other flavors. Season generously, tasting as you go, especially after adding the cheese.
Step-by-Step Guide to Crafting Creamy Pasta e Piselli
Follow these simple steps to create a wonderfully comforting bowl of Pasta e Piselli:
Step 1: Build the Aromatic Foundation
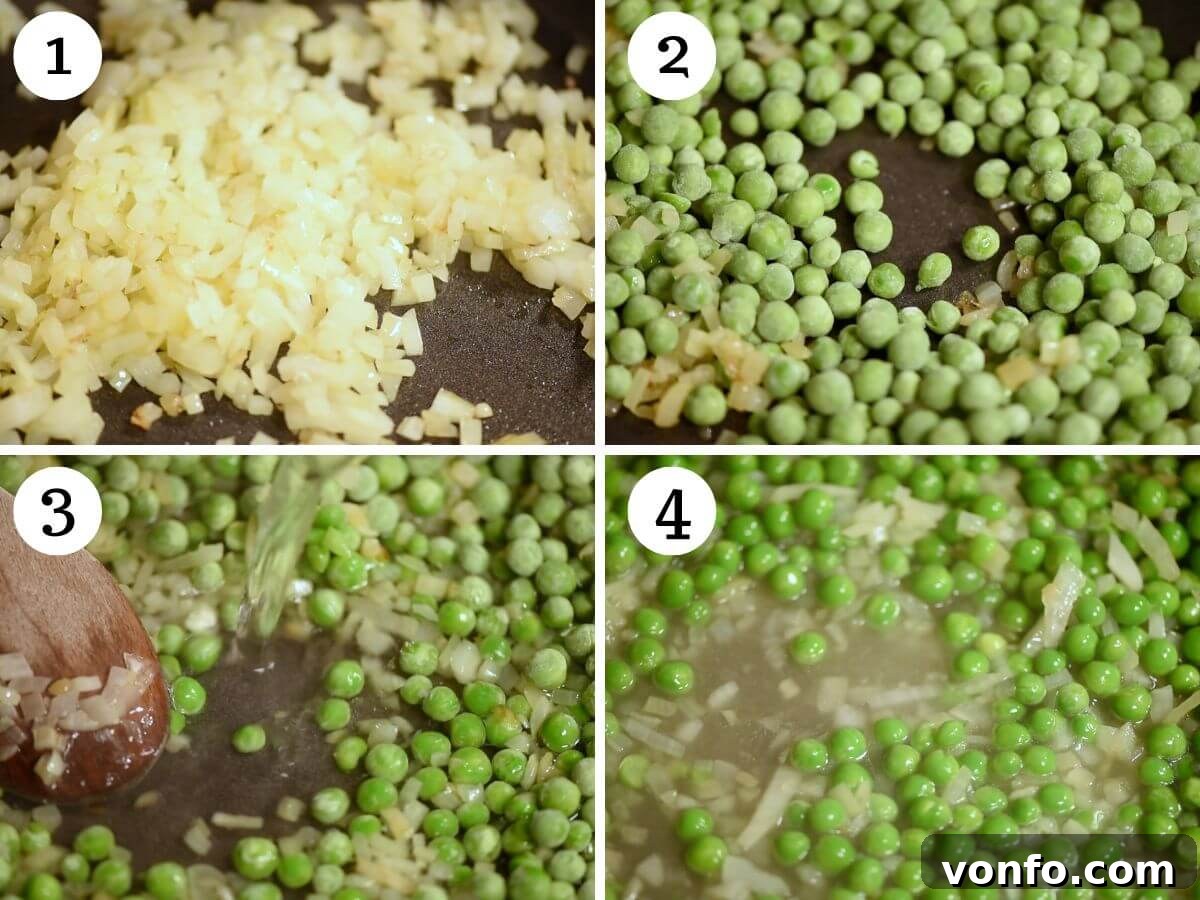
Begin by heating 2 tablespoons of good quality olive oil in a large, sturdy pan or pot over medium heat. Once shimmering, add the finely chopped large onion. Sauté the onion gently and patiently, stirring occasionally, until it becomes soft, translucent, and fragrant. This process should take about 5-7 minutes. Avoid browning the onion; the goal is to soften it to release its sweet flavors, which will be the delicate base of your sauce (photo 1).
Step 2: Gently Cook the Peas
Once the onion is perfectly tender, add the frozen peas to the pan. Pour in approximately 200ml (about 3/4 cup) of hot water. Bring the mixture to a gentle simmer and cook for just 1-2 minutes. The peas should be cooked through, vibrant green, and tender-crisp. Overcooking at this stage can make them mushy, so keep an eye on them (photos 2-4).
Step 3: Create the Creamy Pea Puree
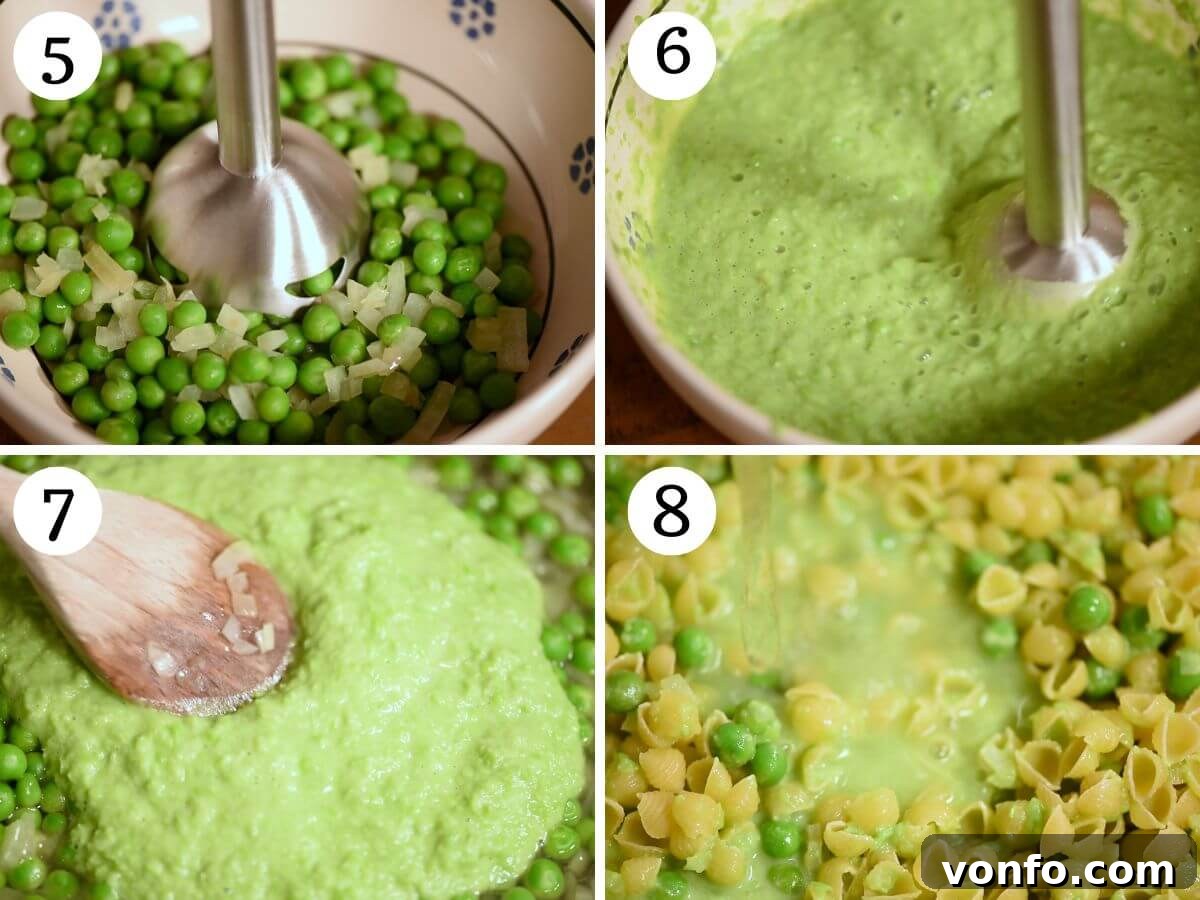
Carefully remove slightly more than half of the cooked peas from the pan and transfer them to a separate bowl. Add a small splash of the hot cooking water (or fresh hot water if needed) to the bowl with the reserved peas. Using an immersion blender, blitz the peas until they form a smooth, vibrant puree. Alternatively, you can transfer the peas to a regular blender and blend until smooth. Once pureed, return this creamy pea mixture to the pan with the remaining peas and onions. This blending step is key to achieving the dish’s signature creamy consistency without using actual cream (photos 5-7).
Step 4: Cook the Pasta to Al Dente Perfection
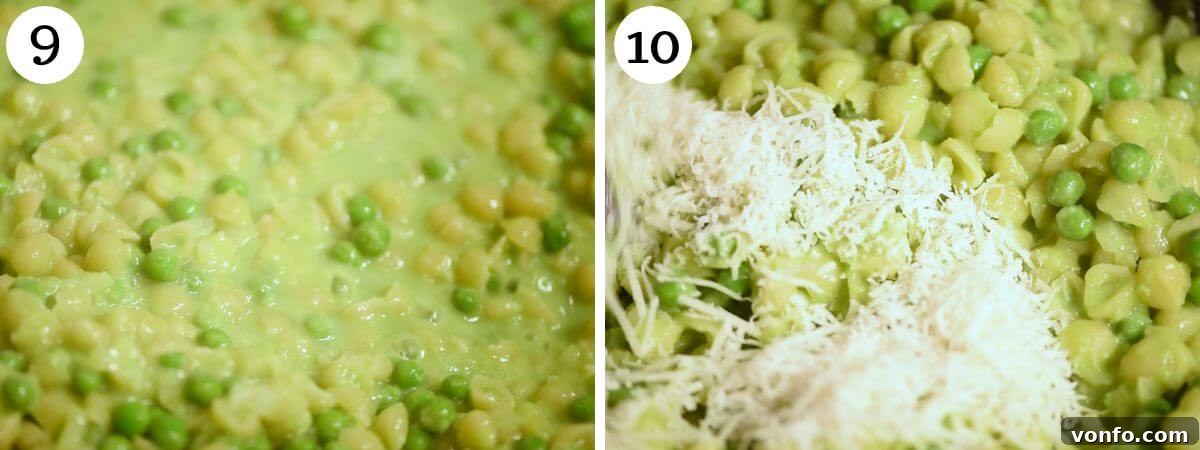
Now, add the small pasta shapes to the pan, along with the remaining hot water (or vegetable broth if you prefer) and a generous pinch of salt and freshly ground black pepper. Bring the entire mixture to a gentle simmer, then stir the pasta frequently to prevent sticking and ensure even cooking. Continue to cook until the pasta is perfectly “al dente” – tender with a slight bite in the center. The sauce should have a thick, creamy, and luscious consistency. If it appears too thick for your liking, don’t hesitate to loosen it with another splash of hot water or broth until it reaches your desired texture (photos 8 and 9).
Step 5: Finish with Cheese and Serve
Once the pasta is cooked and the sauce has reached its ideal consistency, remove the pan from the heat. Immediately stir in the freshly grated Pecorino Romano cheese. The residual heat from the pasta and sauce will melt the cheese, creating an even more velvety and flavorful sauce. Serve your Pasta e Piselli immediately, garnished with a little extra Pecorino Romano if desired. This dish is best enjoyed fresh, as the sauce will continue to thicken as it cools (photo 10).
Expert Tips & Frequently Asked Questions for Pasta e Piselli
Mastering Pasta e Piselli is easy with these helpful hints:
- Choosing the Right Pasta Shape: The success of Pasta e Piselli largely depends on using a small pasta shape. While the specific variety isn’t critical, aim for one that is comparable in size to a pea. This ensures that each spoonful offers a delightful balance of pasta and peas, and the sauce adheres beautifully. Ditalini, ditali, or even small elbow macaroni work wonderfully.
- Adjusting Pasta Consistency to Your Liking: One of the beauties of this dish is its adaptability. You can easily serve Pasta e Piselli as a more soupy, broth-like dish, or a thicker, richer, saucier creation. If you prefer it looser, simply add more hot water or vegetable broth, a splash at a time, until it reaches your desired consistency. Remember, it will thicken as it cools, so a slightly looser consistency hot off the stove is often ideal.
- Effortless Blending for Creaminess: An immersion blender (hand blender) is incredibly convenient for creating the smooth pea puree directly in the pan, saving on washing extra dishes. However, a regular stand blender will work just as well. If using a stand blender, you might need to add a little extra water or cooking liquid to help it blend smoothly. Be cautious when blending hot liquids; ensure the blender lid is vented.
- Delightful Variations (Optional Additions): While I wholeheartedly advocate for enjoying Pasta e Piselli in its purest, traditional form, which I find absolutely perfect, there are popular variations you might consider. Some enjoy adding a finely diced pancetta or guanciale, rendered crispy at the start with the onion, for a savory depth. Others introduce a clove or two of minced garlic along with the onion for an aromatic boost. Fresh mint or parsley, stirred in at the end, can also add a lovely herbaceous note. Feel free to experiment if you wish, but first, try the classic!
Frequently Asked Questions
While Pasta e Piselli can be stored in an airtight container in the refrigerator for 1-2 days, it is truly best enjoyed immediately after preparation. The pasta continues to absorb the sauce as it cools and sits, causing it to thicken significantly. When reheating, you will likely need to add a splash of hot water or broth to loosen the consistency and bring back its creamy texture. I do not recommend freezing this dish, as the pasta can become mushy upon thawing and reheating.
This recipe is naturally vegetarian if you omit any optional meat additions like pancetta. To make it vegan, simply substitute the Pecorino Romano cheese with a good quality nutritional yeast for a cheesy, umami flavor, or a plant-based grated parmesan alternative. Ensure any broth used is vegetable-based.
A large, heavy-bottomed pot or a deep skillet is ideal for making Pasta e Piselli. This provides ample space for sautéing the onions, simmering the peas, and cooking the pasta evenly, preventing it from sticking. A pan with high sides also helps contain the liquid as the pasta cooks.
More Delicious Italian Pasta Recipes to Explore
If you’ve fallen in love with the comforting simplicity of Pasta e Piselli, you’ll surely enjoy these other Italian pasta recipes from our kitchen. Each offers a unique taste of Italy, perfect for any occasion:
Pasta
Pasta e Ceci (Pasta with Chickpeas)
Soups
Pasta Fagioli Soup – Pasta & Beans
Pasta
Creamy Tomato Pasta with Italian Sausage
Pasta
Tortellini alla Panna
If you’ve tried this delightful Pasta e Piselli recipe or any other recipe from our blog, please don’t hesitate to rate the recipe and share your experience in the comments below! We absolutely love hearing from you and learning about your culinary adventures. You can also follow us on Facebook, Instagram, and Pinterest for daily inspiration, or sign up for our Newsletter to get our latest delicious recipes delivered straight to your inbox.
Step By Step Photos Above
Most of our recipes come with step by step photos, helpful tips and tricks to make it perfectly first time and even video!
Pasta e Piselli (Pasta and Peas)
By Emily
10 mins
20 mins
30 mins
4 servings
Ingredients
- 1 large onion, finely chopped
- 2 cups (300g) frozen peas , (can also use fresh)
- 2 cups (250g) small pasta , such as ditalini or Margheritini
- 3 cups (700ml) hot water
- ½ heaped cup (50g) Pecorino Romano,, finely grated
- Salt and pepper, to taste
- 2 tablespoons olive oil, extra virgin preferred
Instructions
-
Add 2 tablespoons of olive oil to a large pan on a medium heat and add the onion. Saute the onion gently until soft and translucent, about 5-7 minutes.
-
Add the peas with about 200ml (3/4 cup) water and simmer for 1-2 minutes until the peas are cooked through and vibrant.
-
Remove just over half of the peas to a bowl and add a splash of water. Blitz until smooth with an immersion blender (or regular blender), then add the puree back to the pan.
-
Add the pasta with the remaining water (or hot vegetable broth) and a good pinch of salt and pepper. Bring to a simmer and stir the pasta frequently until al dente. The sauce should have a thick and creamy consistency, but if it’s too thick, you can loosen it with another splash of hot water.
-
Turn off the heat and stir in the freshly grated Pecorino cheese. Serve immediately, garnished with extra cheese if desired.
Notes
For best results, keep these tips in mind:
- Pasta Shape: Always use a small pasta shape similar in size to peas for optimal texture.
- Consistency Control: Easily adjust the sauce’s thickness by adding more hot water or broth to achieve your preferred soupy or creamy texture.
- Blending Efficiency: An immersion blender is highly recommended for quick and easy pea pureeing directly in the pot. If using a regular blender, add a little extra liquid to aid blending.
- Flavor Variations: While the traditional recipe is perfect, feel free to add pancetta or garlic for a deeper flavor profile if desired.
- Storage & Reheating: Pasta e Piselli is best served fresh. Leftovers will keep for 1-2 days in the fridge, but the sauce will thicken. Reheat gently with an extra splash of water or broth; freezing is not recommended.
Helpful Info for All Recipes
- I always use extra virgin olive oil in all of my recipes unless stated otherwise.
- When I use canned or jarred tomatoes of any kind, I always use Cirio or Mutti brands for the best results and flavour.
- All vegetables are medium sized unless stated otherwise.
- All recipes are tested and developed using a fan (convection) oven.
- Find out more about how nutrition is calculated.
- Check out our must-have Italian Pantry Staples.
- You can also find all our Essential Kitchen Tools for Italian Cooking.
Nutrition
Carbohydrates: 60g |
Protein: 16g |
Fat: 12g |
Saturated Fat: 3g |
Polyunsaturated Fat: 1g |
Monounsaturated Fat: 6g |
Cholesterol: 13mg |
Sodium: 167mg |
Potassium: 373mg |
Fiber: 7g |
Sugar: 7g |
Vitamin A: 626IU |
Vitamin C: 32mg |
Calcium: 177mg |
Iron: 2mg
Nutrition information is automatically calculated, so should only be used as an approximation.
Did you try this recipe?
Leave a comment below!