
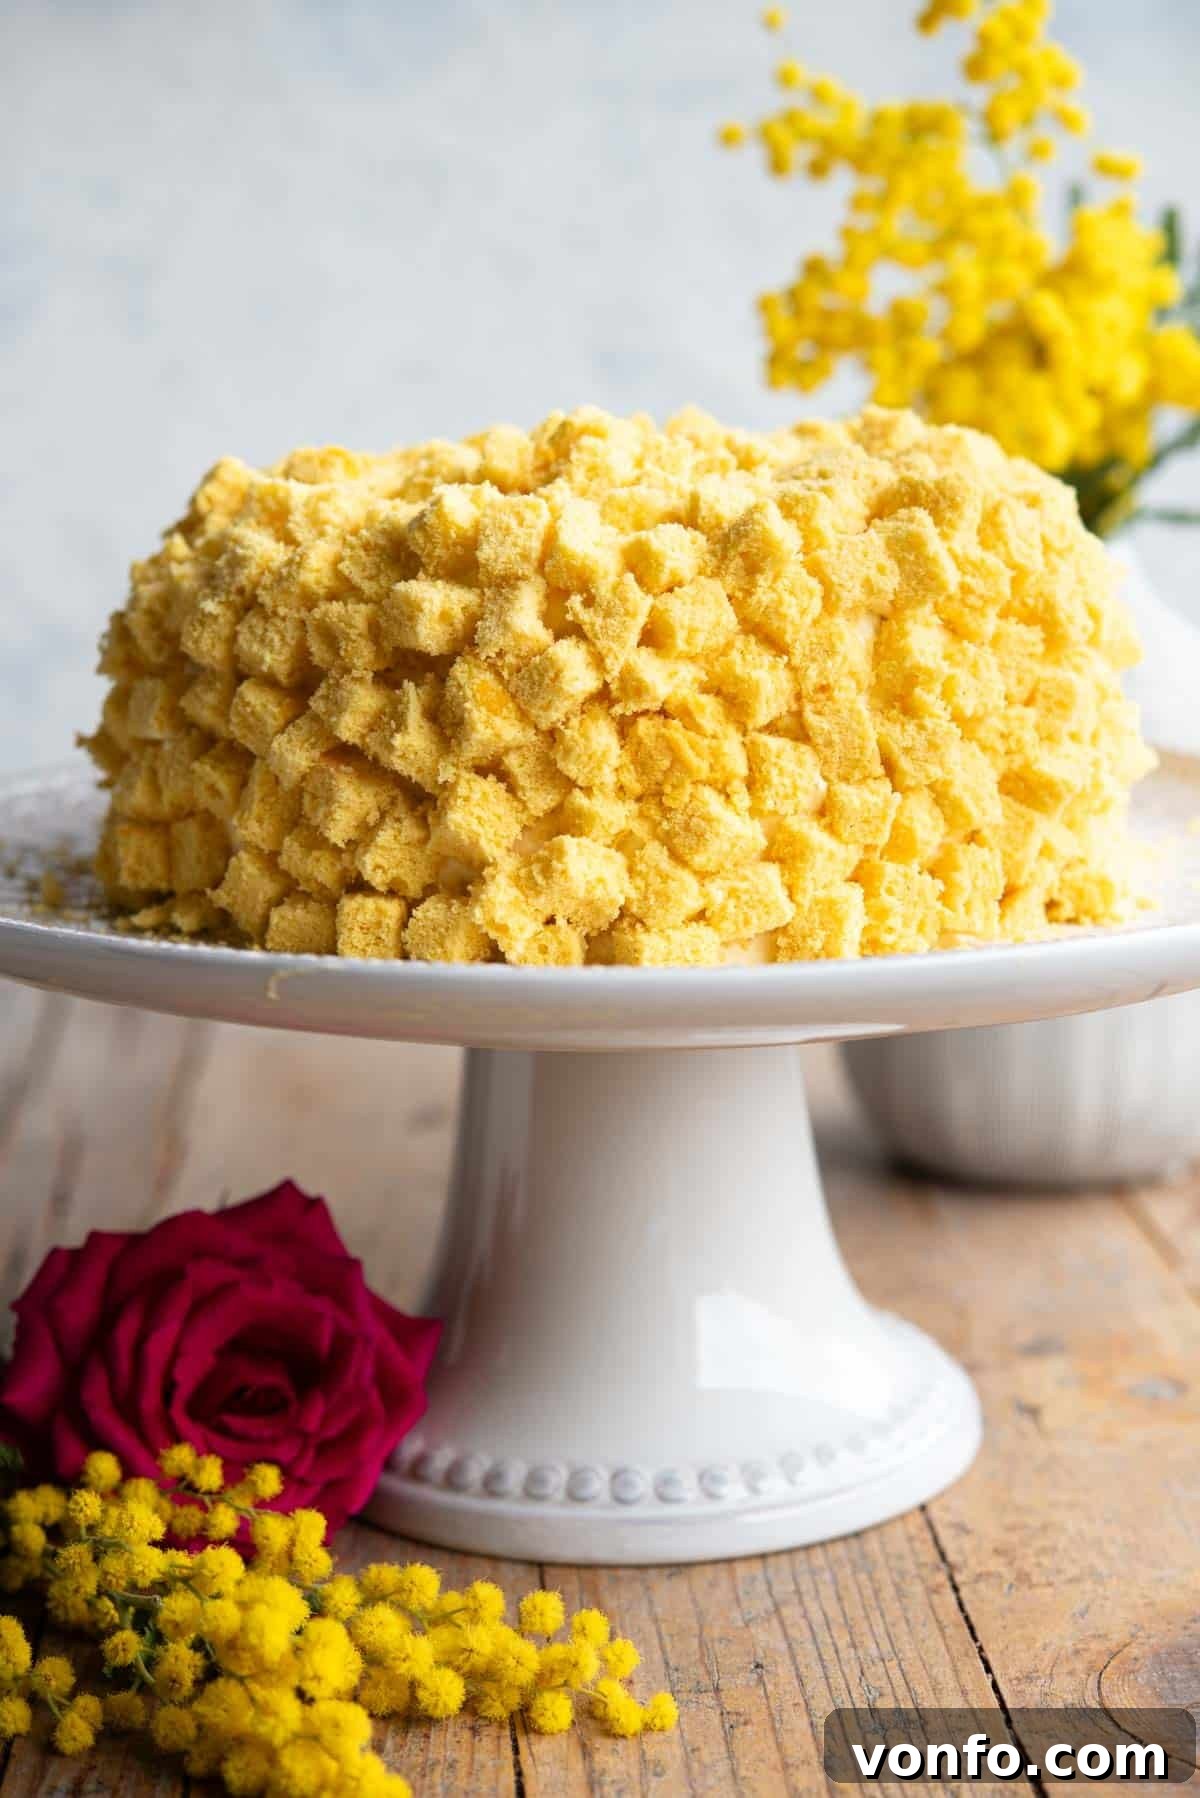
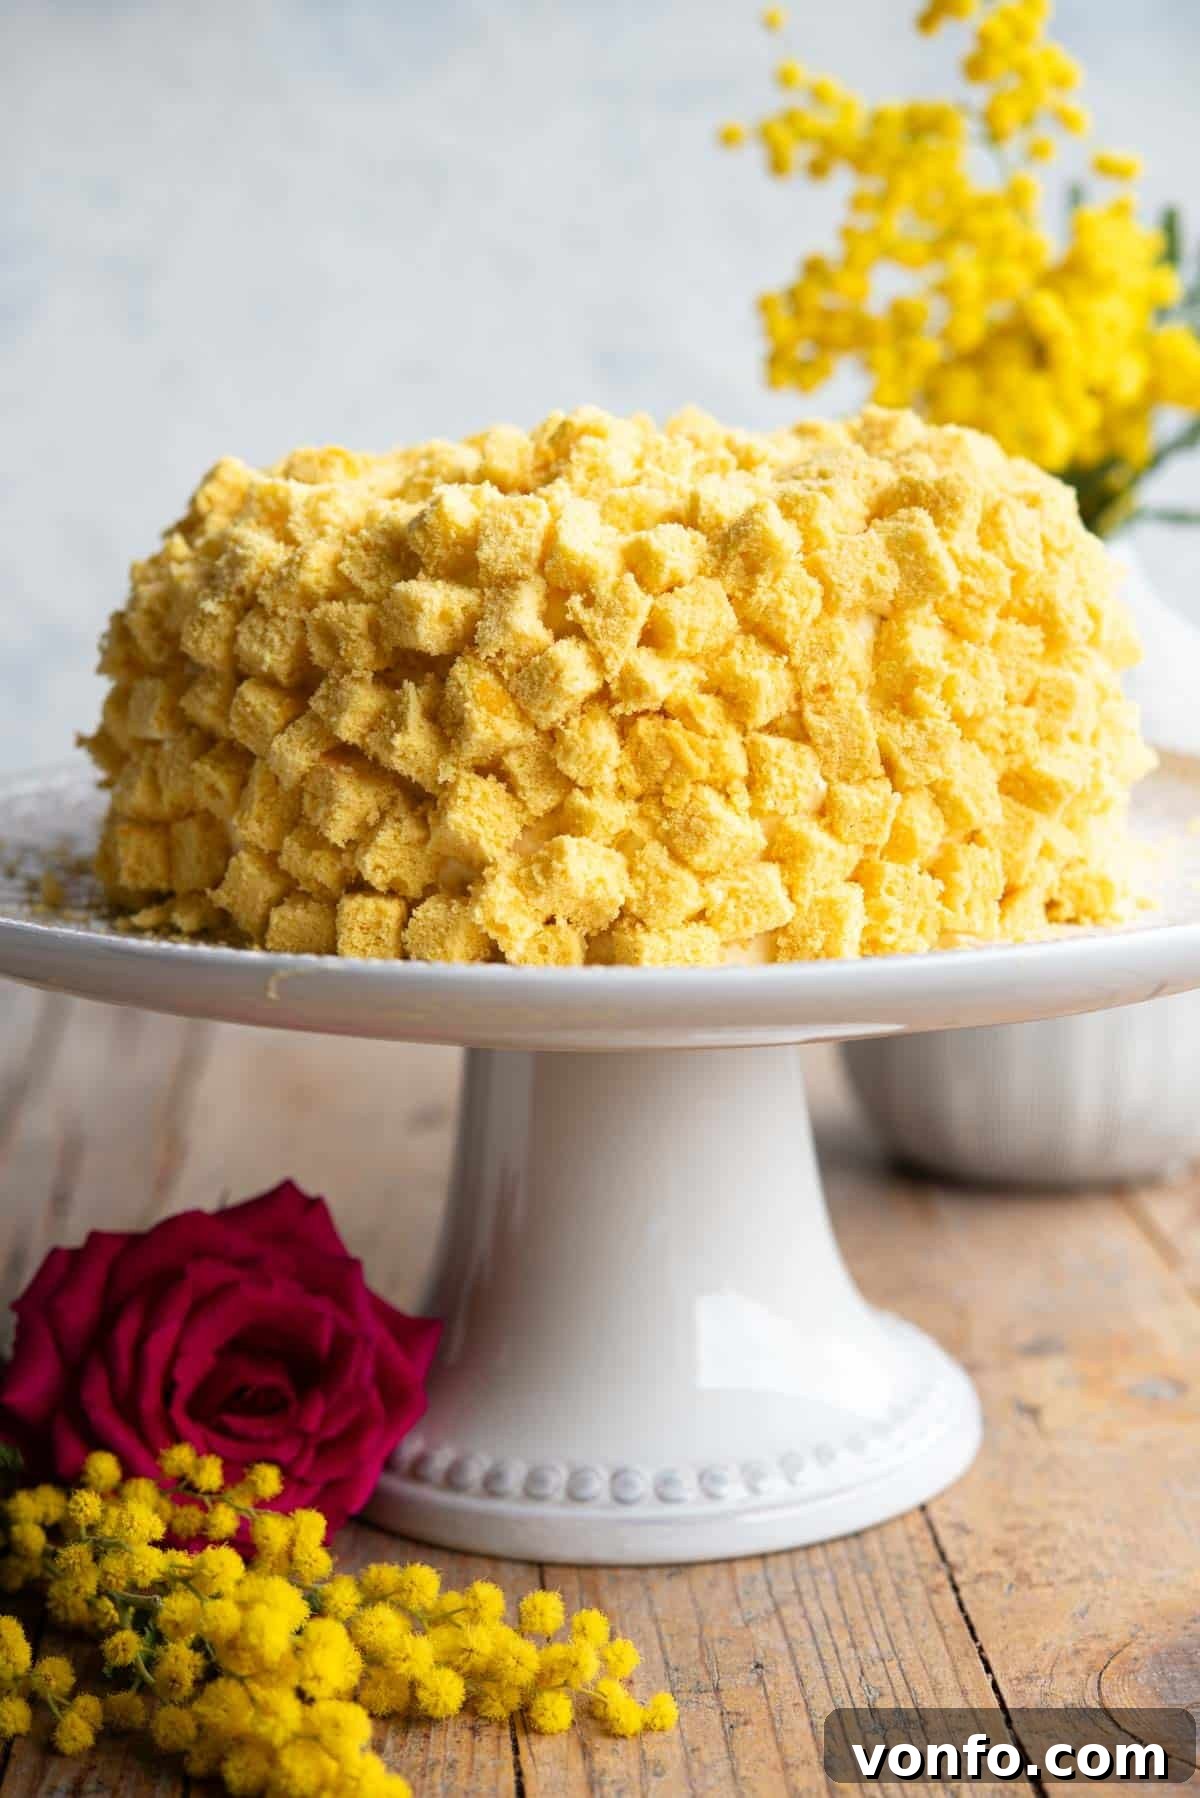
Torta Mimosa is an enchanting Italian cake, revered not only for its delicate flavor but also for its stunning visual resemblance to the fluffy mimosa flower. This exquisite dessert is a beloved symbol, traditionally gifted and enjoyed across Italy on March 8th, International Women’s Day (Festa della Donna). Crafted with the lightest, airiest sponge cake, known as Pan di Spagna, it features a luxurious filling made from a harmonious blend of velvety chantilly cream and rich Italian pastry cream (Crema Pasticcera). The cake’s signature look is achieved by covering its exterior with tiny cubes of sponge cake, mimicking the distinctive yellow blooms of the mimosa tree.
The Symbolism and History of Torta Mimosa
In Italy, the mimosa flower holds a special place, particularly on March 8th. Sprigs of its bright yellow, fragrant blossoms are presented to women as a gesture of appreciation and celebration for International Women’s Day. It’s a cherished tradition that fills the country with vibrant yellow hues and a sense of joy. During this period, if you find yourself wandering through Italian bakeries and cafes, you’ll inevitably be captivated by the sight of these stunning Torta Mimosa cakes displayed everywhere, each one a testament to this beautiful custom. The cake perfectly captures the essence of the mimosa flower, bringing its delicate beauty to the dessert table.
Crafting the Perfect Italian Mimosa Cake
At the heart of a truly authentic Torta Mimosa is the Pan di Spagna, a classic Italian sponge cake renowned for its incredibly light, almost ethereal texture. Unlike many sponges that rely on chemical leavening agents, Pan di Spagna achieves its remarkable rise and tenderness through the meticulous whipping of whole eggs with sugar until they become incredibly pale, thick, and voluminous. This technique incorporates a significant amount of air, resulting in a cake that is both sturdy enough to be sliced into delicate layers and wonderfully airy on the palate.
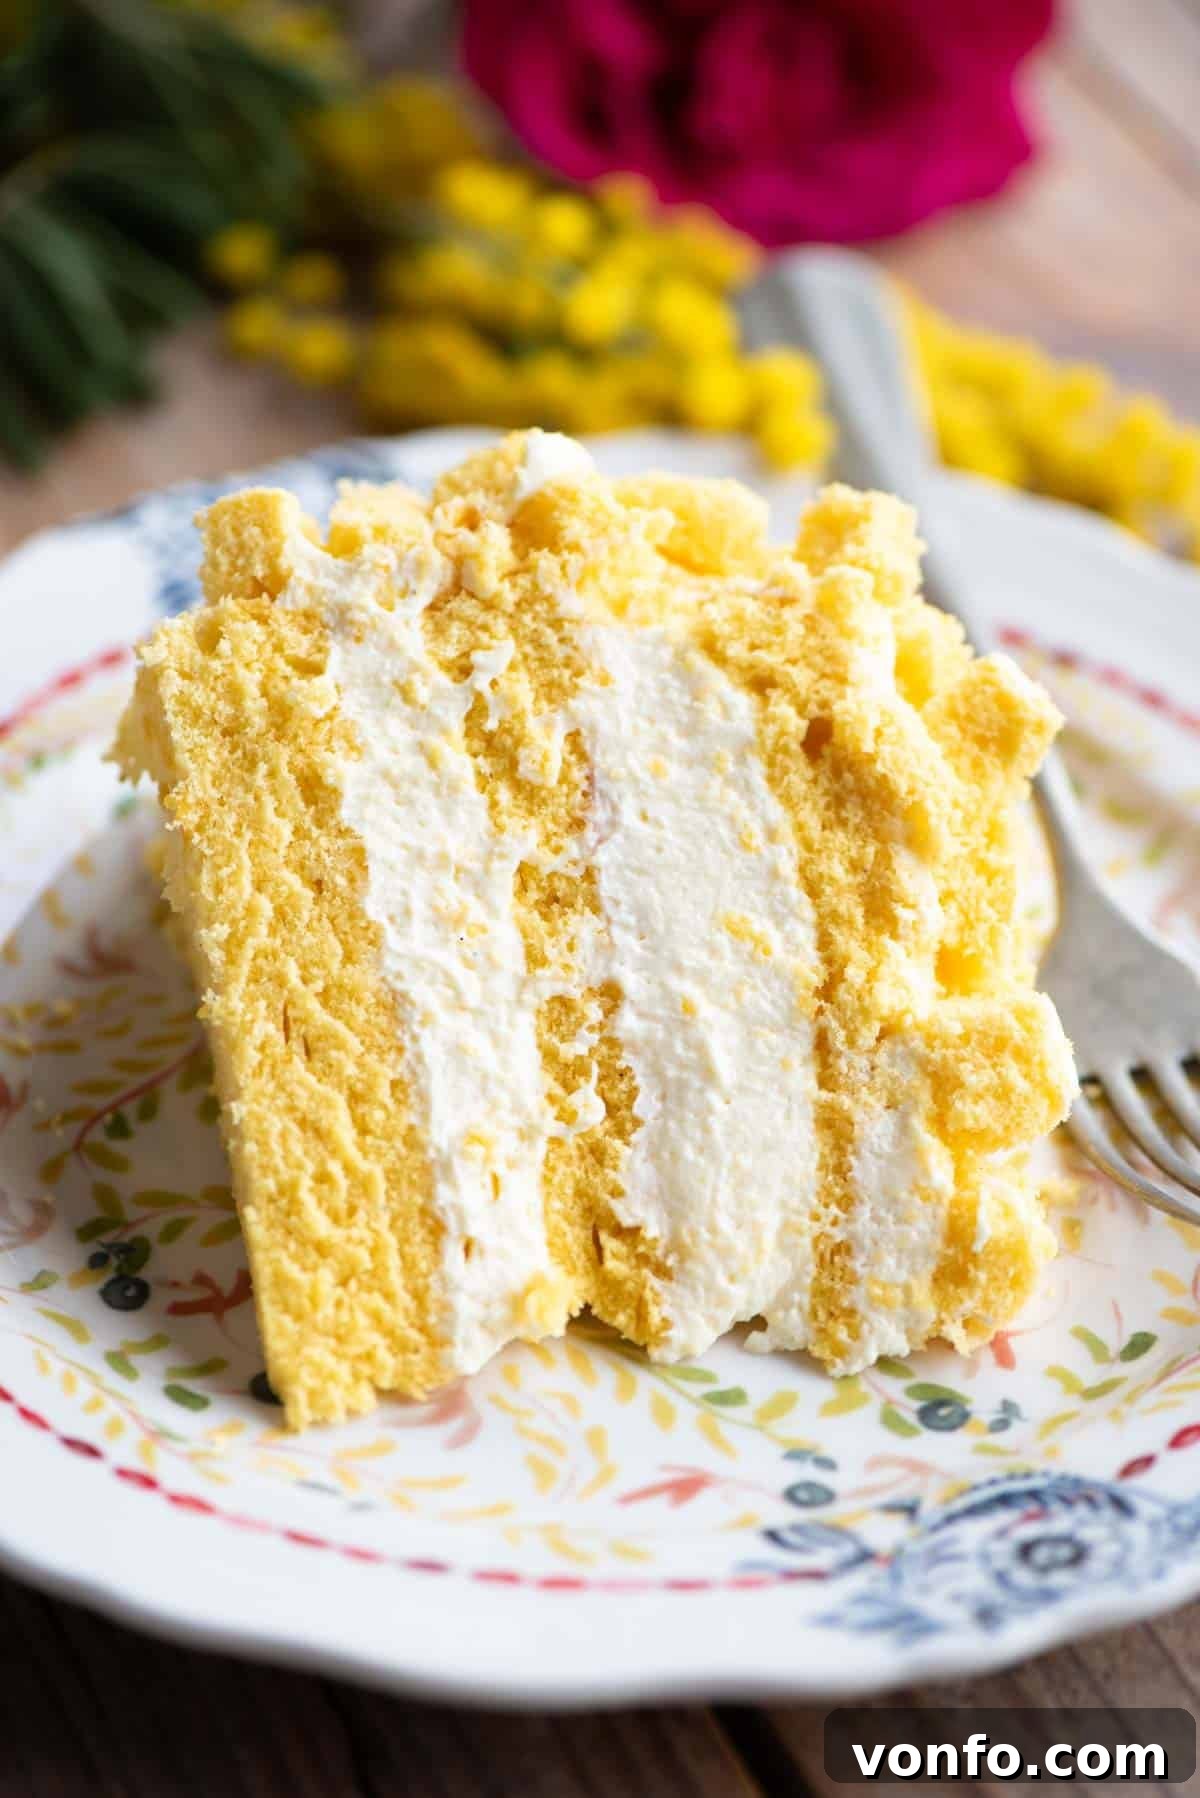
Once baked and cooled, the sponge cake layers are gently brushed with a fragrant sugar syrup, often infused with a hint of liqueur, adding moisture and an extra layer of flavor without making the cake overly sweet. The cake is then generously filled with a luscious mixture of two quintessential Italian creams: light and airy Chantilly cream, and rich, smooth Crema Pasticcera (pastry cream). The combination of these creams creates a filling that is both decadent and refreshing, a perfect counterpoint to the delicate sponge.
The final touch is the distinctive mimosa-like decoration. Small cubes of reserved sponge cake are carefully arranged over the entire surface of the cake, giving it the appearance of a freshly bloomed mimosa branch. This meticulous presentation, combined with its undeniably delicious flavor, makes Torta Mimosa truly extraordinary. It’s not just a cake; it’s an edible work of art that embodies spring, celebration, and culinary tradition. While a staple for International Women’s Day, this cake is also ideal for celebrating Spring, Easter, Mother’s Day, or any occasion where you want to impress and delight your guests with something truly special.
Essential Ingredients for Torta Mimosa
Ingredient Notes and Expert Substitutions
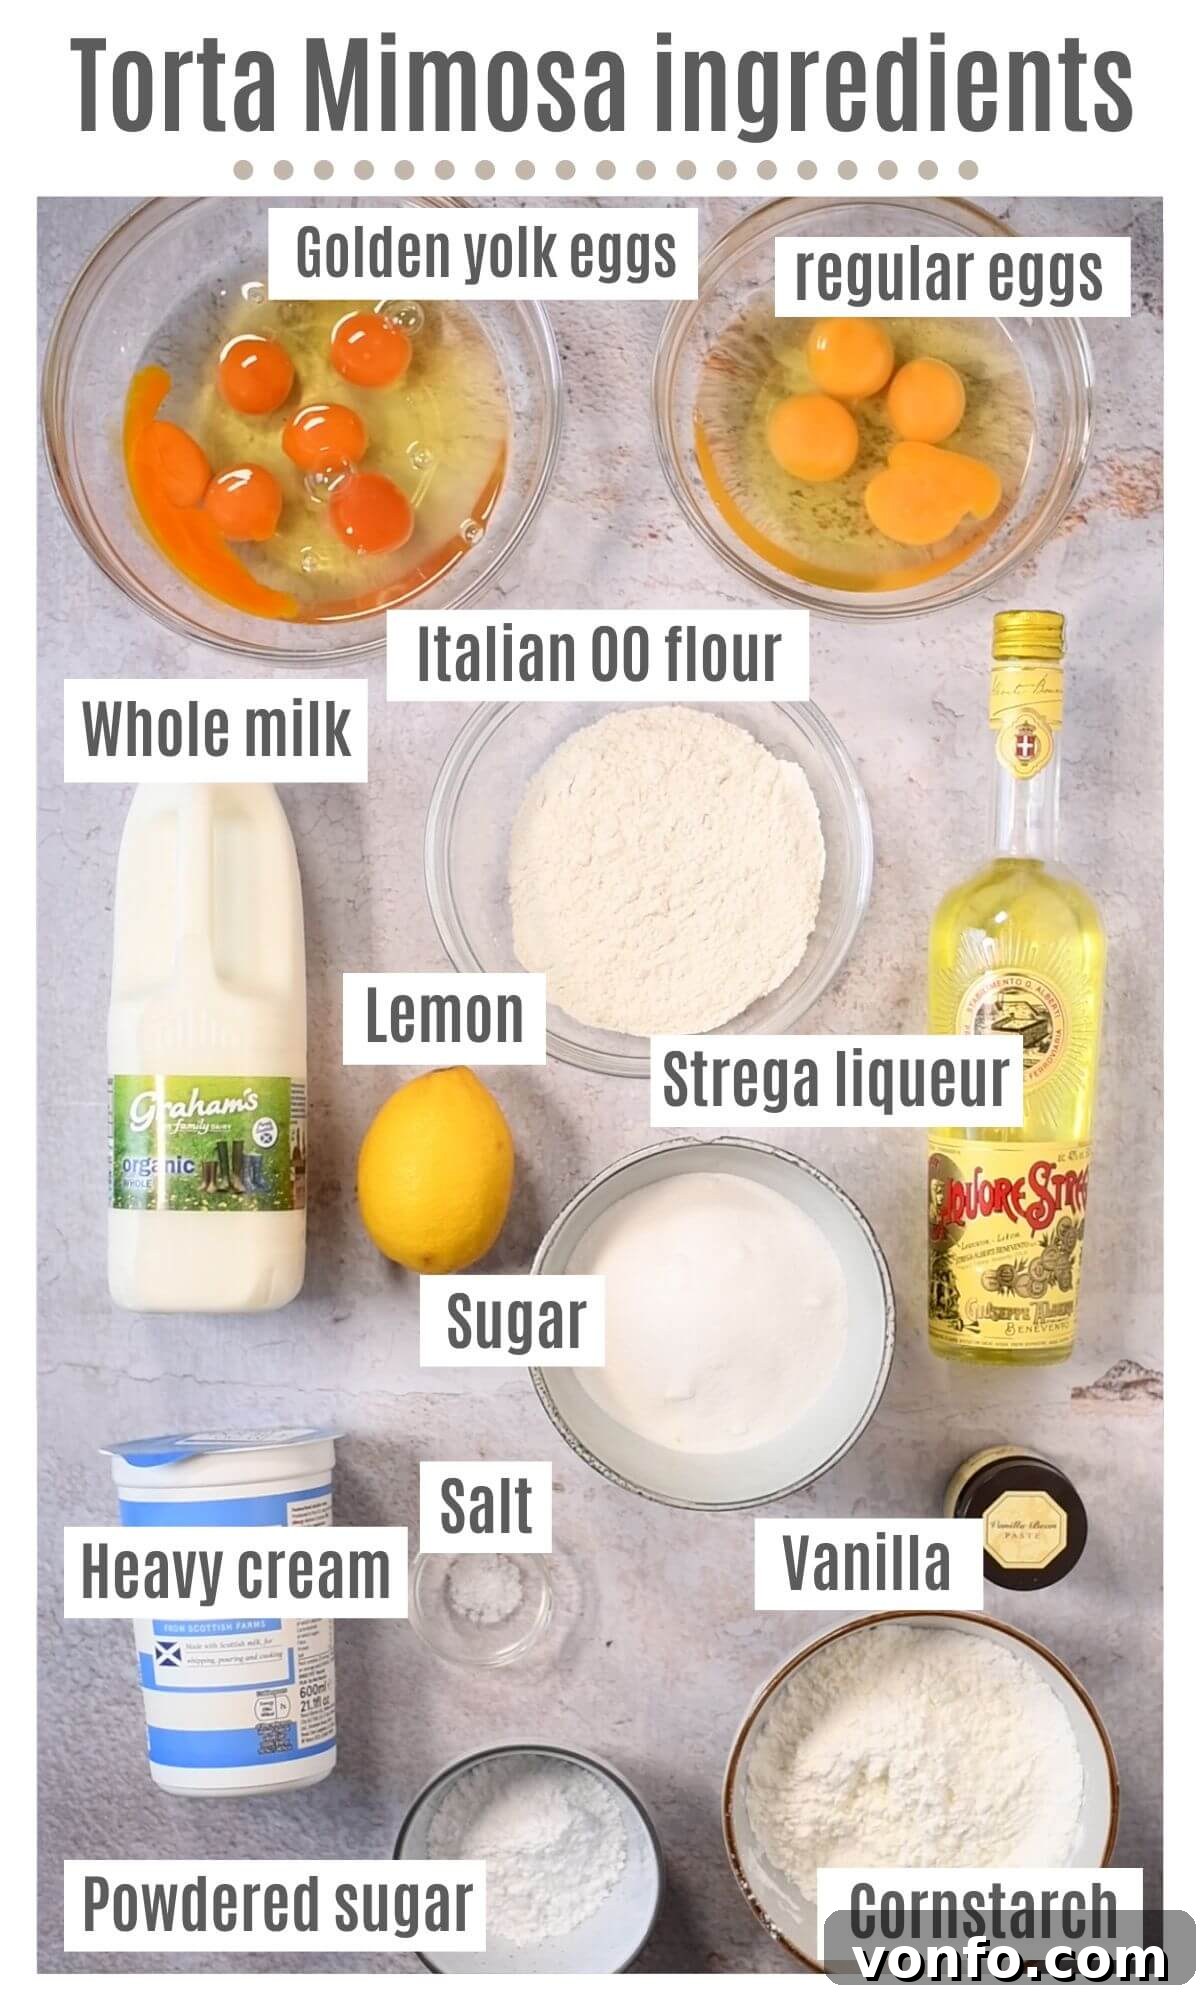
- Golden Yolk Eggs: For the most visually appealing Pan di Spagna, I highly recommend using eggs with naturally golden yolks. These impart a beautiful yellow hue to the sponge without the need for artificial food coloring, echoing the mimosa’s natural shade. If your eggs have paler yolks, you can certainly proceed as is – the cake will still be delicious, just lighter in color. Alternatively, a tiny drop of yellow food coloring can be added to achieve the desired vibrancy.
- Sugar: Caster sugar, also known as extra-fine sugar, is my preferred choice for baking due to its ability to dissolve quickly and create a finer crumb. However, standard granulated sugar will work perfectly fine in this recipe, yielding excellent results. The key is to ensure it’s fully dissolved during the egg whipping process for a smooth sponge.
- Italian 00 Flour: This finely milled Italian flour produces an incredibly tender and light sponge, characteristic of traditional Italian baking. If 00 flour is not readily available, a good quality all-purpose flour can be used as a direct substitute. The slight difference in texture will be minimal, and your cake will still be delightful.
- Vanilla: The quality of your vanilla makes a significant difference in the final flavor. I suggest using vanilla bean paste for its rich flavor and visible specks, or the scraped seeds from a whole vanilla pod for the most authentic aroma. Pure vanilla extract is also an excellent option. Please avoid artificial vanilla essence, as it can impart an undesirable chemical taste that detracts from the delicate flavors of this cake.
- Liqueur: The sugar syrup is traditionally enhanced with a touch of Italian liqueur. Strega, an herbal liqueur with a distinctive golden color, is a popular choice and adds a wonderfully complex flavor. Limoncello, with its bright lemon notes, also pairs exceptionally well, adding a zesty freshness. If you prefer to omit alcohol, you can simply use plain sugar syrup, or add a splash of orange blossom water or a little more vanilla for an aromatic touch. The cake will be equally delicious without the liqueur.
Step-by-Step Instructions: Creating Your Torta Mimosa Masterpiece
Preparing the Pan di Spagna Sponge Cake
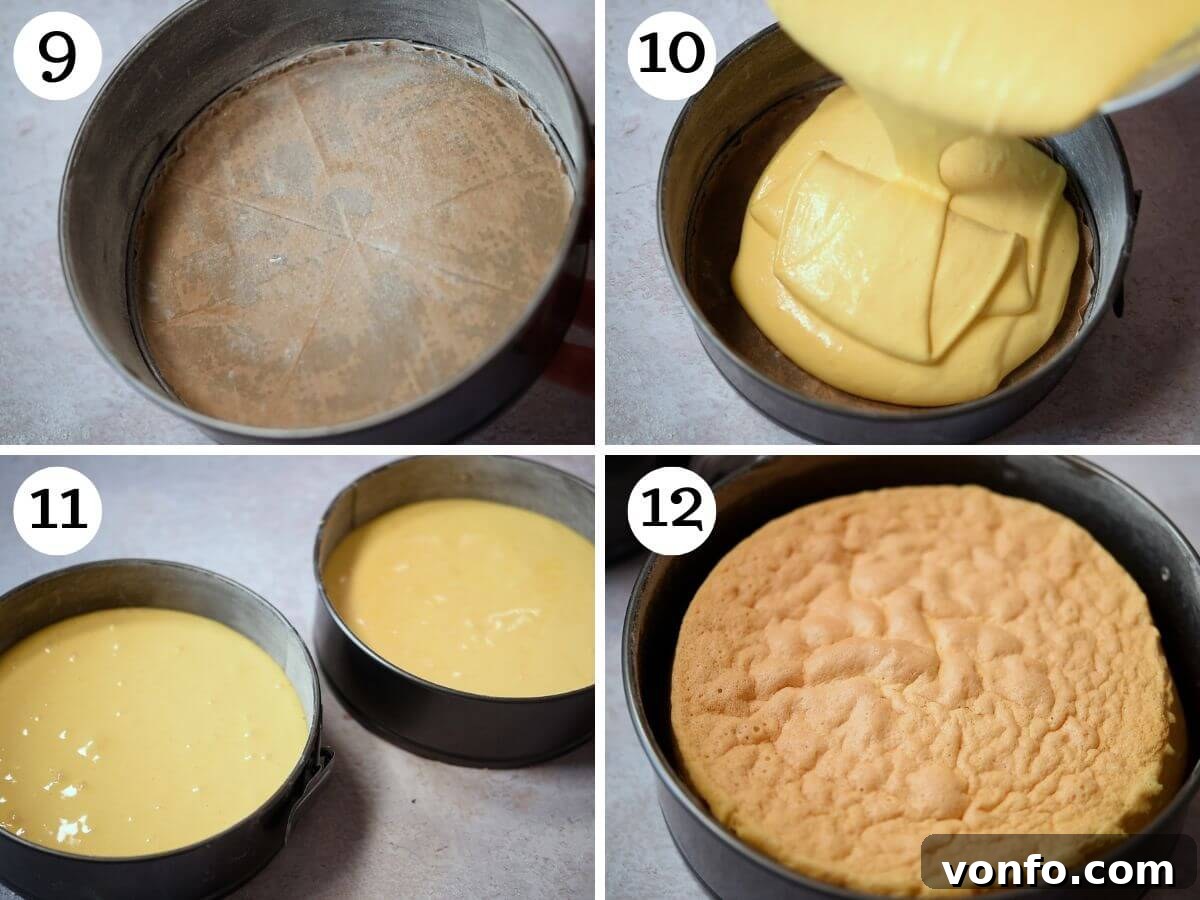
Achieving the perfect Pan di Spagna is crucial for Torta Mimosa. Begin by meticulously greasing both 8-inch (20cm) springform cake pans with butter, ensuring every crevice is coated. Line the bottoms with baking parchment paper for easy removal. Lightly dust the greased sides with flour, tapping out any excess. This preparation prevents sticking and ensures a beautiful, even crust. Preheat your oven to 160°C (320°F) using a static (non-fan) setting for even baking.
In the bowl of your stand mixer, combine the 6 medium eggs, caster sugar, vanilla, and a tiny pinch of salt. Begin whisking on medium speed. This step is critical; you’ll need to whip the mixture for a substantial 15-20 minutes. The goal is to achieve a pale, thick, and incredibly fluffy consistency. The eggs should almost triple in volume, forming a “ribbon” when the whisk is lifted, which slowly disappears back into the mixture. This indicates sufficient aeration, which is the secret to a light sponge.
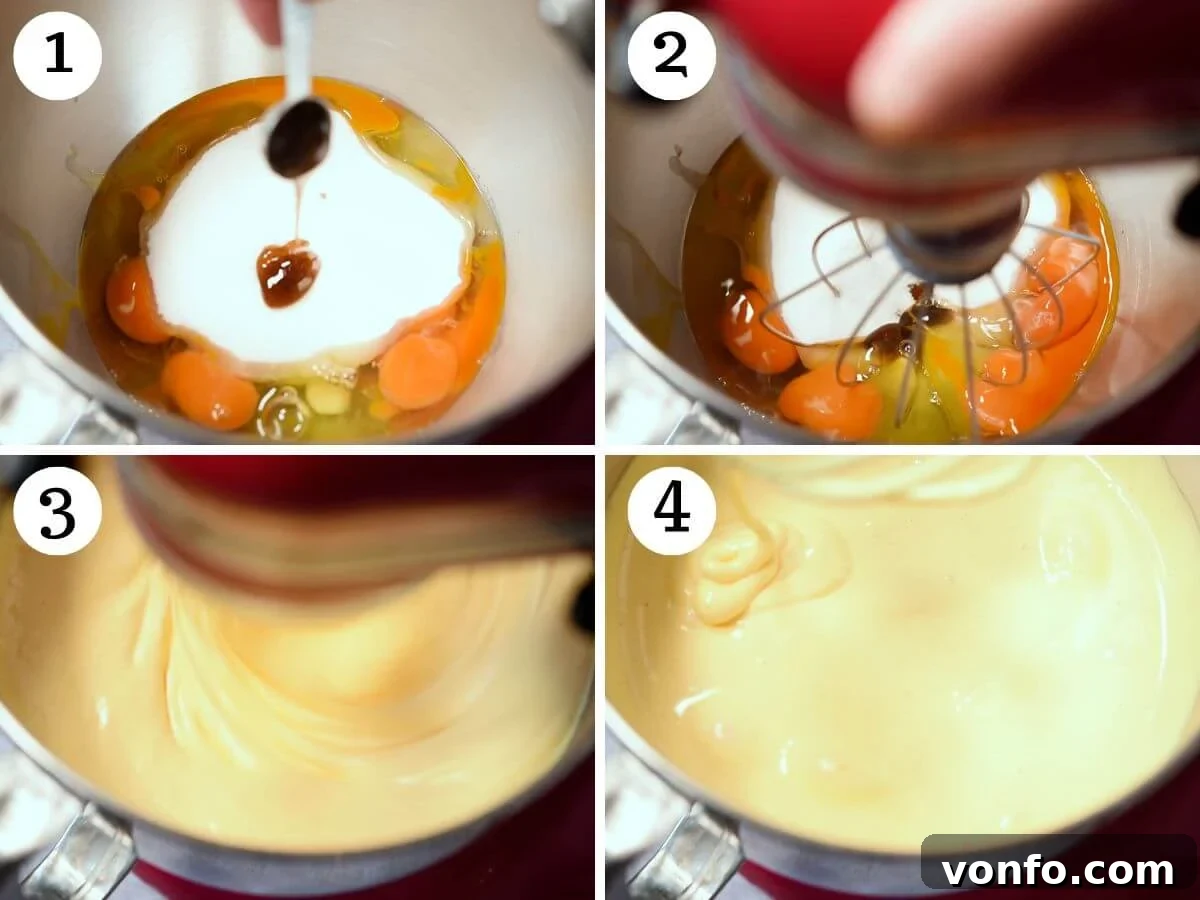
Once the egg mixture is perfectly whipped, gently sift the Italian 00 flour and cornstarch over the batter, adding 1-2 tablespoons at a time. The key here is to fold the dry ingredients into the airy egg mixture very gently using a large spatula. This preserves the volume and air you’ve built up. Ensure you scrape the bottom and sides of the bowl with each fold to prevent any pockets of unmixed flour, which can lead to a dense crumb.
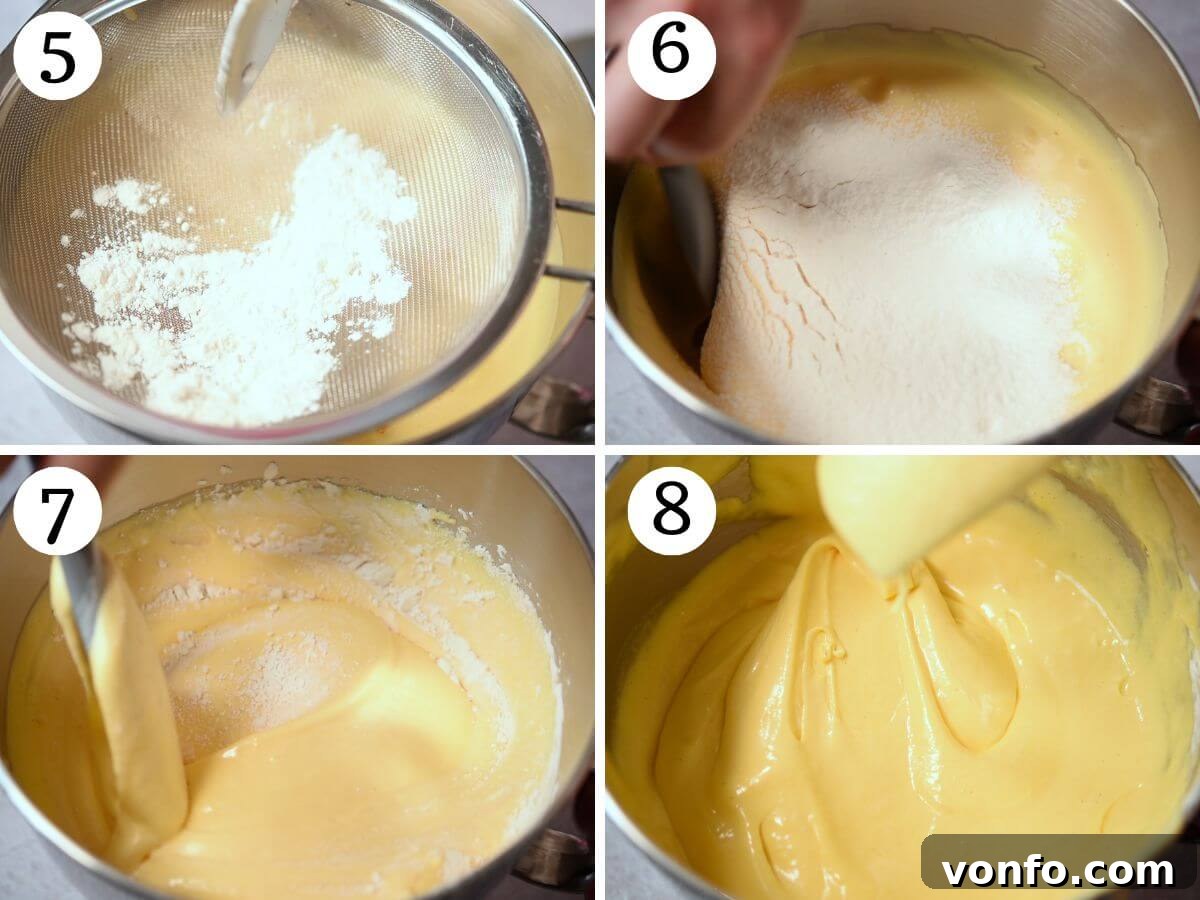
Carefully divide the delicate batter evenly between the two prepared 8-inch cake tins. Place them on the bottom shelf of your preheated oven and bake for approximately 40 minutes. Resist the urge to open the oven door during baking, as this can cause the sponge to sink. After 40 minutes, turn off the oven but leave the cakes inside with the oven door ajar for an additional 5 minutes. This gradual cooling prevents the cakes from collapsing, ensuring their delicate structure remains intact.
Once the tins are cool enough to handle (typically 5-10 minutes), run a thin knife around the edges of each cake to loosen them from the pans. Invert the cakes onto a wire rack and allow them to cool completely. Patience is key here; a fully cooled cake is essential for clean slicing and assembly.
Preparing the Silky Crema Pasticcera (Pastry Cream)
Tip: The ideal time to prepare your pastry cream is while the sponge cakes are baking in the oven. This allows it to cool thoroughly, which is essential before incorporating it into the Chantilly cream.
In a medium saucepan, combine the whole milk and vanilla. Using a vegetable peeler, carefully remove the peel from one whole lemon, taking care to avoid too much of the bitter white pith. Add the lemon peel to the milk mixture. Bring the milk to a gentle simmer over medium heat, then immediately remove it from the heat. This infuses the milk with beautiful vanilla and lemon aromas.
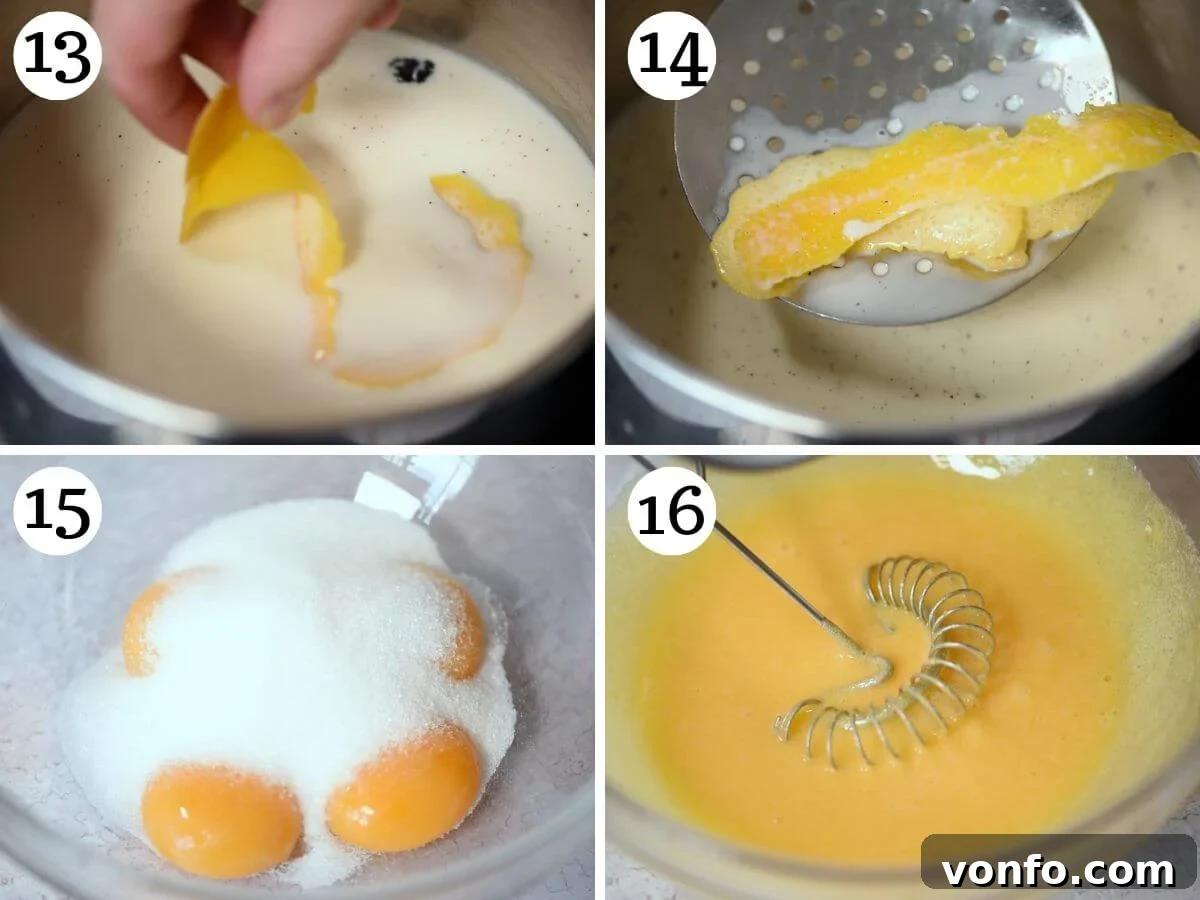
While the milk is infusing, in a large heatproof bowl, whisk the egg yolks with the caster or granulated sugar until the mixture is pale and smooth. Then, whisk in the cornstarch until it is completely dissolved and no lumps remain. This creates a smooth base for your pastry cream.
Remove the lemon peel from the hot milk. Slowly, gradually, and while continuously whisking, pour the warm, infused milk into the egg yolk mixture. This tempering step is crucial to prevent the eggs from scrambling. Once fully combined, pour the entire mixture back into the saucepan. Return the saucepan to a medium-low heat and continue to whisk constantly. The cream will begin to thicken as it cooks. It’s ready when it achieves a thick, pudding-like consistency that coats the back of a wooden spoon, and you can draw a clear line through it with your finger without the cream dripping back together.
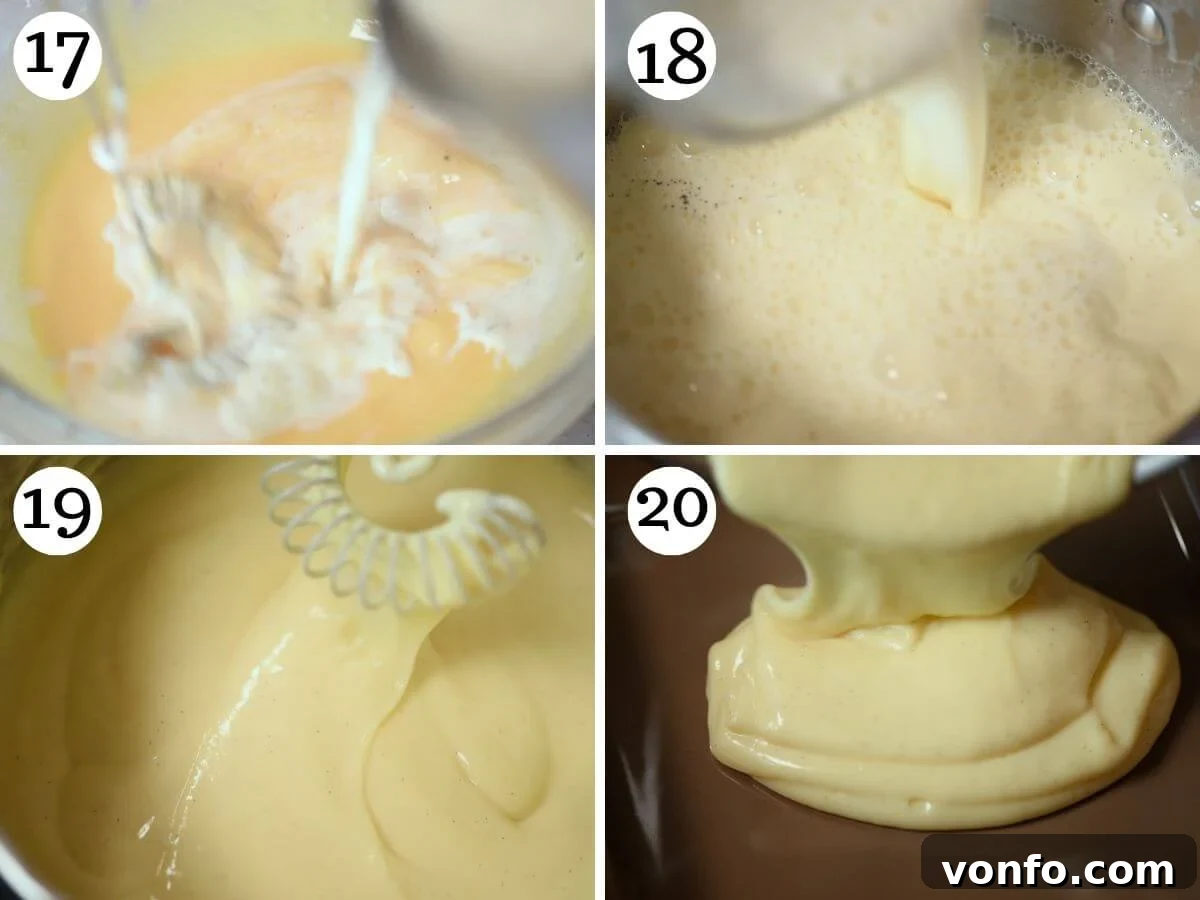
Immediately pour the hot pastry cream into a clean, shallow medium-sized baking dish. Spread it out thinly to facilitate rapid cooling. Cover the surface of the pastry cream directly with a piece of plastic wrap, pressing it down so it touches the entire surface. This prevents a skin from forming as it cools. Place the dish in the refrigerator to cool completely – this can take a couple of hours.
Preparing the Aromatic Sugar Syrup
In a small saucepan, combine ½ cup (125ml) of water with 2 tablespoons of caster or granulated sugar. Bring the mixture to a boil over medium heat, stirring occasionally. Once the sugar has fully dissolved, reduce the heat to a simmer for a minute or two, then remove from heat. Pour the sugar syrup into a bowl and allow it to cool completely to room temperature. This syrup will be used to moisten the sponge layers.
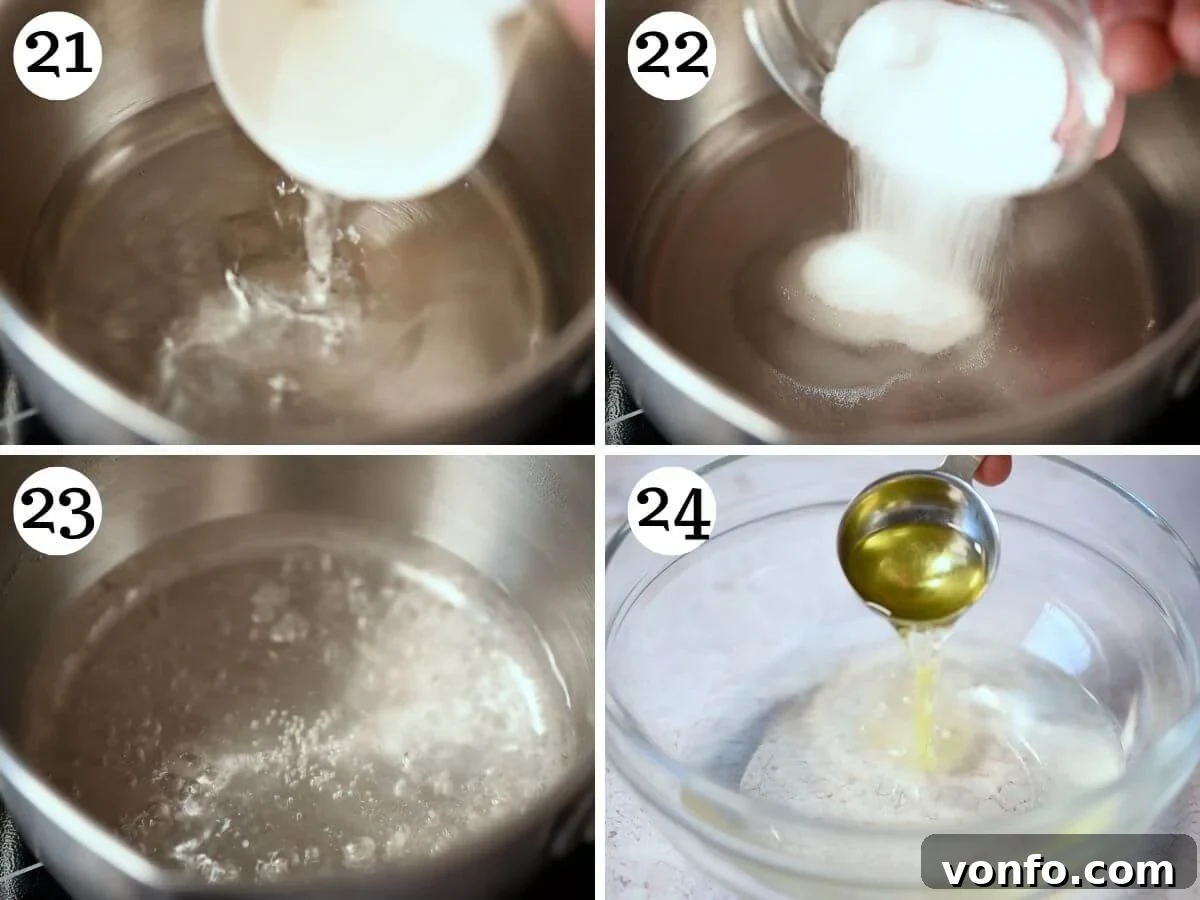
Once the sugar syrup has cooled, stir in 2 tablespoons of your chosen liqueur, such as Strega or Limoncello, if using. The alcohol will evaporate during storage, leaving behind a delightful flavor.
Whipping the Light Chantilly Cream
In the chilled bowl of your stand mixer, fitted with a whisk attachment, add the cold heavy cream. Begin whipping on medium speed. Gradually add the powdered sugar, 1 tablespoon at a time, as the cream starts to thicken. Continue whipping until the cream forms stiff peaks. Be extremely careful not to overwhip the cream, as it can quickly turn grainy or even into butter. Stop as soon as firm peaks are achieved – the cream should hold its shape beautifully.
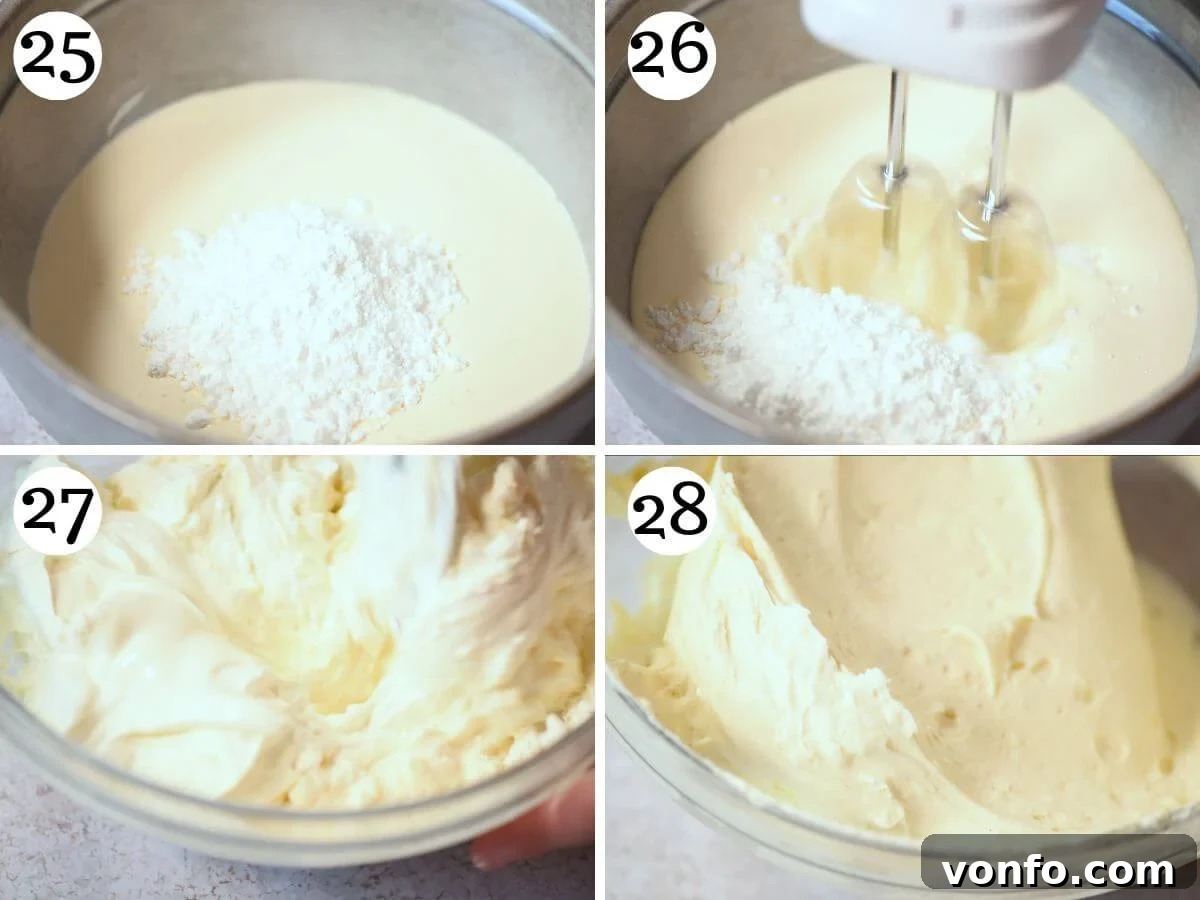
Once your pastry cream is completely chilled and firm, transfer it to a large mixing bowl. Give it a quick whisk to loosen its consistency, making it smooth and pliable. Now, gently fold the whipped Chantilly cream into the loosened pastry cream, adding it in three separate additions. Use a spatula to carefully combine the two creams, preserving the airiness of the Chantilly. The goal is a light, smooth, and airy combined cream that will be the exquisite filling for your Torta Mimosa.
Transfer this beautiful cream mixture back to the fridge until you are ready to assemble the cake, ensuring it stays firm and chilled.
Assembling the Torta Mimosa
Take one of your cooled Pan di Spagna sponge cakes. Carefully slice off the top crust to create a flat, even surface, removing as little cake as possible. Then, using a long serrated knife, slice this sponge into three equal horizontal layers. These will form the main structure of your cake.
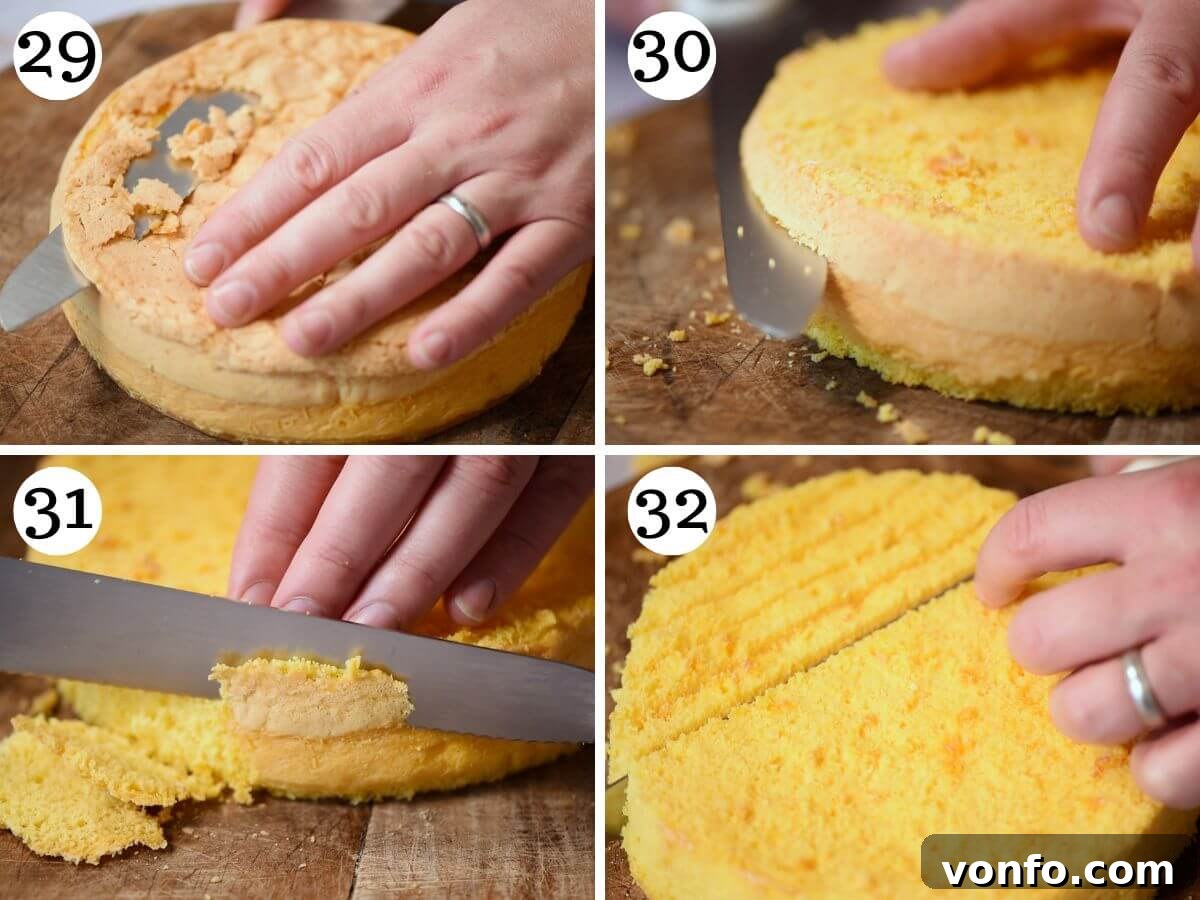
Now, prepare the “mimosa” decoration from the second sponge cake. Remove both the top crust and any browned edges from the sides of this sponge. Slice the cake into even pieces, then cut each slice lengthwise into three strips. Finally, dice each strip into small, uniform cubes, approximately 1cm (about 1/3 of an inch) in size. These delicate cubes will give your cake its iconic mimosa flower appearance.
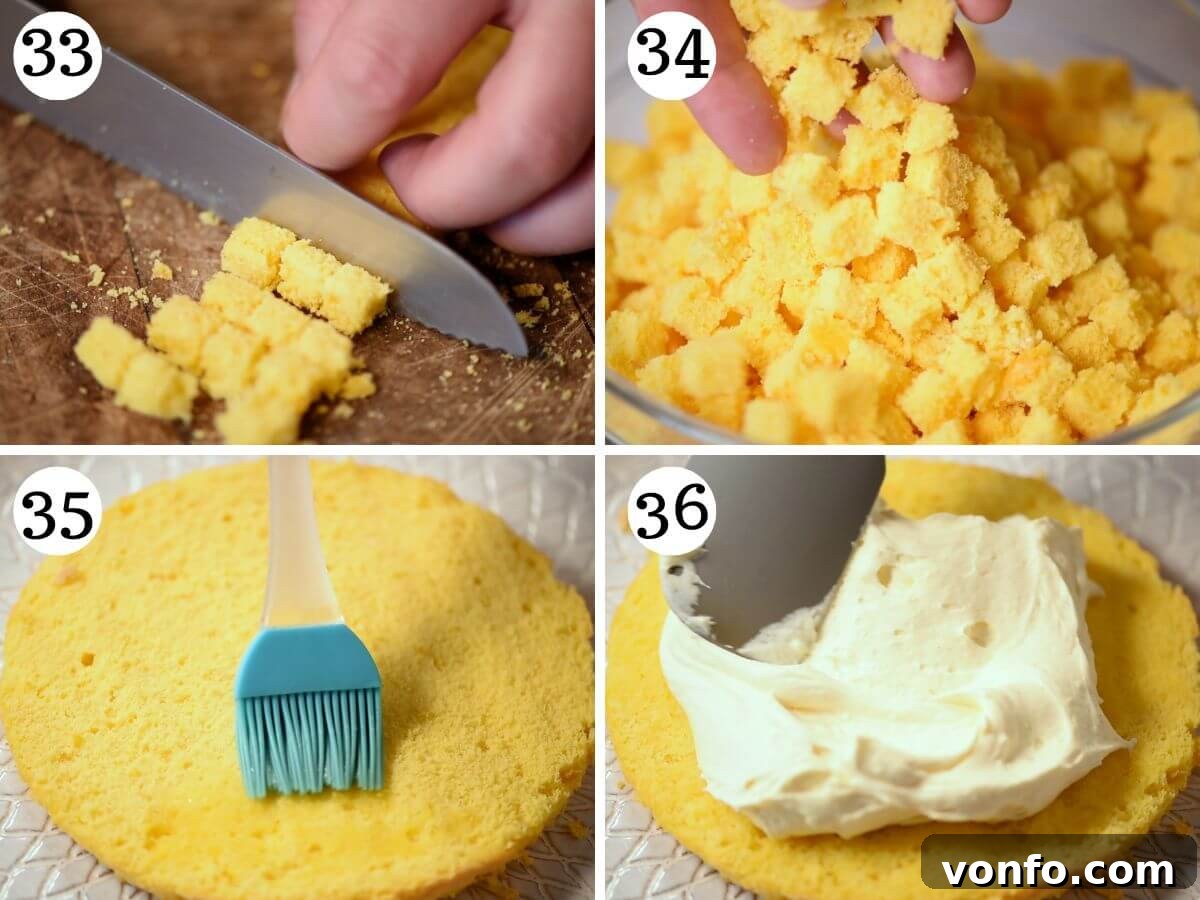
To assemble your stunning Torta Mimosa, place the first (bottom) layer of sponge cake onto your chosen cake stand or serving plate. Using a pastry brush, generously moisten the sponge with the prepared sugar syrup. This ensures the cake remains tender and flavorful. Spread approximately one-third of your combined chantilly and pastry cream filling evenly over this layer. Carefully place the next sponge layer on top, aligning it perfectly.
Repeat the process: brush the second layer with more sugar syrup and then spread another one-third of the cream filling over it. Distribute the filling meticulously to maintain an even surface, which is essential for a well-balanced and stable cake.
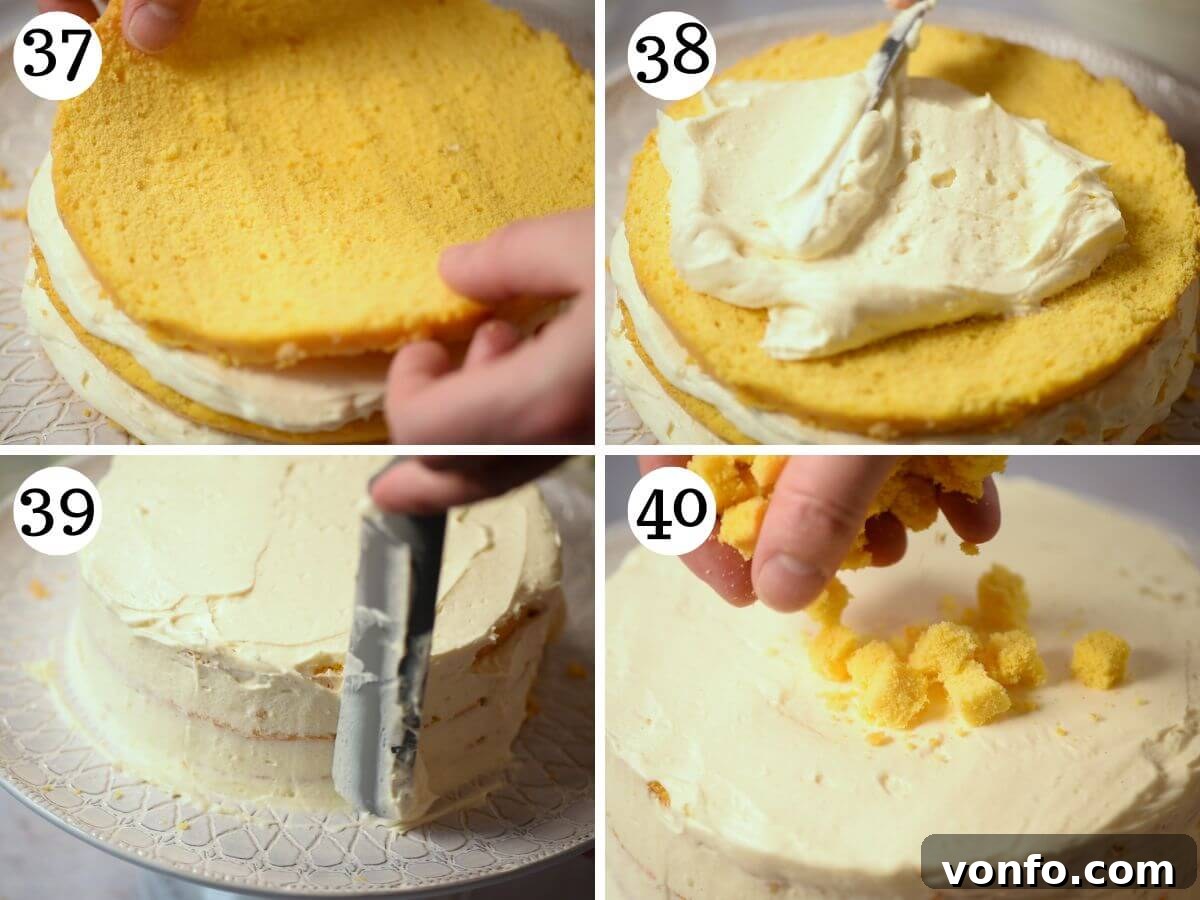
Finally, gently place the third and final sponge layer on top. Use the remaining cream to generously cover the entire top and sides of the cake, creating a smooth, even canvas. Now comes the magical part: carefully adhere the small sponge cubes all over the cream-covered cake, pressing them gently to ensure they stick. Continue until the entire cake surface is completely covered, resembling a beautiful, blooming mimosa flower. Your Torta Mimosa is now ready to be served and admired!
Creative Ways to Decorate Your Mimosa Cake
The iconic mimosa flower appearance is central to this cake’s charm, and there are two primary methods to achieve it. I’ve experimented with both, and each offers a visually stunning effect, truly giving the illusion of a vibrant mimosa bloom. Your choice ultimately comes down to personal preference for texture and aesthetic:
- Sponge Cubes (The Classic Method): This is the most traditional and widely recognized way to decorate a Torta Mimosa. It involves carefully cutting one of your baked sponge cakes into small, uniform cubes (approximately 1cm or 1/3 inch). These cubes are then gently pressed onto the cream-covered cake, creating a beautiful, textured surface that perfectly mimics the tiny, fluffy florets of the mimosa flower. This method results in a slightly more defined and structural appearance.
- Sponge Crumbs (A Softer Look): The second excellent option is to transform the second sponge cake into fine crumbs instead of cubes. You can do this by gently crumbling the cake by hand or pulsing it briefly in a food processor. These softer crumbs are then sprinkled and pressed onto the cake. This method yields a slightly more delicate, cloud-like finish, giving the cake an even more ethereal, powdery mimosa effect. Both methods are gorgeous, so choose the one that appeals most to your artistic vision!
Expert Tips & Frequently Asked Questions for Torta Mimosa
- Thoroughly Read the Entire Recipe First: The Torta Mimosa, while not inherently difficult, involves several distinct elements and sequential steps (sponge, pastry cream, sugar syrup, Chantilly, assembly). Before you begin, take the time to read the entire recipe from start to finish. This will give you a clear overview of the process, help you manage your time effectively, and anticipate each stage. Always refer to the step-by-step photos or any accompanying video tutorials for visual clarification, especially if it’s your first time making this cake.
- Achieving a Vibrant Yellow Sponge Cake: The distinctive yellow color of the Torta Mimosa sponge is part of its charm. I achieve this naturally by using high-quality eggs with deep orange/golden yolks, similar to those I use for making fresh pasta dough. These eggs impart a beautiful, natural yellow hue to the Pan di Spagna. If you cannot find eggs with such rich yolks, you have two options: you can either accept a slightly paler sponge (which will still be delicious) or add a tiny amount of yellow food coloring to the egg mixture during the whipping stage to enhance the color.
- Properly Prepare Your Cake Tins: To ensure your delicate sponge cakes release easily and maintain their perfect shape, meticulous tin preparation is essential. Thoroughly grease both 8-inch springform cake tins with butter, making sure to cover all interior surfaces. Then, line the bottoms with baking parchment paper. Lightly dust the greased sides with a thin layer of flour, shaking out any excess. This creates a non-stick barrier crucial for preventing the cakes from adhering to the pans.
- Avoid Opening the Oven Door During Baking: Pan di Spagna is a delicate sponge that relies on trapped air for its rise and light texture. It is critically important to resist the temptation to open the oven door for the full 40 minutes of baking time. Opening the door prematurely can cause a sudden drop in temperature, leading the sponge to collapse and become dense. Once the baking time is complete, turn off the oven but leave the cakes inside with the door slightly ajar for an additional 5 minutes. This gradual cooling prevents thermal shock and helps the cake retain its structure.
- Preventing the Sponge Cubes from Drying Out: While the internal sponge layers are moistened with sugar syrup, the small sponge cubes covering the exterior of the cake can dry out more quickly, especially if stored for a day or two. To combat this, you can reserve a small amount of the sugar syrup. The next day, if you notice the cubes beginning to dry, very lightly dab them with a pastry brush dipped in the reserved syrup. This will rehydrate them and keep your Torta Mimosa fresh and moist.
- Storage Guidelines: Once assembled, the Torta Mimosa should be stored in an airtight container in the refrigerator. It will maintain its delicious flavor and texture for up to 3 days. Be aware that, as mentioned above, the small sponge cubes on the exterior may start to dry out slightly over time, but the interior will remain moist thanks to the cream and syrup.
- Making Ahead: This cake is perfect for preparing in advance! You can make each component (sponge cakes, pastry cream, sugar syrup) 1-2 days ahead of time and store them separately in the fridge. Alternatively, you can assemble the entire cake 1-2 days before serving. This allows the flavors to meld beautifully, making for an even more delicious dessert. Just keep the assembled cake covered in the refrigerator.
- Serving Suggestions: Torta Mimosa is best served chilled, directly from the refrigerator. A dusting of powdered sugar just before serving can add an elegant touch, complementing its mimosa-like appearance. It pairs wonderfully with a cup of espresso or a light dessert wine.
Absolutely! Torta Mimosa is a great make-ahead dessert. You have a few options: you can prepare each individual component (the sponge cake layers, the pastry cream, and the sugar syrup) 1-2 days in advance and store them separately in the refrigerator. When you’re ready, simply assemble the cake. Alternatively, you can assemble the entire cake 1-2 days before you plan to serve it. Storing it in the fridge allows the flavors to meld beautifully, often enhancing the overall taste. Just ensure all components are properly chilled before assembly and the finished cake is covered to prevent drying.
When stored properly in an airtight container in the refrigerator, Torta Mimosa will remain fresh and delicious for up to 3 days. While the internal layers, soaked in sugar syrup and covered in cream, stay wonderfully moist, it’s worth noting that the small sponge cubes on the very top of the cake, exposed to the air, may begin to dry out slightly after the first day. You can mitigate this by very gently dabbing them with a little reserved sugar syrup if needed.
Explore More Classic Italian Desserts
Italian Desserts
Zuccotto (Sponge Cake with Ricotta Filling)
Breakfast
Italian Breakfast Bundt Cake – Ciambella Allo Yogurt
Italian Desserts
Torta della Nonna: Italian Custard Tart
Italian Desserts
Crostata di Frutta (Italian Fruit Tart)
If you’ve tried this delightful Torta Mimosa recipe or any other recipe from our collection, we’d love to hear from you! Please don’t hesitate to rate the recipe and share your experience in the comments section below. Your feedback means the world to us. For more delicious Italian recipes and culinary inspiration, be sure to follow us on Facebook, Instagram, and Pinterest. You can also sign up for our Newsletter to receive our latest recipes directly in your inbox!
Step-by-Step Photos Above
Most of our recipes include detailed step-by-step photos, helpful tips, and tricks to ensure perfect results every time, and even video tutorials!
Torta Mimosa (Italian Mimosa Cake)
By Emily
1 hr 10 mins
1 hr 5 mins
2 hrs
4 hrs 15 mins
10 servings
Print Recipe
Equipment
- 2 x 8 inch (20cm) springform cake pans
- Baking parchment
- Stand mixer or electric whisk
- Large mixing bowls
- Small saucepan
- Wire rack
- Spatula
- Serrated knife
- Pastry brush
Ingredients
For the Sponge (Pan di Spagna)
- 6 medium eggs (approx. 300g), ideally with golden yolks
- 130g (1 cup) Italian 00 flour, or all-purpose flour
- 130g (1 cup) cornstarch
- 260g (1.5 cups) caster sugar, or granulated sugar
- 1 teaspoon vanilla bean paste, or 1 vanilla bean (seeds scraped out), or 1 teaspoon pure vanilla extract
- 1 pinch of salt
- Butter for greasing cake pans
For the Pastry Cream (Crema Pasticcera)
- 4 egg yolks
- 70g (1/3 cup) caster or granulated sugar
- 30g (1/4 cup) cornstarch (cornflour UK)
- 500ml (2 cups plus 2 tablespoons) whole milk
- Peel of 1 whole lemon (avoiding white pith)
- 1 teaspoon vanilla bean paste or extract
For the Chantilly Cream
- 450ml (2 cups) heavy cream (double cream UK), very cold
- 5 tablespoons powdered sugar (icing sugar UK), (55g)
For the Sugar Syrup
- 125ml (1/2 cup) water
- 2 tablespoons caster or granulated sugar
- 2 tablespoons Strega or Limoncello liqueur (optional)
Instructions
To Make the Sponge
- Grease two 8-inch (20cm) springform cake pans with butter and line the bottom with baking parchment. Dust the sides with flour, shaking out any excess. Preheat your oven to 160°C (320°F) static (no fan).
- In a stand mixer, combine the 6 eggs, sugar, vanilla, and a pinch of salt. Whisk on medium speed for 15-20 minutes until the mixture is pale, very thick, and fluffy. It should form a ribbon when the whisk is lifted that slowly disappears.
- Gently sift the flour and cornstarch into the whipped egg mixture, 1-2 tablespoons at a time. Carefully fold the flours into the batter after each addition, ensuring to scrape the bottom of the bowl to avoid any pockets of dry flour.
- Divide the batter evenly between the two prepared cake tins. Bake on the bottom shelf of your oven for 40 minutes. Once baked, turn off the oven and leave the cakes inside with the oven door ajar for 5 minutes before removing.
- Once the tins are cool enough to touch (5-10 minutes), run a knife along the edge and remove the cakes. Let them cool completely on a wire rack.
To Make the Pastry Cream
- Tip: Prepare the pastry cream while the cakes are baking to allow for sufficient cooling time.
- Add the milk and vanilla to a saucepan. Peel the lemon using a vegetable peeler, being careful not to include too much white pith, and add it to the milk. Bring to a gentle simmer, then immediately turn off the heat.
- Meanwhile, in a large bowl, whisk the egg yolks and sugar until combined and pale. Stir in the cornstarch until dissolved.
- Remove the lemon peel from the hot milk. Slowly pour the warm milk into the egg mixture while continuously whisking. Then, pour the entire mixture back into the saucepan.
- Heat the cream mixture on medium-low heat, whisking constantly, until it thickens to a smooth, thick consistency. It’s ready when it coats the back of a wooden spoon and you can draw a clear line through it.
- Pour the pastry cream into a medium-sized baking dish and spread it out to cool quickly. Place plastic wrap directly on top of the cream to prevent a skin from forming. Refrigerate until completely cold.
To Make the Sugar Syrup
- Pour ½ cup (125ml) water into a small saucepan and add 2 tablespoons of sugar. Bring to a boil, then reduce to a simmer until the sugar fully dissolves. Pour the sugar water into a bowl to cool completely.
- Once cooled, stir in 2 tablespoons of Strega or Limoncello liqueur, if using.
To Make the Chantilly Cream
- Add the very cold heavy cream to the bowl of your mixer. Whip on medium speed until soft peaks form. Gradually add the powdered sugar 1 tablespoon at a time, continuing to whip until stiff peaks are achieved. Be careful not to overwhip.
- Transfer the cold pastry cream to a mixing bowl and give it a quick whisk to loosen it. Gently fold in the whipped Chantilly cream, one-third at a time, until fully combined and light.
- Transfer the combined cream mixture to the fridge until you are ready to assemble the cake.
Assembling the Cake
- From one of the cooled sponge cakes, carefully slice off the top crust to make it flat. Cut this sponge into three even layers.
- From the second sponge cake, remove the top crust and browned sides. Cut it into slices, then cut each slice lengthwise into three strips. Finally, dice each strip into small cubes, about 1cm (1/3 inch) in size. These will be your mimosa “flowers.”
- To assemble: Place the bottom sponge layer on your cake stand. Brush generously with sugar syrup. Spread ⅓ of the cream filling evenly over it. Top with the second sponge layer. Brush with more sugar syrup and add another ⅓ of the filling, spreading it out to keep the cake level.
- Place the final sponge layer on top. Use the remaining cream to completely cover the top and sides of the cake. Gently press the small sponge cubes all over the cream until the entire cake is covered, creating the mimosa effect. Serve immediately or refrigerate until ready.
Video Tutorial
Watch the video below for a visual guide on how to prepare your Torta Mimosa step-by-step.
For a detailed video demonstration of making Torta Mimosa, please visit the original blog post or search for “Torta Mimosa recipe video” on YouTube.
Important Notes
- Read the whole recipe first: This multi-component cake is best tackled with a full understanding of all steps. Review the entire recipe, including photos and videos, before starting to ensure a smooth process.
- To achieve a yellow sponge cake: For a naturally vibrant yellow sponge, use eggs with deep golden yolks. If not available, a tiny drop of yellow food coloring can be added to the egg mixture.
- Don’t open the oven door: It’s critical not to open the oven door during the 40-minute baking time for the sponge, as this can cause it to sink. After baking, turn off the oven and leave the door ajar for 5 minutes for gradual cooling.
- To stop it drying out: The inner sponge layers are kept moist by the syrup and cream. However, the external sponge cubes can dry out. Reserve a little sugar syrup to lightly dab the top of the cake the next day if needed.
- Storage: Store the assembled Torta Mimosa in an airtight container in the fridge for up to 3 days.
- Room Temperature Ingredients: For the best results, ensure eggs for the sponge are at room temperature, as they whip up to greater volume more effectively.
- Chilling Times are Key: Respect the cooling times for the sponge cakes and especially the pastry cream. The pastry cream must be completely cold before folding into the Chantilly to ensure a stable and fluffy filling.
Helpful Information for All Our Recipes
- We consistently use extra virgin olive oil in all our recipes unless otherwise specified, for its superior flavor and health benefits.
- When using canned or jarred tomatoes, we recommend Cirio or Mutti brands for the best taste and quality, ensuring authentic Italian flavors.
- All vegetable measurements assume medium-sized vegetables unless stated differently within the recipe.
- Every recipe shared here is meticulously tested and developed using a fan (convection) oven, which may require slight temperature or time adjustments for conventional ovens.
- Find out more about how nutrition is calculated for our recipes, providing you with approximate dietary information.
- Discover our must-have Italian Pantry Staples to stock your kitchen with essential ingredients for authentic Italian cooking.
- You can also find all our Essential Kitchen Tools for Italian Cooking to ensure you have everything you need for culinary success.
Nutrition Information (per serving)
Calories:
517kcal
|
Carbohydrates:
69g
|
Protein:
9g
|
Fat:
23g
|
Saturated Fat:
13g
|
Polyunsaturated Fat:
2g
|
Monounsaturated Fat:
6g
|
Trans Fat:
0.01g
|
Cholesterol:
233mg
|
Sodium:
79mg
|
Potassium:
180mg
|
Fiber:
0.5g
|
Sugar:
44g
|
Vitamin A:
995IU
|
Vitamin C:
0.3mg
|
Calcium:
120mg
|
Iron:
1mg
Nutrition information is automatically calculated and should be used as an approximation only.
Did you try this recipe?
Leave a comment below and share your thoughts!