
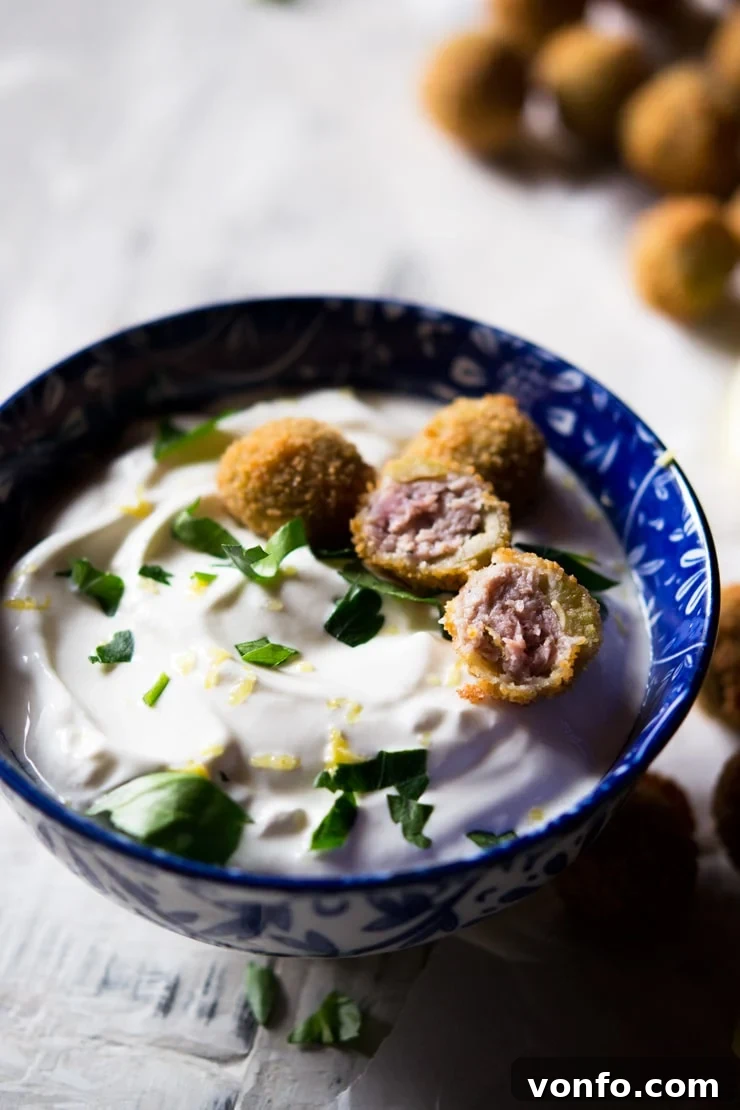
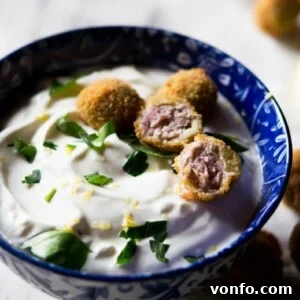
Prepare to tantalize your taste buds with one of Italy’s most beloved and undeniably addictive appetizers: **Fried Sausage Stuffed Olives**! These irresistible golden bites, each brimming with a savory Italian sausage filling, offer a symphony of textures and flavors. Perfectly crispy on the outside and tender within, they make an exceptional addition to any gathering. Whether you’re hosting a sophisticated party, enjoying weekend nibbles with drinks, or simply craving a gourmet snack, these homemade stuffed olives, served with a refreshing squeeze of lemon juice and a creamy garlic sour cream dip, are guaranteed to be a crowd-pleaser.
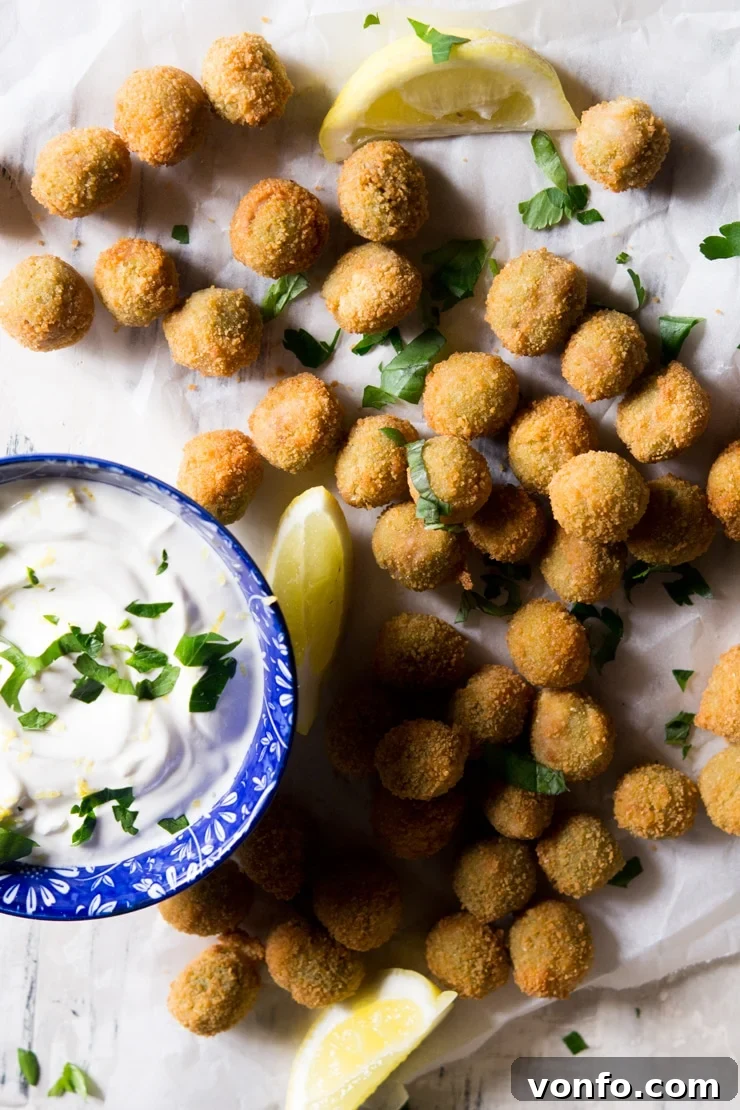
Embracing the Aperitivo: The Italian Love Affair with Fried Stuffed Olives
In Italy, particularly in the enchanting Marche region, deep-fried stuffed olives, known affectionately as “Olive Ascolane,” are far more than just a snack – they’re a culinary institution. These delectable morsels are a quintessential component of the Italian *aperitivo* culture, often served alongside cocktails in bustling bars and elegant restaurants. Their popularity stems from their exquisite balance: the briny burst of the olive perfectly complements the rich, spiced sausage filling, all enveloped in a delightfully crunchy fried coating. It’s a taste experience that truly captures the essence of Italian hospitality and flavor.
While you might find frozen versions in Italian supermarkets, offering a convenient shortcut for frying at home, these pre-made options often fall short of the genuine article. For those residing outside of Italy, discovering ready-to-fry stuffed olives can be a significant challenge. This is precisely why we’re thrilled to share our simple yet authentic recipe. Crafting these olives from scratch not only guarantees unparalleled freshness and flavor but also offers the immense satisfaction of creating something truly special in your own kitchen. Trust us, once you experience the superior taste of homemade, you’ll understand why it’s worth every moment!
Chef’s Insight: Planning a party or looking for easy meal prep? Prepare a substantial batch of these **fried stuffed olives** and freeze them before frying. This smart trick ensures you always have a gourmet, last-minute appetizer ready to go, requiring only a quick trip to the fryer before serving.
Elevating Your Stuffed Olives: Creative Filling Inspirations
The beauty of homemade stuffed olives lies in the freedom to customize your fillings. While the traditional Italian sausage offers a wonderfully aromatic and robust flavor profile, enriched with hints of fennel seeds, oregano, and garlic, there’s a world of delicious possibilities waiting to be explored. When choosing your stuffing, consider ingredients that offer complementary flavors to the olive’s brininess and possess a texture that will hold up well during the frying process. Here are some diverse and exciting stuffing ideas to spark your creativity:
- Classic Italian Sausage: For the most authentic experience, opt for a high-quality Italian sausage. Its natural blend of spices and herbs provides a deep, savory foundation that perfectly balances the olive. If you prefer a milder taste, avoid overly spicy varieties.
- Gooey Cheese Sensations: Introduce a delightful melt with cheeses like fresh mozzarella, smoked provolone, or even a creamy Fontina. For firmer cheeses, instead of cutting the olives completely in half, simply make a small incision and insert a tiny cube of cheese into the pitted olive. This method helps prevent the cheese from escaping during frying, ensuring a wonderfully oozy center.
- Creamy & Herbaceous Fillings:
- Ricotta or Cream Cheese: Mix creamy ricotta or smooth cream cheese with finely chopped chives, parsley, a pinch of garlic powder, and a dash of salt and pepper for a rich, tangy stuffing.
- Spinach and Ricotta: Inspired by traditional Italian flavors, a blend of cooked, finely chopped spinach and creamy ricotta provides an earthy and satisfying vegetarian option. (Similar to our spinach and ricotta cannelloni filling)
- Flavorful Pesto Blends:
- Sun-Dried Tomato Pesto with Ricotta: This offers a vibrant, tangy, and umami-rich vegetarian alternative that brings a Mediterranean flair.
- Classic Basil Pesto: For a fresh, aromatic, and herbaceous burst, a spoonful of traditional basil pesto makes a fantastic filling.
- Mushroom & Herb Medley: Finely chop and sauté your favorite mushrooms (cremini, shiitake) with garlic and fresh herbs like thyme and rosemary. Bind the mixture with a little breadcrumb or soft cheese for a savory, earthy vegetarian option.
- Personalized Seasoning: Feel free to experiment with other herbs and spices to match your palate. A pinch of red pepper flakes for a subtle heat, or a touch of smoked paprika for depth, can transform your stuffed olives into a unique creation.
Mastering the Art of Crispy Fried Stuffed Olives: Your Step-by-Step Blueprint
Crafting these delectable **fried stuffed olives** is a gratifying culinary journey. By following these precise and detailed instructions, you’ll consistently achieve perfectly golden, irresistibly crispy, and intensely flavorful results every single time.
Step 1: Efficiently Prepare Your Workstation and Stuffing
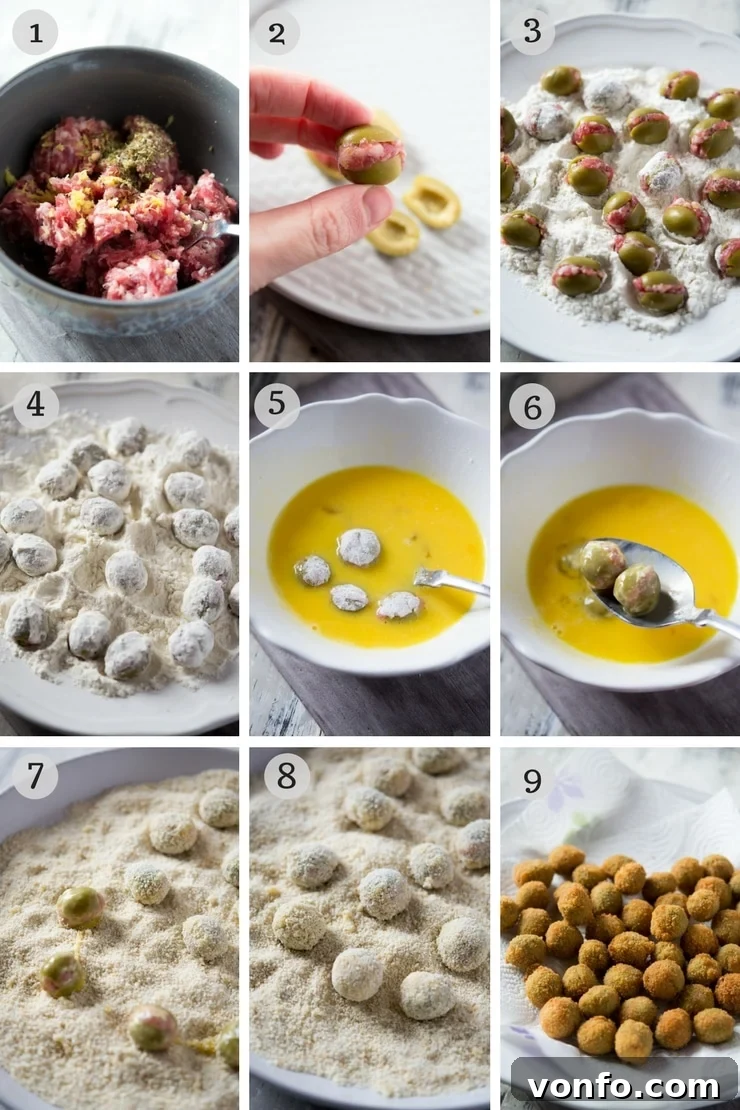
Begin by organizing your cooking space. In a medium-sized mixing bowl, combine the contents of your chosen Italian sausage with the bright, finely grated zest from half a lemon and 1 teaspoon of dried oregano. Use your hands or a sturdy fork to thoroughly mash and blend these ingredients until they are uniformly combined. This crucial step ensures that the aromatic flavors are evenly distributed throughout your sausage filling. Next, establish your breading assembly line: arrange three separate shallow plates or bowls side-by-side. Into the first, place 1/2 cup (70g) of plain flour; into the second, pour 1 beaten egg; and into the third, add 1 cup (100g) of fine breadcrumbs. Lightly season each with a tiny pinch of salt and pepper. A well-organized setup is the secret to a smooth and mess-free breading process.
Step 2: Expertly Prepare and Stuff Each Olive
Take 1 1/2 cups (340g) of pitted olives. Drain them completely of any liquid, then rinse them under cold running water. It is absolutely essential to pat each olive meticulously dry with kitchen paper. Any residual moisture will act as a barrier, preventing the breading from adhering properly and leading to a soggy exterior. With a sharp knife, carefully slice each olive lengthwise, creating a “butterfly” cut where the halves remain connected at one side, allowing you to open them gently. Take approximately 1/2 teaspoon of the seasoned sausage mixture and gently press it into the cavity of an opened olive. Carefully fold the olive halves back together, gently pressing the sides to securely encase the savory filling. Repeat this precise stuffing process for every single olive, ensuring each one is sealed tightly.
Step 3: The Triple-Breading Technique for Ultimate Crispiness
This stage is pivotal for achieving that coveted, perfectly crispy exterior. Work with small batches of olives to avoid overcrowding and ensure even coating. First, gently toss the stuffed olives in the plain flour until they are lightly but entirely coated. This initial flour layer provides a dry surface for the egg wash to cling to. **Pro Tip for Success:** After flouring, cup the olives in your hands and give them a light shake to dislodge any excess flour before proceeding to the egg dip. Too much flour can result in a thick, pasty breading. Next, immerse the floured olives into the beaten egg, ensuring they are thoroughly coated on all sides. Finally, generously roll the egg-washed olives in the fine breadcrumbs, gently pressing to ensure the crumbs adhere firmly. Repeat this comprehensive breading process until all your olives are beautifully coated. **Shaping Trick:** For a more uniform and aesthetically pleasing rounded shape, gently roll the crumbed olives between the palms of your hands. This also helps to firmly set the breading.
Step 4: Achieving Golden Perfection Through Deep Frying
In a large, heavy-bottomed pot, Dutch oven, or deep fryer, heat 3.5 cups (1 liter) of a neutral-flavored oil, such as sunflower or canola oil, to a temperature between 350-375°F (175-190°C). If you don’t possess a kitchen thermometer, a simple test can gauge the oil’s readiness: drop a small piece of bread into the hot oil. If it sizzles vigorously and turns golden brown within 30-60 seconds, your oil is ready for frying. Carefully lower the breaded olives into the hot oil in small batches. It’s crucial not to overcrowd the pot, as this will drastically lower the oil’s temperature, leading to greasy, less crispy olives. Fry each batch for approximately 2-3 minutes, or until they achieve a gorgeous golden-brown hue and a satisfying crisp texture. Using a slotted spoon, carefully remove the fried olives and transfer them to a plate lined with several layers of kitchen paper. This vital step allows any excess oil to drain away, preserving their delightful crispiness.
Step 5: Crafting Your Creamy Garlic Sour Cream Dip and Serving
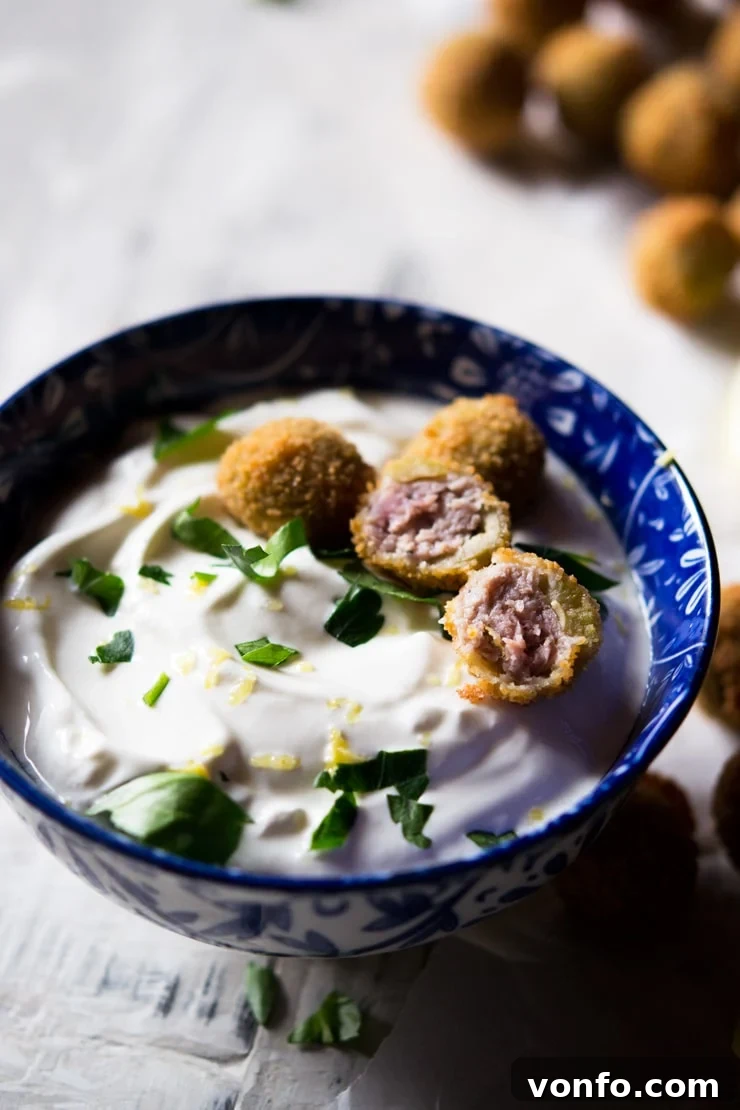
While your freshly fried olives are draining and cooling slightly, whip up the incredibly simple yet utterly delicious garlic sour cream dip. In a small bowl, combine 1 small bunch of finely chopped fresh parsley with your desired amount of sour cream (for instance, starting with about 1/2 cup and adjusting to your preference). Season the dip with a pinch of salt and pepper, then mix thoroughly until it’s smooth and perfectly creamy. While traditional Italian *aperitivo* typically presents these olives without additional dips or lemon, we find that the bright zest of lemon and the cool, tangy creaminess of this dip beautifully enhance the rich flavor of the fried olives, making them particularly appealing for parties and varied palates. Garnish the finished olives with an extra sprinkle of chopped parsley and serve them immediately, accompanied by the garlic sour cream dip and fresh lemon wedges for squeezing.
Make Ahead & Storage Solutions for Your Stuffed Olives
One of the many advantages of these delightful **fried stuffed olives** is their adaptability for advance preparation, making them an entertainer’s dream. You can easily prepare and bread the olives ahead of time, then either refrigerate or freeze them until you’re ready to fry.
- Refrigeration: After stuffing and breading, arrange the uncooked olives in a single layer on a plate or in an airtight container. If stacking, use parchment paper between layers to prevent them from sticking. They can be safely stored in the refrigerator for up to 24 hours before frying.
- Freezing for Longer Storage: For extended freshness, lay the breaded, uncooked olives in a single layer on a baking sheet. Place the sheet in the freezer until the olives are completely solid (this usually takes about 1-2 hours). Once frozen firm, transfer them to a freezer-safe bag or container. They will maintain their quality for up to 3 months. When you’re ready to enjoy them, deep fry the olives directly from their frozen state; they may simply require an additional minute or two of frying time to cook through and become golden.
- Reheating Cooked Olives: Should you find yourself with any delicious leftovers, these fried olives can be gently reheated to regain their crispness. We recommend using an air fryer or a conventional oven preheated to 350°F (175°C) for about 5-7 minutes, or until they are hot and re-crisped. Microwaving is generally not advised, as it can lead to a soft, soggy texture.
More Irresistible Italian Appetizer Recipes to Discover
If you’ve fallen in love with these crispy, savory delights, you’ll undoubtedly appreciate our other collection of simple, authentic, and utterly delicious Italian appetizer recipes. Perfect for expanding your *aperitivo* repertoire!
- Easy Marinated Olives: A quick and aromatic way to enjoy olives, infused with herbs and citrus.
- Stracchino and Sausage Crostini: A delightful combination of creamy Italian cheese and savory sausage served on toasted bread.
- Bruschetta al Pomodoro – Classic Tomato Bruschetta: The timeless fresh tomato and basil topping on crispy grilled bread, a staple of Italian starters.
- Cecina Toscana – Tuscan Chickpea Flatbread: A naturally gluten-free and incredibly satisfying savory pancake, popular in Tuscany.
- Ricotta Stuffed Zucchini Flowers: Delicate zucchini blossoms filled with creamy ricotta and lightly fried to golden perfection.
We truly hope you enjoy making and sharing these incredible **Fried Sausage Stuffed Olives**. If this recipe brings a taste of Italy to your home, or if you try any other recipe from our blog, please don’t hesitate to rate it and share your cooking experience in the comments section below – your feedback inspires us! For a continuous stream of delicious recipes, culinary tips, and what we’re cooking up next, make sure to **FOLLOW US** on FACEBOOK, TWITTER, INSTAGRAM, and PINTEREST.
Most of our recipes come with step-by-step photos, helpful tips and tricks to make it perfectly first time, and even video!
Recipe: Fried Sausage Stuffed Olives
By Emily
Cook: 5 mins
Total: 35 mins
Servings: 8 people
Print Recipe
Delicious and crispy sausage stuffed olives, deep fried and served with a squeeze of lemon juice and garlic sour cream dip. These stuffed olives make a great appetizer or snack that are perfect for weekend nibbles with drinks or to serve up at your next party.
Ingredients
For the Stuffed Olives
- 1 1/2 cups (340g) pitted olives
- Zest of half a lemon
- 3.5 oz (100g) Italian sausage
- 1 tsp dried oregano
- 1/2 cup (70g) plain flour
- 1 cup (100g) fine breadcrumbs
- 1 egg, beaten
- Salt and pepper, to taste
- 3.5 cups (1 ltr) sunflower oil, for frying
- Lemon wedges (optional), for serving
For the Dip
- 1 small bunch parsley, finely chopped (plus extra for garnish)
- Soured cream (quantity as desired for serving, e.g., 1/2 cup)
- 1 pinch salt and pepper
Instructions
- Add the sausage to a bowl with the lemon zest and oregano; mash with a fork to mix together thoroughly.
- Rinse the olives in cold water, then pat dry completely with a paper towel. Cut each olive in half lengthwise (but not entirely through) and stuff with a small amount of sausage meat (around 1/2 tsp). Close the olives back up by pressing the sides together. Repeat for all olives.
- Place the flour and breadcrumbs in separate plates, and a beaten egg in a bowl. Season each with a tiny pinch of salt and pepper. In batches, toss the stuffed olives in the flour, then dip in the beaten egg, and finally roll them in breadcrumbs until completely coated.
- Heat 3.5 cups (1 ltr) of sunflower oil in a large pot to 350-375°F (175-190°C). Fry the olives in batches until golden and crispy (about 2-3 minutes), then remove with a slotted spoon and drain on kitchen paper. Scatter over some chopped parsley and serve with lemon wedges.
- To make the sour cream dip, simply combine all dip ingredients in a bowl and serve alongside the olives.
Notes
- Batch Prep & Freezing: Make in large batches and freeze for a super quick and easy snack.
- Excess Flour Removal: Cup the olives in your hands after dusting in flour and lightly shake to remove excess flour before dipping in the egg.
- Uniform Shape: Roll the crumbed olives gently in the palm of your hands to create a rounder, more uniformed shape.
- Stuffing Variations: Experiment with fillings like any good quality sausage (avoid overly spicy), mozzarella or melting cheese (insert cubes into pitted olives), spinach and ricotta, sun-dried tomato pesto, or basil pesto.
Nutrition
Calories: 259kcal | Carbohydrates: 28g | Protein: 7g | Fat: 12g | Saturated Fat: 2g | Cholesterol: 29mg | Sodium: 1005mg | Potassium: 123mg | Fiber: 3g | Sugar: 2g | Vitamin A: 205IU | Vitamin C: 0.2mg | Calcium: 84mg | Iron: 2.3mg
Nutrition information is automatically calculated, so should only be used as an approximation.
Helpful Info for All Recipes
- We always use extra virgin olive oil in all of our recipes unless stated otherwise.
- When using canned or jarred tomatoes, we recommend Cirio or Mutti brands for the best results and flavor.
- All vegetables are medium-sized unless stated otherwise.
- All recipes are tested and developed using a fan (convection) oven.
- Find out more about how nutrition is calculated.
- Check out our must-have Italian Pantry Staples.
- You can also find all our Essential Kitchen Tools for Italian Cooking.
Did you try this recipe? We’d love to hear about it! Leave a comment below!