
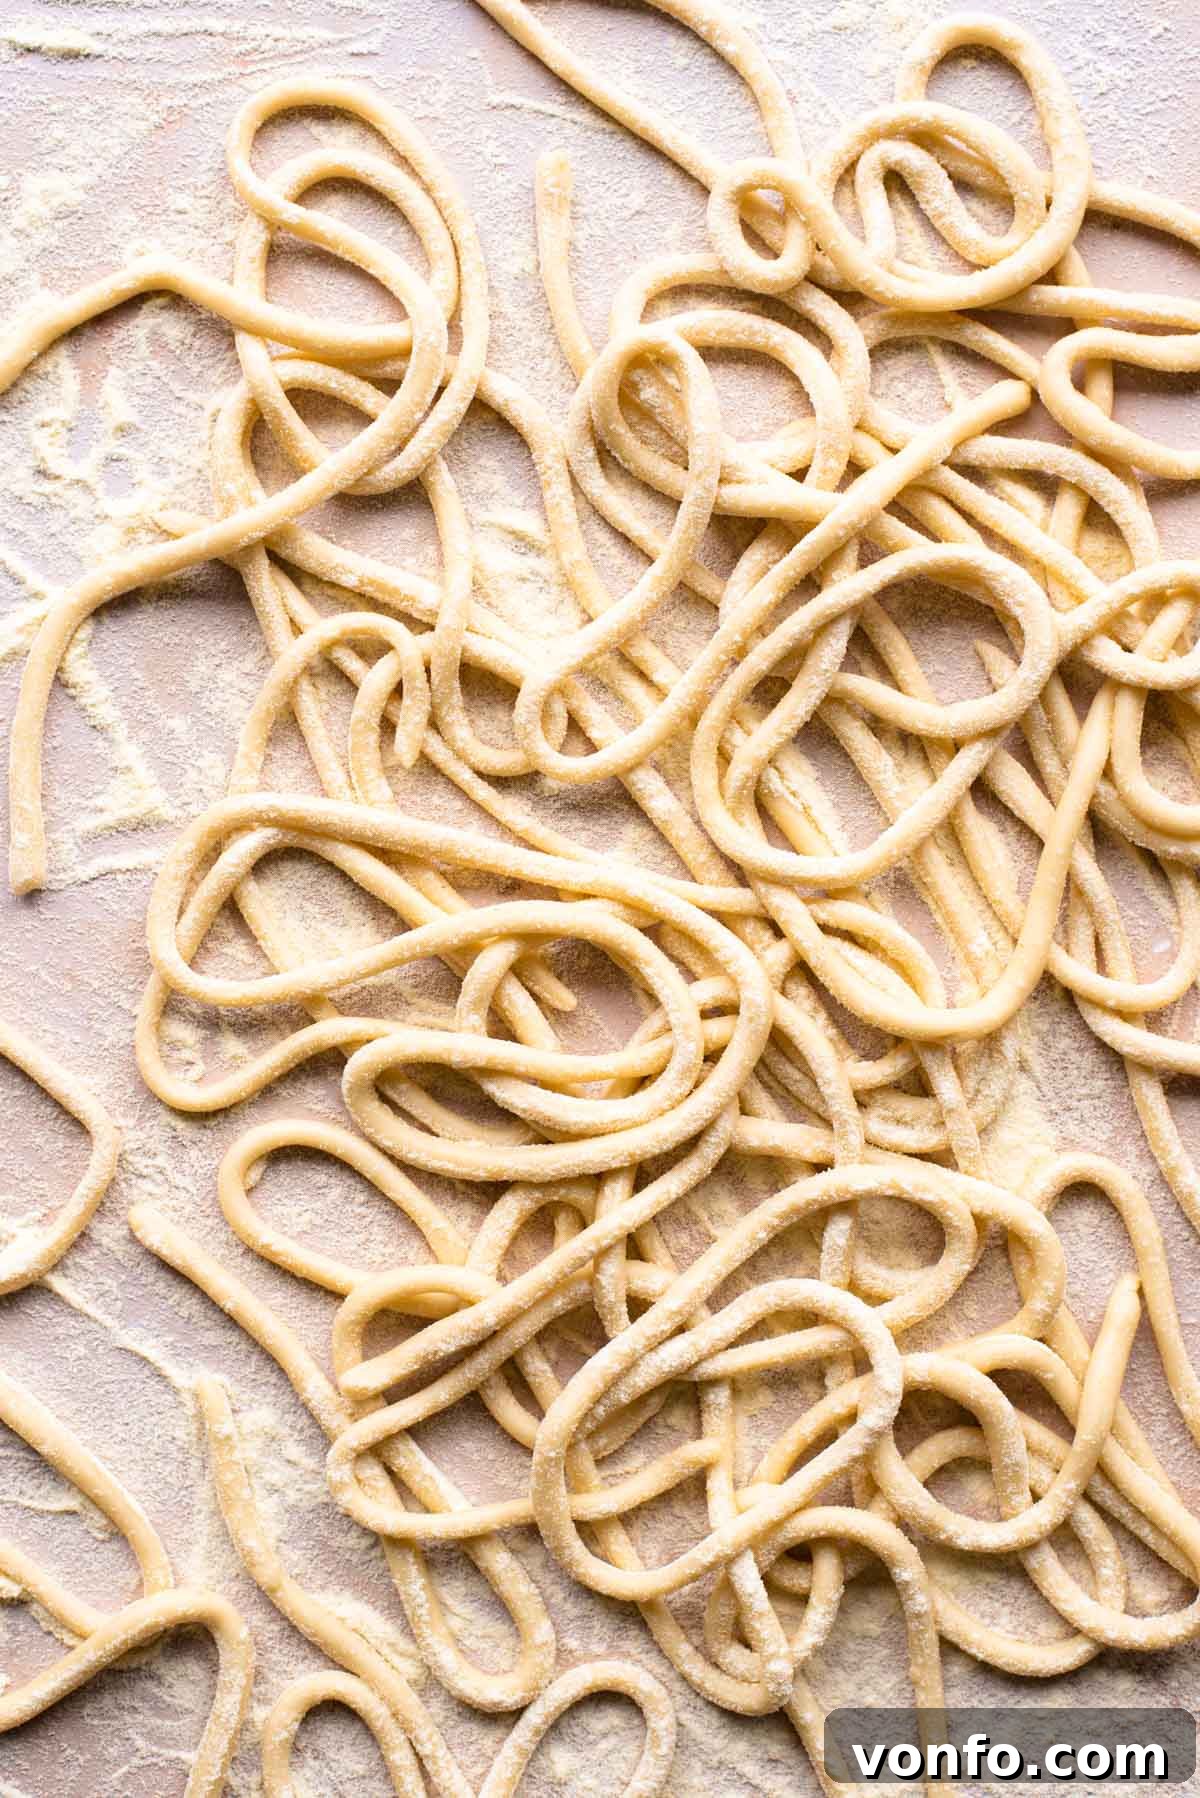
There’s an undeniable magic to homemade pasta, and few shapes capture the rustic charm and satisfaction of Italian cooking quite like Pici. Hailing from the picturesque hills of Siena in Tuscany, Pici pasta is a thick, hand-rolled noodle, celebrated for its wonderfully chewy texture and incredible versatility. Forget complicated equipment or fussy ingredients; this traditional pasta requires just three simple staples – flour, water, and a touch of olive oil – making it an ideal project for both seasoned pasta makers and enthusiastic beginners.
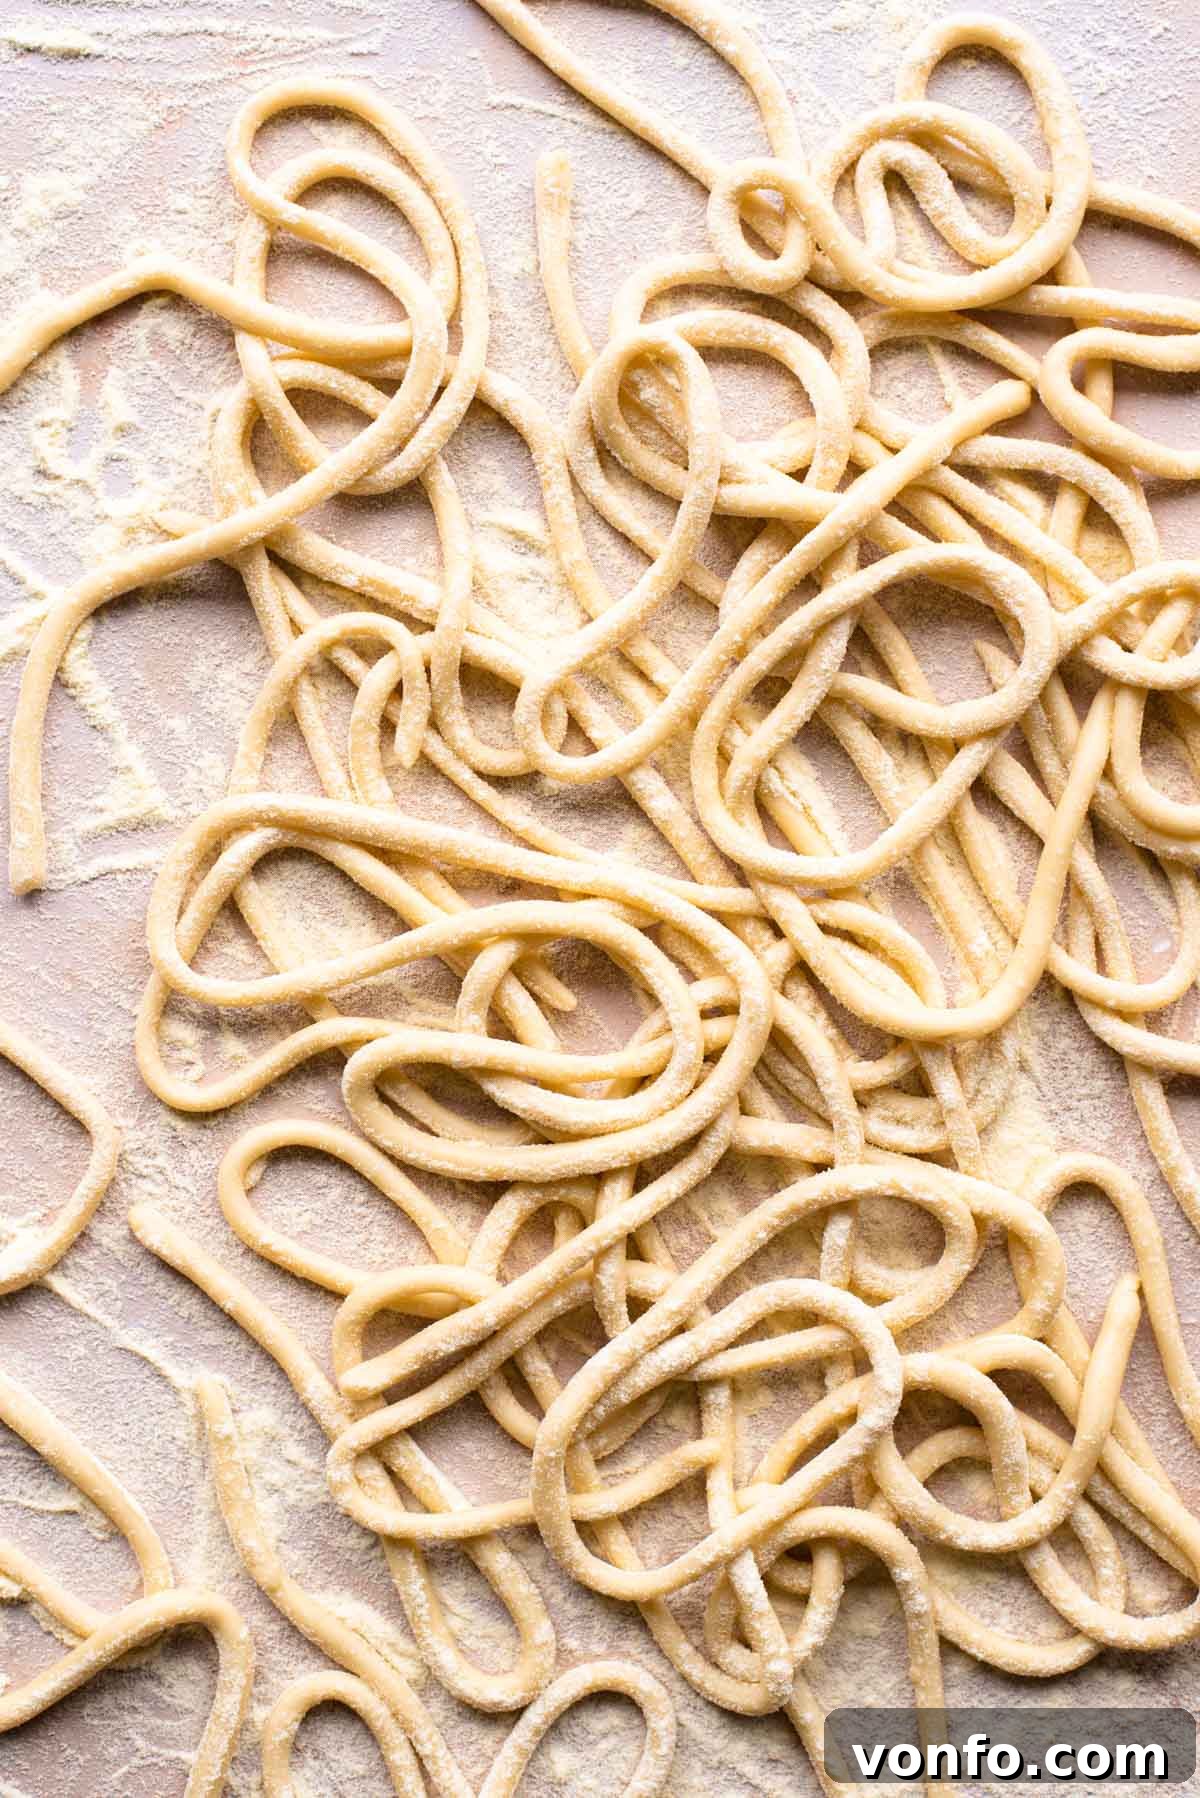
The Rustic Heart of Tuscany: Discovering Pici Pasta
Pici, often affectionately known as ‘Pici Senesi’, is more than just a pasta shape; it’s a culinary emblem of Tuscan heritage. Unlike many Italian pastas that rely on eggs for richness, Pici’s humble, egg-free dough highlights its peasant origins, a testament to resourceful cooking where readily available ingredients were transformed into something truly special. Each strand is lovingly hand-rolled, giving it a unique, slightly irregular appearance that adds to its authentic appeal.
This charmingly rustic pasta boasts a delightfully chewy bite, making it perfect for soaking up rich, hearty sauces. Its robust nature ensures it stands up well to powerful flavors without getting lost, providing a satisfying mouthfeel that’s distinct from thinner spaghetti or delicate fresh egg pasta.
Why You’ll Love Making Pici From Scratch
If you’ve ever dreamt of making homemade pasta but felt intimidated, Pici is your perfect entry point. It’s incredibly forgiving and doesn’t require any special pasta machines. Here’s why Pici will become your new favorite pasta to make:
- Simplicity at its Best: With only flour, water, and olive oil, the ingredient list couldn’t be shorter. This minimalist approach allows the quality of each component to shine.
- Beginner-Friendly: Unlike delicate egg pastas that can be temperamental, Pici dough is wonderfully pliable and easy to handle. The hand-rolling technique is intuitive and doesn’t demand precision, making it perfect for those new to pasta making.
- Therapeutic Process: The act of hand-rolling each Pici strand is a meditative and enjoyable experience. It’s a wonderful way to connect with your food and the age-old traditions of Italian kitchens.
- Versatility in Serving: Pici is a true chameleon, pairing beautifully with a wide array of sauces, from simple garlic and oil to robust meat ragus. Its thick shape provides an ideal canvas for both traditional Tuscan flavors and your own creative culinary experiments.
- Unbeatable Texture: The substantial, chewy texture of Pici is incredibly satisfying. It provides a delightful contrast to lighter sauces and perfectly complements richer ones.
In Tuscany, Pici is traditionally served with iconic sauces like Cacio e Pepe, a creamy cheese and pepper sauce that clings beautifully to the rough strands. Another classic is Pici con La Nana, a rich duck ragu from Siena, or alle Bricole, which features breadcrumbs, fresh chili, and Tuscan Pecorino cheese. These pairings perfectly showcase Pici’s ability to absorb and enhance bold, regional flavors.
Ready to embark on your Pici-making journey? Below, you’ll find our comprehensive step-by-step guide, complete with photos, essential tips, and mouth-watering sauce recommendations to elevate your homemade pasta experience. Buon Appetito!
Essential Ingredients for Pici Pasta
Creating authentic Pici pasta requires only a few humble ingredients, but understanding their role is key to achieving the perfect texture and flavor. Take a look at the image below to visualize what you’ll need, along with some crucial tips on selecting the right components.
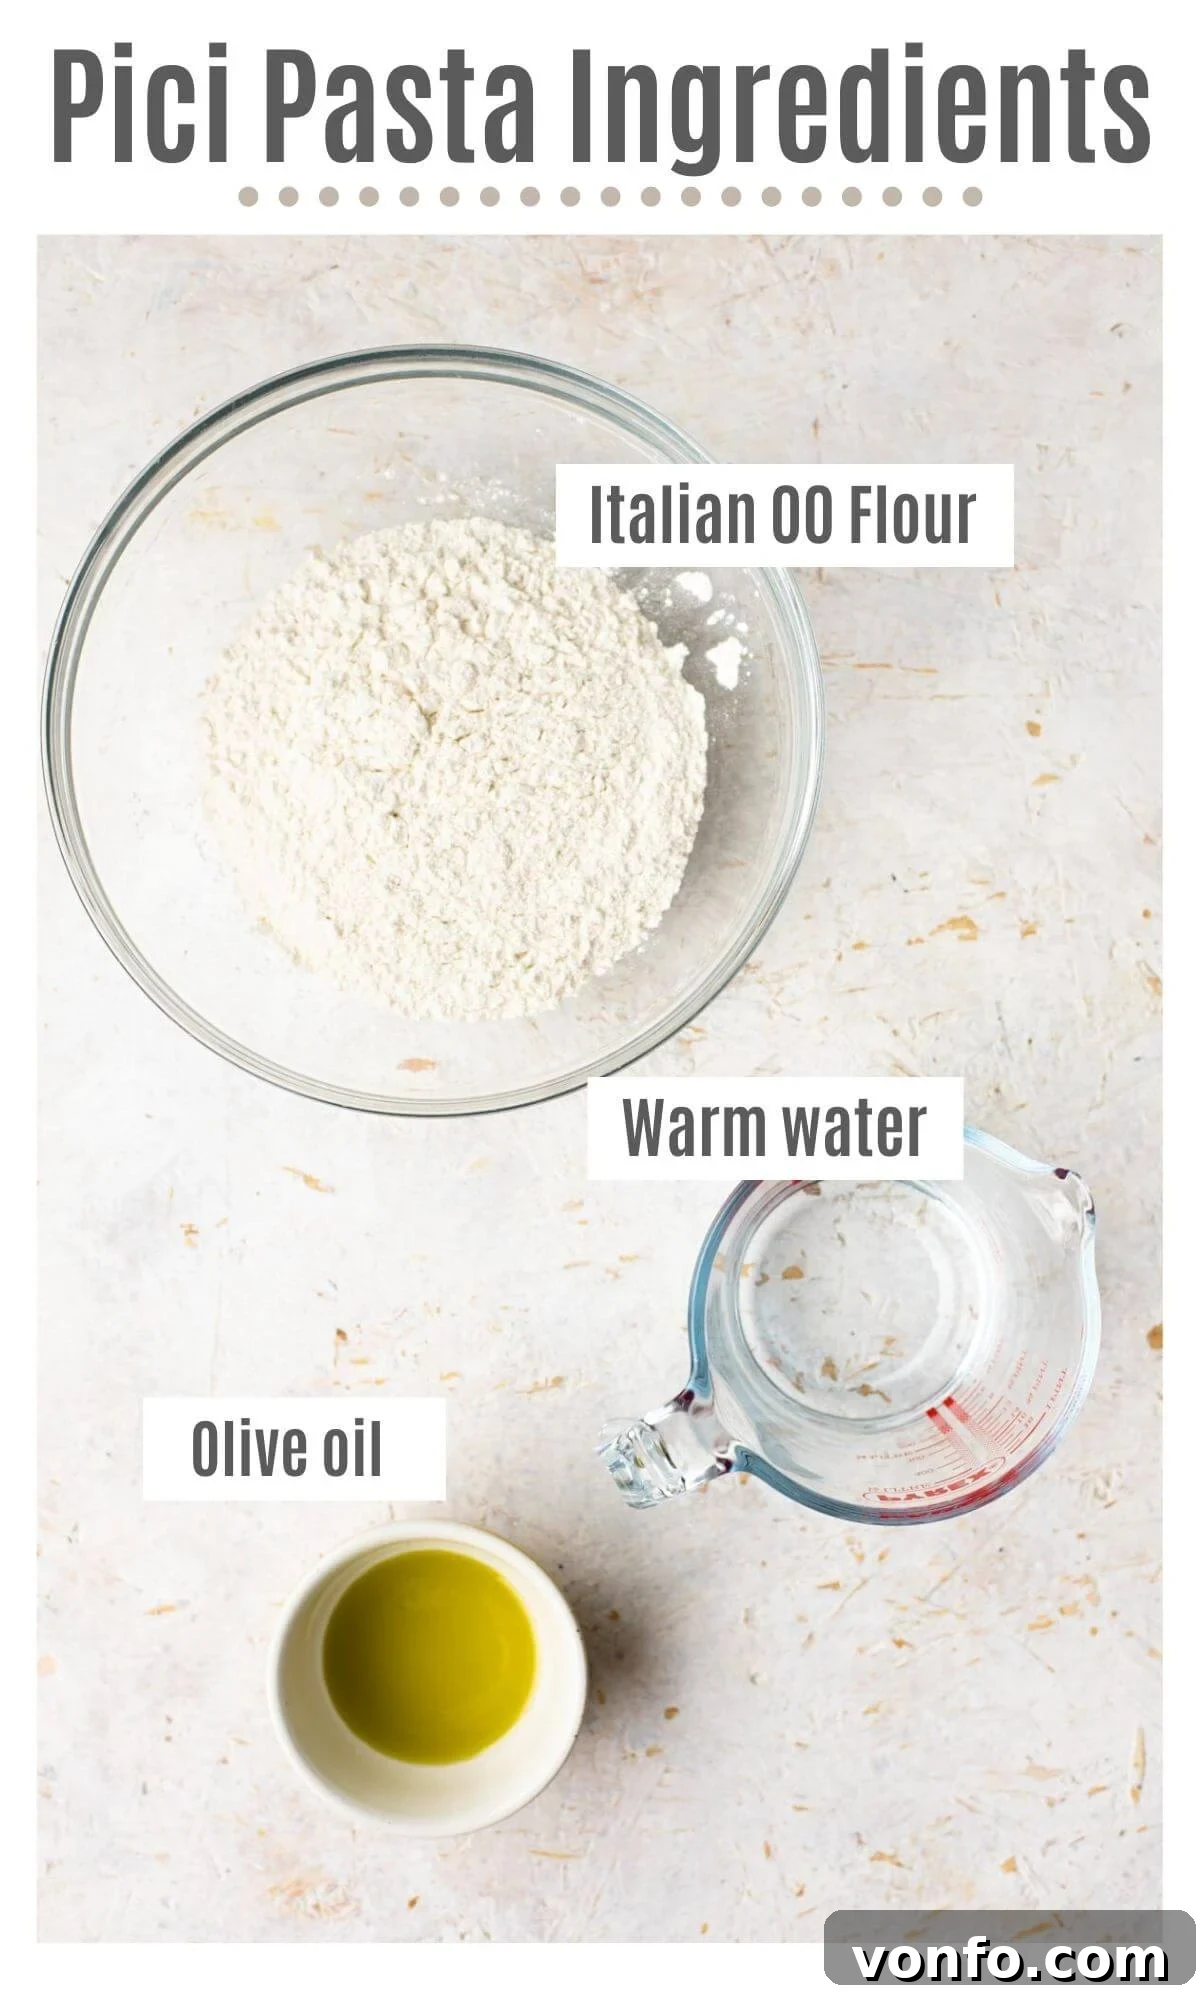
- Italian 00 Flour: Without a doubt, Italian ‘double zero’ (00) flour is the gold standard for pasta making. Its finely milled texture and low protein content produce a smooth, elastic dough that is easy to work with and results in a wonderfully tender chew. If 00 flour is difficult to find, a good quality all-purpose flour can be used as a substitute, though the final texture may be slightly different.
- Warm Water: The temperature of the water plays a crucial role in dough hydration. Warm water (not hot!) helps to activate the flour’s gluten more effectively and makes the dough easier to knead and more pliable. Aim for a temperature that feels comfortably warm to the touch.
- Extra Virgin Olive Oil: A touch of olive oil adds elasticity to the dough, contributes to its smooth texture, and imparts a subtle, authentic flavor. Use a good quality regular extra virgin olive oil for the best results.
- Salt (for cooking): While not directly in the dough, ample salt in your pasta water is essential. It seasons the pasta from within, enhancing its flavor significantly. Think of it as seasoning the pasta itself, not just the water.
Step-by-Step Guide to Crafting Perfect Homemade Pici
Follow these detailed instructions to create beautiful, authentic Pici pasta right in your kitchen. Remember, practice makes perfect, and the beauty of Pici lies in its rustic, handmade charm!
1. Prepare Your Work Surface and Add Flour: Begin by placing the Italian 00 flour directly onto a clean, dry work surface (a large wooden board or countertop works best) or into a large mixing bowl. Create a generous well in the center of the flour pile. This well will hold your liquid ingredients.
2. Combine Wet and Dry Ingredients: Pour the warm water and olive oil into the well. Using a fork, gradually incorporate the flour from the inner edges of the well into the liquid. Continue mixing until a shaggy, rough dough ball begins to form. At this stage, it will still look quite crumbly.
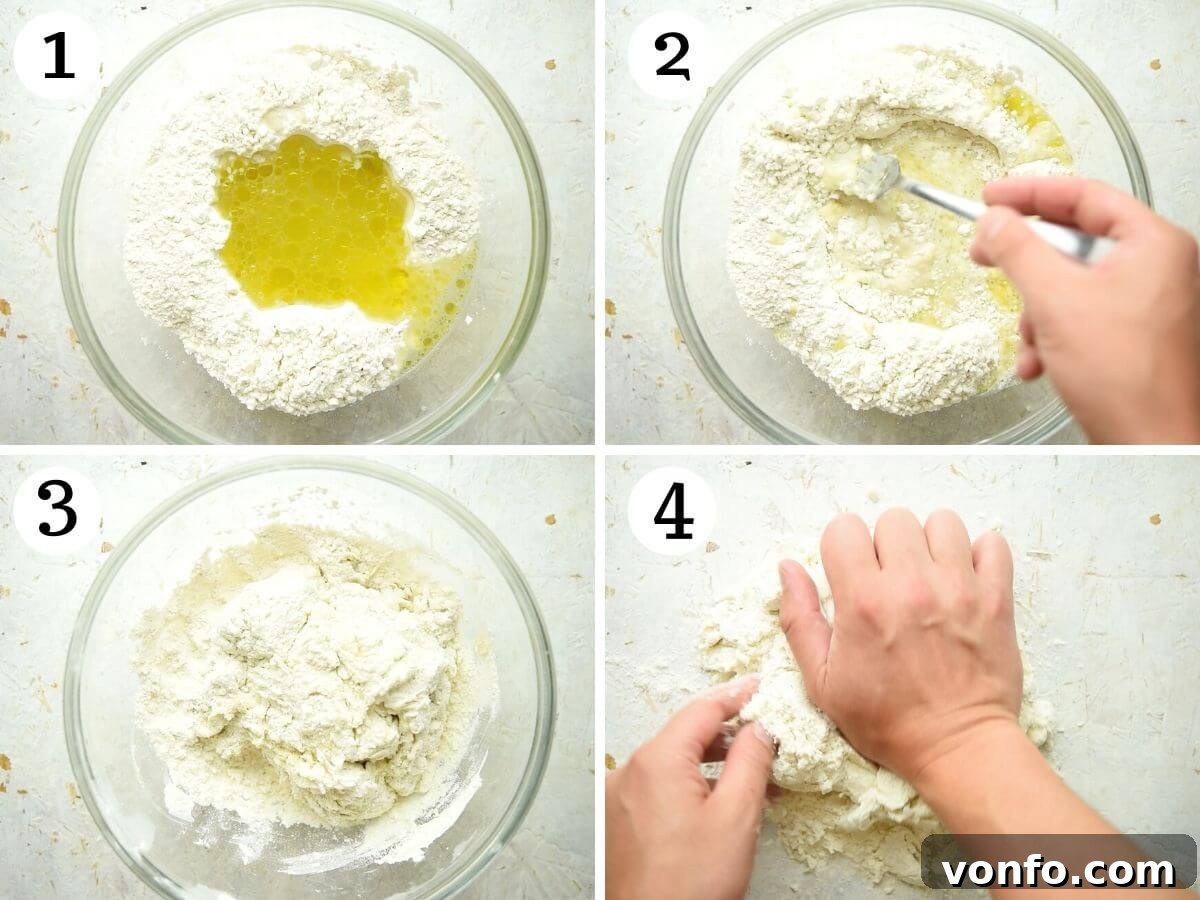
3. Knead the Dough to Perfection: Once a rough dough has formed, scrape it together and begin kneading. Knead the dough vigorously for about 10 minutes. Use the heel of your hand to push and fold the dough, rotating it frequently. The dough will transform from sticky and rough to smooth, elastic, and resilient. It should spring back when gently pressed. Wrap the well-kneaded dough tightly in plastic wrap or cover with an inverted bowl to prevent it from drying out, and let it rest at room temperature for a minimum of 30 minutes. This resting period is crucial as it allows the gluten to relax, making the dough much easier to roll.
4. Roll and Cut the Dough: After resting, unwrap the dough and place it on your clean, unfloured work surface. Without adding any extra flour (this is very important!), use a rolling pin to roll the dough out evenly into a round or rectangular shape, approximately 1 centimeter (about ⅜ inch) thick. Once rolled, use a sharp knife or a pasta wheel to cut the dough into ¼-inch (0.6 cm) thick strips.
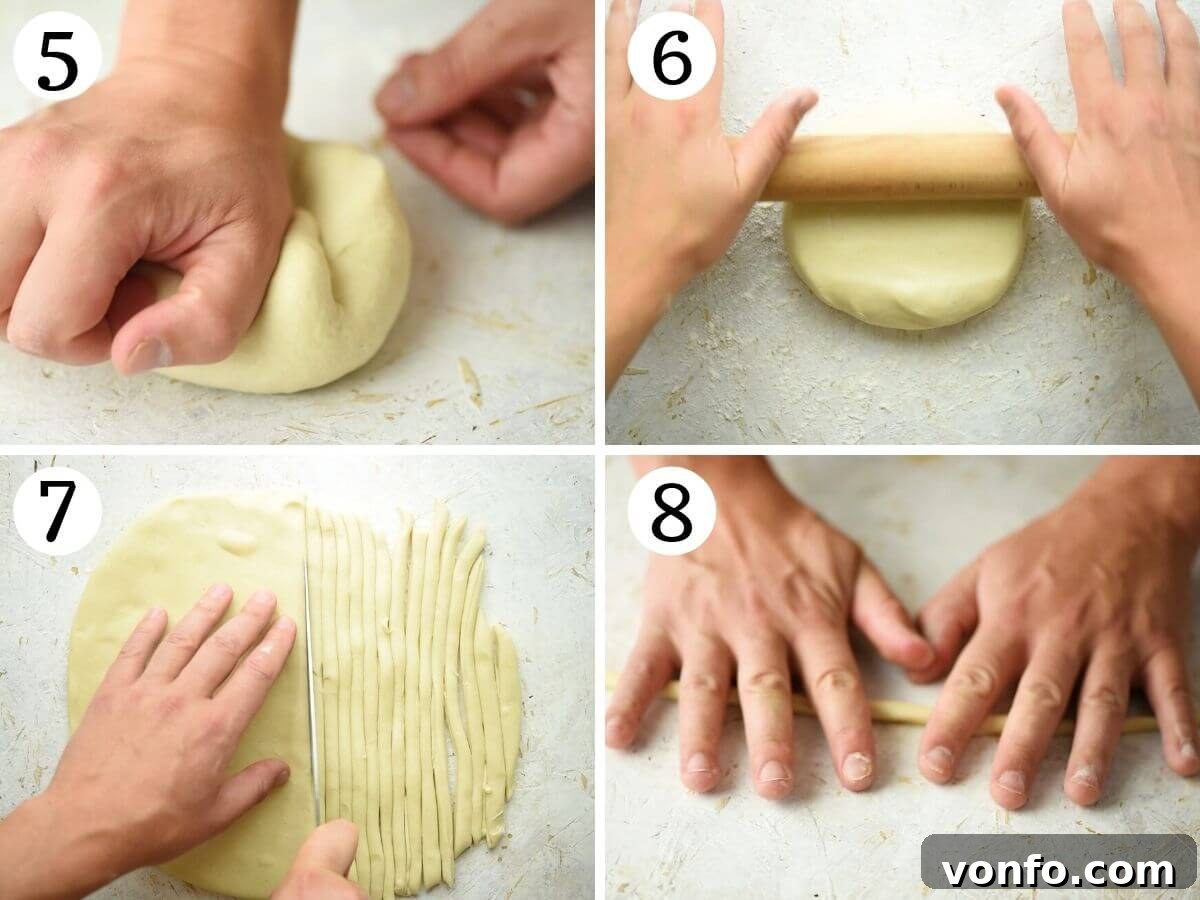
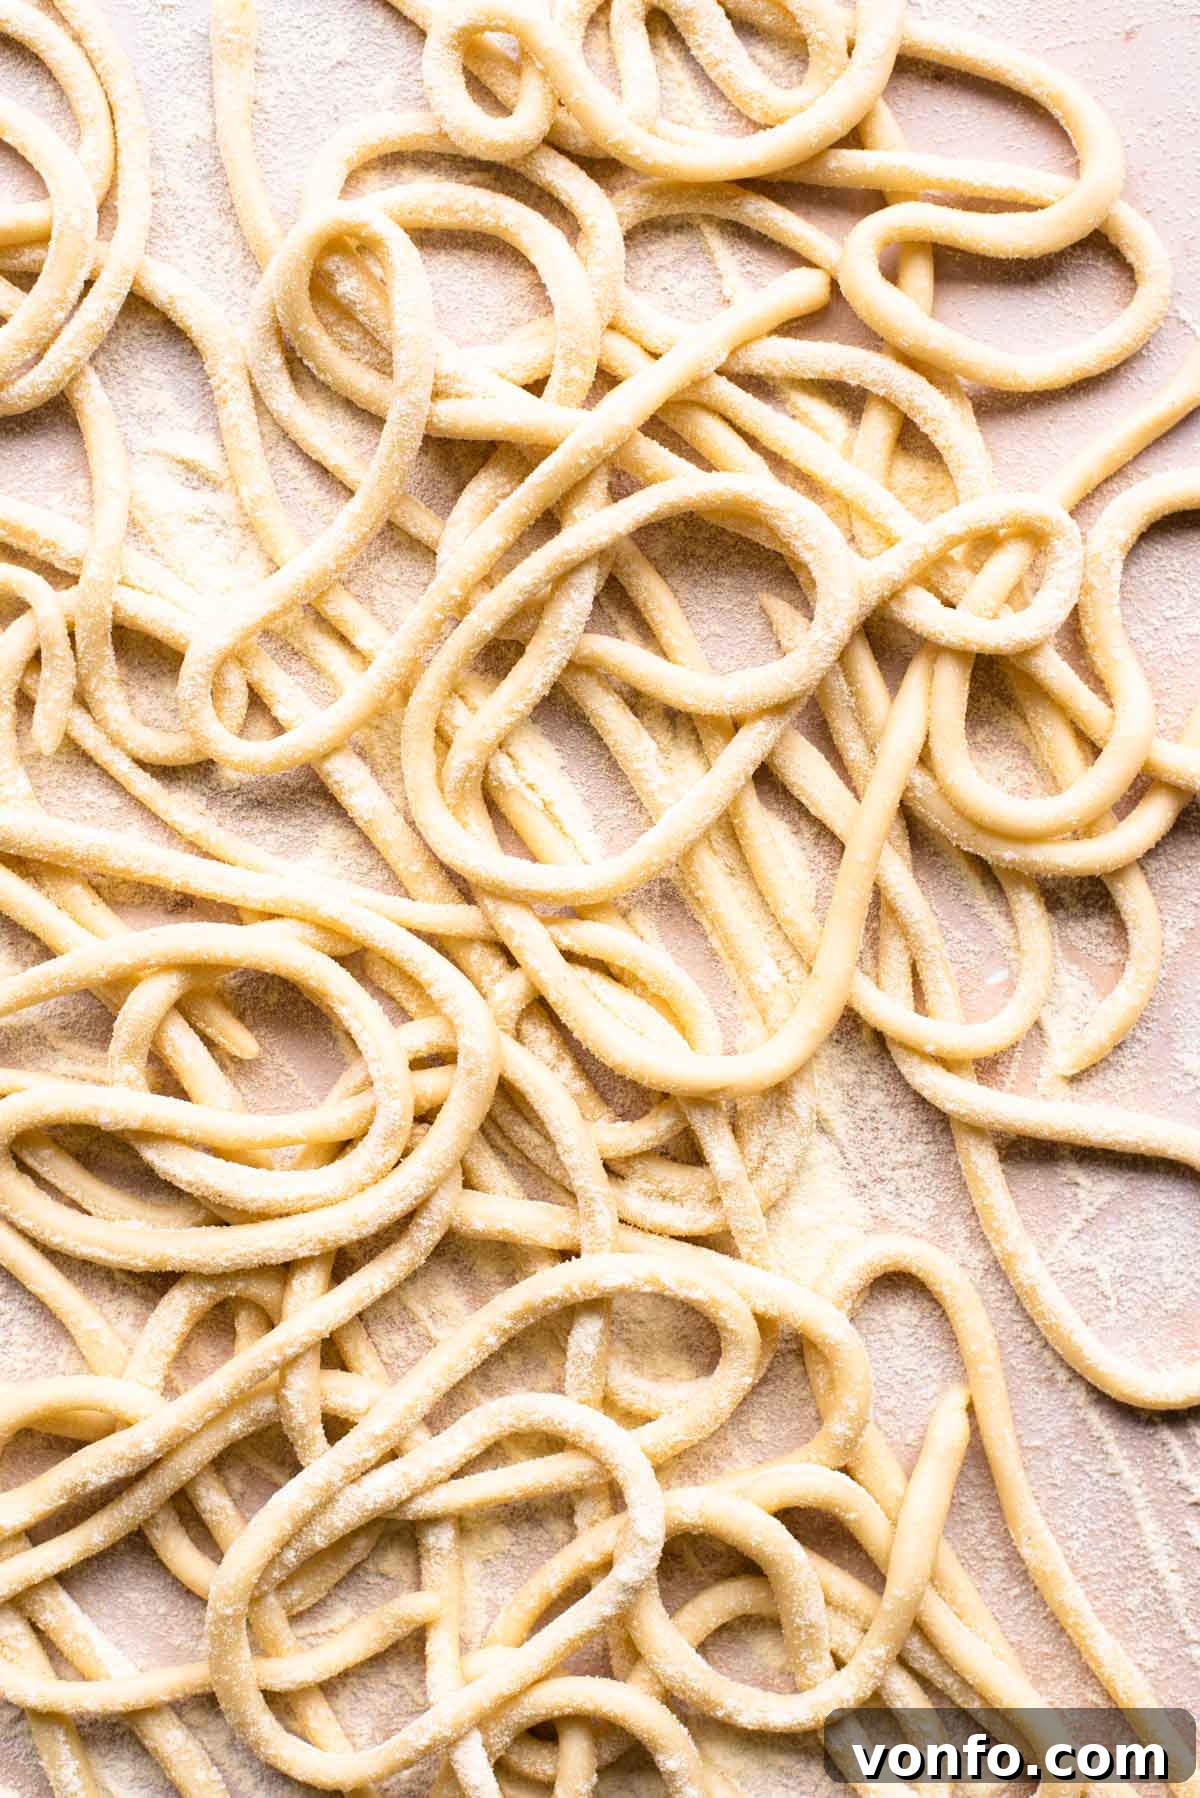
5. Hand-Roll the Pici: This is where the magic happens! Take one strip of dough at a time. Place it on your clean, unfloured work surface. Using the palms of your hands and a gentle, rolling motion, roll the strip back and forth, stretching it out until it resembles thick spaghetti or a sturdy worm. The friction between your hands and the unfloured surface is essential for the dough to lengthen. If you add flour, the dough will simply slide and won’t roll effectively. Continue rolling until each Pici strand reaches your desired thickness and length (typically 10-12 inches). As you roll each piece, gently place the finished Pici on a baking tray or a separate, designated area lightly dusted with semolina flour or regular flour. This dusting prevents the fresh pasta from sticking together while you continue rolling the rest.
6. Cook the Pici: Bring a large pot of generously salted water to a rolling boil. Ensure there’s enough water for the pasta to move freely. Once the water is boiling rapidly, add the freshly rolled Pici pasta. Cook for a short period, typically 2-3 minutes, or until the Pici floats to the surface and is tender yet firm (al dente). Fresh pasta cooks very quickly! Using tongs, carefully transfer the cooked Pici directly into your prepared pasta sauce. Toss gently to coat, allowing the pasta to absorb the sauce’s flavors, and serve immediately.
Expert Tips for Pici Success & FAQs
Achieving perfect Pici pasta is simple with these helpful hints and answers to common questions:
- The Importance of Resting Dough: Never skip the resting period! Allowing the dough to rest for at least 30 minutes at room temperature is crucial. This relaxes the gluten, making the dough much softer, more elastic, and significantly easier to roll and shape without tearing or shrinking back.
- Avoid Flour for Rolling Pici: This is perhaps the most critical tip for Pici. When hand-rolling individual Pici strands, do NOT dust your work surface with flour. The dough needs friction to lengthen and form its distinctive shape. If you use flour, the dough strips will simply slide around, making it impossible to roll them effectively. A clean, dry surface provides the necessary grip.
- Accurate Flour Measurement is Key: For the most consistent and best results in pasta making, using a kitchen scale to weigh your flour is highly recommended. This ensures precision every time, leading to a perfectly hydrated dough. If you’re measuring with cups, make sure to spoon the flour into the measuring cup and level it off with a straight edge; avoid packing or scooping the flour directly, as this can result in too much flour.
- Dough Consistency Matters: Pici dough should be firm but pliable, not sticky or crumbly. If your dough feels too dry during kneading, add a tiny amount of warm water, a teaspoon at a time. If it’s too sticky, incorporate a small amount of flour until the desired consistency is reached.
- Humidity and Environment: On humid days, your dough might absorb less water or feel stickier. Adjust flour slightly if needed. Keep the unworked dough covered with plastic wrap to prevent drying.
- Making Pici in Advance: You can prepare the dough up to 24 hours ahead of time. Wrap it tightly in plastic wrap and store it in the refrigerator. Allow it to come to room temperature for about 30 minutes before rolling. Alternatively, you can roll out all the Pici strands and arrange them on a baking tray heavily dusted with semolina flour (or regular flour). Cover them with a clean kitchen towel to prevent drying and sticking, and cook within a few hours.
- Freezing Pici Dough: Yes, you can freeze Pici dough! Wrap it tightly in plastic wrap, then an additional layer of aluminum foil, and freeze for up to 1 month. Thaw in the refrigerator overnight, then bring to room temperature before rolling.
- Freezing Rolled Pici: For longer storage, freeze rolled Pici. Arrange the fresh Pici in a single layer on a flour-dusted baking sheet and freeze until solid. Once frozen, transfer the Pici to an airtight freezer bag or container. Cook from frozen, adding an extra minute or two to the cooking time.
Video Tutorial
For a visual guide to mastering the art of Pici pasta, watch our comprehensive video tutorial. It demonstrates each step, from mixing the dough to the hand-rolling technique, ensuring you can follow along with confidence and achieve perfect results every time.
Delicious Sauces to Pair with Homemade Pici
Pici’s hearty texture makes it a perfect partner for a wide variety of sauces, allowing you to explore traditional Tuscan flavors or experiment with your own creations. In Tuscany, classic preparations include Cacio e Pepe (cheese and pepper), con La Nana (a rich duck ragu), and con Le Bricole (bread, chili, garlic, and Pecorino). Here are even more delicious sauces that will complement your homemade Pici beautifully:
- Pici and Tuscan Sausage Ragu: A robust and flavorful meat sauce that clings wonderfully to the thick Pici strands. The richness of the sausage and savory tomatoes create a truly comforting dish.
- Walnut Sauce – Salsa di Noci: A creamy, aromatic pesto-like sauce made with walnuts, garlic, Parmesan, and olive oil. Its rich, nutty flavor provides an elegant contrast to the rustic pasta.
- Vodka Pasta Sauce: A vibrant and creamy tomato sauce with a hint of vodka, offering a luxurious texture and deep flavor that is incredibly satisfying with Pici.
- Creamy Gorgonzola Sauce: For cheese lovers, a decadent sauce featuring the pungent, creamy notes of Gorgonzola cheese. This rich sauce is perfectly balanced by the chewiness of Pici.
- Authentic Italian Tomato Sauce – Quick, Easy & Delicious: Sometimes, simplicity is best. A classic, well-made tomato sauce allows the natural flavors of the Pici to shine through, offering a comforting and timeless meal.
- Wild Mushroom Ragu: Earthy wild mushrooms sautéed with garlic, herbs, and a splash of white wine, simmered into a rich ragu, perfectly complement the rustic nature of Pici.
- Garlic and Chili Oil (Aglio e Olio con Peperoncino): For a quick and spicy option, toss freshly cooked Pici with sautéed garlic, red pepper flakes, and plenty of good quality extra virgin olive oil. Finish with fresh parsley and a sprinkle of Pecorino.
Pairing your Pici with a robust red wine, such as a Chianti Classico or a Brunello di Montalcino, will further enhance the Tuscan dining experience. Consider serving with a simple green salad dressed with a vinaigrette to cut through the richness of heavier sauces.
Homemade Pici Pasta Recipe
Discover the joy of making traditional Tuscan Pici pasta from scratch. This simple, egg-free dough comes together quickly and results in wonderfully chewy, hand-rolled noodles perfect for your favorite sauces.
Author: Emily
Prep time: 20 minutes
Cook time: 2-3 minutes
Resting time: 30 minutes
Total time: Approximately 52-53 minutes
Yields: 4 servings
Ingredients
- 300 g Italian 00 Flour (approximately 2 cups + 2 tbsp)
- 150 ml warm water (approximately ⅔ cup)
- 3 tbsp extra virgin olive oil
- Pinch of salt (for dough, optional; essential for cooking water)
Instructions
- Put the flour in a large mixing bowl or on a clean work surface and make a well in the middle.
- Add the olive oil and warm water to the well. Gradually incorporate the flour from the edges into the liquid using a fork until a rough dough forms.
- Once a rough dough has formed, transfer it to a clean work surface and knead for 10 minutes until it is smooth and elastic. Wrap the dough in plastic wrap and let it rest at room temperature for 30 minutes.
- Without adding any extra flour, roll the dough out into a 1cm (⅜ inch) thick round. Next, cut the dough into ¼ inch (0.6 cm) thick strips.
- One at a time, roll each strip out on a clean, unfloured work surface using the palms of your hands to resemble thick spaghetti. The dough needs friction to roll, so do not add any flour to your surface. Place each piece of rolled Pici on a tray or separate area lightly dusted with flour or semolina to prevent sticking.
- Bring a large pot of generously salted water to a boil. Once boiling, add the Pici pasta and boil for 2-3 minutes, or until al dente. Transfer the cooked Pici directly to your desired pasta sauce and toss together to coat. Serve immediately.
Notes
- Let the dough rest: It’s important to let the dough rest for at least 30 minutes so it’ll be softer and easier to work with.
- Don’t use flour to roll out the Pici: It’s really important not to use any flour for rolling the Pici, or they’ll just slide across the surface of your countertop instead of rolling, making it impossible to shape them. They need grip!
- Measuring flour: For best results, use a kitchen scale to weigh the flour; it’ll give you perfect dough every time. If you are using cups, make sure to spoon the flour into the cups and level it off with a knife; don’t pack or scoop the flour.
- Make in advance: You can make the dough up to 24 hours in advance and store it in the fridge.
- Freezing: You can freeze the dough wrapped tightly in plastic wrap and foil. Use within one month. Rolled Pici can also be frozen in a single layer on a dusted tray, then transferred to a bag.
Helpful Information for All Our Recipes
- We always use high-quality extra virgin olive oil in all of our recipes unless otherwise specified for optimal flavor.
- For canned or jarred tomatoes, we recommend premium brands like Cirio or Mutti for the best results and authentic Italian flavor.
- Unless stated otherwise, all vegetables used in our recipes are assumed to be of medium size.
- All recipes featured here are thoroughly tested and developed using a fan (convection) oven.
- You can find more detailed information on how nutrition is calculated on our website.
- Explore our comprehensive guide to Italian Pantry Staples to stock your kitchen like a pro.
- Discover all the Essential Kitchen Tools for Italian Cooking that will elevate your culinary journey.
Nutrition Information
Nutrition information is automatically calculated and should only be used as an approximation.
Per Serving:
- Calories: 364 kcal
- Carbohydrates: 54 g
- Protein: 9 g
- Fat: 12 g
- Saturated Fat: 2 g
- Polyunsaturated Fat: 2 g
- Monounsaturated Fat: 8 g
- Sodium: 4 mg
- Potassium: 75 mg
- Fiber: 2 g
- Sugar: 1 g
- Vitamin A: 2 IU
- Calcium: 12 mg
- Iron: 1 mg
If you’ve tried this Homemade Pici Pasta recipe or any other delicious creation on our blog, we’d love to hear from you! Please don’t forget to rate the recipe and leave your comments below to let us know how you enjoyed it. Your feedback is invaluable to us!
You can also FOLLOW US on FACEBOOK, INSTAGRAM, and PINTEREST for more culinary inspiration, or subscribe to our NEWSLETTER to receive new recipes directly in your inbox every week.