
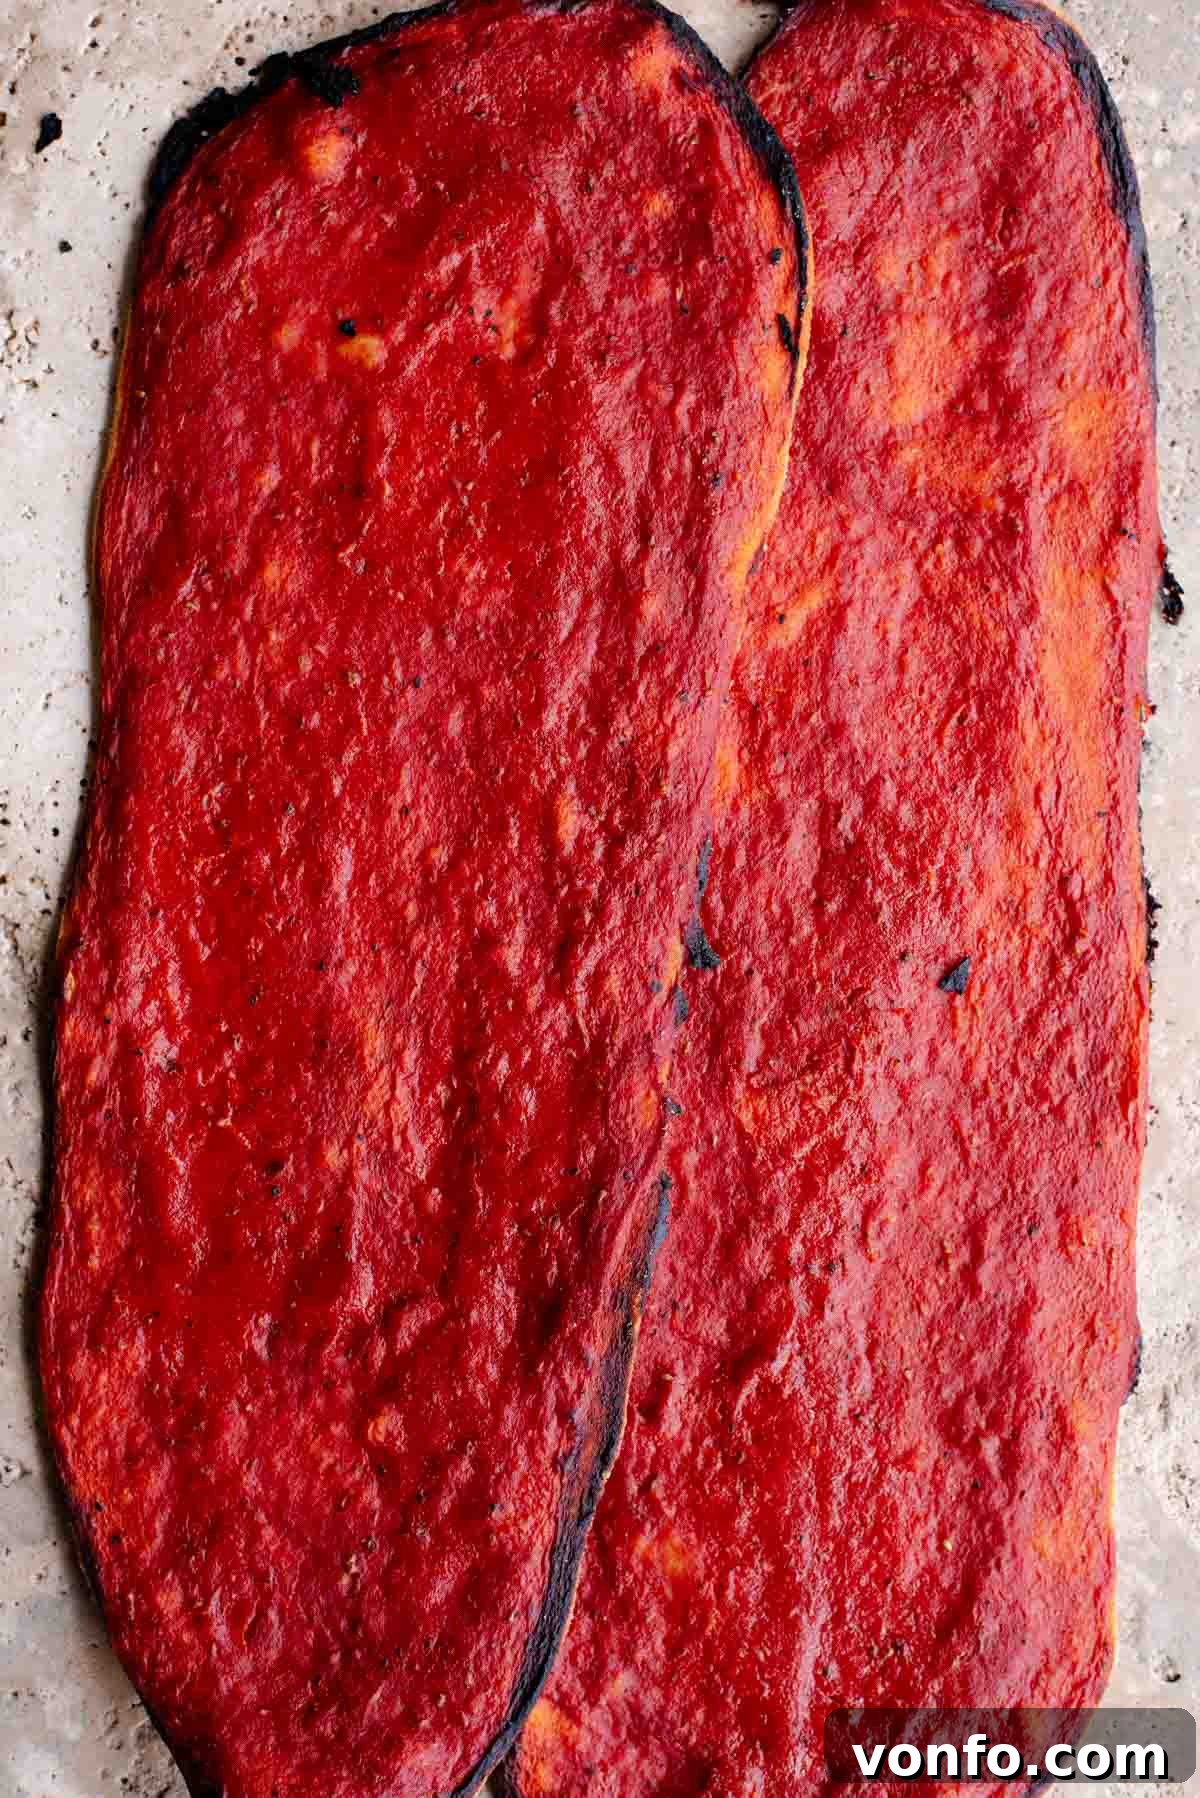
Craving the irresistible crunch of a thin, crispy pizza but short on time? Look no further than Lingue di Pizza, a delightful Italian street food that’s as quick to make as it is delicious. These long, thin, and uniquely crispy pizzas are completely yeast-free, meaning no lengthy proofing times. In just over an hour (including a short resting period), you can whip up a batch of these savory treats. Our comprehensive recipe guides you through each step, complete with two classic and incredibly tasty topping variations that are sure to become family favorites!
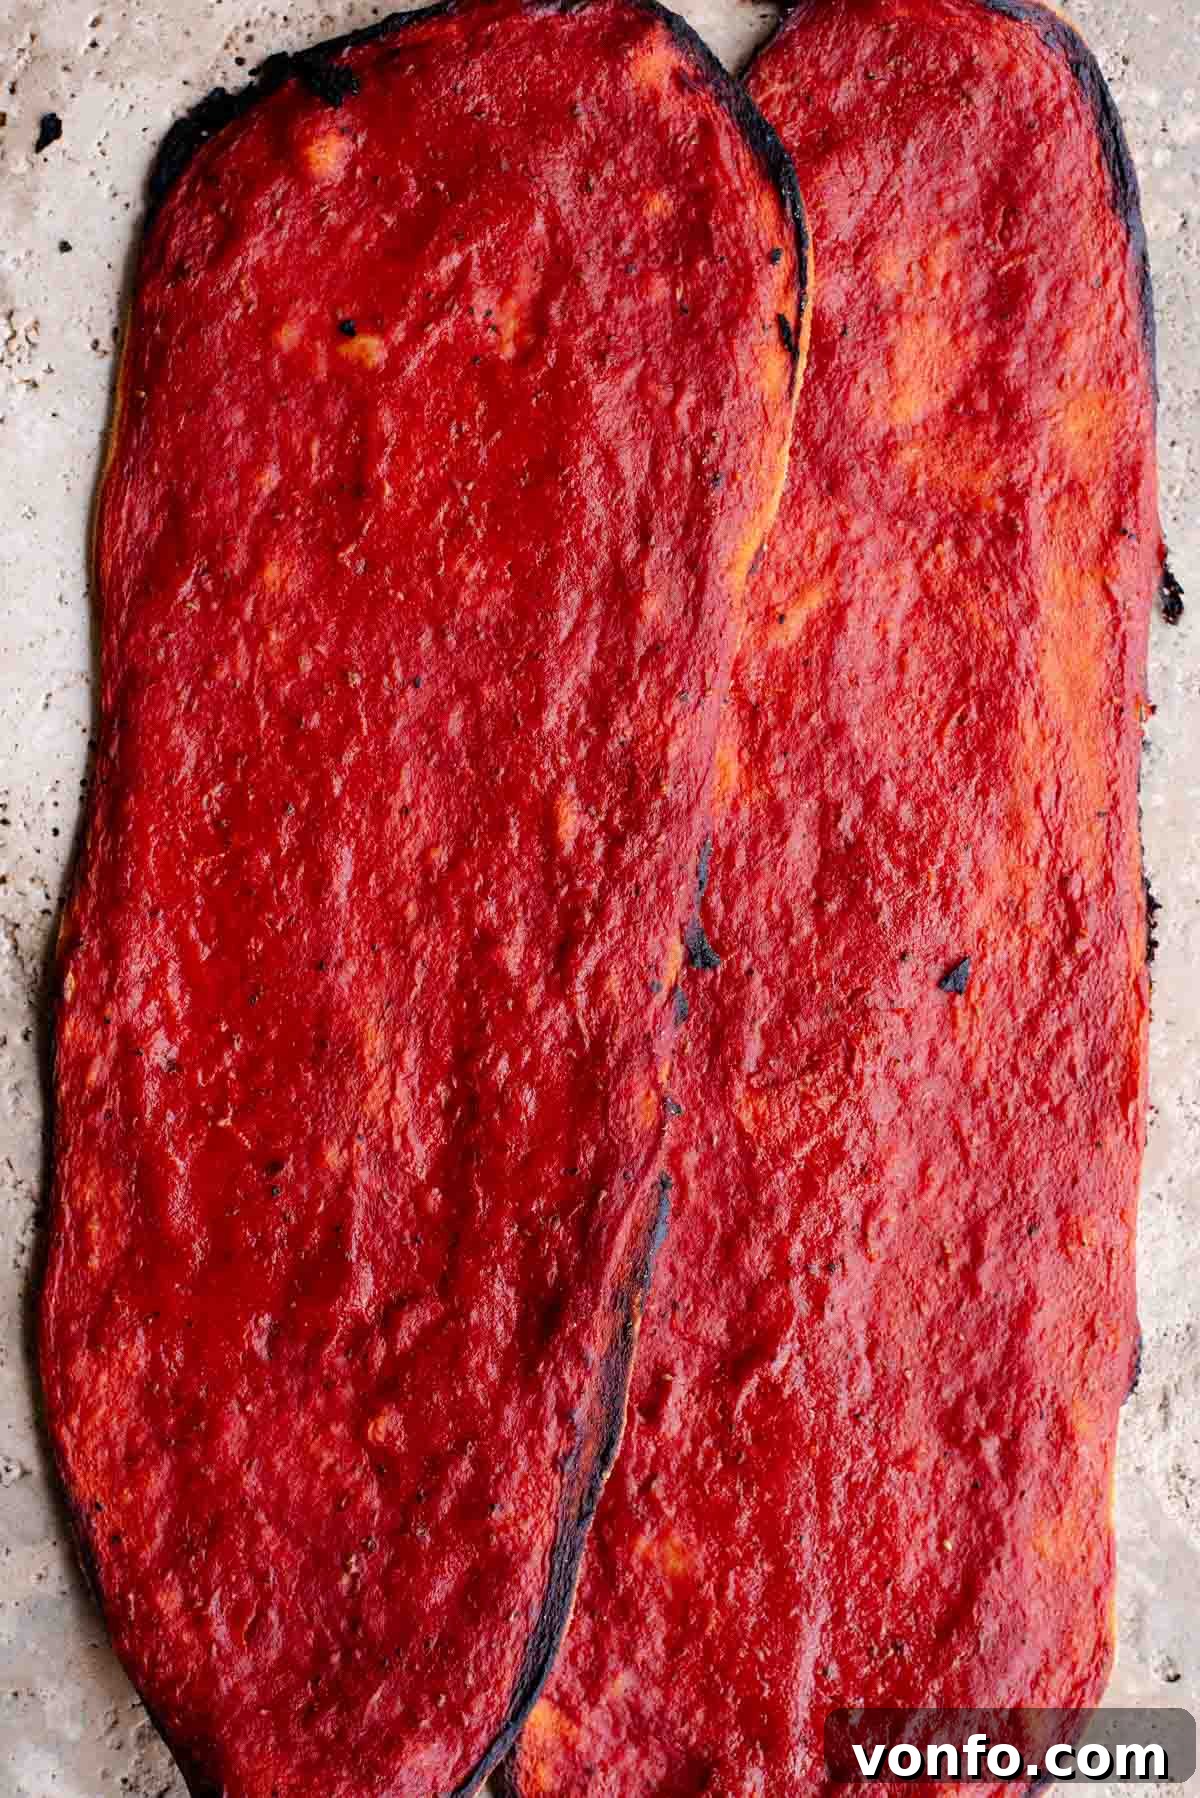
Lingue di Pizza: The Ultimate Quick & Crispy Italian Street Food
Lingue di Pizza, literally translating to ‘pizza tongues’ due to their distinctive long and slender shape, are a cherished street food tradition hailing from the vibrant culinary landscapes of Rome and Naples. More than just a snack, they represent a perfect blend of simplicity, speed, and sensational flavor, offering a delightful alternative to traditional pizzas.
These savory flatbreads are an absolute revelation for anyone seeking an easy yet impressive dish. I frequently prepare Lingue di Pizza for a light and satisfying lunch, or as an essential component of an authentic Italian aperitivo spread, perfectly paired with a refreshing spritz and other delightful nibbles. They are especially ideal when that pizza craving strikes, but you simply don’t have hours to spare for yeast dough to rise. The beauty of Lingue di Pizza lies in their unique dough—it’s completely yeast-free. This ingenious characteristic eliminates the need for extensive proofing, drastically cutting down preparation time. The result is a wonderfully crisp and crunchy texture that sets them apart from conventional pizzas, making every bite an experience to savor.
Classic & Creative Topping Inspirations
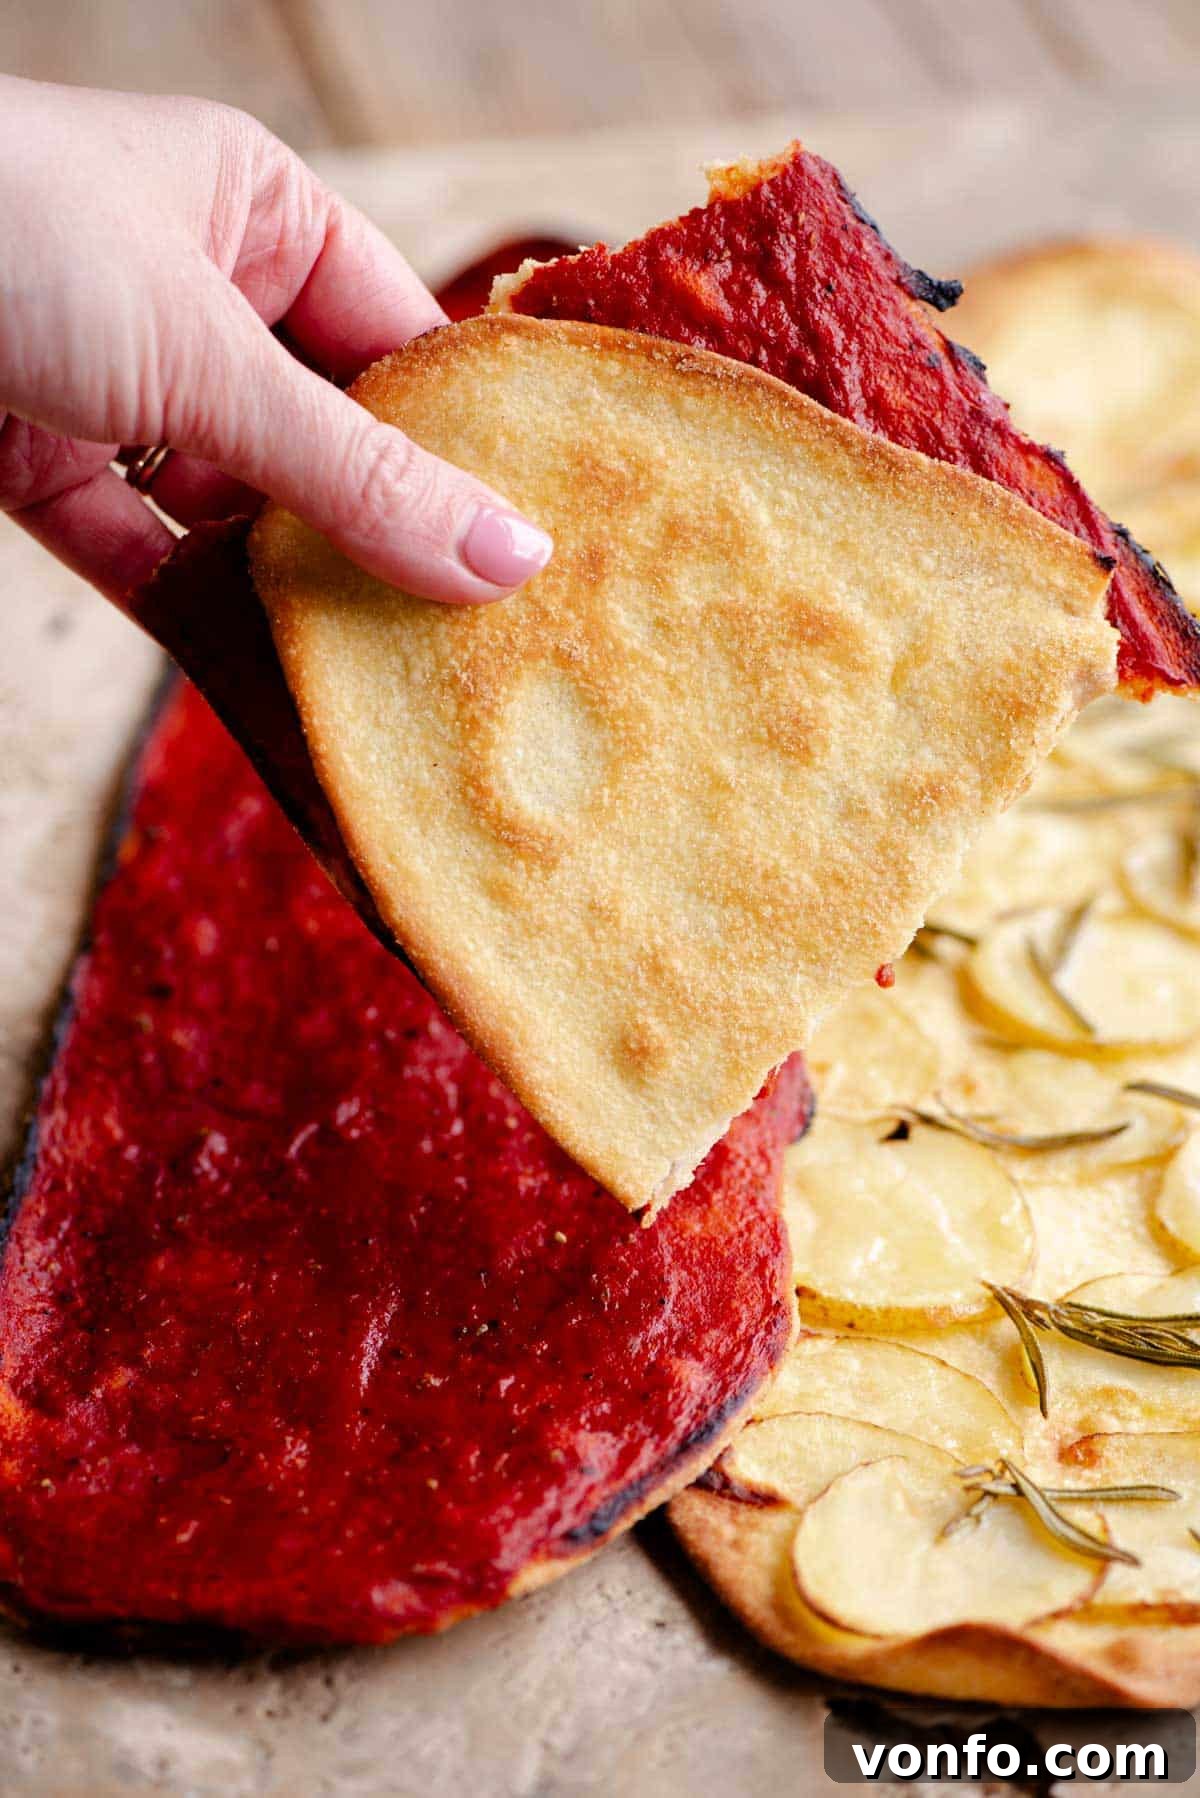
Traditionally, Lingue di Pizza are celebrated for their understated elegance, often served simply adorned with a rich tomato sauce and fragrant oregano. For an extra layer of flavor, we love to add a touch of fresh, crushed garlic to the tomato base, though this aromatic addition is entirely optional and can be adjusted to your preference. This classic preparation truly allows the exceptional crispiness of the base to shine through.
Beyond the traditional, another supremely popular and utterly delicious topping involves thinly sliced potatoes and fresh rosemary. This rustic combination offers a different, yet equally captivating, flavor profile and texture. This recipe will meticulously guide you through creating both of these beloved variations, ensuring you master the art of Lingue di Pizza. However, we wholeheartedly encourage you to unleash your culinary creativity and experiment with an array of different flavors and ingredients to make these “pizza tongues” truly your own. The possibilities are endless, and the joy of discovery is part of the experience. Enjoy crafting these versatile Italian delights!
Table of Contents
- Why You’ll Love This Recipe
- Ingredient Notes
- Visual Walk-through of the Recipe
- Expert Recipe Tips for Success
- Creative Topping Ideas
- More Delicious Italian Snacks to Try
- FAQs About Lingue di Pizza
- Full Recipe Card
Why You’ll Love This Lingue di Pizza Recipe
If you’re still on the fence about trying this fantastic Italian street food, here are a few compelling reasons why Lingue di Pizza deserves a spot in your culinary repertoire:
- Incredibly Fast: Say goodbye to long waiting times! Since this dough is yeast-free, it requires only a short 1-hour rest, making it perfect for last-minute cravings or busy weeknights.
- Effortlessly Easy: The simple dough comes together in minutes, and the rolling and topping process is straightforward, even for novice bakers.
- Deliciously Crispy: The unique combination of flours and baking method results in an extraordinarily thin, light, and crispy base that’s truly addictive.
- Versatile for Any Occasion: Whether you need a quick lunch, an elegant appetizer for guests, a fun snack for kids, or a flavorful addition to an aperitivo spread, Lingue di Pizza fits the bill perfectly.
- Customizable: While we provide two classic topping options, this recipe is a canvas for your creativity. Experiment with different cheeses, herbs, vegetables, and cured meats to discover your favorite combinations.
- Authentic Italian Flavors: Experience the true taste of Italian street food right in your own kitchen, a delightful experience that transports you straight to Rome or Naples.
Essential Ingredient Notes for Perfect Lingue di Pizza
Crafting the perfect Lingue di Pizza begins with understanding the role of each ingredient. While the list is simple, the specific choices are key to achieving that signature crispy texture and authentic flavor:
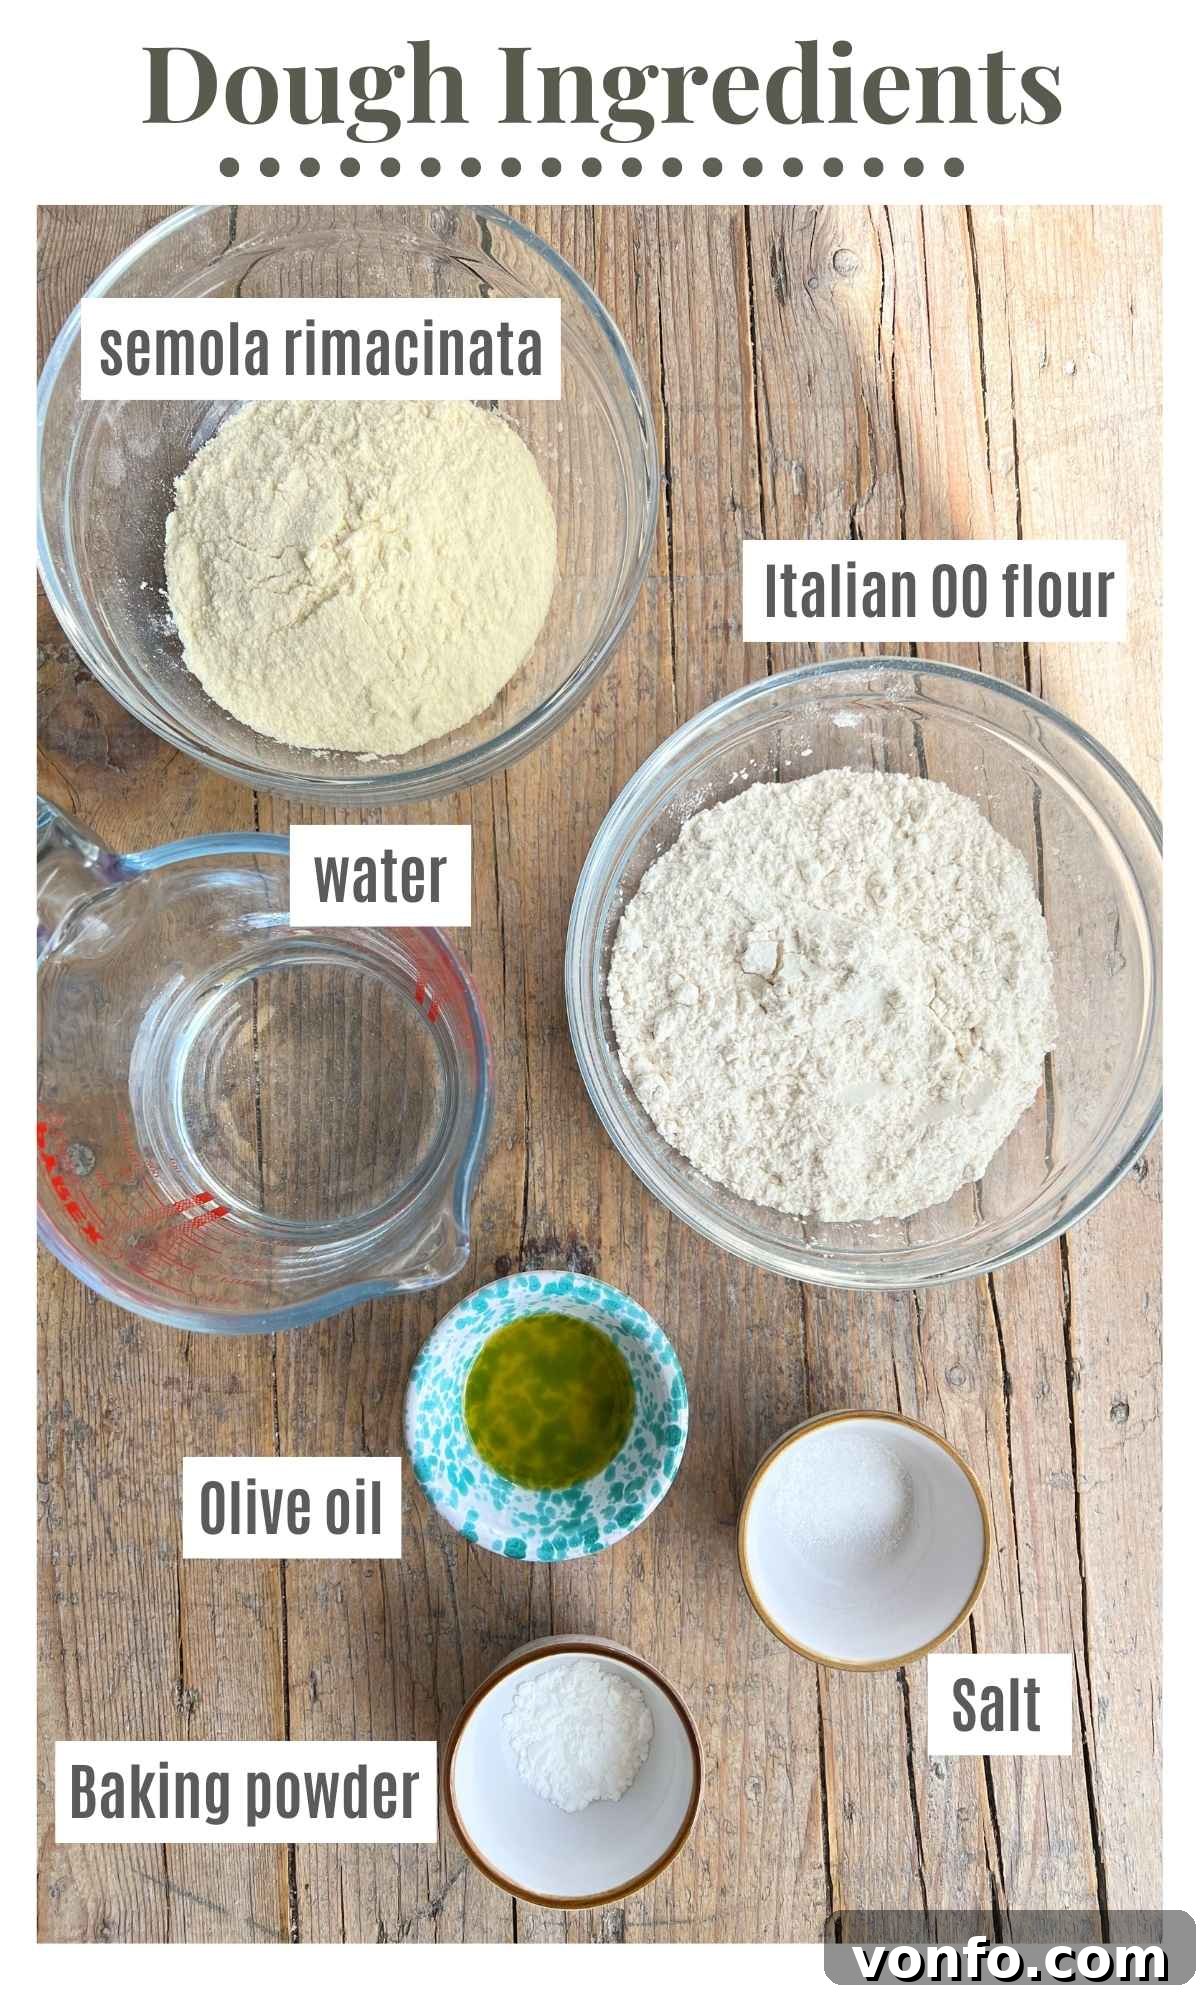
- Italian 00 flour – This finely milled flour is a cornerstone of Italian baking, known for its low protein content which helps create a tender yet crisp crust. If Italian 00 flour is not readily available, a high-quality all-purpose flour can be used as a suitable substitute. The goal is a delicate, not overly chewy, dough.
- Semola Rimacinata – This ingredient is truly the secret weapon for Lingue di Pizza’s distinctive texture. Semola Rimacinata is a re-milled durum wheat semolina, ground to an incredibly fine consistency, almost like flour. It contributes significantly to both the structure and the glorious crunch of the cooked pizza. Unlike coarser semolina, its fine texture integrates seamlessly into the dough, providing resilience and a golden hue. You should be able to find it in most Italian specialty food stores or conveniently online (a link is provided in the recipe card for easy sourcing).
- Baking powder – In this yeast-free recipe, baking powder serves as the leavening agent. Its purpose isn’t to create a thick, airy crust like yeast, but rather to impart a subtle lightness to the dough, preventing it from becoming overly dense and ensuring that coveted crispiness.
- Fine Sea Salt: A good quality fine sea salt enhances the flavor of the dough, balancing the other ingredients.
- Extra Virgin Olive Oil: Essential for both the dough and for greasing the baking tray, olive oil contributes to the flavor and helps achieve a beautifully golden and crispy base.
- Water: Lukewarm water is best for mixing the dough, helping the ingredients come together smoothly.
Visual Walk-through: Crafting Your Lingue di Pizza Step-by-Step
Let’s embark on the journey of making these delectable pizza tongues. Following these visual cues and detailed steps will ensure a perfect outcome every time.
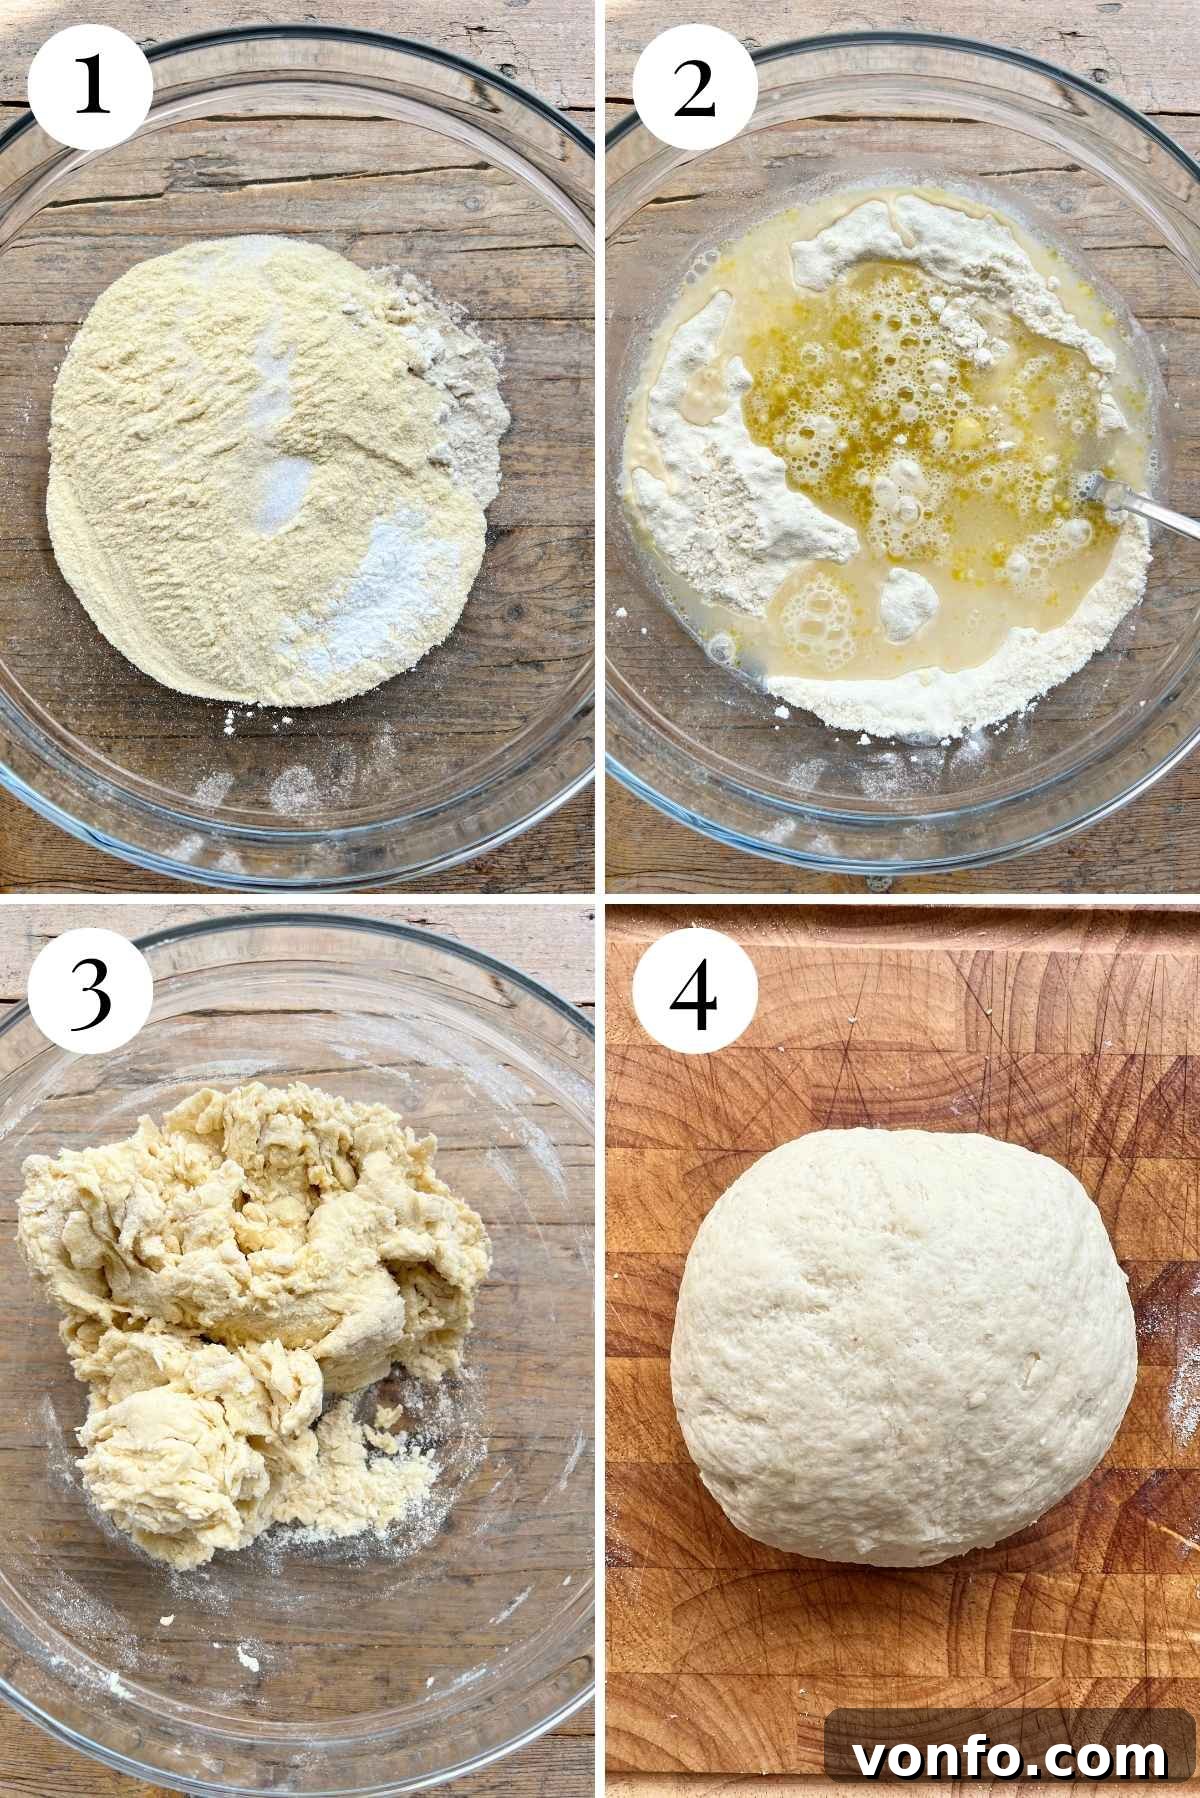
Step 1: Mix the Dough – Begin by combining all the dry ingredients – Italian 00 flour, Semola Rimacinata, baking powder, and fine salt – in a spacious mixing bowl. Whisk them together thoroughly to ensure even distribution. Next, pour in the olive oil and water. Using your hands or a sturdy spoon, mix everything until a rough, shaggy dough begins to form. It won’t be perfectly smooth at this stage, and that’s exactly what we’re looking for (photos 1-3).
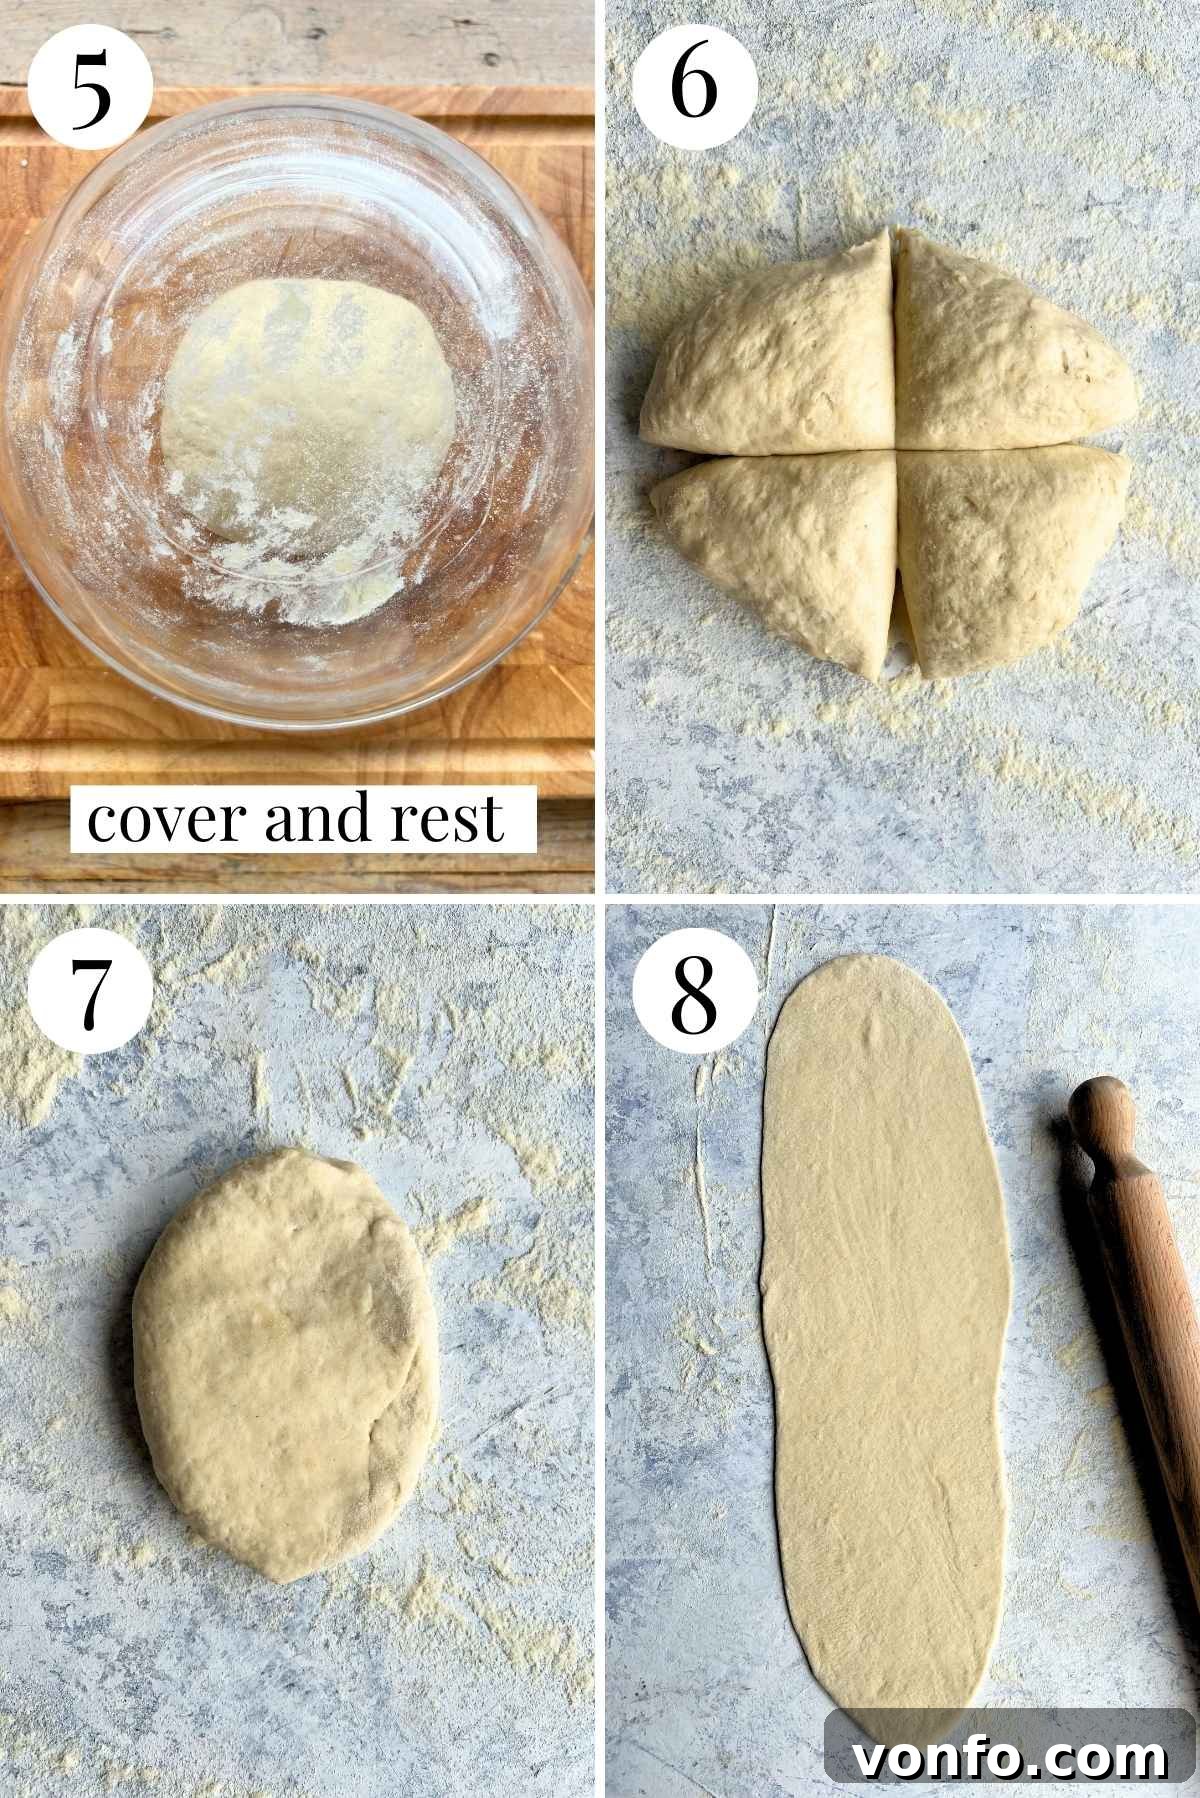
Step 2: Knead and Rest – Transfer the rough dough onto a clean, lightly floured work surface. Knead it gently for just a few seconds, shaping it into a smooth ball. This minimal kneading develops just enough gluten for structure without making the dough tough. Once formed, place the dough ball back into the mixing bowl, cover it (I often simply invert the mixing bowl over the dough, but plastic wrap works perfectly), and allow it to rest for a full hour. This resting period is crucial, as it allows the flours to fully hydrate and the dough to relax, making it much easier to roll out later (photos 4 and 5).
Step 3: Roll It Out – After the dough has rested, gently divide it into four equal quarters. Lightly dust your work surface with a little extra Semola Rimacinata to prevent sticking and to enhance crispiness. Take one quarter of the dough and, using a rolling pin, roll it out into a remarkably long and thin pizza shape. The key here is thinness, as this contributes significantly to the signature crispiness of Lingue di Pizza. Make sure you roll it long enough to comfortably fit the length of your baking tray (photos 7 and 8).
Step 4: Assemble – Before placing your rolled-out dough, generously grease your baking tray with olive oil. This step is vital not only to prevent sticking but also to ensure that the base of your Lingue di Pizza achieves that coveted golden-brown crispiness. Carefully lay your long, thin pizza dough onto the prepared tray.
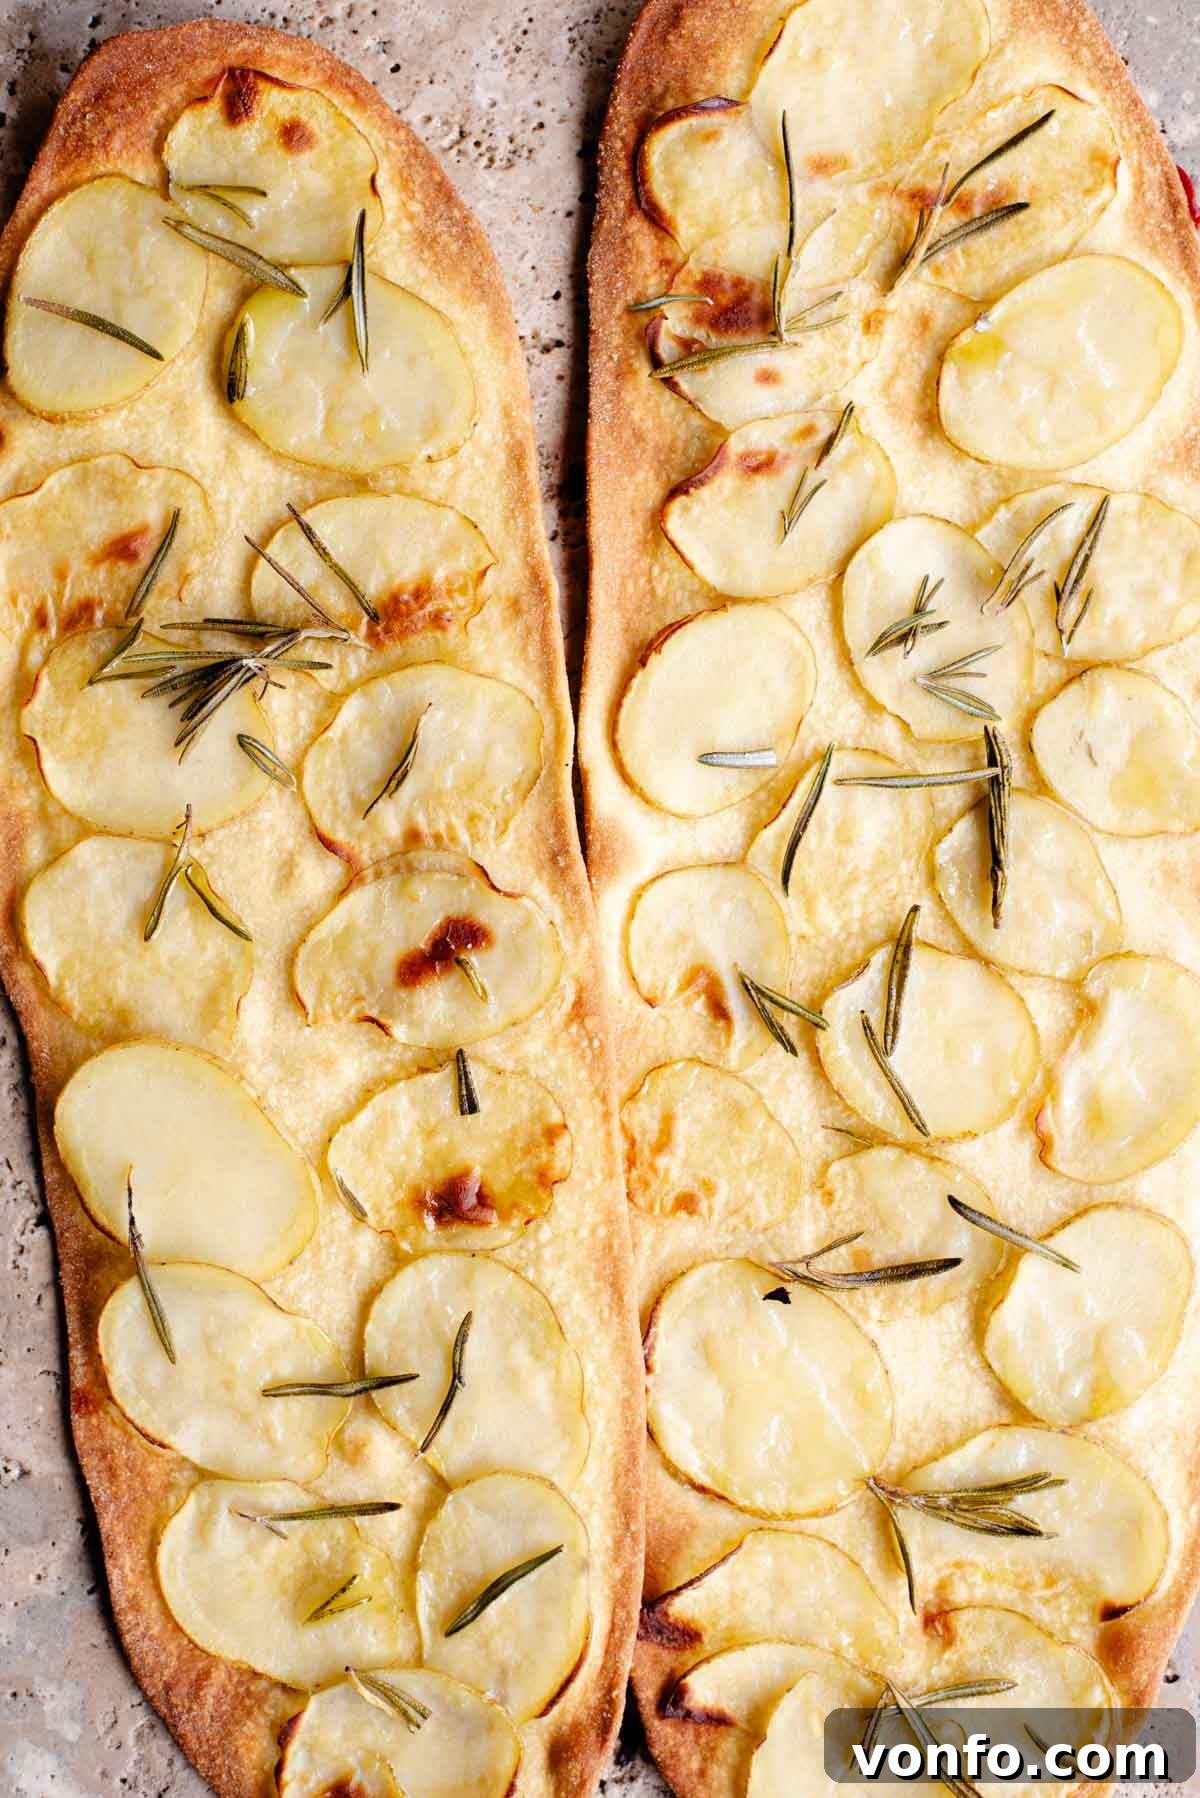
Step 5: Potato Lingue di Pizza – For a rustic and deeply satisfying variation, drizzle your rolled dough with a good amount of olive oil. Arrange thinly sliced potatoes evenly over the base. The thinner the slices, the better they will cook and crisp up. Scatter fresh rosemary sprigs or leaves over the potatoes, and sprinkle generously with sea salt. Finish with another light drizzle of olive oil before transferring to the oven. Bake for approximately 15-20 minutes, keeping a close eye on them after 15 minutes, until the edges are golden and the potatoes are tender and slightly caramelized (photos 9 and 10).
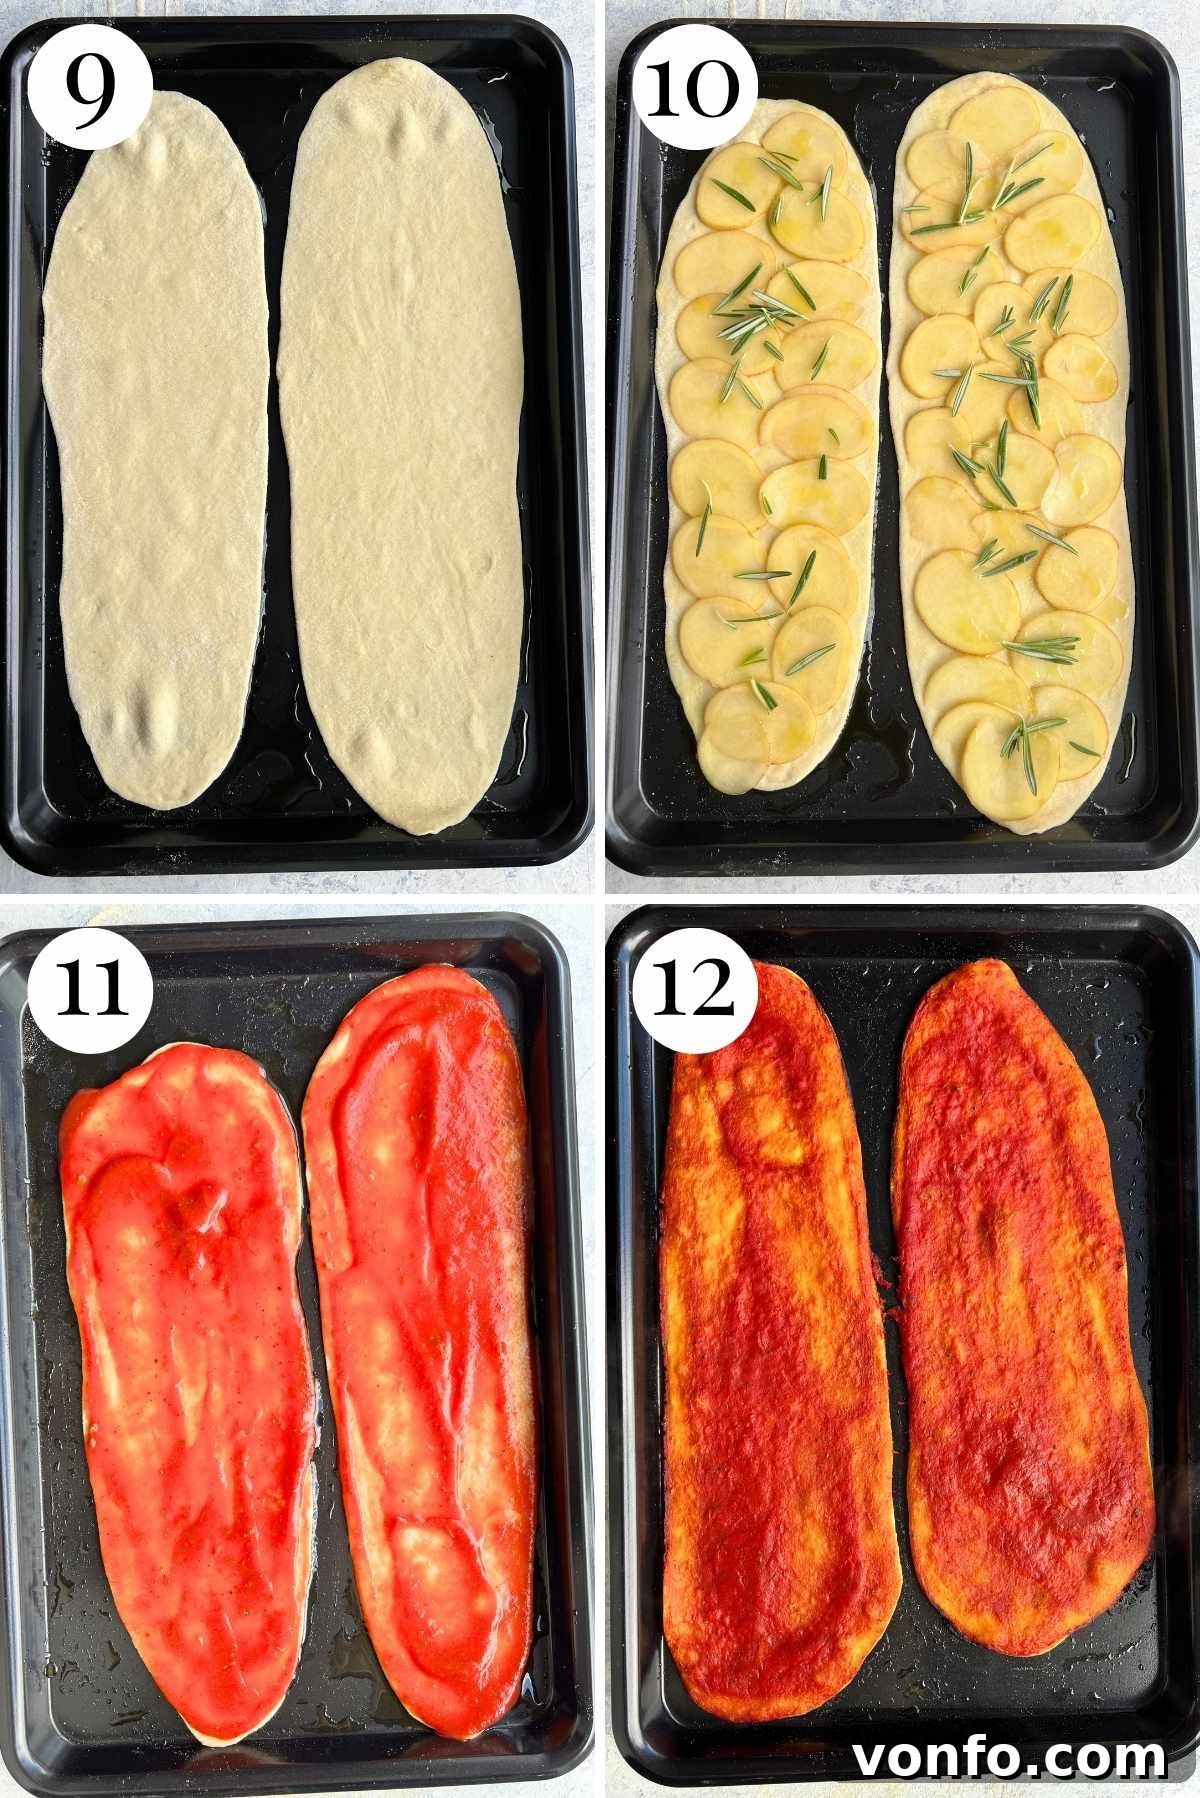
Step 6: Tomato Lingue di Pizza – For the classic tomato topping, generously spread the prepared tomato sauce (passata with oregano, garlic, salt, pepper, and olive oil) all the way to the very edges of the rolled dough, leaving no border. This ensures every bite is bursting with flavor. Bake in the preheated oven for 10 minutes. Remove the pizzas from the oven and spread another thin layer of passata over them. This double bake helps to create a deeper tomato flavor and prevents the sauce from drying out. Return them to the oven for another 10 minutes, or until the crust is golden and crispy. Serve immediately for the best experience (photos 11 and 12).
Expert Recipe Tips for Success
Achieving perfectly crispy and delicious Lingue di Pizza is easy with these insider tips:
- Embrace Your Kitchen Scale – For consistent and accurate results every single time, I highly recommend using a digital kitchen scale to measure your ingredients, especially the flours. While cup measurements are provided as a convenience (and I measure them myself by spooning and leveling), slight variations in how flour is packed can significantly alter the dough’s consistency. A scale eliminates this guesswork, ensuring your dough is always just right.
- Do Not Overload the Pizza – With Lingue di Pizza, the philosophy of “less is more” truly applies. The dough is designed to be very thin and crispy, meaning it cannot support a heavy burden of toppings. Keep your toppings simple, light, and minimal to allow the crispy base to shine through and to prevent the pizza from becoming soggy or difficult to handle.
- Preparing in Advance – The dough for Lingue di Pizza is quite forgiving. If you plan to make them on the same day, ensure the dough gets at least its minimum 1-hour resting time. It can comfortably rest at room temperature for a few additional hours if needed. Should you wish to prepare the dough the day before, simply place it in the refrigerator. Remember to bring it back to room temperature for about 30 minutes to an hour before you intend to roll it out, as cold dough can be stiff and harder to work with.
- Serving and Leftovers – Lingue di Pizza are at their absolute best when served immediately, fresh out of the oven. Their thin, unleavened base means they can dry out much quicker than a thicker, yeast-leavened pizza. While delicious, any leftovers are best enjoyed on the same day. If you do have some, a quick reheat in a hot oven or air fryer can help restore some of their crispiness.
- Hot Oven is Key: Ensure your oven is fully preheated to the specified high temperature (250C/480F). High heat is crucial for achieving that characteristic crisp crust quickly.
- Don’t Skip the Olive Oil on the Tray: The generous coating of olive oil on your baking tray is not just for preventing stickiness; it actively contributes to the golden-brown, irresistible crispiness of the base.
Beyond the Basics: Creative Topping Ideas for Lingue di Pizza
While the classic tomato and rustic potato/rosemary toppings are undeniably delicious, Lingue di Pizza’s simple base makes it incredibly versatile for experimentation. Here are some more inspiring ideas to tantalize your taste buds:
- Original – Keep it beautifully simple with just a rich passata (tomato puree), dried oregano, a drizzle of olive oil, and a pinch of salt and pepper. Feel free to add a freshly crushed garlic clove for an aromatic kick or omit it for a purer tomato flavor.
- Potato & Rosemary – As described, this combination is a rustic masterpiece. Ensure your waxy potatoes are sliced as thinly as possible for even cooking and crispness. Enhance with fresh rosemary (or thyme for a slight variation), sea salt, and a generous splash of olive oil.
- Prosciutto Perfection – For a salty, savory kick, add thinly sliced cured prosciutto or high-quality Italian ham. If using tomato sauce, layer the prosciutto during the second bake to prevent it from over-crisping or drying out. The warmth of the pizza will gently soften and warm the meat.
- Mediterranean Medley (Anchovies, Capers, Olives) – Embrace the bold flavors of the Mediterranean. These ingredients are fantastic additions on top of a classic tomato sauce. Choose one, two, or all three for a truly punchy flavor profile. Again, for best results, add these toppings during the second bake to retain their texture and freshness.
- Pesto and Burrata Bliss – For an elegant and fresh take, spread a vibrant basil pesto over the freshly baked, hot Lingue di Pizza. Then, tear creamy burrata cheese into pieces and scatter over the pesto. The heat from the pizza will gently melt the burrata, creating a luxurious and utterly delicious experience. We highly recommend trying our homemade basil pesto recipe for unparalleled flavor.
- Spicy Salami & Chili Flakes: For those who love a bit of heat, top your tomato base with thinly sliced spicy salami (like Calabrian ‘nduja or regular spicy salami) and a sprinkle of chili flakes.
- Grilled Vegetables: Lightly grill or roast thin slices of zucchini, eggplant, or bell peppers. Arrange them on the pizza (with or without tomato sauce) for a healthier, flavorful option.
- Ricotta & Honey: For a sweet and savory contrast, spread a thin layer of ricotta cheese, then drizzle with honey after baking. A sprinkle of fresh thyme would also be lovely.
More Delicious Italian Snacks & Bakes to Try
Bread & Savory Bakes
Easy Overnight No Knead Focaccia
Antipasti
Taralli Pugliesi (Italian Snack)
Antipasti
Rustici Leccesi (Tomato and Mozzarella Pastries)
Antipasti
Pizza Scima (Abruzzese Flatbread)
Frequently Asked Questions About Lingue di Pizza
- Can I use regular all-purpose flour instead of Italian 00 flour?
Yes, you can substitute Italian 00 flour with good quality all-purpose flour. The texture might be slightly different, but it will still yield delicious results. - What if I can’t find Semola Rimacinata?
Semola Rimacinata is quite unique for its fine texture and crisping properties. If you absolutely cannot find it, you might try a finely ground semolina or even replace it with more 00 or all-purpose flour, but be aware that the characteristic crunch of Lingue di Pizza might be less pronounced. - Can I make the dough in advance and freeze it?
While the dough can be stored in the fridge for a day, freezing it is not recommended for this specific yeast-free dough. The texture after thawing and baking might not be as optimal and crispy. It’s best made fresh. - How thin should I roll the dough?
Aim for as thin as possible without tearing the dough. The thinner you roll it, the crispier your Lingue di Pizza will be. It should be almost translucent. - Why is it called “pizza tongues”?
The name “Lingue di Pizza” literally translates to “pizza tongues” because of their distinctive long, narrow, and flat shape, which resembles a tongue.
If you’ve tried this fantastic Lingue di Pizza recipe or any other recipe on the blog, please don’t hesitate to rate the recipe and share your experience in the comments below. I always love hearing from you! For more delicious Italian food inspiration, you can also follow us on Facebook, Instagram, and Pinterest, or sign up for our Newsletter to receive weekly updates on our latest culinary creations.
Step By Step Photos Above
Most of our recipes come with step by step photos, helpful tips and tricks to make it perfectly first time!
Lingue di Pizza (Quick and Crispy Pizza)
By Emily
20
20
1
1 40
4 pizzas (serves 8)

Equipment
-
17×11.5 inch Baking tray
-
Rolling pin
Ingredients
- 200 g Italian 00 flour, or all-purpose flour (1.5 cups spooned and levelled)
- 130 g Semola Rimacinata, plus more for dusting (3/4 cup plus 1 tablespoon)
- ½ teaspoon baking powder
- ½ teaspoon fine salt
- 200 ml water, (3/4 cup plus 1 tablespoon)
- 1 tablespoon olive oil, plus extra for greasing
Topping 1 (for 4 pizzas)
- 560 g (2 cups) Passata (tomato puree US)
- 1/2 teaspoon dried oregano
- 1 garlic clove
- Olive oil
- Salt and pepper
Topping 2 (for 4 pizzas)
- 2 large waxy potatoes
- Fresh rosemary
- Olive oil
- Salt and pepper
Instructions
Make the dough
-
Put the flour, semola, baking powder and salt in a large mixing bowl and mix them together. Add the olive oil and water and mix to form a rough dough.
-
Place the dough on a clean work surface and knead for a few seconds into a ball. Cover the dough with the mixing bowl (or use plastic wrap) and leave it to rest for 1 hour.
Prep the toppings
-
For the tomato topping, put the passata in a bowl with the oregano, crushed garlic clove, a pinch of salt and pepper and a drizzle of olive oil. Mix until combined, then set aside.
-
For the potato topping, thinly slice the potatoes as thin as possible (I keep the skin on but you can peel it if you prefer) then set them aside.
Assemble and bake
-
Pre-heat the oven to 250C (480F). Grease a baking tray generously with olive oil.
-
When the dough has rested, cut it into 4 quarters. Lightly dust your work surface with semola and roll one quarter of the dough out into a long thin pizza using a rolling pin. Make sure you roll it out long enough to fit your tray (our tray is 17×11.5 inches).
For the tomato topping
-
Lay the dough on the baking tray and cover it with tomato sauce all the way to the edges. Repeat with the rest of the dough (I usually do this in 2 batches as I can only fit 2 on a tray at a time).
-
Bake in the oven for 10 minutes, then remove them from the oven and spread on another layer of tomato sauce. Bake for a further 10 minutes, then remove from the oven and serve.
For the potato topping
-
For the potato topping, drizzle your rolled out dough with olive oil then lay thin slices of potato over the dough, sprinkle with sea salt, fresh rosemary and then a drizzle of more olive oil.
-
Bake in the oven for 15-20 minutes until golden around the edges.
Notes
- Topping amounts – Each topping option in the ingredients list makes enough for the whole batch of dough (4 pizzas). You can cut this in half to make 2 pizzas instead.
- Storage – best served immediately and eaten the same day.
- Use a scale for best results – I highly recommend using a kitchen scale to weigh both flours for best results. I always measure the ingredients in cups myself for each recipe, but I find this can vary greatly with flour in particular. When using cups, I always measure the flour by spooning it into the cup and levelling it off with a knife.
Helpful Info for All Recipes
- I always use extra virgin olive oil in all of my recipes unless stated otherwise.
- When I use canned or jarred tomatoes of any kind, I always use Cirio or Mutti brands for the best results and flavor.
- All vegetables are medium sized unless stated otherwise.
- All recipes are tested and developed using a fan (convection) oven.
- Find out more about how nutrition is calculated.
- Check out our must-have Italian Pantry Staples.
- You can also find all our Essential Kitchen Tools for Italian Cooking.
Nutrition
Nutrition information is automatically calculated, so should only be used as an approximation.