
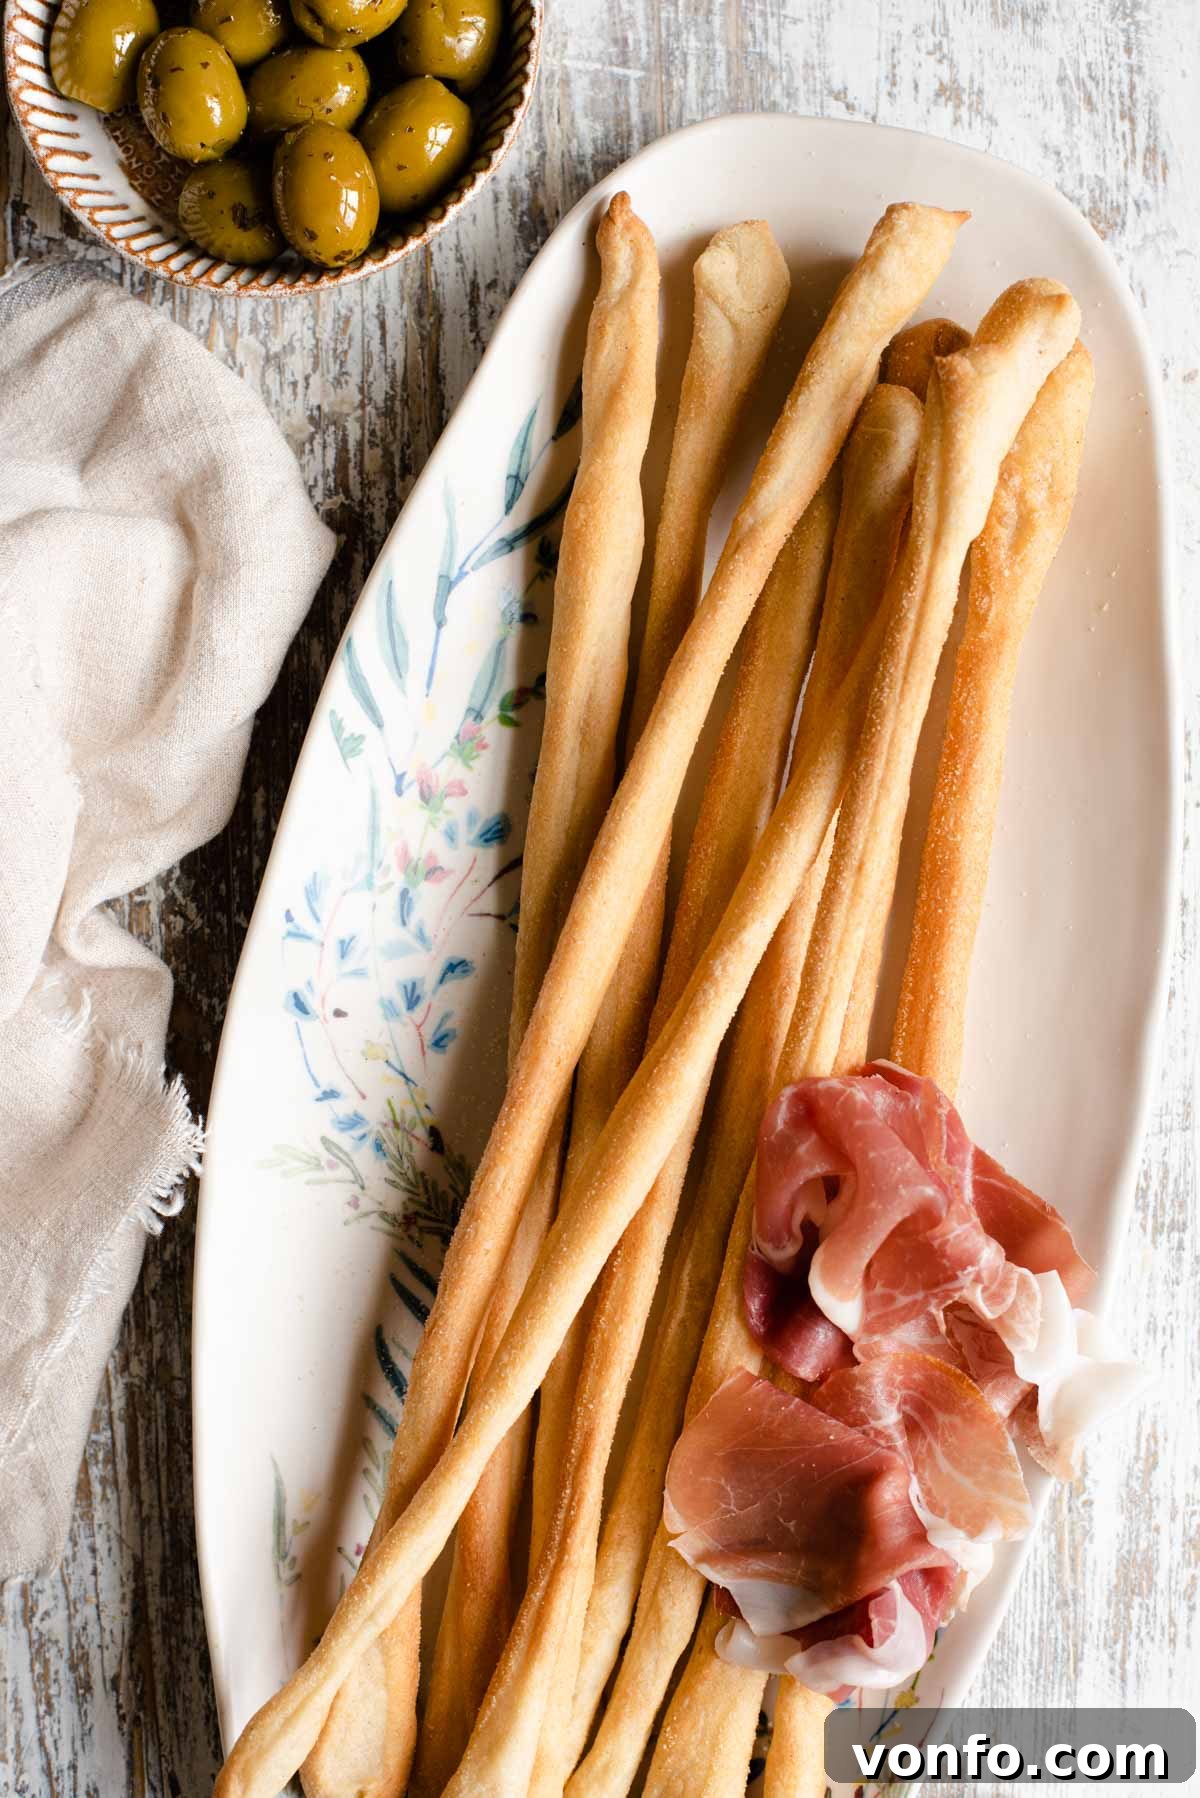
Homemade Italian Grissini: The Ultimate Guide to Crispy Breadsticks
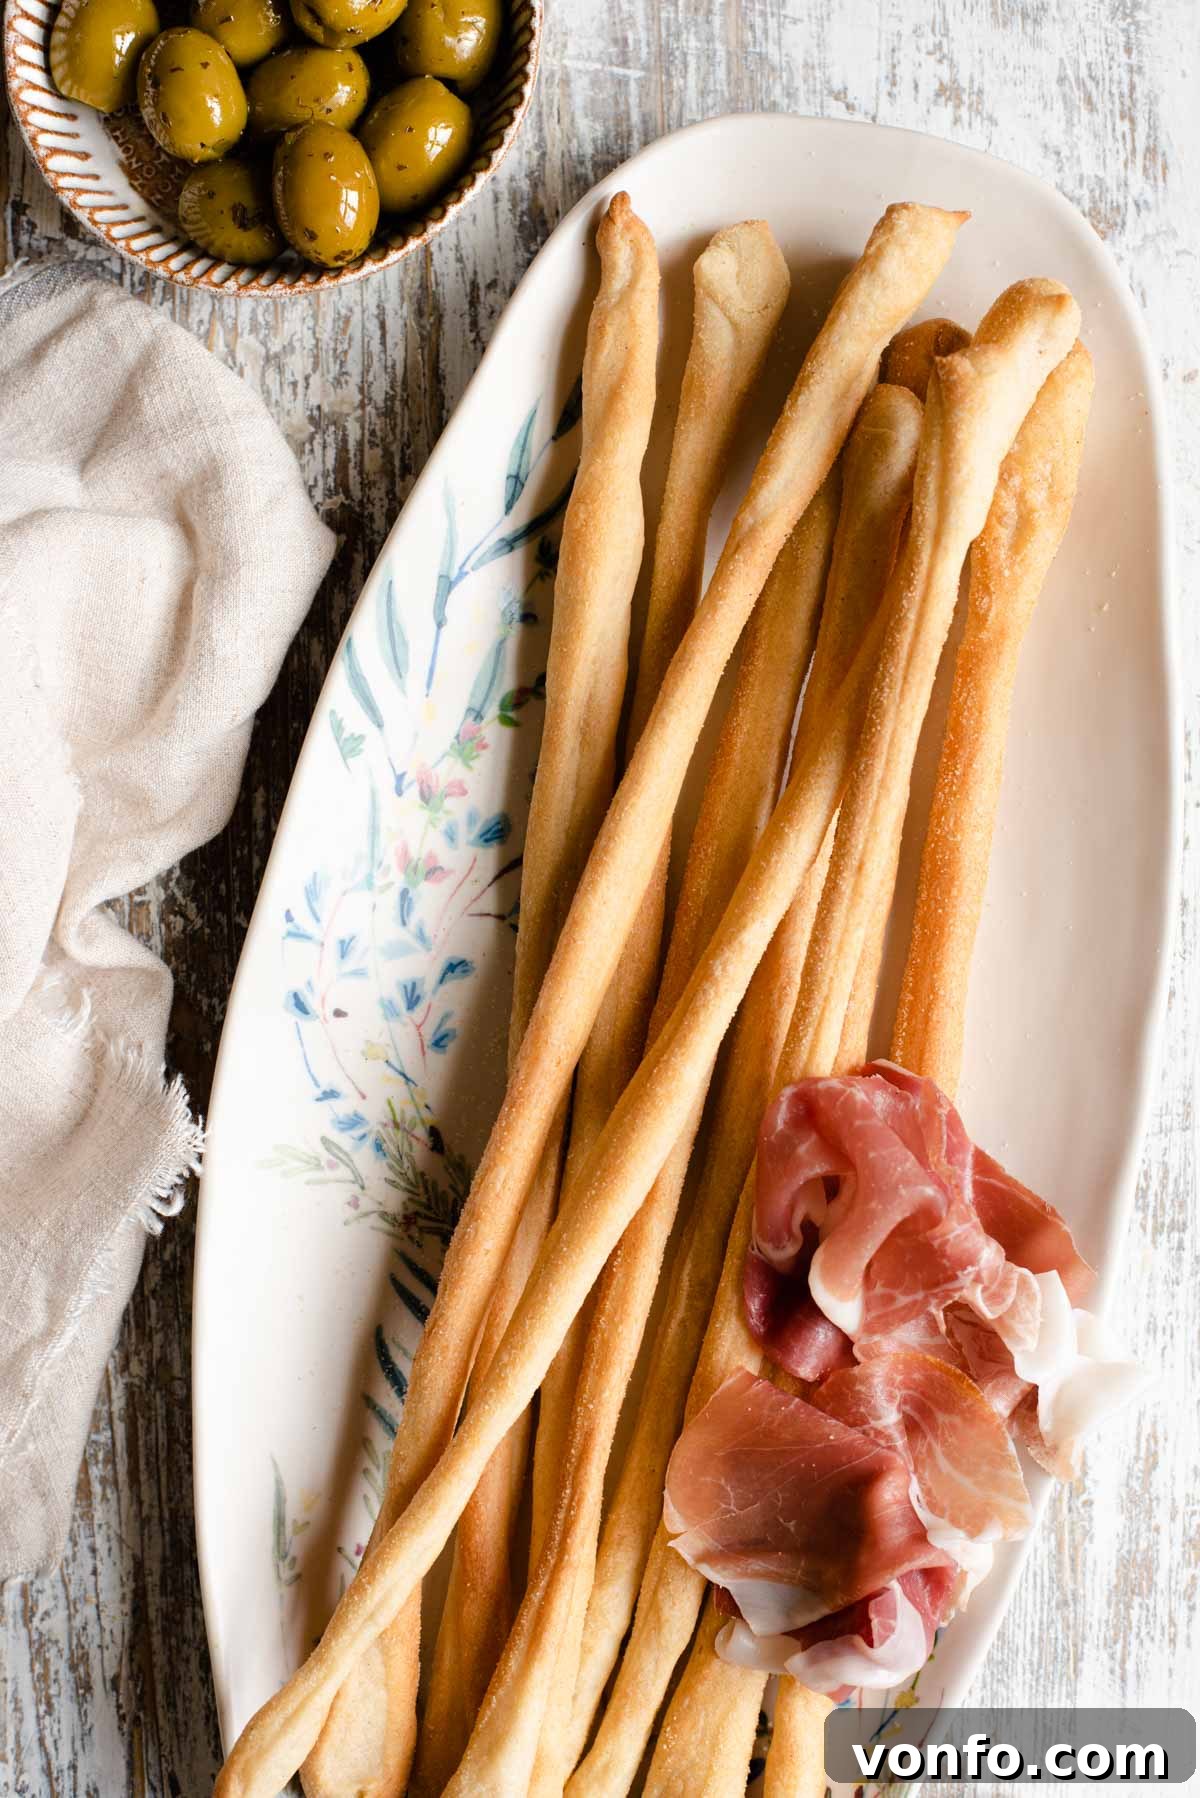
Embark on a culinary journey to the heart of Italy with our simple yet exquisite recipe for homemade Grissini. These long, thin, and wonderfully crispy Italian breadsticks are a staple across Italy, particularly beloved in their birthplace of Turin. Far from being just an accompaniment, Grissini are a delightful experience in themselves, offering a satisfying crunch and a versatile canvas for various flavors. Perfect for an authentic Italian aperitivo alongside cured meats and artisanal cheeses, ideal for dipping into rich soups or creamy spreads, or simply enjoyed on their own as a savory snack, these breadsticks are incredibly easy to make at home and will undoubtedly impress your guests.
The Charm of Grissini: A Glimpse into Italian Culinary History
Grissini, often described as elegant and rustic, boast a rich history dating back to the late 17th century in Turin, Piedmont. Legend has it that they were created for Vittorio Amedeo II, a young duke suffering from digestive issues, by his court baker, Antonio Brunero. The duke needed a bread that was light and easily digestible, leading to the invention of these thin, dry sticks. Their popularity quickly soared beyond the court, becoming a common sight in bakeries and homes across Italy. Grissini were even famously enjoyed by Napoleon Bonaparte, who established a regular postal service between Turin and Paris just to satisfy his craving for them.
What makes Grissini truly unique is their distinctive handmade appearance. Each breadstick is stretched by hand, resulting in a charmingly irregular, knobbly shape that speaks volumes of its artisanal origin. Unlike their industrially produced counterparts, homemade Grissini possess an unparalleled freshness, aroma, and a delicate crispness that simply cannot be replicated. They are a testament to the beauty of simplicity in Italian cooking, transforming basic ingredients into something truly extraordinary.
Why Homemade Grissini are Simply the Best
Making Grissini at home offers a deeply rewarding experience. Not only do you get to control the quality of the ingredients, but you also infuse them with your personal touch, allowing for endless customization. The process itself is surprisingly straightforward and immensely enjoyable, making it a fantastic baking project for all skill levels. The aroma of freshly baked breadsticks wafting through your kitchen is an instant mood lifter, promising a delicious reward. Furthermore, homemade Grissini elevate any meal or gathering, transforming a simple spread into an authentic Italian feast. Their crisp texture and subtle flavor make them incredibly versatile, pairing beautifully with a wide array of dishes and drinks.
Essential Ingredients for Perfect Grissini
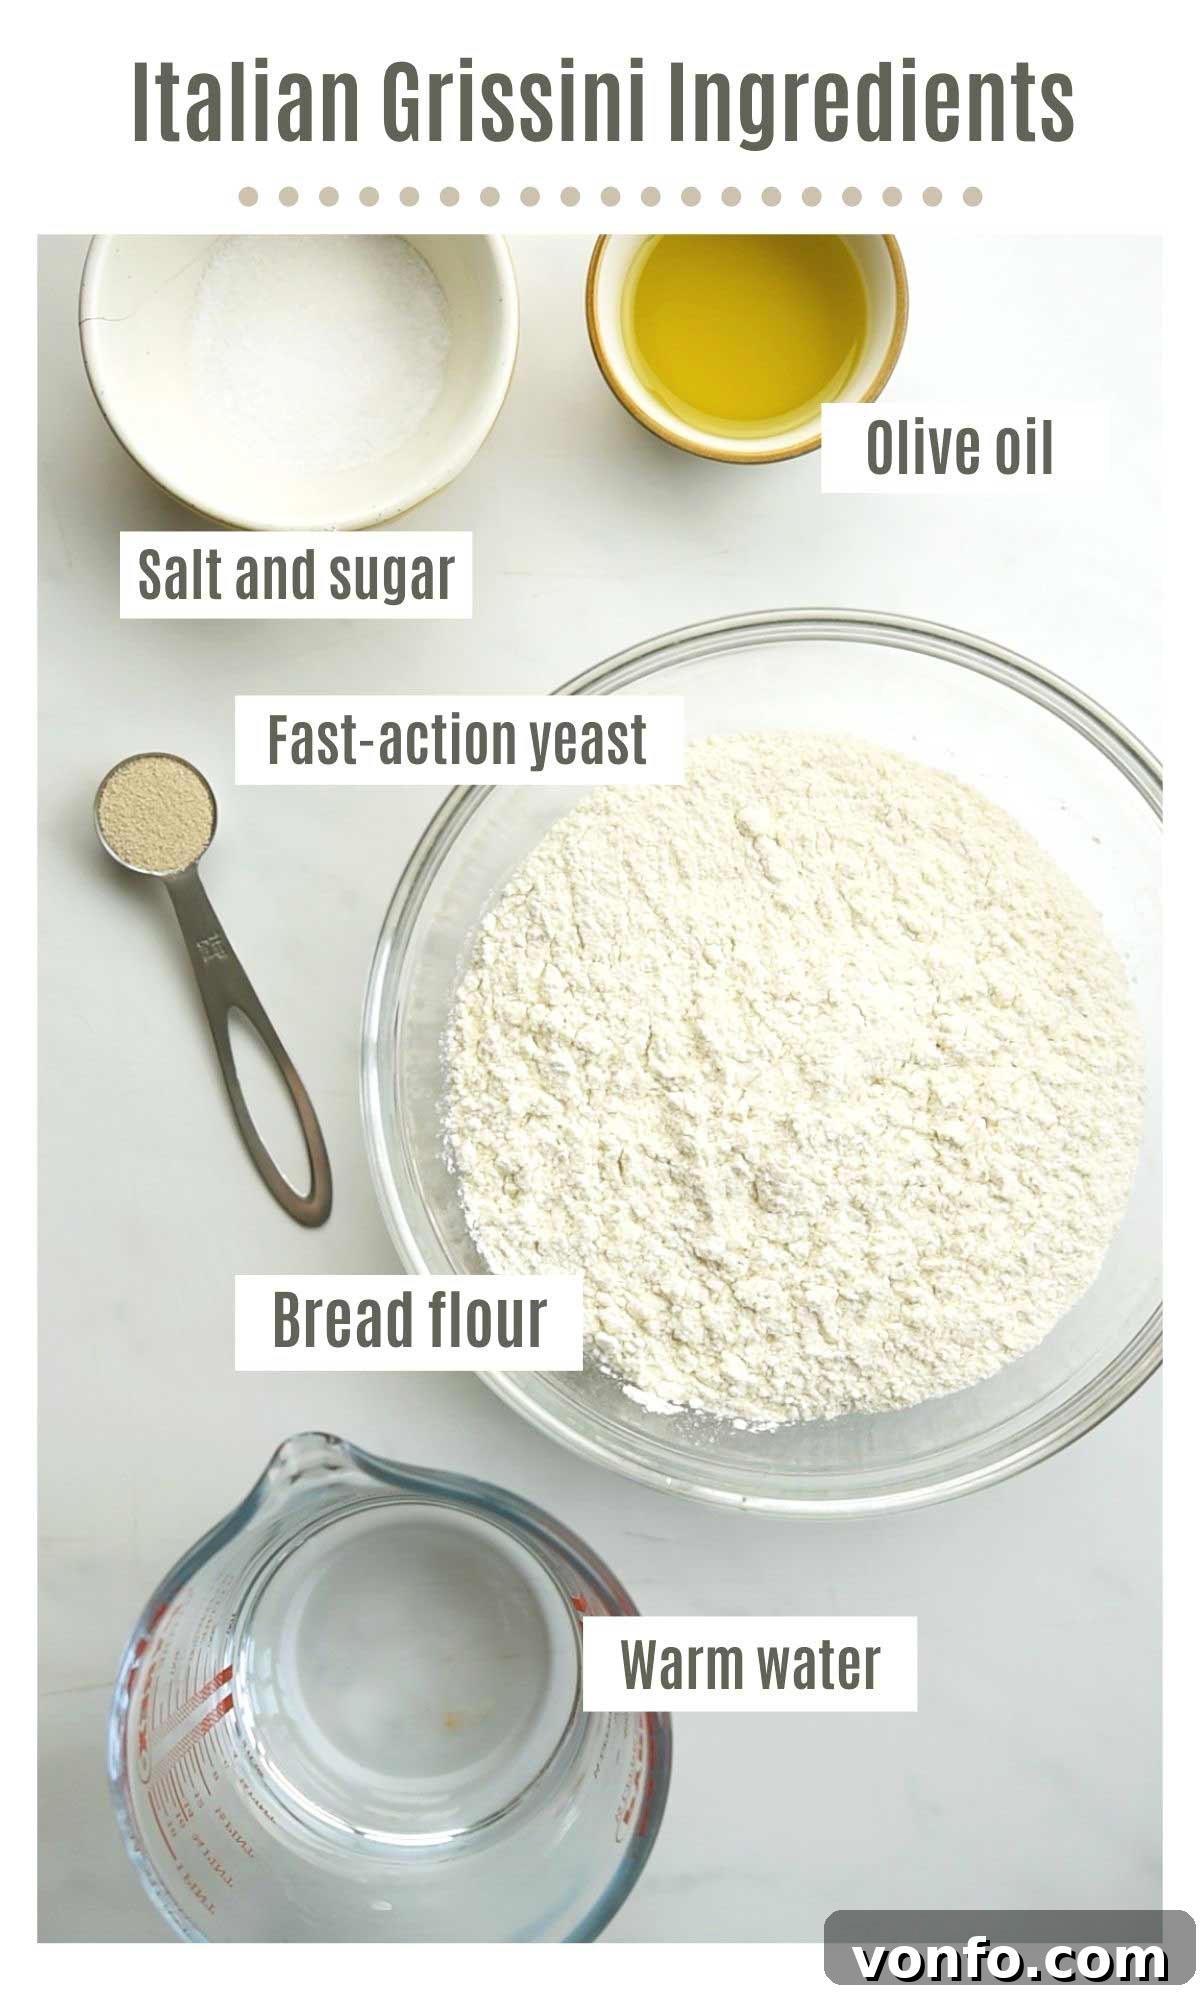
Crafting delicious Grissini requires just a handful of common pantry ingredients. Each plays a crucial role in achieving the signature texture and flavor of these beloved Italian breadsticks:
- Flour: While strong bread flour is recommended for the best chewy yet crisp texture due to its higher protein content, all-purpose flour (plain flour) can also be used successfully, yielding delightful results. Italian 00 flour is another excellent alternative if you’re aiming for a super fine texture.
- Warm Water: The temperature of the water is key as it helps to activate the yeast, ensuring your dough rises efficiently and achieves a light, airy internal structure. Using warm water can significantly cut down on proving time.
- Olive Oil: A cornerstone of Italian cuisine, good quality olive oil is incorporated into the dough for richness and flavor. It’s also brushed on top of the breadsticks before baking to create that irresistible golden-brown crust and extra crispiness.
- Salt and Sugar: These basic seasonings are vital for enhancing the overall flavor of the breadsticks. The sugar not only adds a subtle sweetness but also helps to feed the yeast, aiding in the fermentation process.
- Fast-Action Yeast: For convenience and efficiency, fast-action (or instant) yeast is preferred as it doesn’t require prior activation in water. Always check your yeast packet instructions as some varieties may need to be bloomed.
- Semolina: Used primarily for dusting both the baking tray and the dough itself. Semolina prevents sticking, adds a lovely coarse texture to the exterior of the breadsticks, and contributes to their overall crispness.
The photo below provides a visual guide to all the simple ingredients you’ll need to create your incredible homemade Grissini!
Step-by-Step Guide: Crafting Your Own Italian Grissini
Making Grissini is a hands-on and enjoyable process. Follow these detailed steps to achieve perfect, rustic breadsticks every time:
Step 1: Prepare the Dough Base
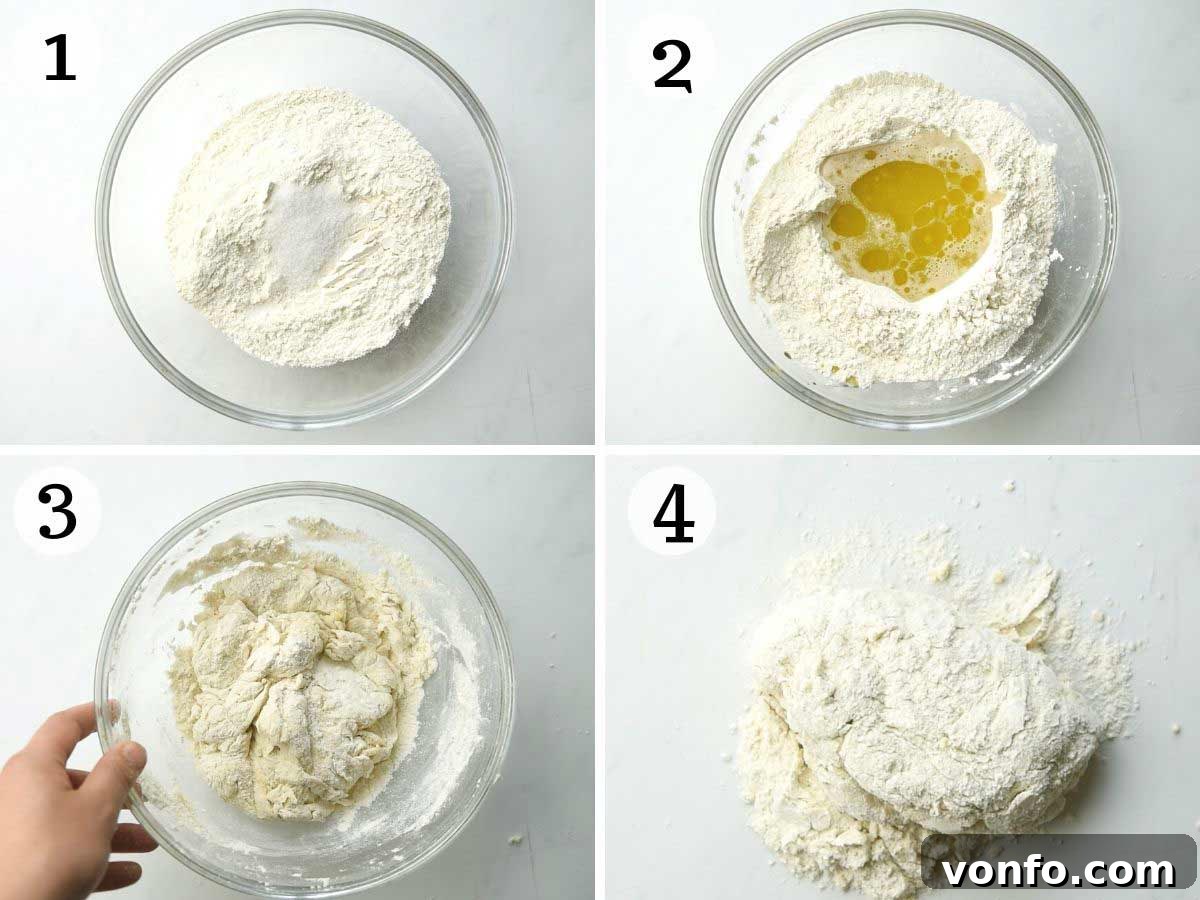
In a large mixing bowl, combine the flour, sugar, and salt, stirring them thoroughly to ensure even distribution. Create a small well in the center of the dry ingredients. Into this well, add the fast-action yeast, warm water, and olive oil. This method ensures the yeast directly interacts with the warm water and sugar, kick-starting its activation.
Step 2: Knead the Dough
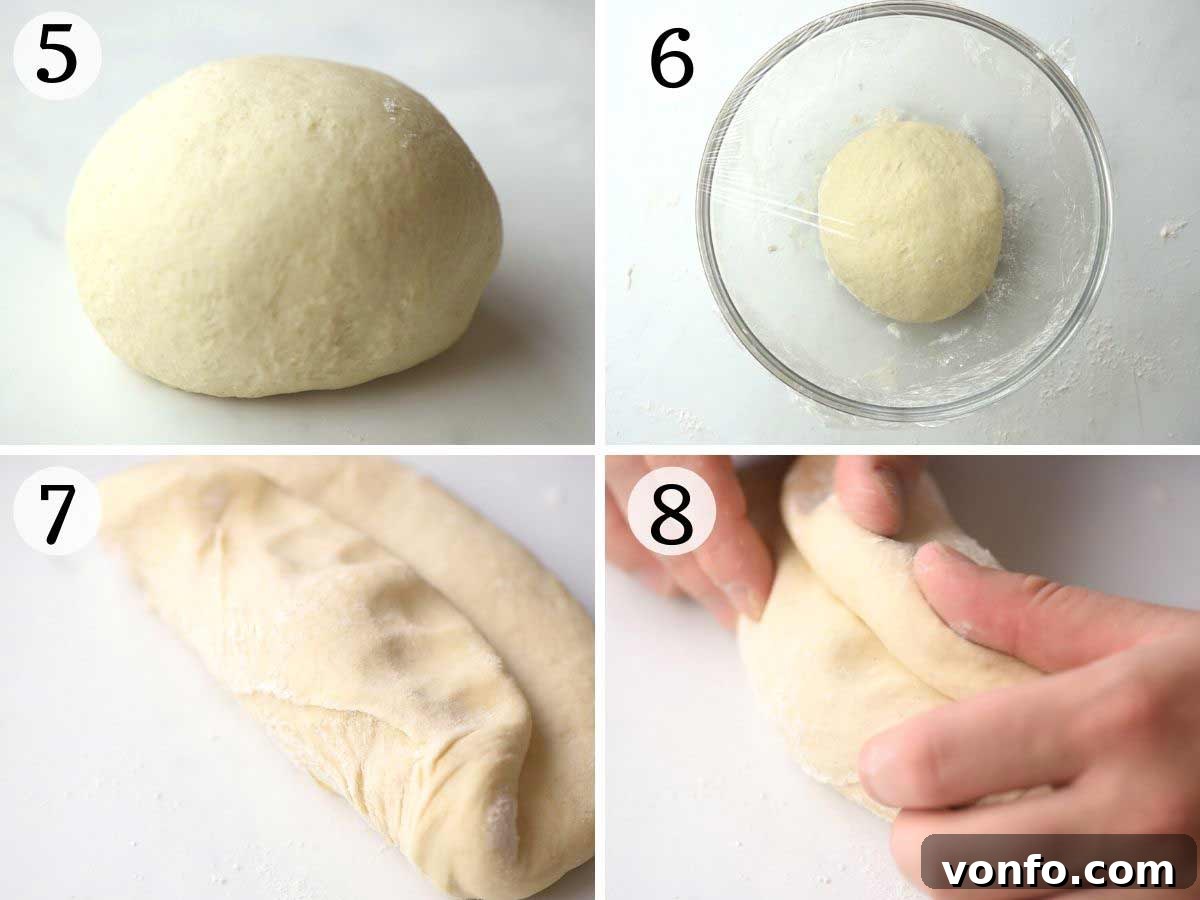
Stir all the ingredients together with a spoon or your hand until a shaggy, rough dough ball forms. Transfer the dough onto a clean, lightly floured work surface. Begin kneading the dough with vigor, pushing and folding it for about 8-10 minutes. The goal is to develop the gluten, transforming the dough into a smooth, elastic, and pliable ball. If the dough becomes too sticky during kneading, sprinkle your work surface with a little extra flour, but avoid adding too much as it can make the breadsticks tough.
Step 3: Initial Rest (Autolyse)
Once your dough is smooth and elastic, shape it into a neat ball. Lightly dust a clean bowl with flour, place the dough ball inside, and cover it tightly with plastic wrap. Let the dough rest at room temperature for 15 minutes. This short rest period, often called autolyse, allows the flour to fully hydrate and the gluten to relax, making the dough easier to work with in the subsequent steps.
Step 4: Shaping the Dough
After the 15-minute rest, gently remove the dough from the bowl and press it down to form a rough rectangle. Now, you’ll perform a simple fold to build strength. Take one of the longer edges of the rectangle and fold it inward towards the center of the dough. Then, take the opposite long edge and fold it over, overlapping the first fold entirely to the other end. This should create a log-like shape.
Step 5: Second Rise (Proving)
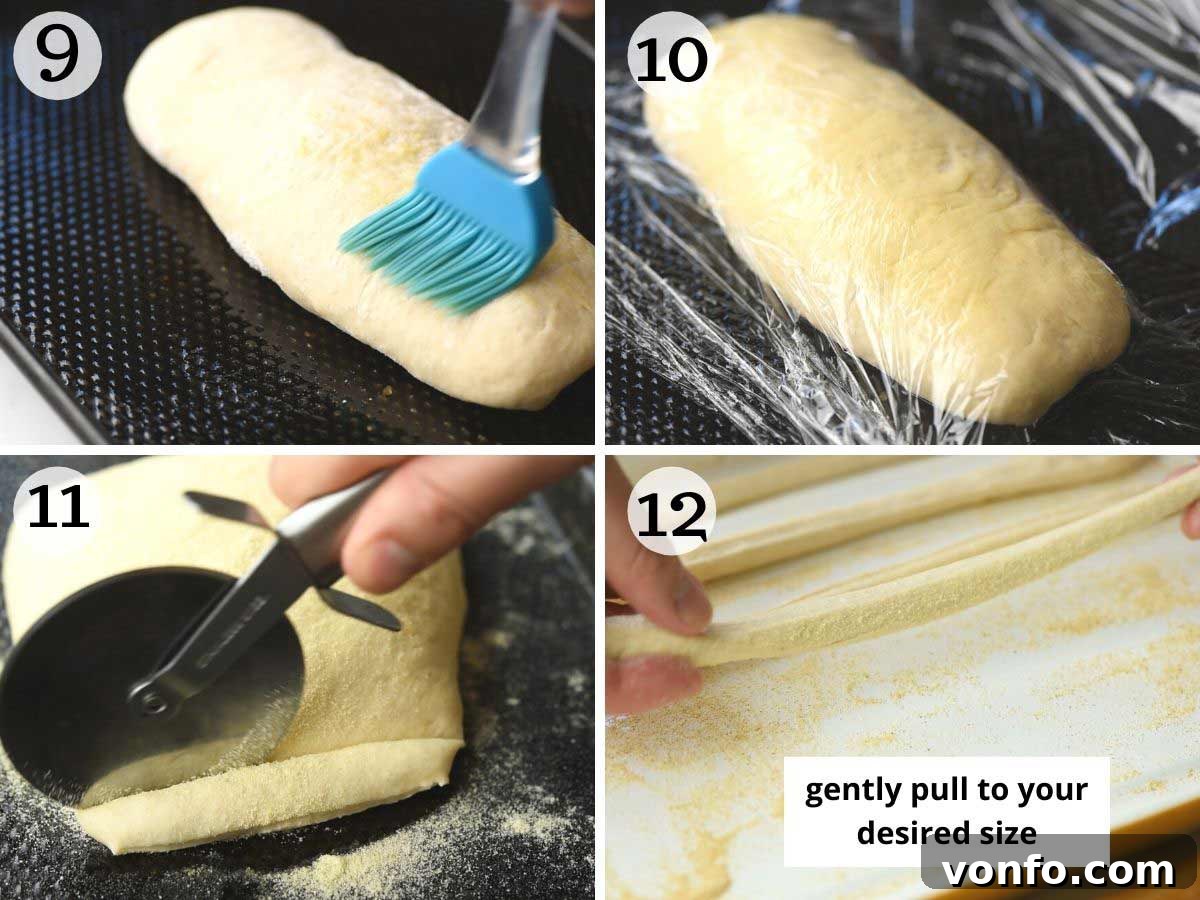
Turn the dough log over so the seam is underneath. Gently push and pat the ends inwards to form a more defined rectangle. Lightly brush a large baking tray with olive oil, then carefully transfer the shaped dough onto it. Brush the top of the dough with a little more olive oil. Loosely cover the entire tray with plastic wrap, ensuring there’s enough room for the dough to expand. Allow the dough to prove in a warm place for about 1 hour, or until it has visibly doubled in size. Warm temperatures will encourage a faster rise.
Step 6: Prepare for Baking
While the dough is proving, preheat your oven to 450°F (230°C). Once the dough has risen, remove the plastic wrap. Lightly sprinkle semolina generously over the baking tray and also dust a little more over the top surface of the uncovered dough. This semolina layer will contribute to the breadsticks’ non-stick properties and add a desirable crunch.
Step 7: Cut and Stretch the Grissini
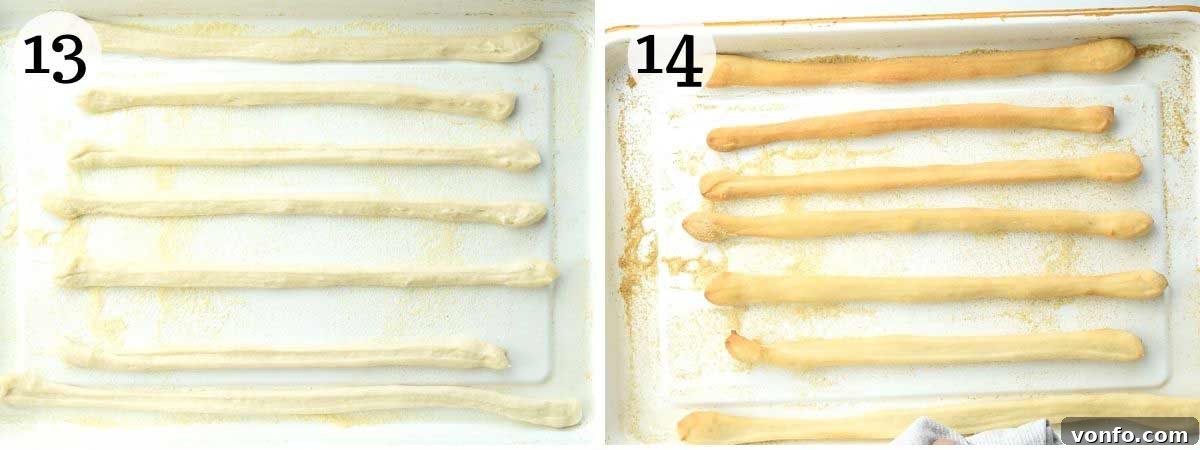
Using a pizza cutter or a sharp knife, carefully cut 1/4 inch (approximately 1 cm) thick strips widthwise from the dough rectangle. Each strip will become a Grissino. Gently pick up each strip and, using both hands, stretch it carefully into a long, thin breadstick. Aim for a length that fits comfortably on your baking tray without overcrowding. Arrange the stretched breadsticks on the prepared semolina-dusted tray, leaving a small gap between each one to ensure they bake evenly and don’t stick together.
Step 8: Bake to Golden Perfection
Transfer the tray of Grissini to your preheated oven. Bake for 12-15 minutes, or until the breadsticks are beautifully golden brown and delightfully crisp. Baking time may vary slightly depending on your oven and the thickness of your Grissini. Once baked, remove them from the oven and let them cool completely on the tray or a wire rack before serving. Cooling them completely is crucial for achieving maximum crispness.
Exciting Variations and Flavor Enhancements
The beauty of Grissini lies in their adaptability. While delicious plain, they are also excellent with added flavors. Experiment with these variations to customize your breadsticks:
- Parmesan Grissini: Incorporate 1/4 cup (30g) of freshly grated Parmesan cheese directly into the flour mixture for a savory, cheesy kick that melts into the dough.
- Spicy Grissini: Add 1-2 teaspoons of dried chili flakes or red pepper flakes to the dough, adjusting to your preferred level of heat. For an extra layer of flavor, a teaspoon of fennel seeds creates a wonderfully aromatic and subtly spicy combination.
- Rosemary Grissini: Finely chop 1-2 sprigs of fresh rosemary and mix it into the flour. The aromatic piney notes of rosemary infuse the breadsticks with a classic Italian essence.
- Seeded Grissini: After shaping and arranging the Grissini on your baking tray, lightly brush them with a little extra olive oil. Then, generously sprinkle them with your favorite seeds, such as sesame seeds, poppy seeds, flax seeds, or a blend of multiple seeds, for added texture and nutrition.
Expert Tips for Grissini Success & Common Questions
Top Tips for Mastering Grissini
- Yeast Activation: Always confirm the type of yeast you are using. Fast-action yeast typically doesn’t require pre-activation. If using active dry yeast, proof it in warm water with a pinch of sugar for 5-10 minutes until foamy before adding it to the flour.
- Optimizing Proving Time: Dough rises best in warm environments. Using warm water initially and placing the covered dough in a warm spot (like a slightly warmed oven turned off, or near a sunny window) can significantly speed up the proving process. If your kitchen is cool, it might take a little longer.
- Achieving Desired Texture: For ultra-crispy, snappy breadsticks, bake them for the full 12-15 minutes until deeply golden. If you prefer them slightly softer with a chewier center, reduce the baking time by about 5 minutes, keeping a close eye on them to prevent burning.
Frequently Asked Questions (FAQs)
- What are breadsticks traditionally eaten with?
Grissini are incredibly versatile. They are a beloved component of an Italian aperitivo, served as a snack with drinks, alongside a spread of cured meats, various cheeses, and marinated olives. They also make excellent dippers for a multitude of appetizers like hummus, pesto dip, or a rich olive tapenade. Many enjoy them as a delightful alternative to croutons, perfect for dunking into hearty soups or stews.
- Do I need to use bread flour?
While bread flour provides the ideal structure for a crisp yet slightly chewy breadstick, it’s not strictly necessary. This recipe has been successfully tested with both all-purpose (plain) flour and fine Italian 00 flour, both yielding delicious Grissini. Feel free to use what you have on hand.
- How do you store Grissini?
To maintain their crispness, Grissini should be stored in an airtight container at room temperature. They will keep well for 5-7 days. If they begin to lose their crunch and become slightly soft or chewy, you can easily revive them by popping them back into a hot oven (around 350°F/175°C) for about 5 minutes until crisp again.
- Can you freeze them?
Yes, Grissini freeze beautifully! Once completely cooled, arrange them in a single layer on a baking sheet and freeze until solid. Then, transfer them to plastic freezer bags, freezer-safe containers, or wrap them tightly in plastic wrap and aluminum foil. They can be stored in the freezer for up to 3 months. To serve, thaw them completely at room temperature, then crisp them up in a hot oven for a few minutes if desired.
Serve Them Right: Perfect Pairings for Your Grissini
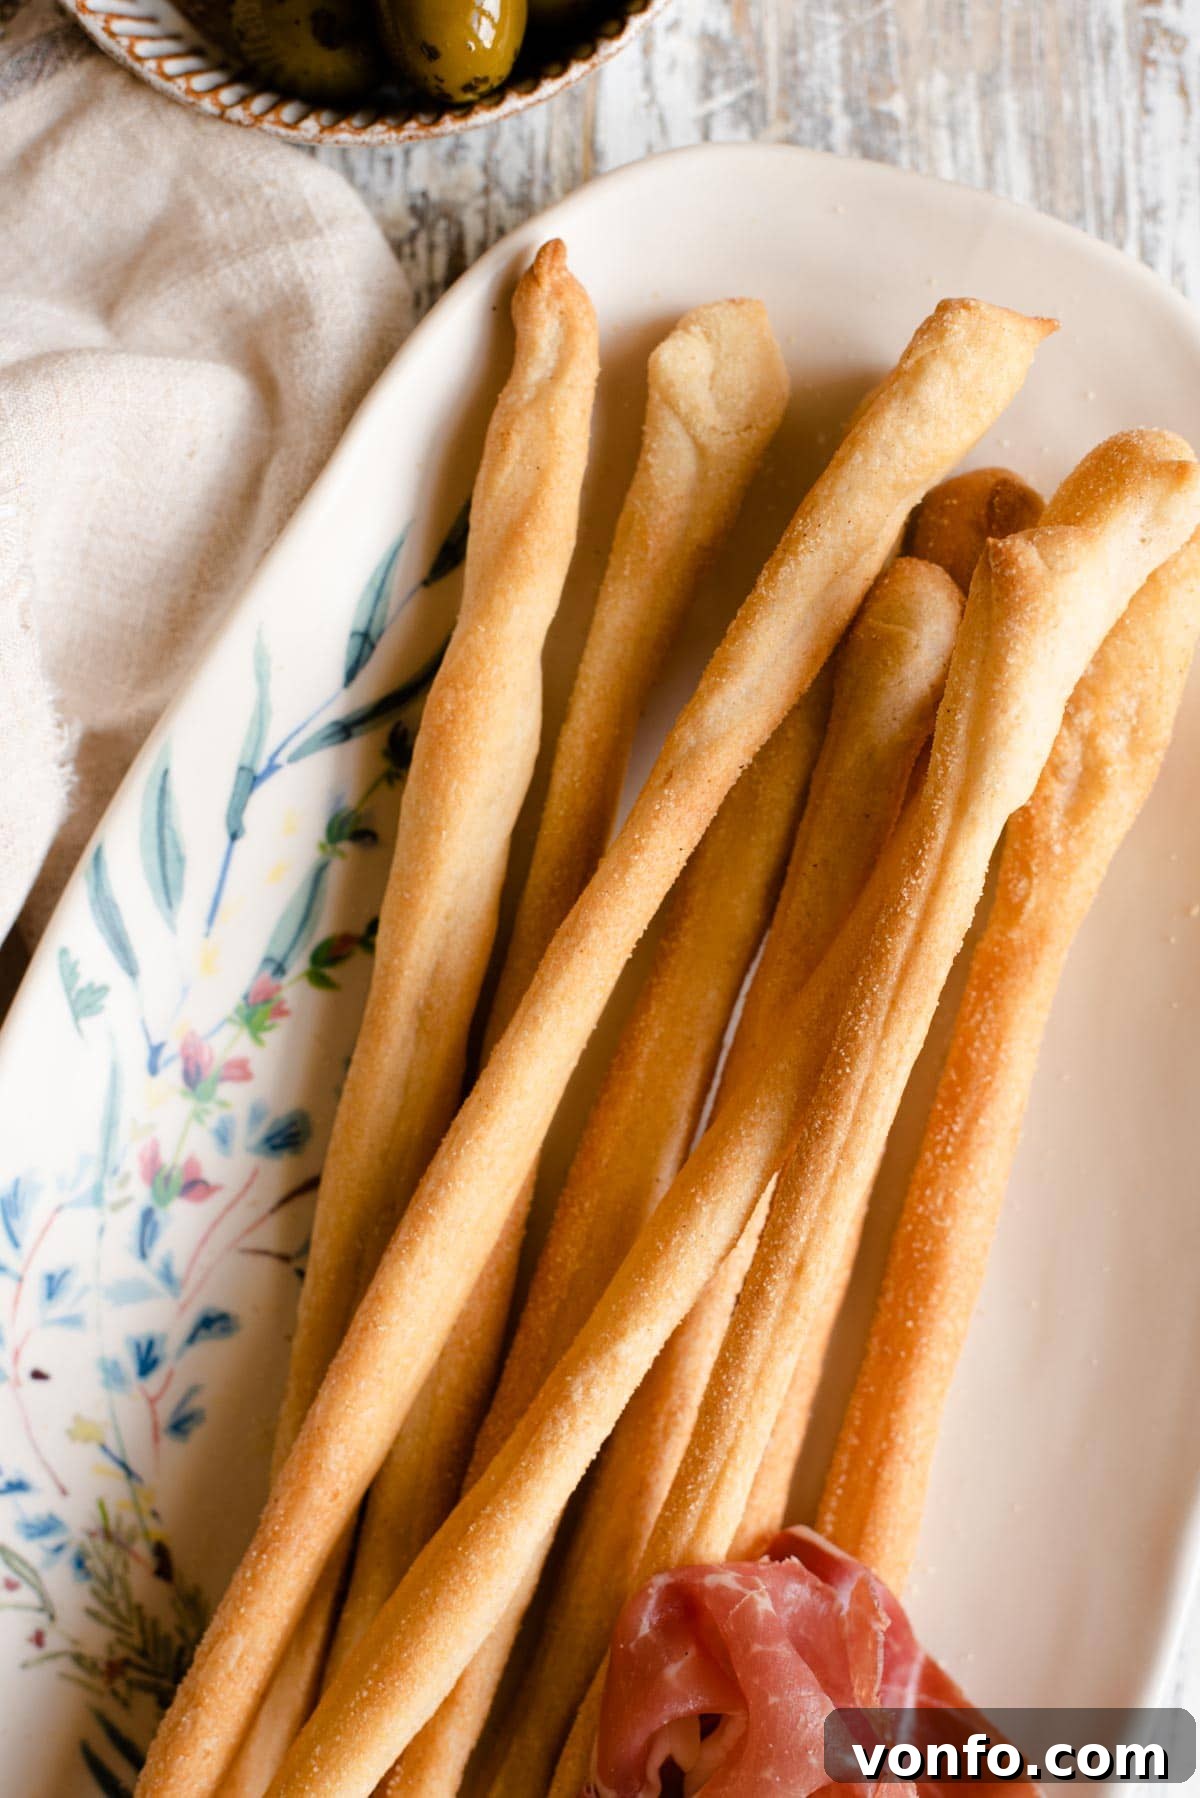
Grissini are designed for sharing and savoring. Their delicate flavor and satisfying crunch make them a perfect accompaniment to a variety of Italian and international dishes. Consider serving them:
- As part of an impressive antipasto platter with a selection of Italian cured meats like prosciutto, salami, and coppa, alongside hard and soft cheeses such as Parmesan, Pecorino, or fresh mozzarella, and a bowl of marinated olives.
- With a vibrant dipping sauce, such as a homemade pesto, a creamy sour cream and chive dip, a rich sun-dried tomato spread, or a classic balsamic vinegar and olive oil dip.
- Alongside a comforting bowl of soup, replacing traditional bread or crackers. They are particularly wonderful with creamy tomato soup, minestrone, or a hearty lentil soup.
- As a light and elegant snack for any gathering, a delightful addition to a charcuterie board, or simply enjoyed on their own with a glass of wine.
More Italian Antipasti Recipes You’ll Love
If you’ve enjoyed making these Grissini, you’ll love exploring other delightful Italian appetizers from our kitchen:
- Rosemary Focaccia Bread
- Gnocco Fritto (Italian Fried Dough)
- La Piadina: Italian Flatbread
- La Giardiniera sott’aceto – Italian Pickled Vegetables
- Fried Sausage Stuffed Olives – Delicious And Crispy
- Italian Farinata Chickpea Flatbread (La Cecina Toscana)
If you’ve tried these Grissini breadsticks or any other recipe on the blog, please let me know how you got on in the comments below, I love hearing from you! You can also FOLLOW ME on FACEBOOK, TWITTER, INSTAGRAM and PINTERESTto see more delicious food and what I’m getting up to.
Grissini – Homemade Italian Breadsticks
By Emily
Prep Time: 30 mins | Cook Time: 12-15 mins | Proving Time: 1 hr 20 mins | Total Time: Approx. 2 hrs 2 mins
Servings: 20 breadsticks
These long, thin and crispy homemade Italian breadsticks are perfect for any occasion. Serve them with drinks, cured meats, and cheese for an authentic Italian aperitivo, or use them for dunking in your favorite dips or soups. So delicious and easy to make at home!
Ingredients
- 2 cups (270g) bread flour, spooned and leveled
- 1 tsp sugar
- 1.5 tsp fine sea salt
- 1 tsp fast action yeast
- 2 tbsp olive oil, plus more for brushing
- ¾ cup (180ml) warm water
- Semolina, for dusting
Instructions
- Place the flour, sugar, and salt in a mixing bowl and stir together. Make a well in the middle and add the yeast, warm water, and 2 tablespoons of olive oil.
- Stir everything together until a rough dough forms, then tip it out onto a clean work surface. Knead the dough until it’s smooth and elastic, approximately 8-10 minutes. Lightly sprinkle the work surface with flour as you knead if the dough is sticking.
- Shape the dough into a ball and place it in a clean bowl lightly dusted with flour. Cover with plastic wrap and let the dough rest for 15 minutes.
- After resting, remove the dough from the bowl and gently press it to form a rectangle. Fold one long edge lengthwise into the middle of the dough, then fold the opposite edge right over so it overlaps the first fold, creating a log shape.
- Turn the dough log over and gently push each end in so it resembles a rough rectangle. Place the dough on a baking tray brushed with olive oil. Brush the top of the dough with more olive oil and loosely cover with plastic wrap.
- Leave the dough to prove for 1 hour or until doubled in size.
- Preheat the oven to 450°F (230°C).
- Lightly sprinkle semolina over the baking tray and sprinkle a little more over the uncovered dough.
- Using a pizza cutter or sharp knife, cut 1/4 inch (1cm) thick strips widthwise from the dough. Gently stretch each strip into a long breadstick, long enough to fit your tray. Continue with the rest of the dough until your tray is filled, ensuring a small gap between each breadstick.
- Bake in the oven for 12-15 minutes or until lightly golden and crispy. Let cool completely before serving.
Notes
- Yeast: This recipe uses fast-action yeast which doesn’t need to be activated first. Always check your yeast packet instructions, as some varieties may require blooming in warm water.
- Proving: Warm temperatures help dough rise quicker. Using warm water to make the dough and placing it in a warm environment will aid in a faster rise. Cold water works but will take longer.
- Texture: For crunchy and crisp breadsticks, bake for the full recommended time. For a slightly softer texture, reduce baking time by about 5 minutes.
- Storage: Grissini keep well in an airtight container for 5-7 days. If they soften, crisp them up in a hot oven for 5 minutes.
- Freezing: These breadsticks can be frozen in freezer bags or wrapped tightly. Thaw completely before serving; reheating in a hot oven is optional for crispness.
Nutrition
Nutrition information is an approximation per breadstick (based on 20 servings):
- Calories: 59 kcal
- Carbohydrates: 9g
- Protein: 2g
- Fat: 2g
- Saturated Fat: 1g
- Sodium: 175mg
- Potassium: 14mg
- Fiber: 1g
- Sugar: 1g
- Calcium: 2mg
- Iron: 1mg
Nutrition information is automatically calculated, so should only be used as an approximation.
Helpful Info for All Recipes
- I always use extra virgin olive oil in all of my recipes unless stated otherwise.
- When I use canned or jarred tomatoes of any kind, I always recommend Cirio or Mutti brands for the best results and flavor.
- All vegetables are medium sized unless stated otherwise.
- All recipes are tested and developed using a fan (convection) oven.
- Find out more about how nutrition is calculated.
- Check out our must-have Italian Pantry Staples.
- You can also find all our Essential Kitchen Tools for Italian Cooking.
Did you try this recipe? Leave a comment below and share your experience! We love hearing from you.