
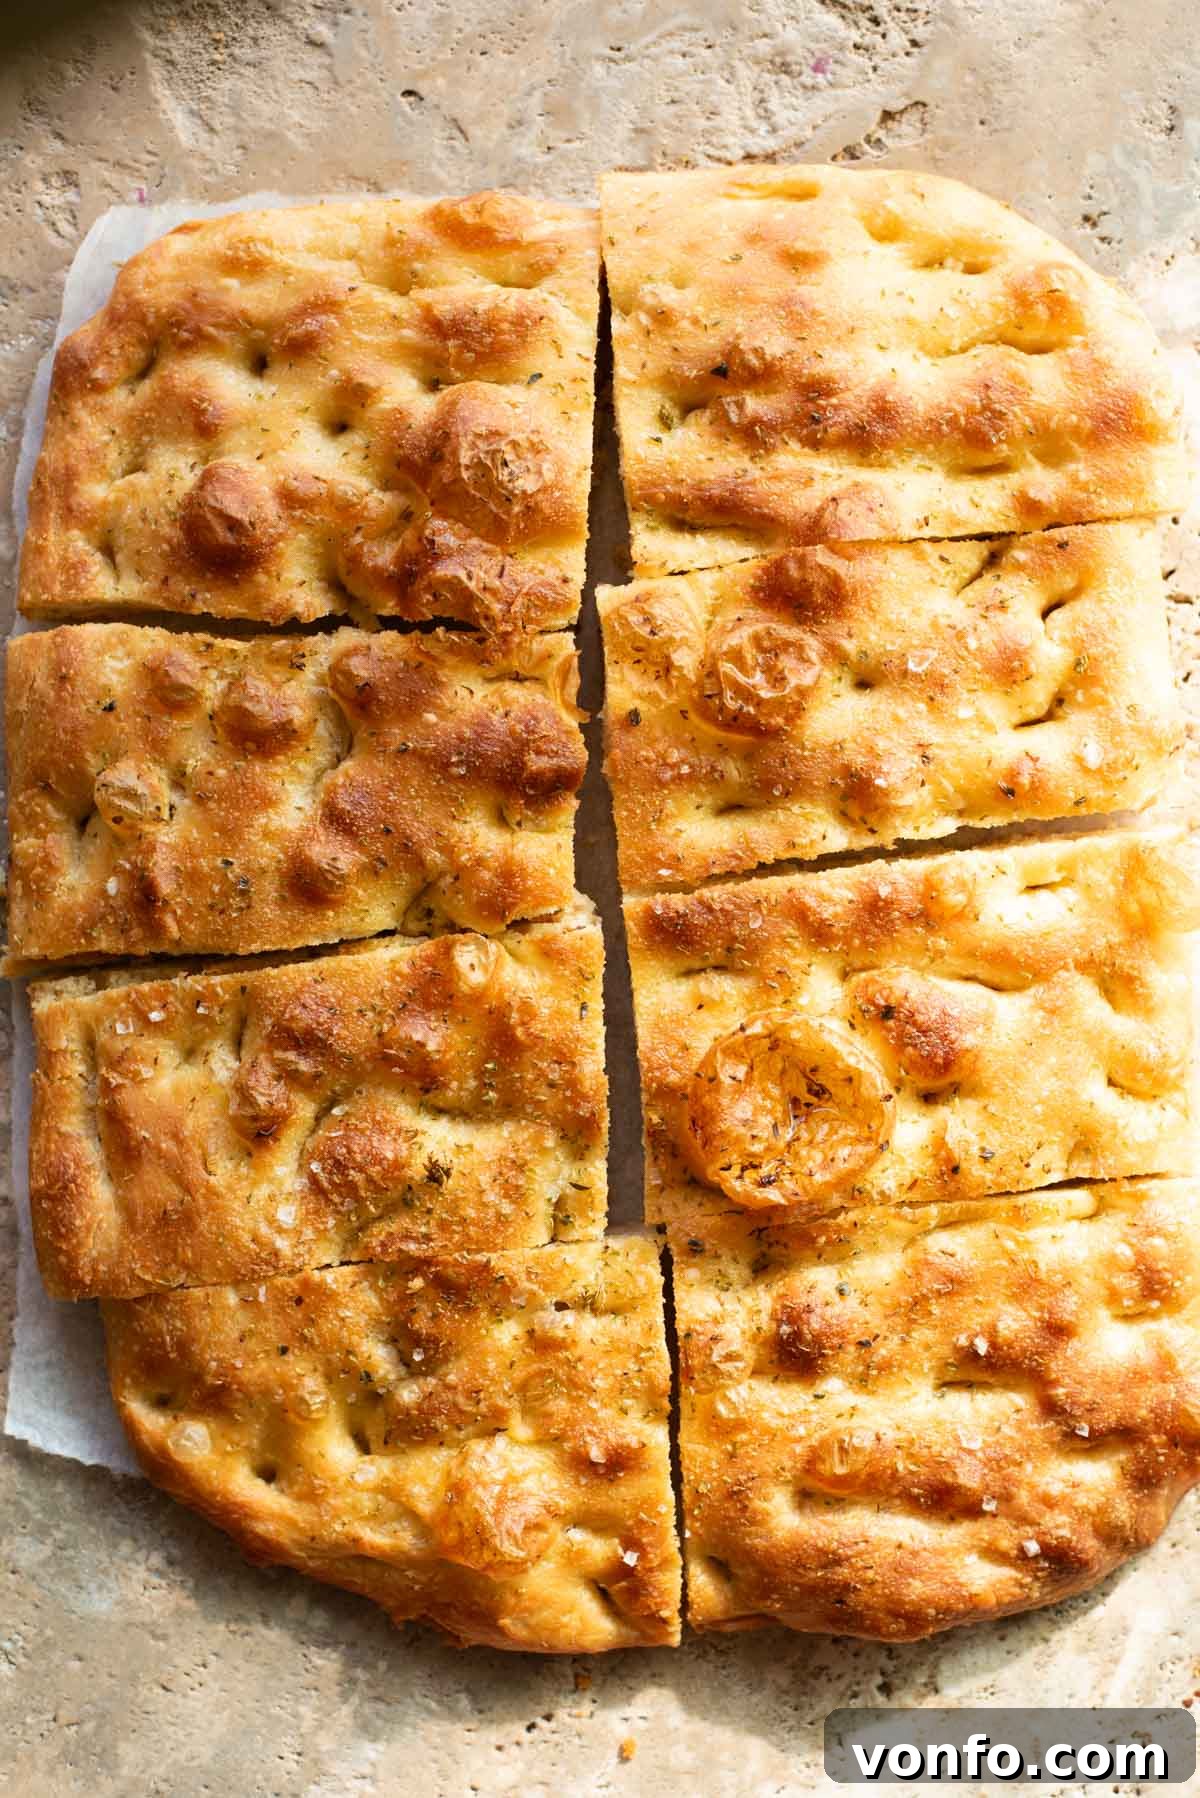
Welcome to your new favorite bread recipe! This is, without a doubt, the **absolute best no-knead focaccia recipe** you’ll ever try. Forget complicated doughs and endless kneading; this method yields a focaccia that is incredibly bubbly, wonderfully light, and exceptionally airy, boasting an irresistible flavor and a perfectly golden, crisp crust. What makes it truly stand out is its simplicity and flexibility – it’s super easy to prepare and can be prepped up to 48 hours in advance, fitting seamlessly into even the busiest schedules. Whether you enjoy it plain, with your favorite gourmet toppings, or use it to craft incredible focaccia sandwiches, this bread is a true revelation for home bakers, promising impressive results with minimal effort.
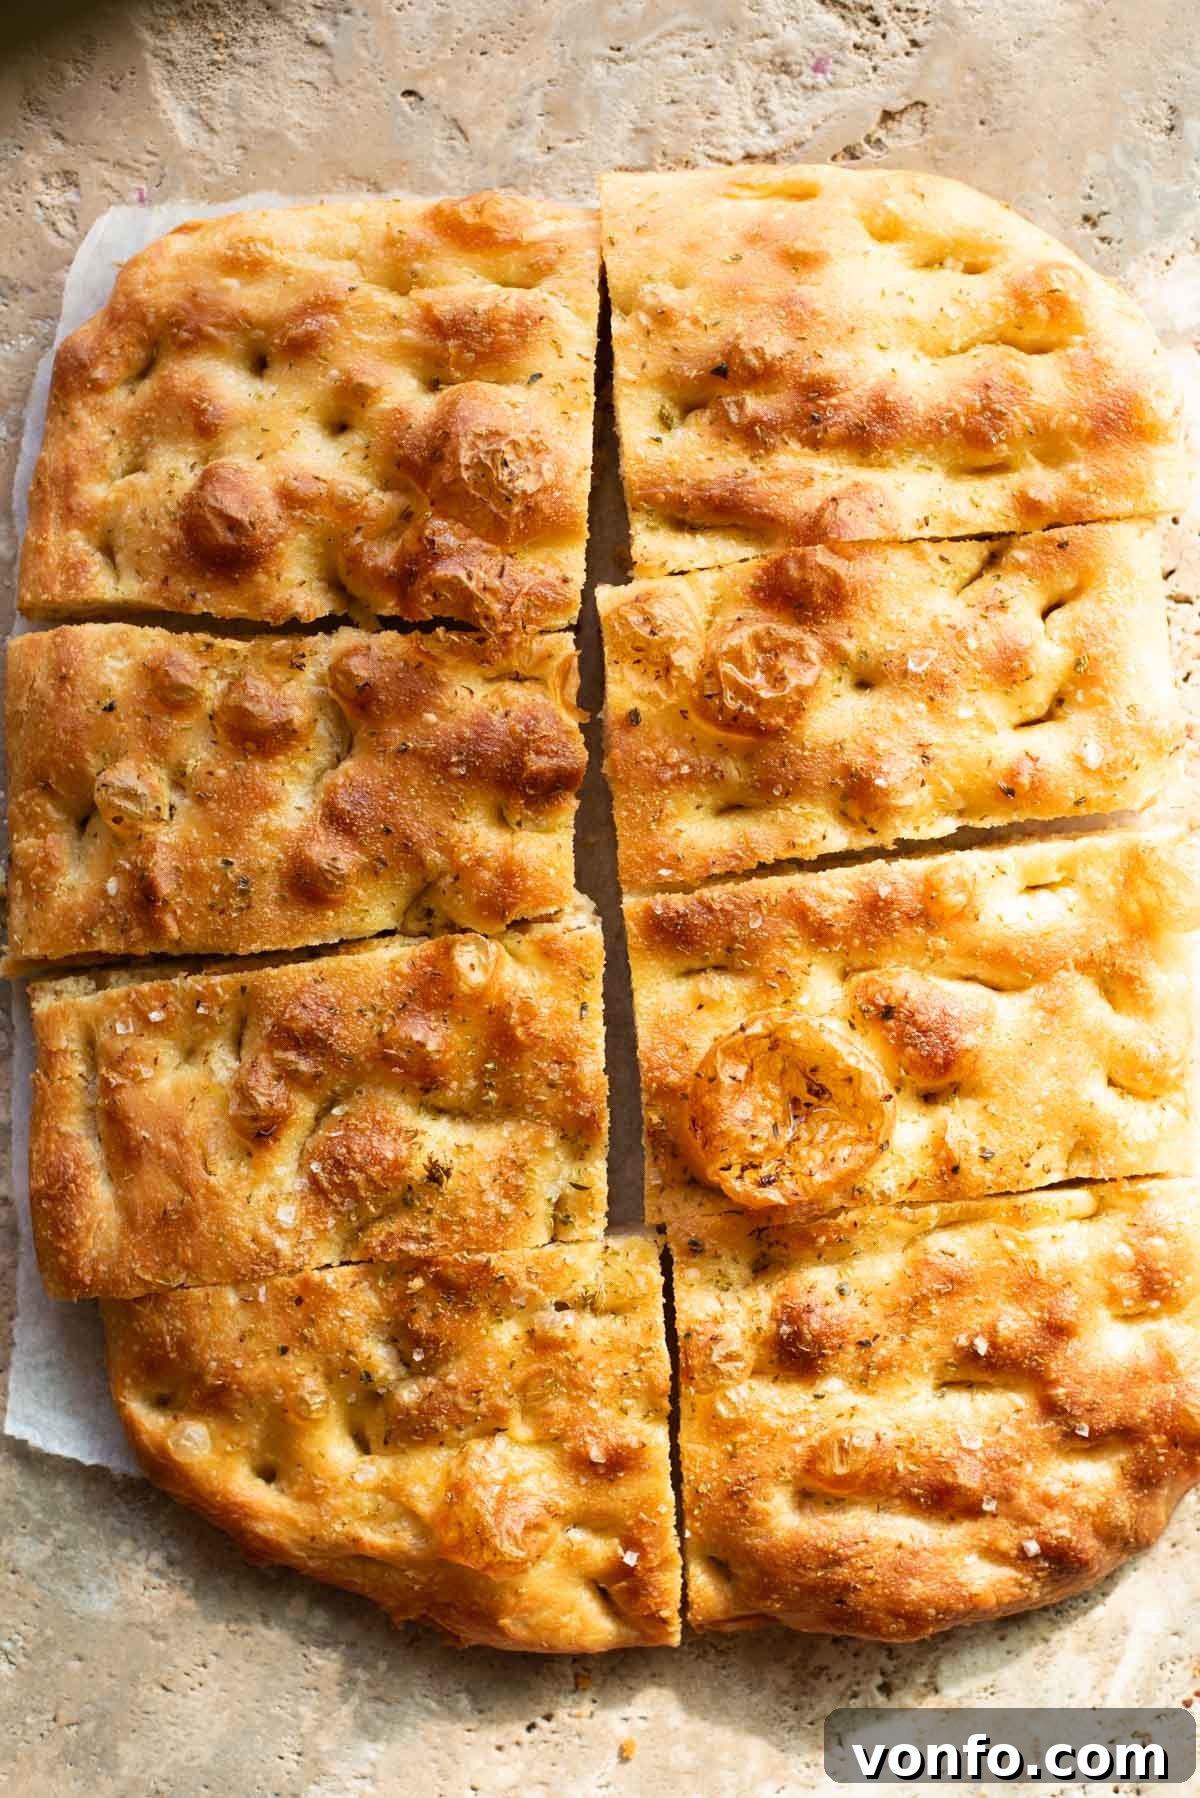
Table of Contents
- Why This is My Favorite Focaccia Recipe
- The Art and Science of High-Hydration Baking
- My Top Tips for Focaccia Success
- Ingredient Notes and Their Importance
- Visual Walk-Through: Step-by-Step Focaccia Making
- Example Baking Timeline: Plan Your Overnight Focaccia
- Exciting Focaccia Flavor Variations
- Frequently Asked Questions About No-Knead Focaccia
- More Delicious Italian Breads to Try
- Full Recipe Card
Why This is My Favorite No-Knead Focaccia Recipe
After years of baking and countless experiments with various bread recipes, this particular focaccia method has truly become my ultimate go-to. Its unique characteristics set it apart, delivering consistent, impressive results and an unparalleled culinary experience with every batch. Here’s why I adore this no-knead focaccia and why I believe it will become your favorite too:
- Exceptional High Hydration (80%): This is the fundamental secret to its ethereal texture! A very high water-to-flour ratio results in an initially wet and sticky dough that, once baked, transforms into an incredibly light, open-crumbed focaccia with countless delightful, irregularly shaped air pockets. This generous hydration also plays a crucial role in developing that beautifully crisp and perfectly golden crust, making every bite a textural marvel – simultaneously chewy, tender, and crisp.
- Minimal Yeast for Enhanced Digestibility and Deeper Flavor: Unlike many conventional bread recipes that rush the fermentation process with a larger amount of yeast, this focaccia uses just a tiny quantity of instant yeast. This intentional decision facilitates a slower, more gradual fermentation, which not only makes the bread much easier to digest (preventing that heavy, sluggish feeling often associated with quickly proofed breads) but also allows the dough ample time to develop complex, nuanced, and profound flavors. The long, slow rise truly enriches the focaccia’s taste profile, moving beyond a simple bread flavor to something far more intricate and satisfying.
- Effortless No-Knead Method (Stretch and Fold): Forget the arm workout and the sticky mess of intensive kneading! This recipe completely eliminates the need for traditional, laborious dough development. Instead, we rely on a series of simple yet incredibly effective stretch and fold techniques. These gentle movements efficiently develop the crucial gluten structure without any hard work, making this recipe remarkably accessible and enjoyable for bakers of all skill levels, from complete novices to seasoned pros.
- Perfect for Advance Preparation (Overnight Proofing): This focaccia is a dream come true for meal planning and effortless entertaining. The dough can be prepared up to 48 hours in advance and proofed slowly in the refrigerator overnight. This extended cold fermentation not only deepens the focaccia’s already rich flavor even further but also allows you to enjoy freshly baked bread with minimal active effort on the day you plan to serve it. It’s the ultimate convenience without ever compromising on the exceptional quality or taste.
The Art and Science of High-Hydration Focaccia
My journey to perfecting focaccia has been a long and incredibly rewarding one, filled with countless experiments and discoveries. For years, I experimented with various techniques, yeast quantities, and hydration levels. I’ve learned that while some recipes offer quick results and a decent loaf, they often compromise significantly on the depth of flavor, the chewiness of the crumb, and the characteristic airy texture that truly defines exceptional focaccia. This recipe is the culmination of those explorations.
For instance, an earlier focaccia recipe I shared had a lower hydration (around 60%) and called for a more significant amount of yeast to achieve a same-day bake. While undoubtedly delicious in its own right, it simply doesn’t achieve the same ethereal lightness, the incredibly open and bubbly interior, and the complex, nuanced flavor profile that this overnight, high-hydration version consistently delivers. The science is simple: more water allows for more steam to be produced during baking, creating larger, more irregular air pockets, while the longer, cooler fermentation gives enzymes ample time to break down starches and proteins, leading to deeper flavors and improved digestibility.
This new recipe is now my undisputed champion, my go-to for nearly every occasion. Its versatility is astounding; it serves beautifully as a comforting standalone snack, a delightful accompaniment for dipping in rich pasta sauces or hearty soups (perfect for the cherished Italian tradition of “scarpetta”), forming the robust yet tender base for gourmet sandwiches, or adorned with an array of delicious toppings tailored to any palate. Its flavor, texture, and sheer adaptability are truly outstanding and will leave you craving more.
I understand that baking bread, especially when incorporating specific techniques like stretch and fold or coil folds, can initially seem a bit daunting. That’s precisely why this post is designed to be as comprehensive and user-friendly as possible. I’ve broken down each step with meticulous detail, included helpful visual aids through high-quality photos, and provided a concise video demonstrating the crucial folding techniques. My ultimate aim is to equip you with all the necessary tips, scientific insights, and practical knowledge to bake a perfect focaccia, bubbling with air and bursting with flavor, every single time you attempt it. Please feel free to use the convenient table of contents above to navigate directly to any specific section you need, or effortlessly jump straight to the full recipe card here for immediate access to the instructions.
My Top Tips for Focaccia Success (Learned from Experience)
Embarking on the journey of focaccia making has taught me invaluable lessons, especially when aiming for that elusive, perfect bubbly, airy texture and rich flavor. Here are my most crucial insights and tips, honed through extensive practice, designed to help you achieve focaccia perfection in your own kitchen. The full detailed recipe, along with precise measurements, is readily available in the recipe card below, and I’ve also included a short video to clearly demonstrate the easy yet effective folding techniques.
- Embrace Minimal Yeast for Better Digestion and Flavor Development: This is a cornerstone of this recipe’s philosophy. You genuinely need only a minimal amount of instant or fast-action yeast. While many commercial bread recipes or same-day doughs often utilize larger quantities of yeast to speed up the process, this can sometimes lead to bread that feels heavy, tastes less complex, or is even difficult for some individuals to digest. By deliberately using less yeast and allowing the dough a significantly longer proofing period, you enable the yeast to work slowly and methodically, gently breaking down complex starches more effectively. This results in a bread that is not only noticeably lighter on your stomach but also boasts a far more developed, sophisticated, and complex flavor profile.
- Time is Your Flavor Ally – The Transformative Power of a Long Proof: A prolonged proofing period is absolutely essential when working with a small amount of yeast, as it provides the necessary time for the dough to rise. However, its benefits extend far beyond just simple volume increase. This extended, slow rest grants the dough ample time to develop a rich, profound, and deeply satisfying flavor that simply cannot be achieved in a hurried, short proof. During this patient fermentation period, enzymes naturally present in the flour, aided by the yeast, create a multitude of aromatic compounds and complex sugars. These compounds contribute immensely to the focaccia’s delicious depth, nuanced taste, and even its irresistible aroma. Patience, in this context, is truly rewarded with a vastly superior taste and texture.
- Set Timers for Folding Intervals – Consistency is Key! The specific folding stages – both stretch and fold and coil folds – are critical for developing gluten strength, incorporating air into the dough, and building structure. These folds typically occur at precise 30-minute intervals. Trust me from experience, it’s incredibly easy to get distracted or sidetracked and forget when the next fold is due! Setting a reliable timer for each interval is a non-negotiable step in my baking routine. This simple practice ensures you consistently perform the necessary folds at exactly the right time, preventing both the pitfalls of over-proofing (where the dough structure weakens) and under-development of the crucial gluten network.
- Don’t Fear the Wet Dough – High Hydration is Your Friend: A high hydration dough, characterized by a significant water-to-flour ratio (80% in this specific recipe), will naturally feel very wet and sticky – almost like a thick batter rather than a traditional bread dough. This might initially feel unusual or even intimidating if you’re accustomed to handling firmer, drier bread doughs, but it’s absolutely crucial for achieving that signature bubbly, open crumb and incredibly tender interior. Attempting to knead such a wet dough in the traditional sense would be impractical and frustrating. Instead, we master the gentle “stretch and fold” and “coil fold” methods. These techniques efficiently develop the gluten network without requiring extensive, messy handling, making the entire process surprisingly easy and manageable (especially when you remember to keep your hands well-oiled or wet!). Always refer to the accompanying photos and the video tutorial for a clear visual demonstration of these techniques.
- Optimal Handling for Wet Dough: To make working with this high-hydration, sticky dough a breeze, always ensure your hands are thoroughly wet with water or lightly oiled with olive oil before you touch the dough for any folding or shaping. This creates a non-stick barrier, preventing the dough from adhering to your fingers and allowing for smoother, more efficient, and less frustrating handling. A little olive oil on your hands goes an incredibly long way in managing the stickiness!
Ingredient Notes and Their Importance
The success of your focaccia hinges significantly on the quality and type of ingredients you use. Each component plays a vital role in achieving the desired texture, flavor, and overall excellence of this beloved Italian bread. Here’s a detailed look at the key elements:
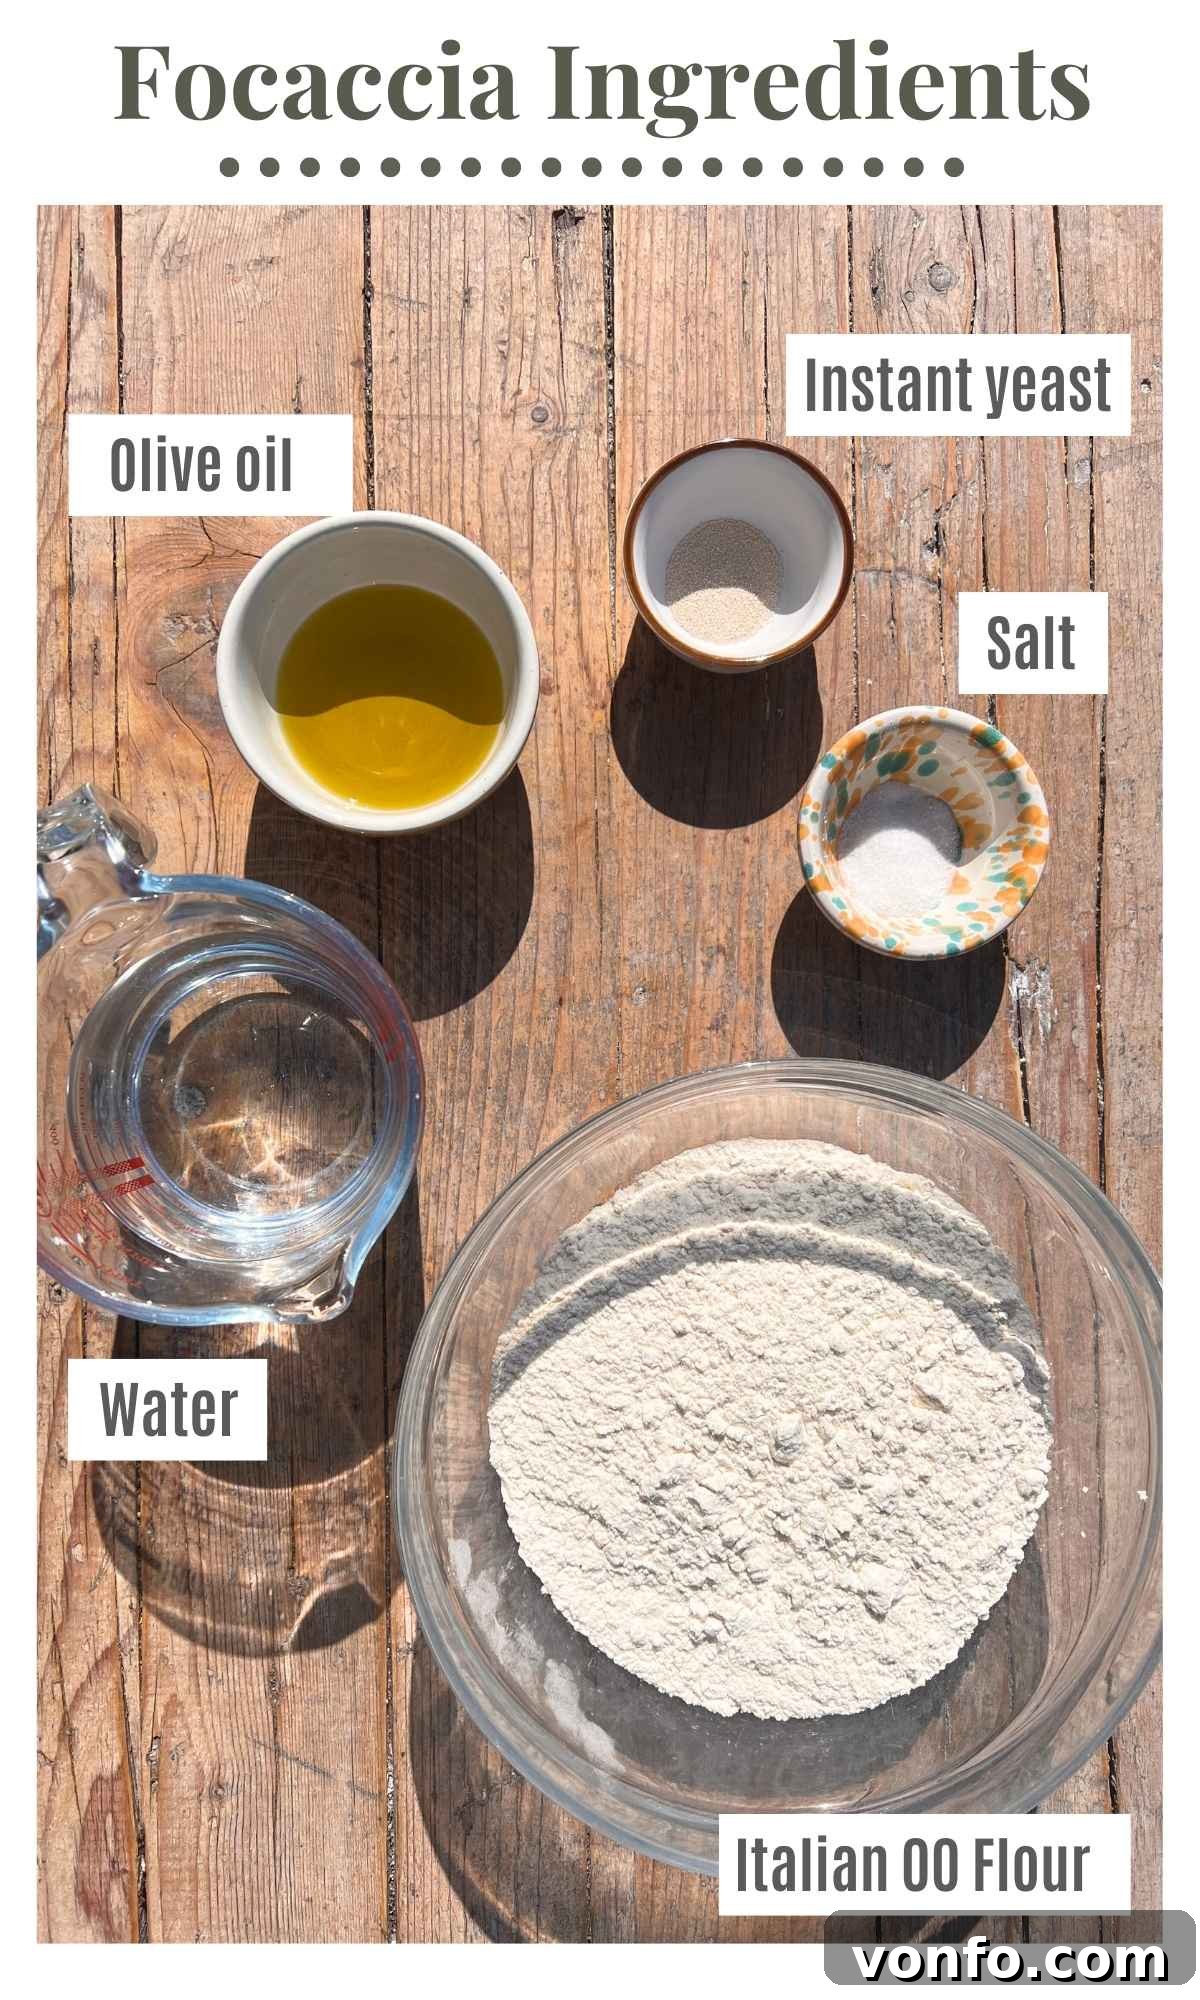
- Italian 00 Flour (with ~12% protein) or Good Quality Bread Flour:
Italian 00 flour is renowned for its incredibly fine texture, which contributes to a very tender crumb in baked goods. When selecting 00 flour for focaccia, look for types with a protein content of around 12% (often labeled as “forte” or “manitoba” in Italy). This protein level is ideal for developing a strong yet elastic gluten network, which is essential for trapping gases and creating those characteristic large, airy bubbles in focaccia. Alternatively, a good quality bread flour, typically ranging from 12-14% protein, will work just as wonderfully. Bread flour is specifically formulated to develop robust gluten, providing the structure and chewiness crucial for this high-hydration bread.
- Instant Yeast:
Instant yeast, also commonly known as fast-action or rapid-rise yeast, is incredibly convenient because it can be added directly into your dry ingredients without the need for prior activation in water. This particular recipe deliberately uses a minimal amount of instant yeast. This small quantity is key to facilitating the long, slow fermentation process, which is fundamental for superior flavor development and improved digestibility. It’s always a good practice, especially if you’re unsure about the freshness of your yeast, to check your yeast packet instructions. Some brands of instant or rapid-rise yeast might suggest (or even require) a brief activation in warm water. If activation is necessary, simply use a small portion of the total water specified in the recipe for this step (e.g., 50ml), allow the yeast to bloom, and then add this activated mixture to your dry ingredients along with the remaining water.
- Water (Temperature Matters):
Water is more than just a liquid in bread baking; it’s the medium for hydration, crucial for activating the yeast and enabling gluten development. For this recipe, given its long proofing time, room temperature water (around 68-75°F / 20-24°C) is generally perfectly fine. However, if your kitchen environment is particularly cool, slightly lukewarm water (around 80-90°F / 27-32°C) can provide a gentle boost to kickstart the yeast activity. It is critically important to avoid using hot water, as temperatures exceeding 120°F (49°C) can kill the yeast, rendering your dough inert. The high hydration level (80%) is arguably the most vital component for achieving the focaccia’s signature light, open, and airy internal structure.
- Good Quality Extra Virgin Olive Oil:
Extra virgin olive oil is not merely a lubricant for greasing the pan; it is an indispensable ingredient in focaccia, contributing profoundly to its characteristic flavor, aroma, and incredibly tender crumb. Invest in a good quality, flavorful extra virgin olive oil – one you would happily use for dipping bread. It imparts a delightful richness to the dough itself, prevents sticking during handling and baking, and, when generously applied to both the baking tray and over the dough’s surface before baking, creates that beautifully crisp, golden bottom crust and a wonderfully aromatic top.
- Salt (Fine and Flaky Sea Salt):
Salt plays a multifaceted and crucial role in bread baking, extending far beyond simple seasoning. It controls the rate of yeast activity (slowing it down just enough for better flavor development), significantly enhances the dough’s overall flavor, and strengthens the gluten structure, leading to a more manageable and resilient dough. For the dough itself, fine sea salt or kosher salt works exceptionally well. For the final flourish on top, flaky sea salt (such as Maldon) is highly preferred for its delicate crunch, appealing texture, and bursts of briny flavor, which beautifully contrast with the focaccia’s richness. Always remember to initially add salt and yeast to opposite ends of your mixing bowl to prevent direct, prolonged contact, which can inhibit the yeast’s essential activity.
Visual Walk-Through: Step-by-Step Focaccia Making
Let’s demystify the focaccia making process with a clear, step-by-step visual guide. Each stage, though simple, is crucial for developing the perfect texture and flavor of your overnight no-knead focaccia. Follow these instructions carefully, referring to the photos for visual confirmation of each step.
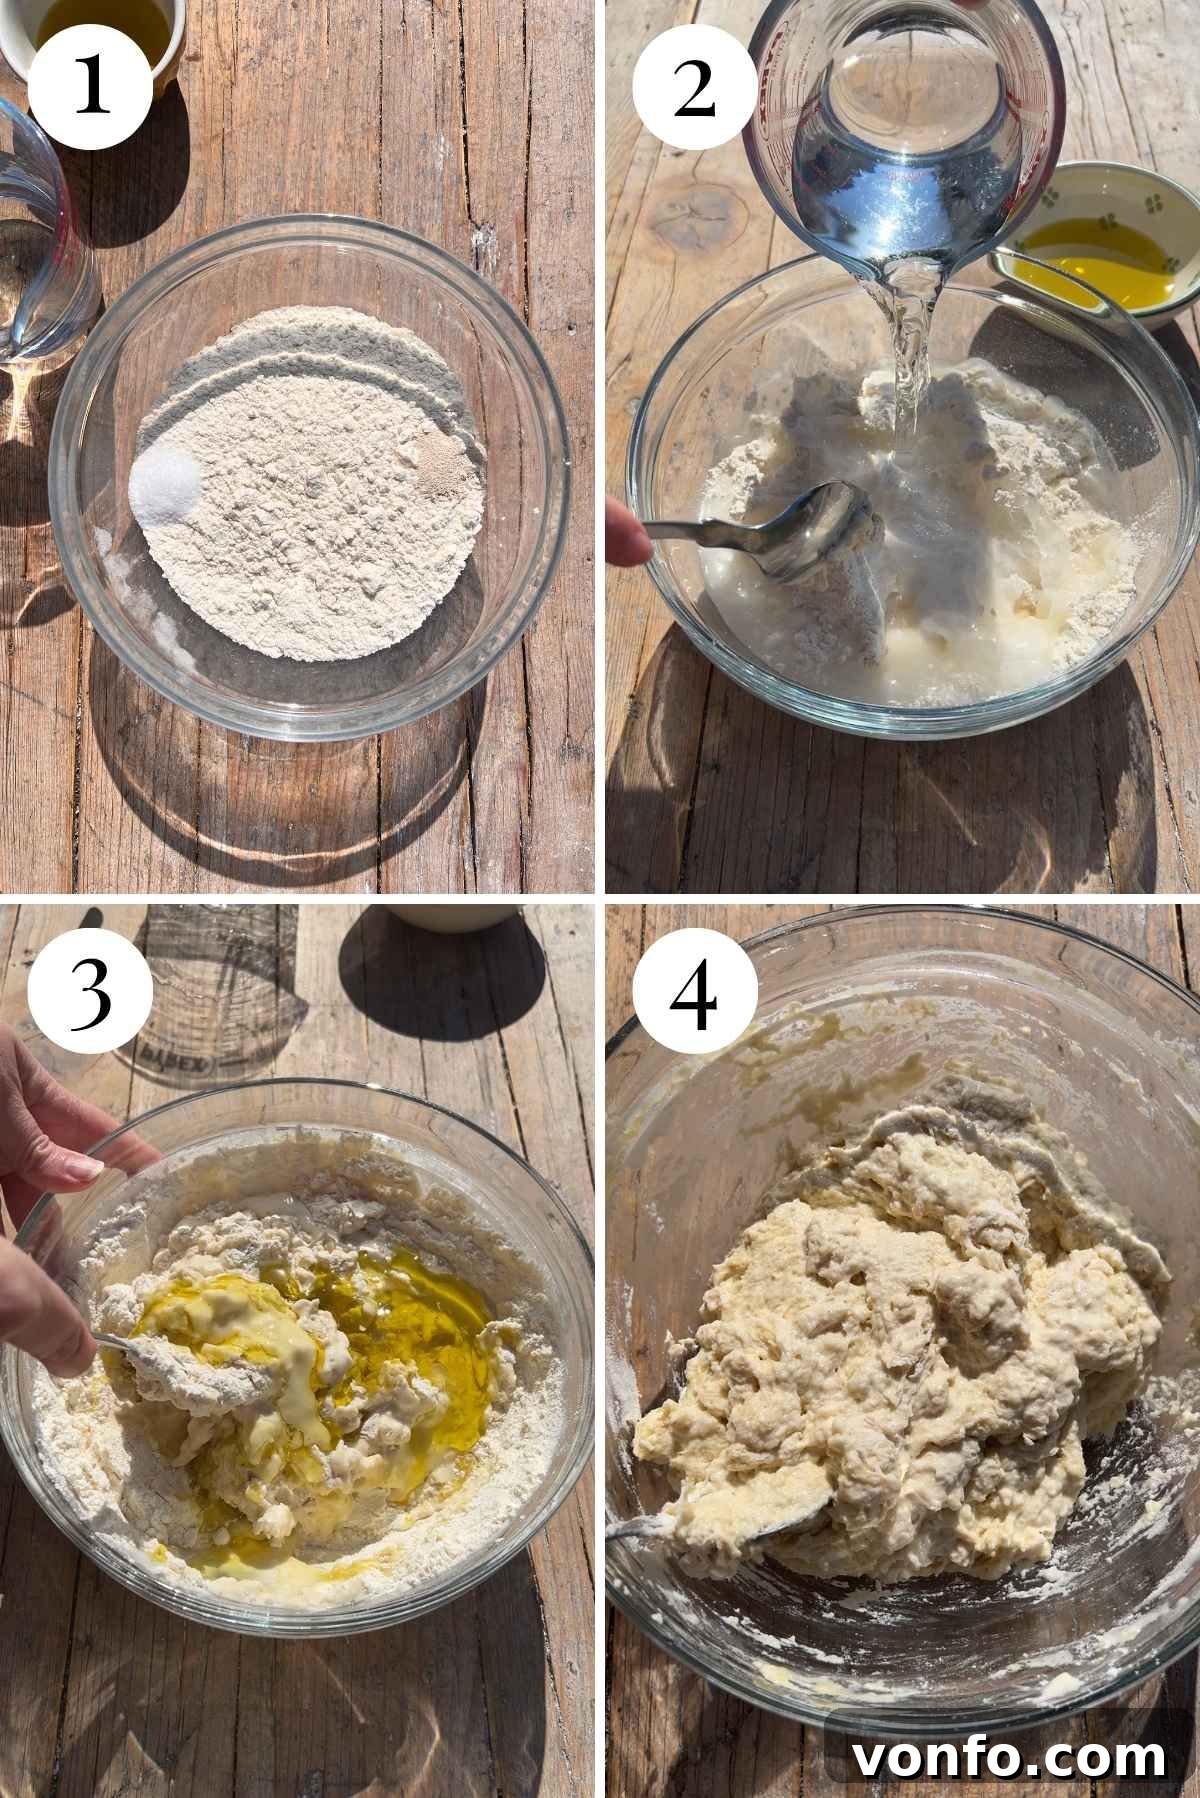
Step 1 – Prepare Your Dry Ingredients with Care: Begin by adding your precisely measured amount of flour (500g) into a large, sturdy mixing bowl. Next, add the 7g of fine sea salt to one side of the bowl and the 1g of instant yeast to the opposite side. This initial separation is important to prevent the salt from directly inhibiting the yeast’s activity. Give them a quick, light stir on their respective sides to ensure they are evenly distributed within their portions of flour and to prevent any clumps. (See photo 1 for a clear visual reference of the separated ingredients).
Step 2 – Form the Shaggy Dough and Initiate Autolyse: Pour the 400ml of water into the bowl, followed by the 4 tablespoons of extra virgin olive oil. Using a sturdy wooden spoon, a silicone spatula, or a specialized dough whisk, mix all the ingredients together until every trace of dry flour has been fully incorporated. At this stage, the mixture will appear very wet, sticky, and quite shaggy – this is not just expected, it’s exactly the desired consistency for a high-hydration dough! Avoid the temptation to overmix; simply ensure all components are thoroughly combined. Cover the bowl tightly with plastic wrap or a damp tea towel and let it rest undisturbed at room temperature for a precise duration of 30 minutes. This critical initial rest, often referred to as ‘autolyse,’ allows the flour to fully hydrate, and the crucial gluten development process to begin passively, setting the stage for the next steps. (Refer to photos 2-4 to observe the progression from dry ingredients to the initial shaggy dough).
Step 3 – First Series of Stretch and Folds: After the initial 30-minute rest, your dough is ready for its first gentle stretch and fold. This technique is designed to efficiently develop the gluten network without any forceful kneading. To begin, thoroughly wet your hand with water (or lightly oil it with olive oil) – this is crucial to prevent the sticky dough from clinging to your fingers. Gently slide your wet hand underneath one edge of the dough, pull it upwards (stretching it gently but firmly), and then fold it over itself towards the middle of the dough. Rotate the bowl a quarter turn (90 degrees) and repeat this action, working your way around the dough until you’ve completed approximately 4-6 distinct folds. This entire process should only take a few seconds per fold. Re-cover the bowl tightly with plastic wrap or a damp tea towel and let the dough rest for another 30 minutes at room temperature. This rest allows the gluten to relax before the next folding session. (Observe photos 5 and 6 carefully for a clear visual demonstration of the stretch and fold technique).
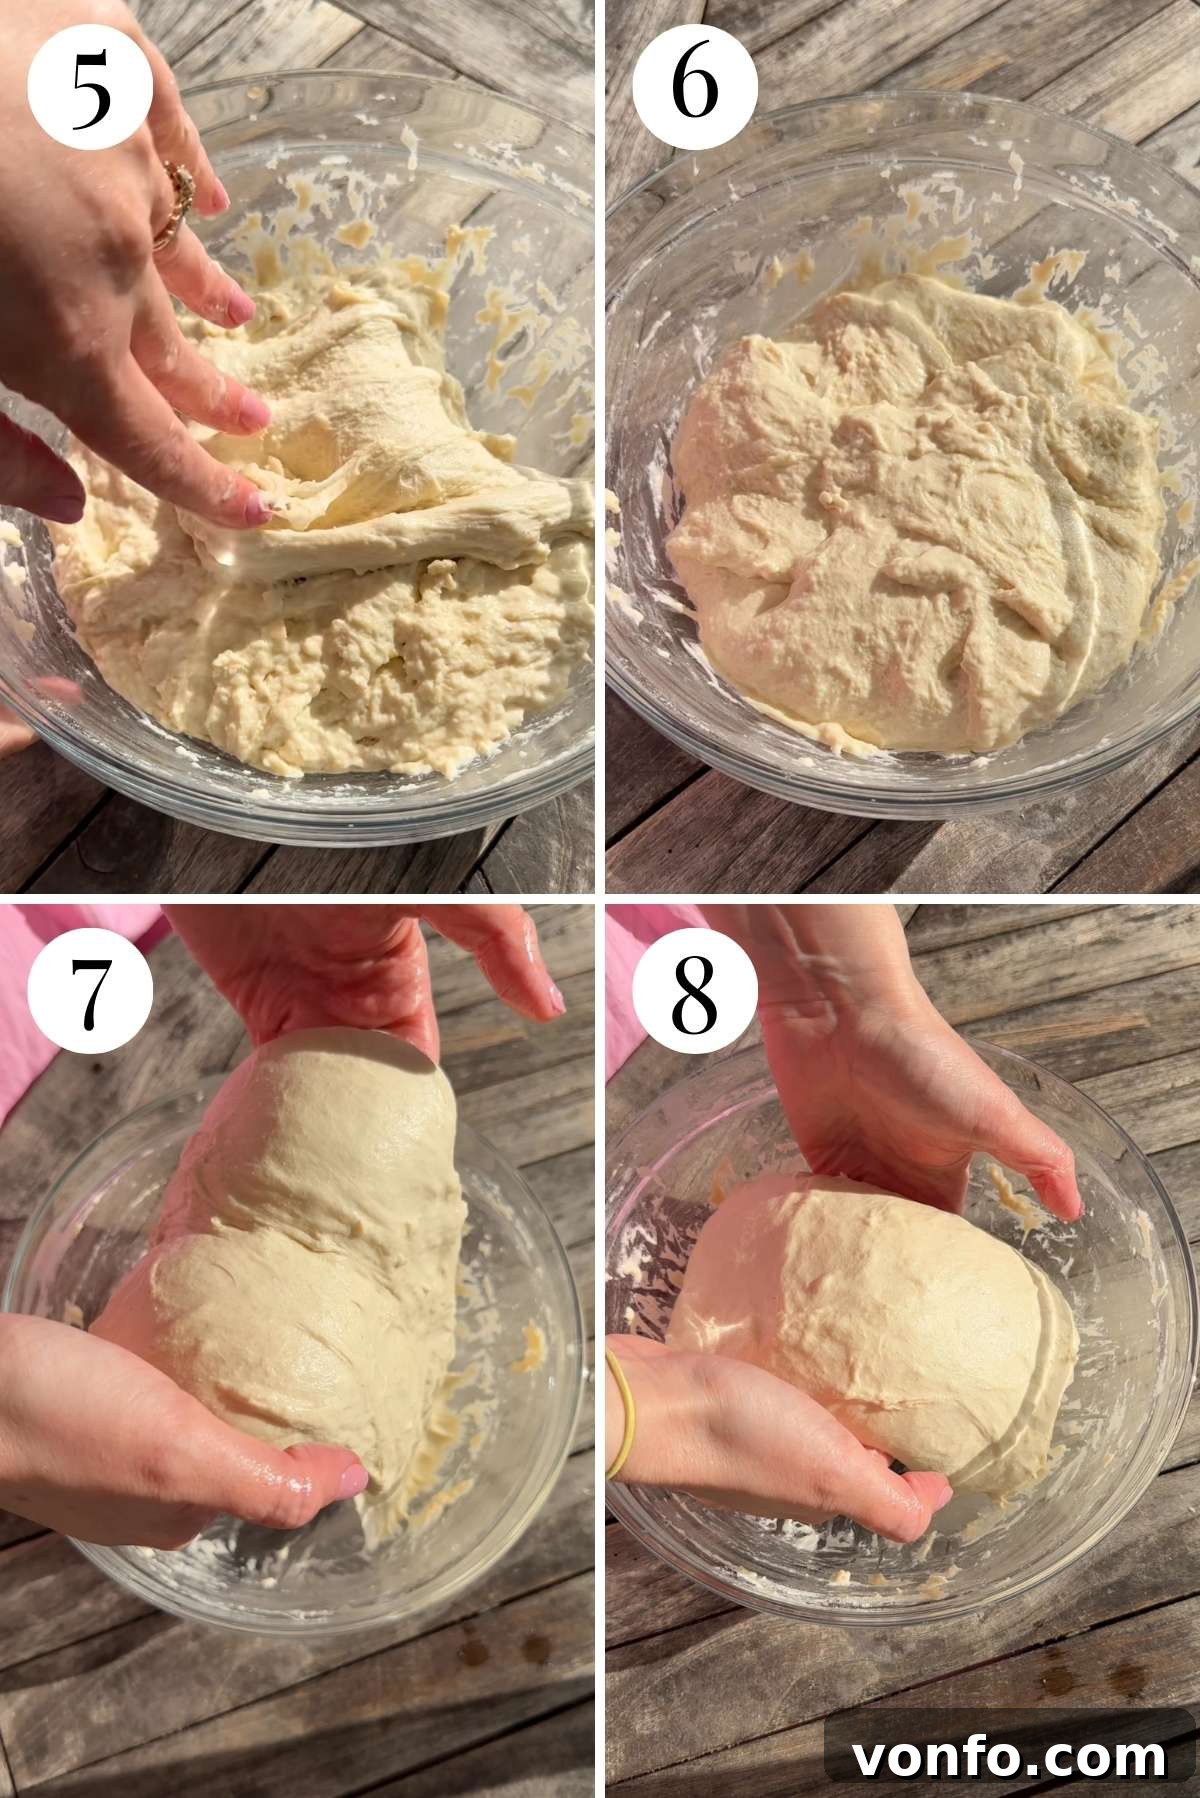
Step 4 – Performing Coil Folds and Initiating Overnight Fermentation: Now, we introduce the coil fold – a remarkably simple yet highly effective technique that often sounds more complex in written description than it actually is in practice. For the clearest understanding, I enthusiastically recommend watching the short video provided in the recipe card below. To perform a coil fold, ensure both your hands are thoroughly wet with water (or lightly oiled). Gently slide both hands underneath the middle of the dough, lifting it upwards. Allow the ends of the dough to stretch naturally and then fold back in on themselves as you gently lower it back into the bowl. Repeat this lifting and folding motion 2-3 times to build tension and strength. Turn the bowl 180 degrees and repeat the entire coil fold process from the opposite edge. This ensures even gluten development throughout the dough. After this first coil fold, cover the dough securely and let it rest for another 30 minutes. You will then repeat this coil folding and resting sequence two more times, resulting in a total of three coil folds, each followed by a 30-minute rest. These iterative folds are absolutely crucial for progressively building strength, elasticity, and structure in the high-hydration dough, creating the perfect framework for those airy bubbles. Once all the folds are complete and the dough has rested, cover the bowl tightly with plastic wrap and transfer the dough to the refrigerator. Allow it to ferment slowly overnight, or for an extended period of up to 48 hours. This prolonged cold fermentation is the cornerstone for developing its deep, complex flavor and its characteristic, highly desirable airy internal texture. (Photos 7 and 8 provide an excellent visual aid for mastering the coil fold process).
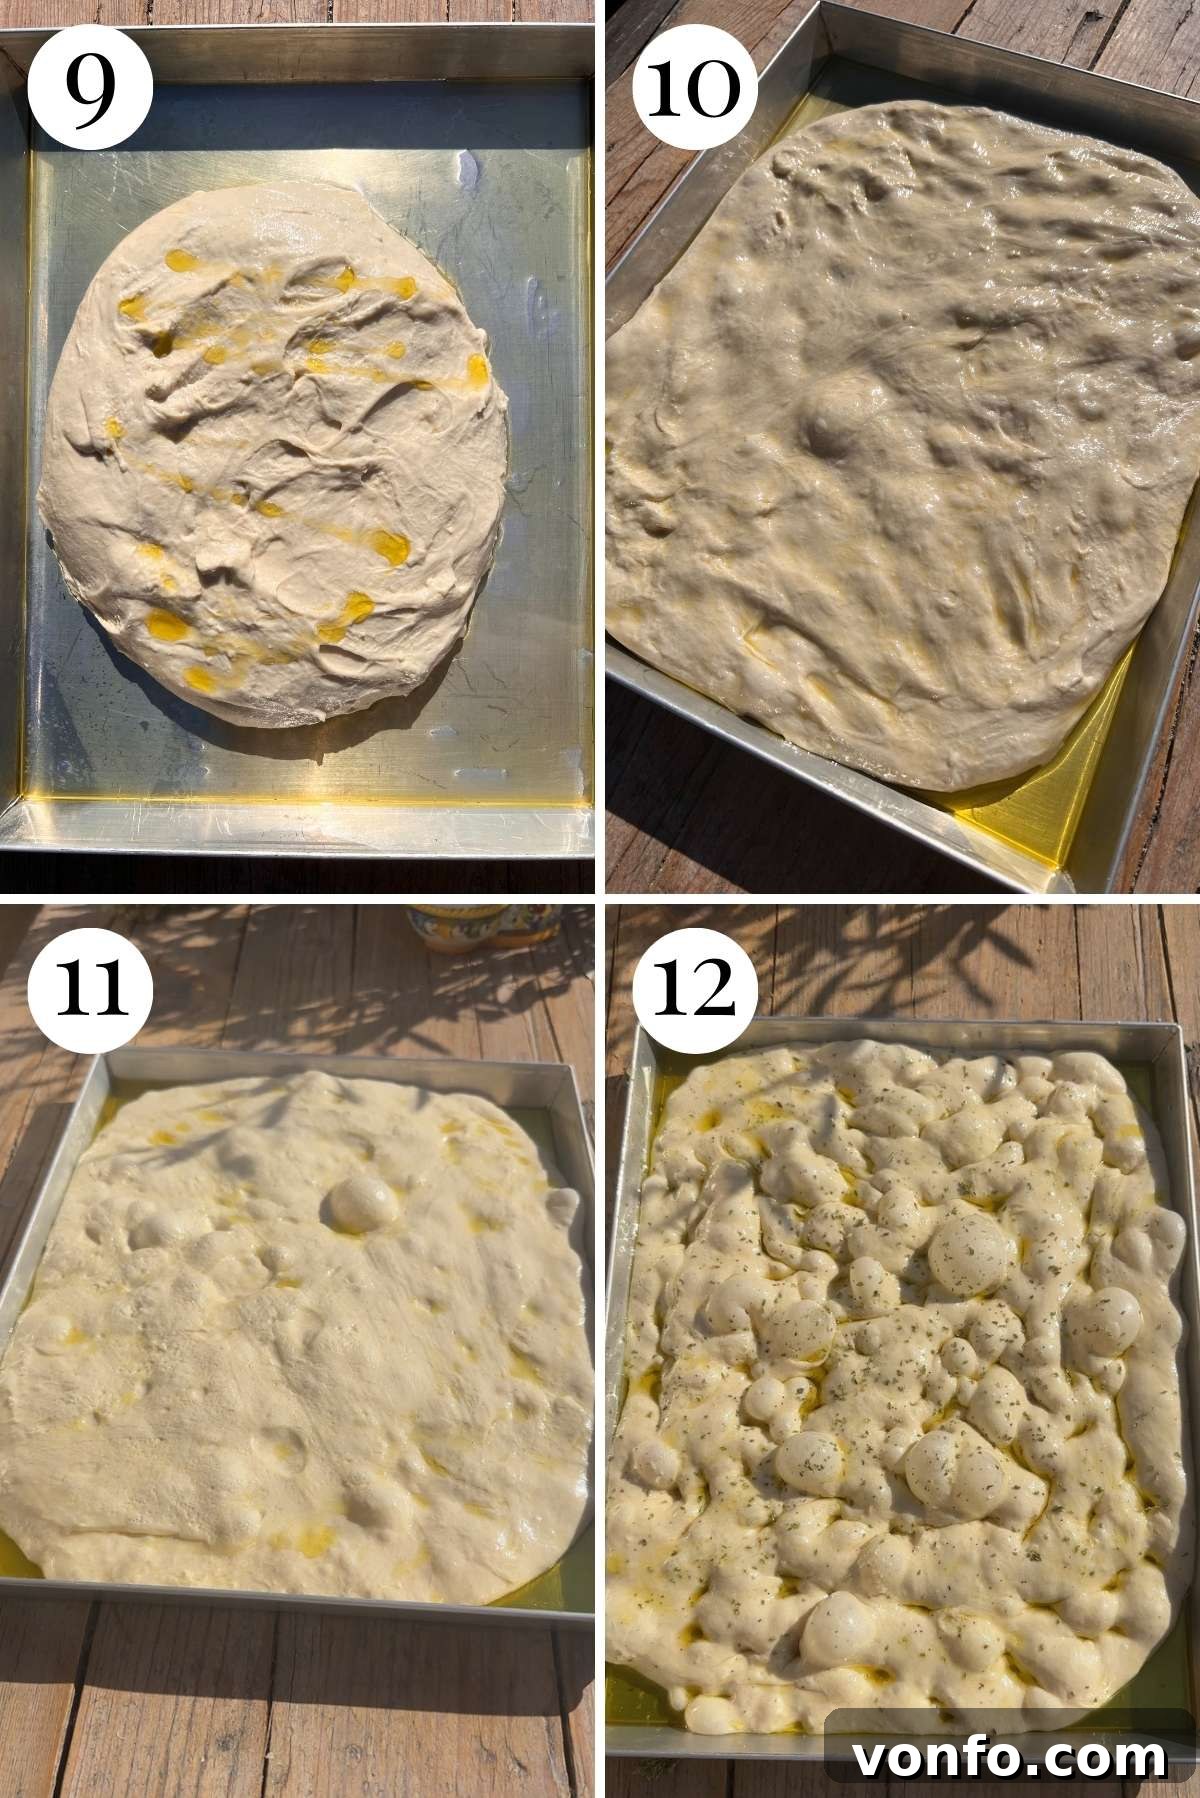
Step 5 – Preparing for the Final Proof (The Morning After): The next morning (or after your chosen 24-48 hour cold fermentation period), remove your beautifully developed dough from the refrigerator. Generously grease your 11×14 inch baking tray with high-quality extra virgin olive oil – do not be shy with the oil, as this not only prevents sticking but also contributes significantly to the focaccia’s ultimately crisp bottom crust and rich, authentic flavor. Lightly oil your hands, then gently transfer the cold dough from its bowl into the prepared tray. Carefully and evenly spread the dough outwards with your oiled fingertips to fit the tray as best as you can, being mindful not to tear or excessively deflate the delicate structure you’ve built. Drizzle a bit more olive oil over the entire surface of the dough, then cover the tray loosely with plastic wrap or a clean, damp tea towel to prevent it from drying out. Let the dough undertake its final proof at room temperature until it has almost doubled in size and looks visibly puffy, airy, and full of life. This crucial final rise could take anywhere from 2 to 4 hours, depending significantly on your kitchen’s ambient temperature. Ensure it is proofing in a warm spot, but crucially, away from any direct sun or high heat, which can over-proof it too quickly or kill the yeast. (See photos 9-11 for a visual representation of this important stage).
Step 6 – Signature Dimpling, Seasoning, and Golden Baking: Once the dough has sufficiently proofed, appearing beautifully puffed and aerated, it’s time for the signature focaccia dimpling. Gently oil your fingertips once more, then lightly press them all over the surface of the dough, creating those characteristic deep dimples. Be careful not to press too hard or aggressively, as the goal is to create indentations without bursting all the precious air bubbles you’ve worked so hard to create. This dimpling process helps prevent large, uneven air pockets and creates wonderful reservoirs for olive oil and any added toppings. Now, it’s time to season! Sprinkle generously with flaky sea salt and any chosen herbs (such as fragrant rosemary or earthy oregano). Give it one final, lavish drizzle of extra virgin olive oil, ensuring the surface is well coated for that gorgeous, glossy, and deeply golden crust. Preheat your oven to a hot 230°C (450°F). Bake for 20-25 minutes, or until the focaccia is beautifully golden brown all over, exhibits a crisp crust, and sounds hollow when gently tapped on the bottom. Remove the focaccia from the oven immediately. If desired, for an extra layer of richness and sheen, drizzle a little more fresh extra virgin olive oil over the warm bread just out of the oven (this step is optional but highly recommended for connoisseurs). Serve your magnificent focaccia warm or at room temperature, and prepare to be utterly amazed by the results!
Example Baking Timeline: Plan Your Overnight Focaccia
One of the greatest advantages and beauties of this no-knead focaccia recipe is its inherent flexibility, primarily thanks to the extended overnight proofing period. This thoughtful design allows you to comfortably spread the active preparation time over two days, making it highly manageable and stress-free even for the busiest of schedules. Here’s a detailed example timeline, which I often follow myself, to help you plan your baking adventure and effortlessly fit this delicious bread into your week:
- Day 1, 5:30 PM: Mix Up the Focaccia Dough. This is a swift and straightforward step, simply combining all the initial ingredients to form the wet, shaggy dough.
- Day 1, 6:00 PM: Perform the First Stretch and Fold. After the initial 30-minute rest, gently work the dough to begin building its gluten structure.
- Day 1, 6:30 PM: Execute the First Coil Fold. Another 30-minute rest is followed by the first of your three coil folds, further developing dough strength and elasticity.
- Day 1, 7:00 PM: Complete the Second Coil Fold. A third 30-minute rest leads to the second round of coil folds.
- Day 1, 7:30 PM: Third and Final Coil Fold. After a final 30-minute rest, perform the last coil fold, ensuring the dough has sufficient structure.
- Day 1, 8:00 PM: Place the Dough in the Fridge Overnight. At this point, all your active work for Day 1 is gloriously complete! The dough will now undergo a slow, cold fermentation in the refrigerator, a critical step that develops incredible depth of flavor and enhances its characteristic airy texture. It can happily stay in the fridge for anywhere from 12 to 48 hours.
- Day 2, 8:00 AM (Next Morning): Remove from Fridge & Transfer to Tray. Take the dough out of the fridge and carefully transfer it into your generously well-oiled baking tray. Gently spread it out to fill the tray, then cover for its final room-temperature proof.
- Day 2, 12:00 PM: Bake Your Perfectly Proofed Focaccia! By this time, your dough will have beautifully puffed up and become wonderfully airy, signaling it’s ready for the hot oven.
It’s vitally important to note that environmental factors, particularly the ambient temperature of your kitchen, will significantly influence the exact duration of the final proofing time on Day 2. For example, in warmer summer months, your dough might double in size much faster, potentially being ready by 10 AM, meaning you could bake it earlier than the 12 PM example. Conversely, in a cooler winter kitchen, the final rise might naturally take a bit longer, possibly extending past noon. Therefore, always trust your dough’s appearance and feel – it should look visibly puffed up, be very airy, and feel soft to the touch – rather than strictly adhering to the clock for the final proofing stage. Your dough will tell you when it’s ready!
Exciting Focaccia Flavor Variations and Toppings
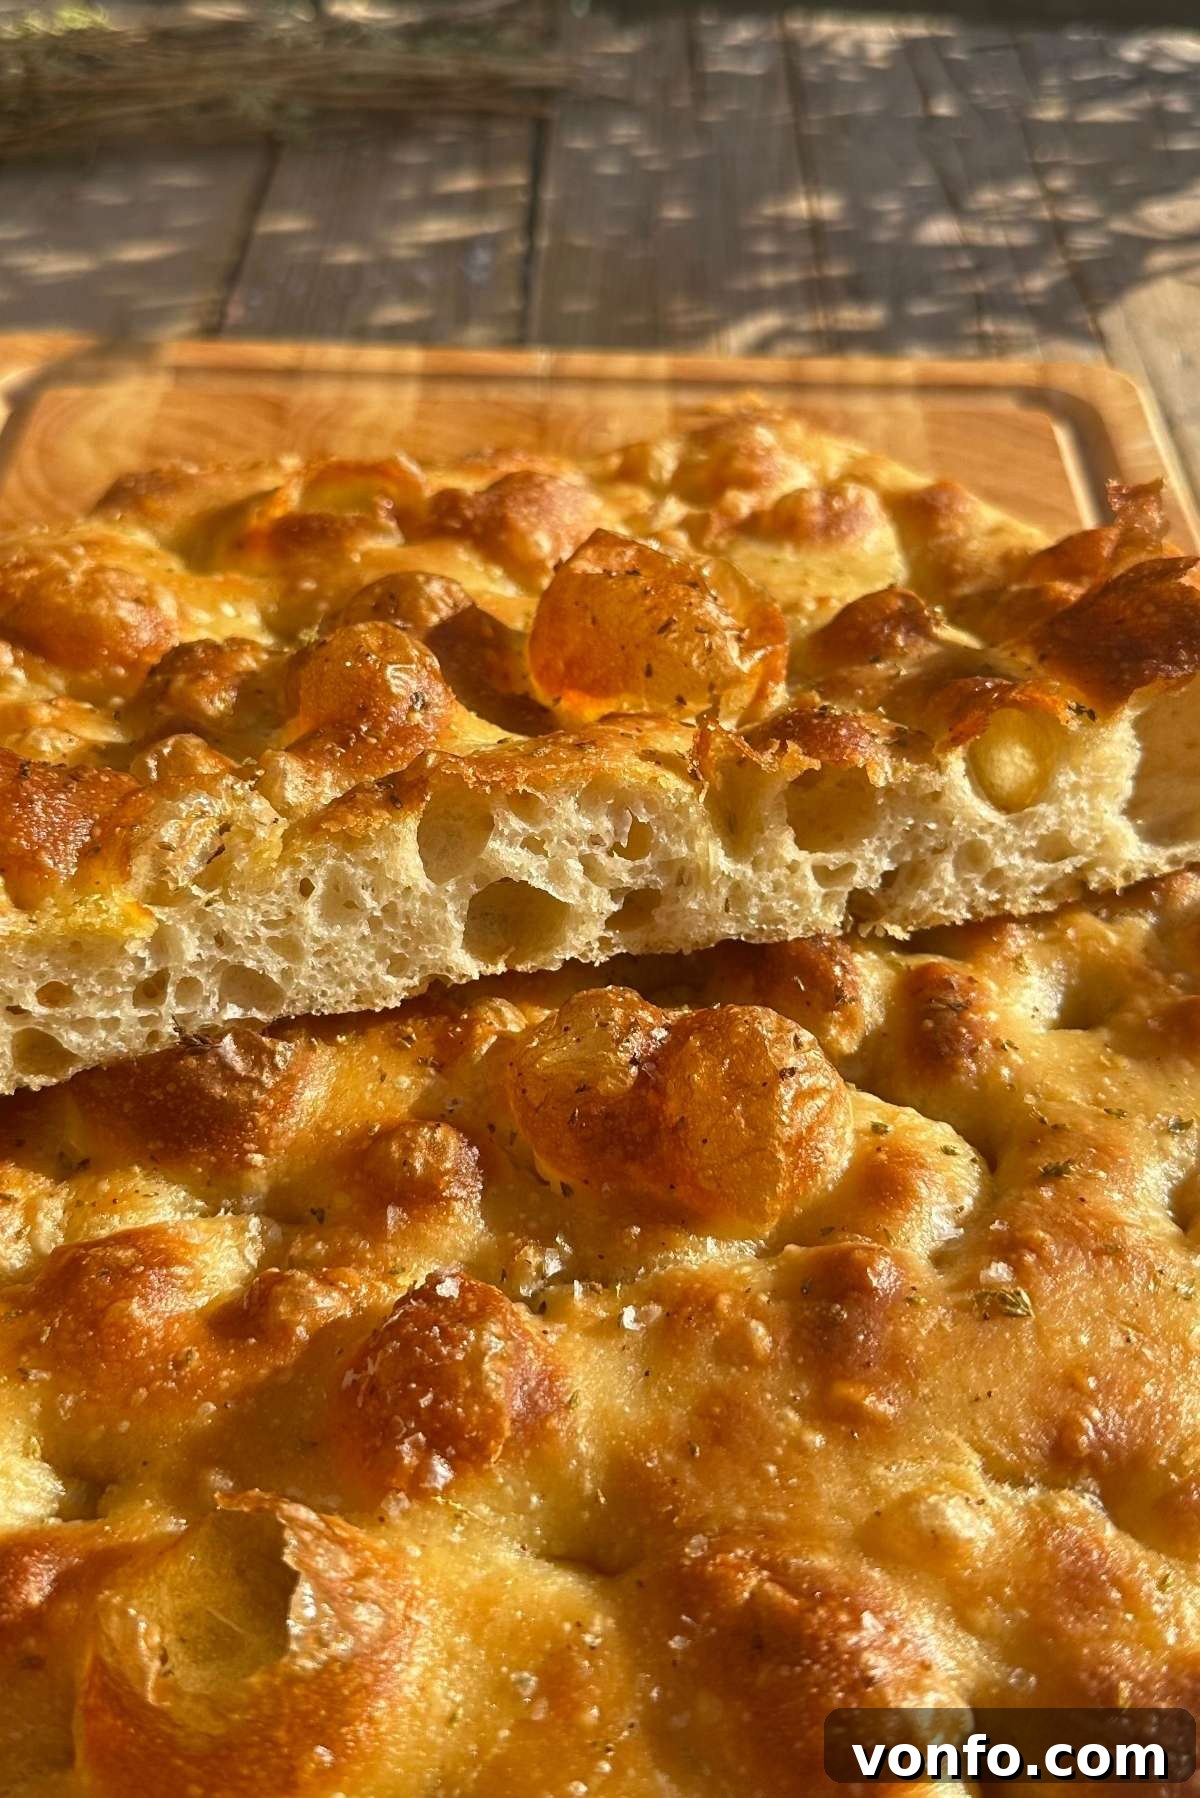
One of the most enjoyable and creatively liberating aspects of making focaccia is the endless array of possibilities it offers when it comes to toppings and flavor variations. Think of your focaccia as a magnificent blank canvas, eagerly awaiting to be adorned with whatever culinary delights you fancy or have readily available in your pantry. This versatility allows you to customize each bake to suit any craving or occasion. Here are some of my favorite delicious combinations and inspiring ideas to elevate your next focaccia creation. For even more delectable inspiration and traditional Italian bread recipes, be sure to explore our extensive Italian Bread Category!
- Classic Olive Focaccia: A truly timeless and perennial favorite, simple yet profoundly satisfying. After gently dimpling your dough, generously scatter some high-quality olives across the surface. The choice of olive is entirely yours – I personally adore the buttery richness of Nocellara olives, the briny depth of Kalamata olives, or the mild fruitiness of Castelvetrano olives. You can choose to keep them whole for a more rustic, bold appearance and texture, or slice them for a more even distribution of flavor in every delectable bite.
- Succulent Tomato Focaccia: There are several fantastic and flavorful ways to incorporate the sweet tang of tomatoes into your focaccia. For a vibrant, fresh burst of flavor, thinly slice raw cherry tomatoes (halved or quartered) and arrange them artfully on top of the dough. For a deeper, more concentrated taste, consider scattering oven-roasted cherry tomatoes. Alternatively, sun-dried tomatoes (packed in oil, well-drained and chopped) offer a wonderfully intense, sweet-tart note. If you ever opt for a tomato sauce base, please, for the love of homemade bread, always use a high-quality homemade tomato sauce – it makes an immense difference compared to store-bought varieties!
- Aromatic Herb Focaccia: Herbs are perhaps the most quintessential focaccia topping, elevating the bread to another level of aromatic delight. My personal absolute favorite is dried Italian oregano, especially the wild varieties sold in bunches, which release an incredibly potent and authentic aroma when baked. Fresh rosemary sprigs are another classic and universally beloved choice, offering a pungent, earthy, and piney fragrance that pairs perfectly with olive oil. Don’t feel limited to these; experiment with other fresh herbs like thyme, marjoram, or even a blend of “Herbes de Provence” for diverse aromatic profiles.
- Sweet and Savory Onion Focaccia: Onions add a wonderful layer of complexity and savory sweetness to focaccia. You can thinly slice raw red or white onions and arrange them artistically on the dimpled dough for a sharp, fresh bite that mellows beautifully and caramelizes slightly during baking. For an utterly indulgent and deeply flavorful treat, take the time to slowly caramelize onions until they are deeply golden, incredibly sweet, and sticky – their rich, umami notes are absolutely divine when spread generously over focaccia.
- Garlic Infusion – Oil or Butter: For a powerfully aromatic and incredibly flavorful garlic focaccia, consider infusing garlic into olive oil or butter. Simply crush a few cloves of fresh garlic and gently warm them in a generous amount of extra virgin olive oil or melted butter (do not brown the garlic, just infuse). Drizzle this fragrant garlic-infused mixture generously over the dimpled focaccia before baking. The garlic will roast gently in the oven, becoming wonderfully sweet and mild, permeating the entire bread with its irresistible aroma.
- Hearty Potato Focaccia: This is a cherished and incredibly popular classic topping in many regions of Italy, particularly in Puglia. Thinly sliced potatoes, often briefly par-boiled or blanched to ensure they cook through, are arranged neatly on top of the focaccia dough. They are typically seasoned with salt, a generous drizzle of olive oil, and sometimes a sprinkle of fresh rosemary. For an even more indulgent and comforting take, you could adapt the rich potato and cheese topping from our cheesy potato pizza recipe – the combination of tender potatoes and melted cheese is simply phenomenal with this airy focaccia dough!
Frequently Asked Questions About No-Knead Focaccia
While this specific recipe is meticulously optimized for an overnight, slow cold proof to develop the absolute best flavor and achieve the most open, airy texture, it is technically possible to adapt it for same-day baking. However, you will need to significantly increase the amount of instant yeast used, typically to at least 4 grams (approximately 1 teaspoon), to accelerate the fermentation process. If you choose this route, it’s best to prepare the dough as early in the day as possible. After completing all the initial stretch and fold and coil fold steps, leave the dough to rise at room temperature (ideally in a slightly warm spot, but crucially away from any direct heat source) until it has visibly doubled or even tripled in size. This accelerated final proof could take anywhere from 3 to 6 hours, depending heavily on your kitchen’s ambient temperature and the activity of your yeast. Be aware that the depth of flavor, the complexity of aroma, and the characteristic open crumb structure may not be as pronounced or developed as with the extended cold fermentation method, but it will still yield a delicious homemade focaccia.
For optimal results, combining maximum flavor development with perfect dough structure, I highly recommend refrigerating the dough for a minimum of 12 hours and a maximum of 48 hours. This window allows for ample slow fermentation without over-proofing. After approximately 48 hours, even though the yeast activity is significantly slowed by the cold temperatures, the fermentation process will continue. If left for too long beyond this point, the dough can start to over-proof, leading to a breakdown of its delicate gluten structure. This can result in a focaccia that turns out noticeably flatter, denser, and might even develop an overly sour or alcoholic taste. Adhering to the 24-48 hour window ensures the best balance of flavor, texture, and rise.
Yes, absolutely! Freezing focaccia dough is a fantastic way to prepare ahead and enjoy fresh focaccia on demand. To do this, prepare the dough through all the stretch and fold/coil fold stages, allowing it its initial 2 hours of room temperature proofing (i.e., before the overnight fridge proof). Once this stage is complete, transfer the dough to an airtight, freezer-safe container or a large, heavy-duty freezer bag, ensuring you expel as much air as possible to prevent freezer burn. The dough can be safely frozen for up to 2-3 weeks. When you’re ready to bake, transfer the frozen dough to a bowl and thaw it completely in the refrigerator overnight. Once fully thawed, remove it from the fridge and allow it to come to room temperature while sitting in a well-oiled baking tray. Then, simply proceed with Step 5 of the recipe (the final proofing in the tray) and continue with the remaining baking instructions as directed.
A focaccia that lacks its characteristic bubbles and airy texture usually points to one of two main issues: insufficient proofing or a problem with yeast activity. First, ensure your yeast is fresh and active – expired yeast is a common culprit. The most frequent reason for dense focaccia is not allowing enough time for the final proof in the baking tray. Ambient temperature dramatically affects this; in a cooler kitchen, the final rise can indeed take 4-5 hours to reach its optimal state. Look for tangible signs of activity – the dough should be noticeably puffed up, feel incredibly airy and light, and jiggle slightly when the tray is gently shaken. If it still feels dense or hasn’t expanded much, give it more time in a slightly warmer spot (but avoid any hot areas) to allow the yeast to further develop. Additionally, be very gentle during the dimpling stage; pressing too hard can deflate the precious air bubbles.
Yes, you can certainly use active dry yeast as a substitute for instant yeast in this recipe, but it requires a minor adjustment: activation. Active dry yeast needs to be ‘woken up’ before being mixed with the dry ingredients. For every 1 gram of instant yeast specified, you’ll typically need a slightly larger quantity, about 1.25 grams, of active dry yeast. To activate it, dissolve the active dry yeast in a small portion (approximately 50-70ml) of the total water specified in the recipe, ensuring the water is lukewarm (ideally between 105-115°F or 40-46°C). Let this mixture sit for 5-10 minutes until it becomes visibly foamy – this indicates the yeast is active. Then, incorporate this activated yeast mixture into your flour along with the remaining water and other ingredients, and continue with the recipe as directed.
More Delicious Italian Breads to Try
If you’ve discovered a new passion for homemade bread after trying this incredible no-knead focaccia, you’re in for a treat! Italian cuisine offers an astonishing and delightful variety of breads, each with its unique charm, regional heritage, and distinct flavor profile. Here are some other delicious Italian bread recipes from our carefully curated collection that we believe you will thoroughly enjoy exploring and baking:
Bread & Savory Bakes
Walnut Focaccia
Bread & Savory Bakes
La Piadina: Italian Flatbread
Bread & Savory Bakes
Cherry Tomato Focaccia with Anchovies and Oregano
Pizza
Focaccia Pizza
If you’ve tried this **Easy Overnight No-Knead Focaccia Recipe** or any other delicious recipe from our blog, we would absolutely love to hear from you! Your experience and feedback are invaluable to us. Don’t forget to rate the recipe by clicking on the stars in the recipe card and share your thoughts in the comments section below – your insights truly inspire us and other home bakers. You can also **follow us** on Facebook, Instagram, and Pinterest for daily inspiration, behind-the-scenes glimpses, and updates on our latest culinary creations. For direct access to our newest irresistible recipes and exclusive content, simply sign up for our Newsletter to have them delivered straight to your inbox every week.
Step By Step Photos Above
Most of our recipes come with step by step photos, helpful tips and tricks to make it perfectly first time and even video!
Easy Overnight No-Knead Focaccia Recipe
By Emily
Save Recipe
Pin Recipe
Print Recipe
Prevent your screen from going dark while cooking
Equipment
-
11×14 inch Baking tray
-
Large mixing bowl
-
Plastic wrap or damp tea towel
-
Digital Kitchen scale (highly recommended for accurate measurements)
Ingredients
- 500 g Italian 00 flour or bread flour, (approx 3 and 3/4 cups spooned and levelled)
- 400 ml water, (1 and 2/3 cups)
- 1 g instant yeast, (¼ teaspoon) Please see notes
- 4 tablespoons extra virgin olive oil, plus more for greasing and topping
- 7 g fine sea salt , plus sea salt flakes for topping
Instructions
-
1. Prepare Dry Ingredients: Into a large mixing bowl, add the 500g of flour. Carefully place the 1g of instant yeast at one end of the bowl and the 7g of fine sea salt at the opposite end. This separation is crucial to prevent the salt from directly inhibiting the yeast’s activity. Briefly stir each ingredient into its respective side of the flour to prevent clumping. (Refer to Step 1 photo above).
-
2. Form Dough & Initial Rest (Autolyse): Pour in the 400ml of water, then add the 4 tablespoons of extra virgin olive oil. Using a sturdy spoon or dough whisk, mix everything together until all the flour is fully hydrated and no dry bits remain. The dough will be very wet and sticky – this is the correct consistency for high-hydration focaccia. Cover the bowl tightly with plastic wrap or a damp tea towel and let it rest at room temperature for 30 minutes. (Refer to Step 2-4 photos above).
-
3. First Stretch and Fold: After 30 minutes, wet your hand thoroughly to prevent sticking. Gently grab one edge of the dough, stretch it upwards, and fold it over towards the center of the bowl. Rotate the bowl a quarter turn and repeat this 4-6 times around the dough. Re-cover the bowl and let it rest for another 30 minutes. (Refer to Step 3, photos 5-6 above).
-
4. Second Stretch and Fold: Repeat the stretch and fold step (as in Step 3) once more. After completing these folds, recover the bowl and let the dough rest for a final 30 minutes at room temperature.
-
5. Coil Folds & Overnight Proof: Now, perform your first coil fold. Wet both hands generously, slide them under the middle of the dough, lift it allowing the ends to fold underneath, and gently lower it back. Repeat 2-3 times. Turn the bowl 180 degrees and repeat. (See video below for visual clarity). Cover and rest for 30 minutes. Repeat this coil fold and rest sequence two more times (total of 3 coil folds). After the final coil fold and rest, cover the bowl tightly and refrigerate overnight or up to 48 hours for optimal flavor. (Refer to Step 4, photos 7-8 above).
-
6. Prepare for Final Proof: The next day, remove the dough from the fridge. Generously oil an 11×14 inch baking tray with olive oil. With oiled hands, gently transfer the dough to the tray and spread it out to fit. Drizzle more olive oil on top, cover loosely with plastic wrap, and let it proof at room temperature until almost doubled in size (2-4 hours, depending on room temp). (Refer to Step 5, photos 9-11 above).
-
7. Dimple & Preheat Oven: Preheat your oven to 230°C (450°F). Oil your hands well, then gently press your fingertips all over the dough to create dimples, avoiding deflating too much. (Refer to Step 6, photo 12 above).
-
8. Season & Bake: Sprinkle generously with flaky sea salt and any desired herbs (e.g., rosemary). Give it one final light drizzle of olive oil. Bake in the preheated oven for 20-25 minutes, or until beautifully golden brown.
-
9. Serve: Remove from the oven. Optional: Drizzle with more olive oil while warm. Serve immediately, warm, or at room temperature.
-
10. Enjoy & Store: Focaccia is best enjoyed the same day it’s made. For storing leftovers, please see the detailed notes section below.
Video Tutorial: Mastering the Focaccia Folds
Watch our quick video tutorial below to see the essential stretch and fold and coil fold techniques in action. Visual guidance makes these simple steps even easier to master for your perfect bubbly focaccia!
Important Notes for Focaccia Success
- Environmental Temperature and Final Proofing: The final proofing time on Day 2, when the dough is in the baking tray, is highly dynamic and depends significantly on the ambient temperature of your kitchen. For instance, in a warmer summer environment, your dough might achieve its doubled size and airy texture in as little as 1.5-2 hours. Conversely, in cooler winter conditions, it could comfortably take 4-5 hours or even slightly longer. It is crucial to always judge by the dough’s appearance and feel – it should be visibly puffed up, feel incredibly airy, and be soft to the touch – rather than strictly adhering to a rigid clock time.
- Optimal Baking Tray Size: This recipe is meticulously developed and optimized for an 11×14 inch baking tray. This size ensures the focaccia achieves its ideal thickness, resulting in the perfect balance of a chewy interior and a crisp crust. While using a slightly smaller tray (e.g., a 9×13 inch) is acceptable and will result in a slightly thicker focaccia, I strongly advise against using a larger one. A larger tray will cause your focaccia to spread too thinly, leading to a drier, less airy, and potentially overly crispy bread that deviates from the desired authentic texture.
- The Importance of Accurate Measuring (Digital Scale vs. Cups): While approximate cup measurements are provided for general guidance, baking, particularly with high-hydration doughs like this focaccia, benefits tremendously from precision. When flour is spooned into cups and leveled, measurements can vary wildly (my cup measurements typically yield around 135g of flour, but this is highly variable depending on how packed the flour is). For the most consistent, reliable, and accurate results every single time, **I highly recommend using a digital kitchen scale to weigh your flour and all other ingredients.** This eliminates human variability and ensures your focaccia turns out perfectly as intended.
- Understanding Instant Yeast vs. Active Dry Yeast: This recipe specifically calls for instant yeast due to its convenience – it can be added directly into the flour mixture without prior activation. If you intend to use active dry yeast, a common alternative, it requires an additional preparatory step. To activate active dry yeast, you’ll typically need about 1.25 grams for every 1 gram of instant yeast. Dissolve the active dry yeast in a small portion (e.g., 50-70ml) of the total water specified in the recipe, ensuring the water is lukewarm (ideally between 105-115°F or 40-46°C). Let this mixture sit for 5-10 minutes until it becomes visibly foamy – this confirms the yeast is active and viable. Then, proceed with the recipe, incorporating this activated yeast mixture along with the remaining water.
- Crucial Initial Proofing Time (During Folding Stages): The cumulative time the dough spends resting between the 30-minute folding intervals totals approximately 2 hours. This period is not arbitrary; it is absolutely crucial for the minimal amount of yeast to begin actively developing and for the vital gluten structure to strengthen properly. While extending this initial proof by an extra hour or two (up to a total of 4 hours) generally won’t harm the dough, I strongly do not recommend shortening this initial 2-hour proof. Adequate time at this stage allows the yeast to sufficiently grow and the dough structure to properly develop before its much longer, flavor-enhancing cold fermentation.
- Leftovers and Optimal Storage: Focaccia, like the vast majority of freshly baked breads, is undeniably at its absolute peak of flavor and texture on the very day it’s made. However, any delightful leftovers can certainly be enjoyed! Once the focaccia has completely cooled to room temperature, wrap it tightly in aluminum foil or plastic wrap to prevent it from drying out, and store it at room temperature for up to 2 days. If your focaccia feels a little dry or has lost some of its initial softness the next day, a simple trick can revitalize it: wrap it loosely in foil and reheat it in a pre-heated oven at 180°C (350°F) for about 10 minutes; this gentle warmth will help to soften and refresh it, bringing back much of its original appeal. Reheated focaccia is absolutely excellent for crafting gourmet sandwiches, making savory paninis, or simply for dipping into olive oil or hearty soups. You can also cube any stale focaccia to make wonderfully flavorful homemade croutons!
Helpful Information Applicable to All Our Recipes
- I consistently use extra virgin olive oil in all my recipes unless a specific recipe explicitly states a different type of oil. This commitment ensures a rich, authentic flavor profile in all our dishes.
- For all recipes that call for canned or jarred tomatoes of any kind (whether crushed, chopped, or whole), I exclusively use premium brands such as Cirio or Mutti. Their superior quality, consistent flavor, and vibrant color make a noticeable and significant difference in the final taste and appearance of any dish.
- Unless otherwise precisely specified within the recipe, you can confidently assume that all vegetables mentioned are of medium size.
- All our recipes are meticulously tested and developed using a fan-assisted (convection) oven. If you are using a conventional oven, you may need to make slight adjustments to baking times and temperatures.
- Find out more detailed information about how nutrition is calculated for our recipes and understand that these values should be used as approximations.
- Be sure to check out our comprehensive guide to Essential Italian Pantry Staples to stock your kitchen with all the fundamental ingredients required for authentic Italian cooking.
- You can also discover all our highly recommended Essential Kitchen Tools for Italian Cooking to ensure you have the right equipment and gadgets for every delicious dish you prepare.
Nutrition Information (Approximate Per Serving)
Nutrition information is automatically calculated and provided for general informational purposes only. It should only be used as an approximation and can vary based on specific ingredient brands, preparation methods, and serving sizes.