
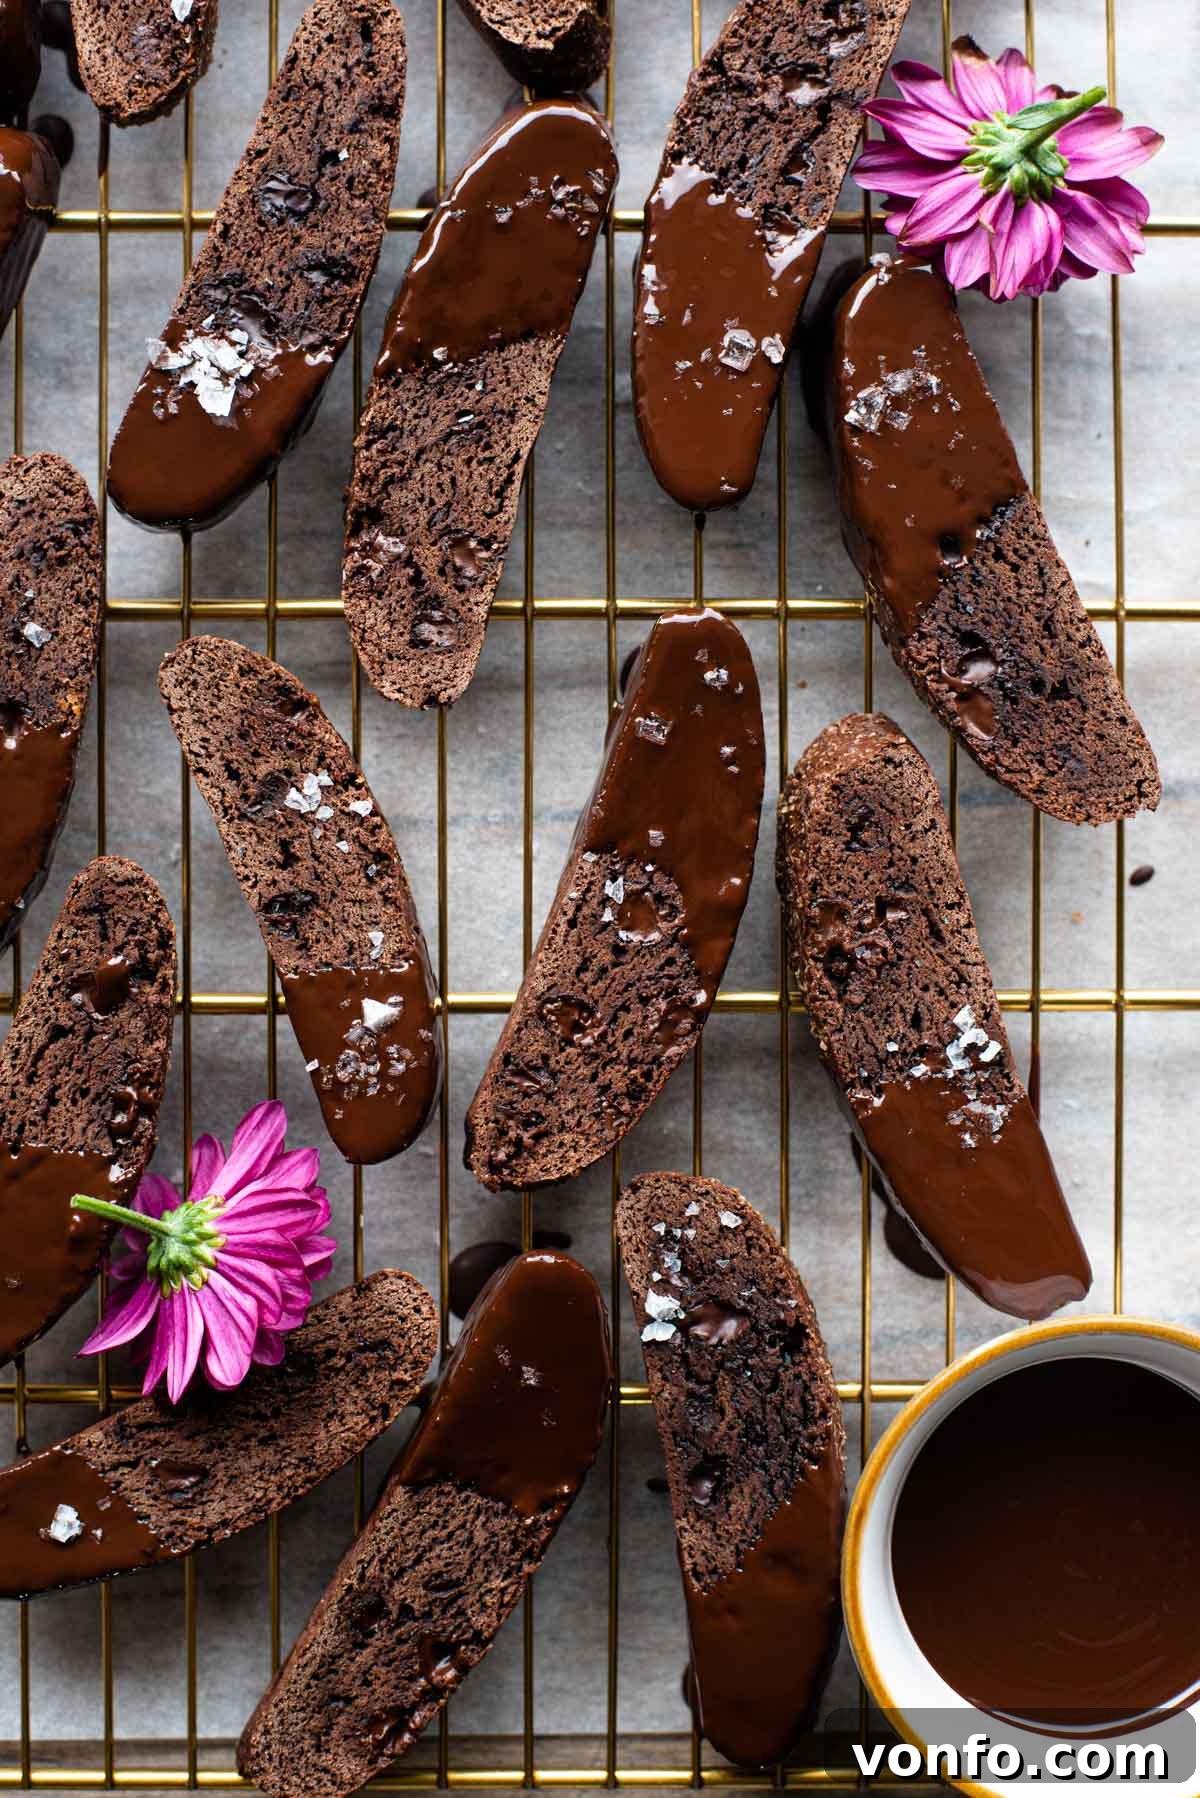
Decadent Triple Chocolate Biscotti: The Ultimate Italian Cantucci Recipe
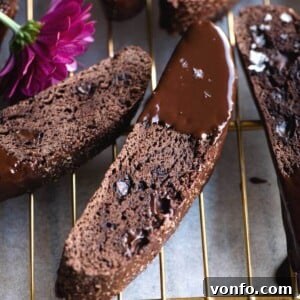
Indulge in the rich, crunchy delight of our Triple Chocolate Biscotti, a truly decadent twist on the classic Italian cantucci. These twice-baked beauties are crafted with premium cocoa powder, loaded with generous chocolate chips, and elegantly finished with a luscious coating of melted chocolate. Each bite offers an intense chocolate experience, making them utterly irresistible. Perfect for dipping into your morning cappuccino, a warm cup of tea, or simply enjoying as a standalone treat, these biscotti promise a delightful moment of pure bliss. Prepare to be amazed by how simple it is to create these bakery-worthy cookies right in your own kitchen.
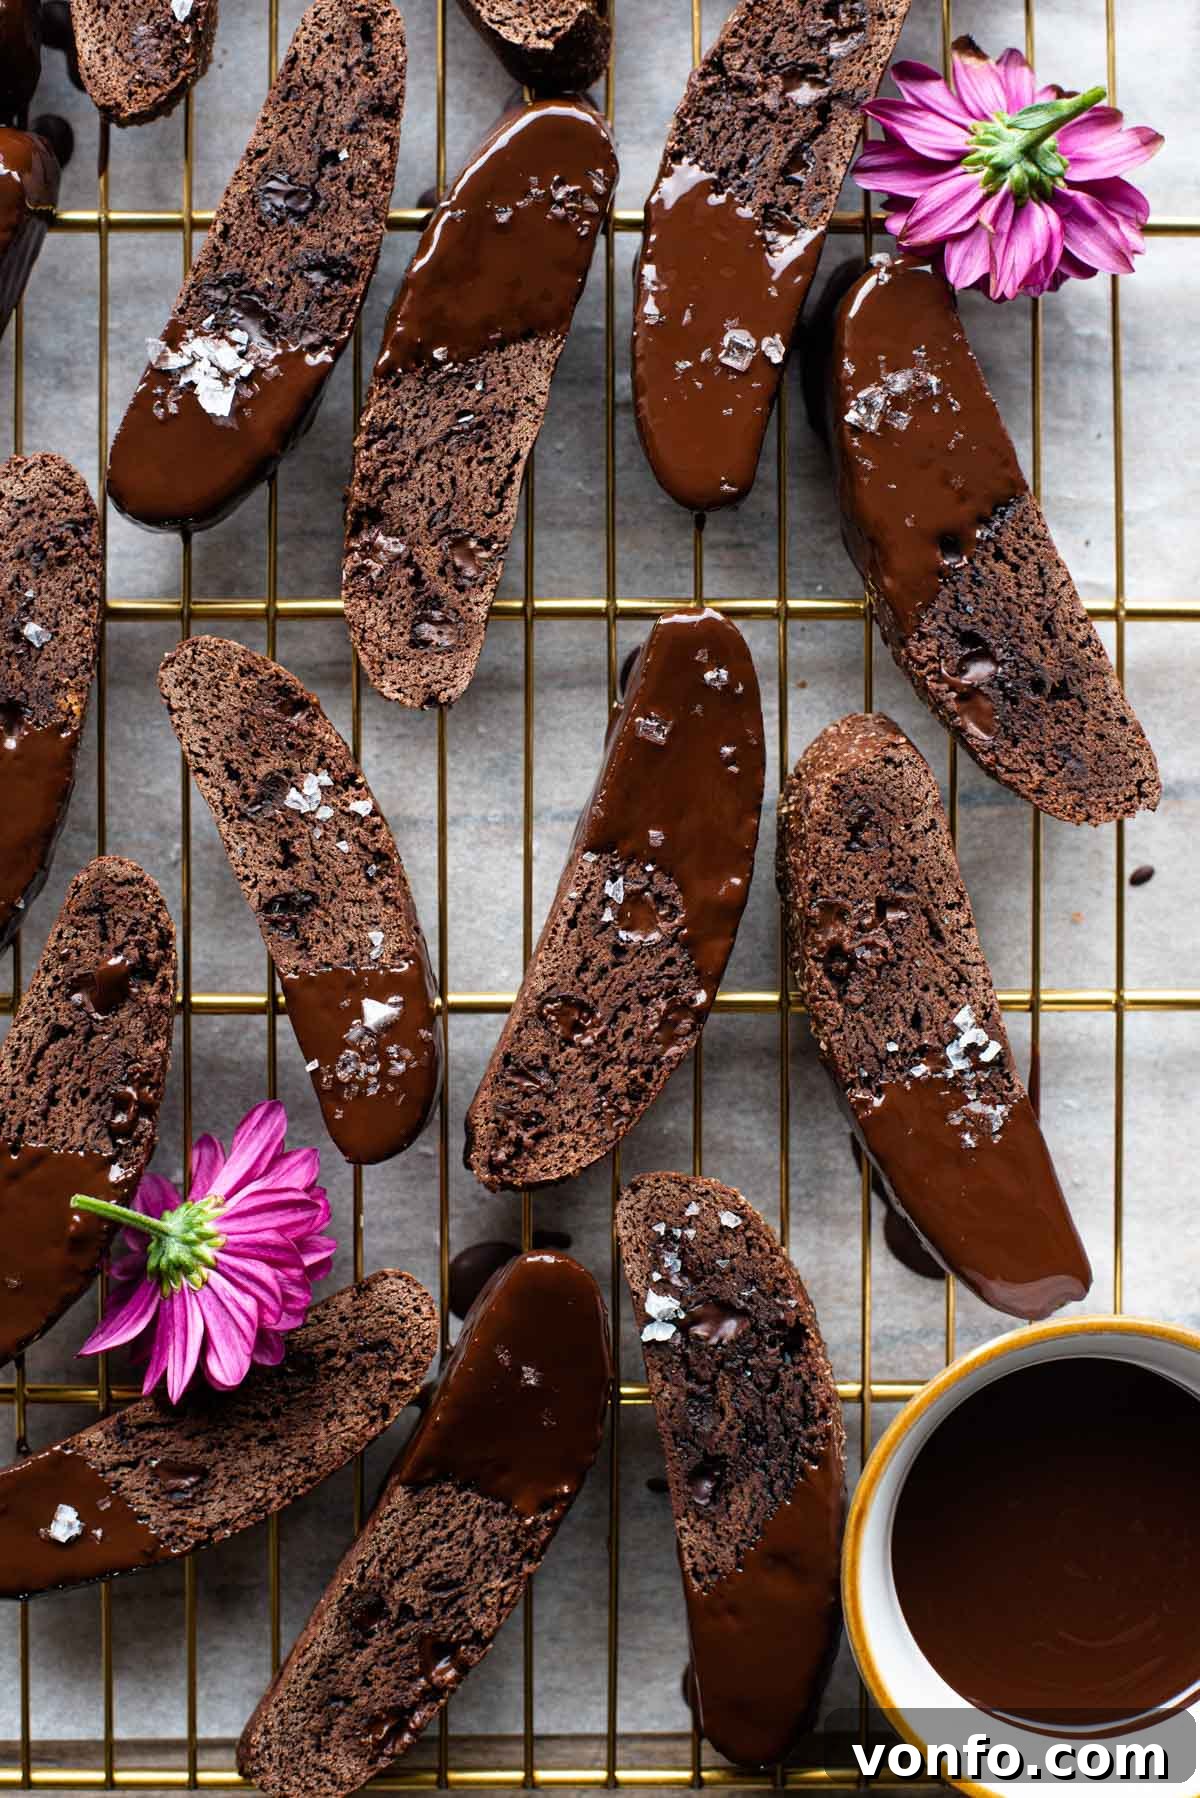
Biscotti, known as cantucci in their native Italy, are beloved for their distinctive crunch and versatile appeal. Our Cantucci al Cioccolato elevate this tradition by infusing it with an extraordinary chocolate flavor profile. Unlike many other cookies, biscotti are twice-baked, a process that removes moisture and results in their signature crisp texture and extended shelf life. This particular recipe takes that concept further, embracing a “triple chocolate” approach that ensures an unparalleled depth of flavor in every morsel.
Beyond their incredible taste, these triple chocolate biscotti are remarkably straightforward to prepare. With our detailed step-by-step photos and a comprehensive video tutorial, even novice bakers can confidently create these exquisite Italian cookies. They also store wonderfully for weeks, meaning you can always have a luxurious chocolate treat ready whenever a craving strikes. Get ready to embark on a delightful baking journey and savor the magic of homemade chocolate biscotti!
Essential Ingredients for Perfect Chocolate Biscotti
Crafting truly exceptional triple chocolate biscotti starts with selecting the right ingredients. Below, you’ll find a detailed breakdown of each component, along with important tips to ensure your biscotti turn out perfectly every time. Pay close attention to these details, as they contribute significantly to the final texture and rich flavor.
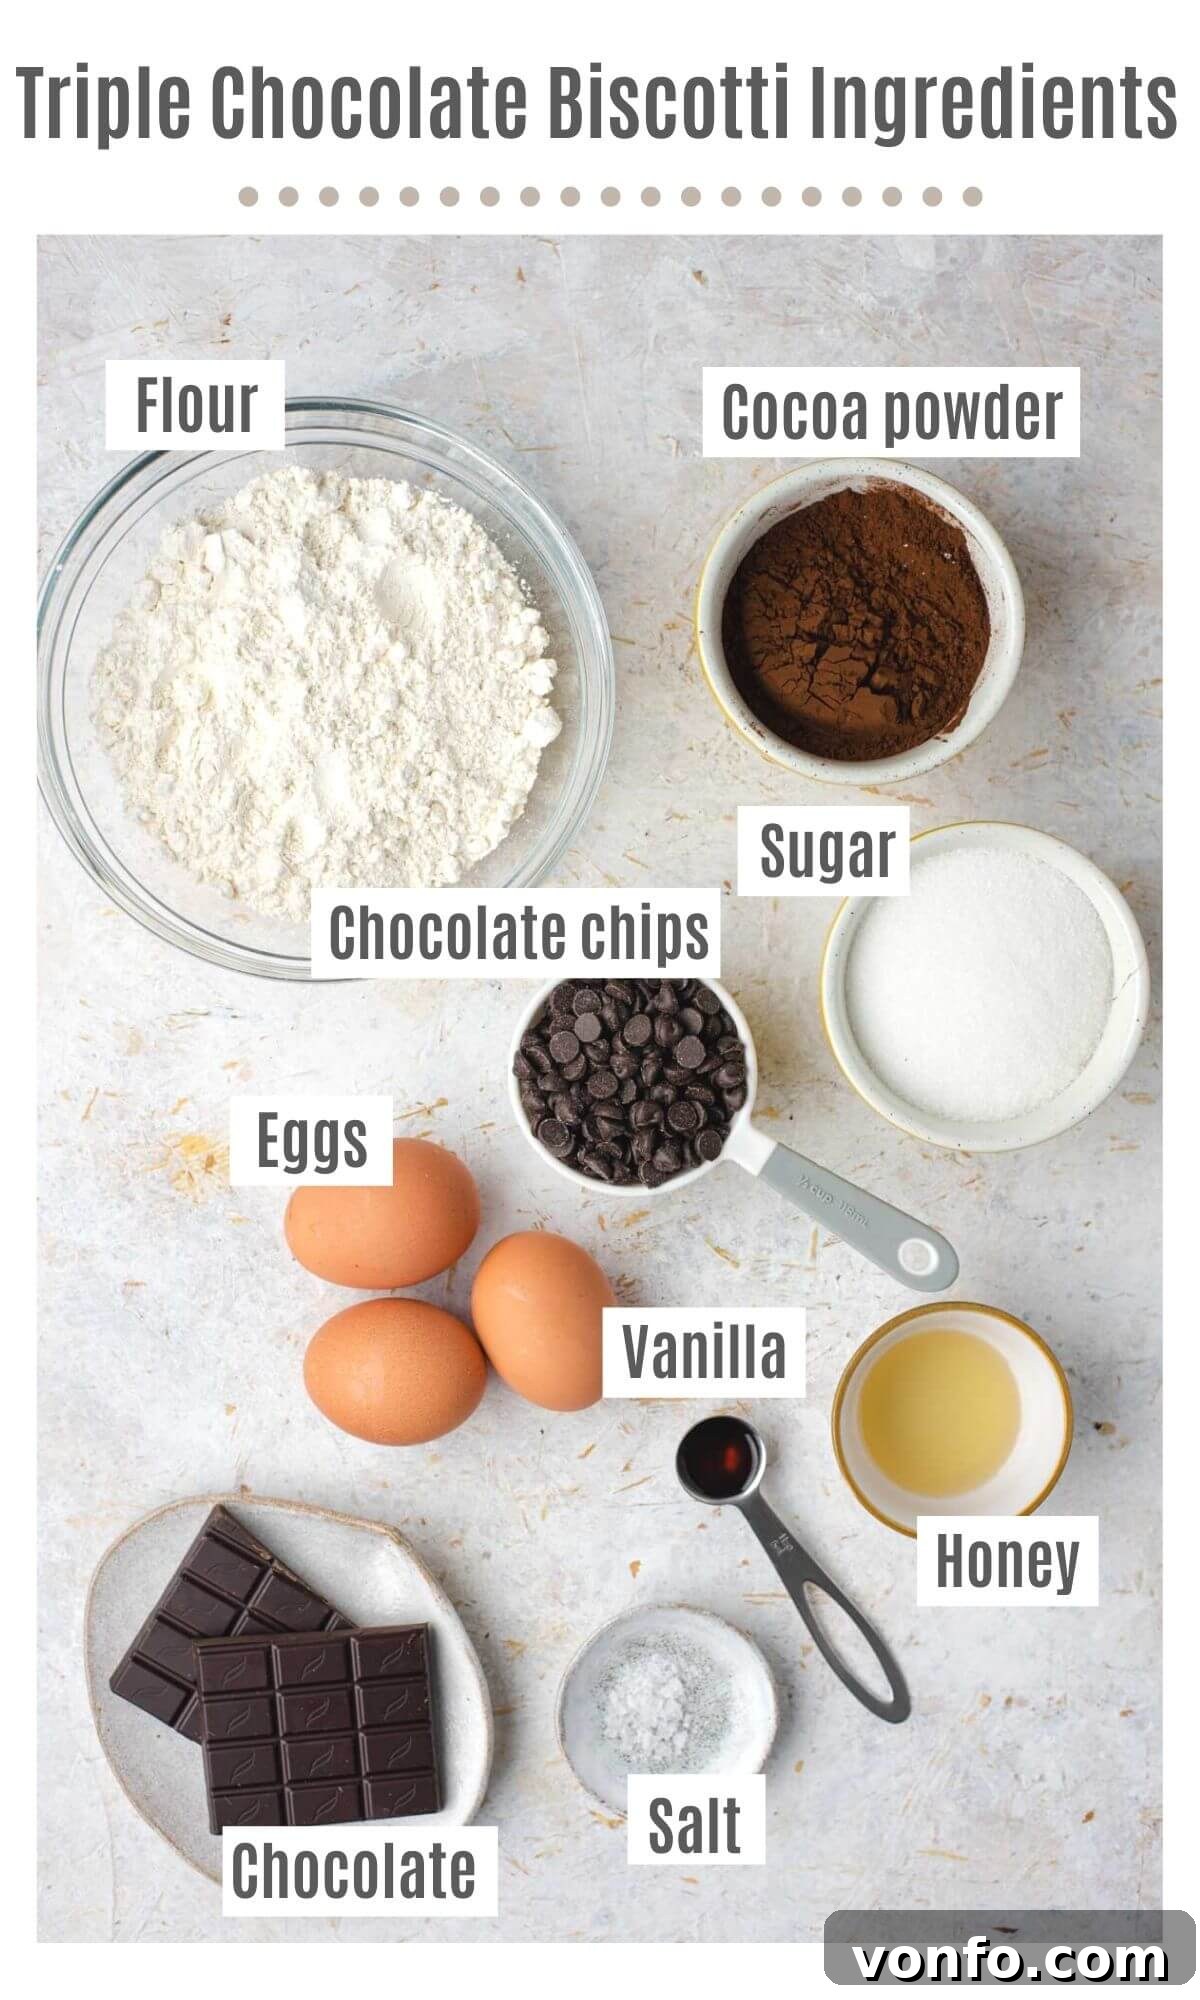
- All-Purpose Flour: This forms the primary structure of your biscotti. It’s crucial to sift the flour along with the cocoa powder. This step isn’t merely about preventing lumps; it also aerates the dry ingredients, resulting in a lighter, more tender crumb for your cookie. Precision in measurement is key for the ideal texture.
- Cocoa Powder: For a truly rich chocolate flavor, invest in a good quality unsweetened cocoa powder. Dutch-processed cocoa will give a darker color and milder chocolate flavor, while natural cocoa powder offers a fruitier, more intense chocolate note. Whichever you choose, ensure it’s fresh for optimal taste.
- Granulated or Caster Sugar: Sugar not only provides sweetness but also contributes to the crisp texture of the biscotti. Both granulated and finer caster sugar work well, with caster sugar dissolving a little more easily into the dough.
- Large Eggs: Always use large eggs for this recipe, and critically, ensure they are at room temperature. Room temperature eggs emulsify better with other ingredients, creating a smoother, more cohesive dough. You’ll need two whole eggs and one egg yolk, reserving the extra egg white for brushing the biscotti logs before baking, which gives them a beautiful sheen.
- Honey: This ingredient is a secret weapon for perfect biscotti. Honey adds a subtle sweetness and a unique depth of flavor, but its primary role here is to enhance the crunchy texture. Don’t be tempted to skip it! Use a clear, runny honey for best results, as thicker honey can be harder to incorporate.
- Vanilla Extract: Opt for pure vanilla extract over imitation vanilla essence. The quality of vanilla makes a noticeable difference in the overall flavor profile, adding a warm, aromatic complement to the chocolate.
- Salt: A small pinch of salt is vital for balancing the sweetness and truly bringing out the deep chocolate notes in the biscotti. Consider sprinkling a little flaky sea salt on top of the melted chocolate coating as they set for an extra gourmet touch and a pleasant textural contrast.
- Chocolate Chips: These provide bursts of melted chocolate within the biscotti. While dark chocolate chips (bitter-sweet) are recommended for a sophisticated flavor, you can easily customize this to your preference. Milk chocolate chips or semi-sweet chocolate chips will add a sweeter profile, or even white chocolate chips for a visual contrast and creamy taste.
- Dipping Chocolate: The final layer of chocolate is where the “triple” in triple chocolate comes from! Again, a good quality dark chocolate (bittersweet or semi-sweet) is ideal for dipping, providing a luxurious finish. However, feel free to choose milk or even white chocolate based on your preference. Ensure it’s a type of chocolate that melts smoothly for easy dipping and a beautiful, glossy finish.
Step-by-Step Guide: Crafting Your Triple Chocolate Biscotti
Follow these detailed instructions to create perfect, crunchy, and richly flavored triple chocolate biscotti. Each step is designed to guide you through the process, ensuring a successful and delicious outcome. Gather all your ingredients and let’s begin!
Preparation and Mixing the Dry Ingredients
Before you begin mixing, ensure your oven is preheated to 350°F (180°C), and a baking tray is lined with parchment paper. This will prevent sticking and make cleanup easier. In a large mixing bowl, meticulously sift together the all-purpose flour and cocoa powder. Sifting is an important step as it removes any lumps from the cocoa powder and aerates the dry ingredients, leading to a smoother dough and a more consistent texture in the final biscotti. Once sifted, add the granulated or caster sugar and the pinch of salt to the bowl. Whisk these dry ingredients together thoroughly until they are uniformly combined. This ensures that the salt and sugar are evenly distributed throughout the mixture, preventing pockets of uneven flavor (refer to visual guides if available, corresponding to original photos 1-3).
Preparing the Wet Ingredients
In a separate, medium-sized bowl, crack two large room-temperature eggs. Gently separate one additional egg, adding only the yolk to the bowl with the other eggs. Set aside the remaining egg white; this will be used later for brushing the biscotti logs, giving them a beautiful golden sheen. To the eggs and egg yolk, add the vanilla extract and the clear honey. Lightly beat these wet ingredients together with a fork or a small whisk until they are just combined and slightly frothy. Do not overbeat, as we are not aiming for a meringue-like consistency.
Combining Wet and Dry Mixtures
Now, it’s time to bring your dough together. Create a shallow well in the center of your dry ingredient mixture. Pour the beaten egg, vanilla, and honey mixture into this well. Using a fork, begin to gradually incorporate the dry ingredients from the sides of the well into the wet mixture. Continue mixing with the fork until a rough, shaggy dough starts to form. At this stage, it will appear dry and crumbly, which is completely normal for biscotti dough (refer to original photos 4 & 5 for visual reference of dough consistency).
Kneading in the Chocolate Chips
Once the rough dough has formed, add all the dark chocolate chips. Now, transition from the fork to your hands. Begin to knead the dough directly in the bowl. Initially, the dough may seem quite dry and stiff, making you think it needs more liquid. Resist the urge to add any extra milk or water. Continue kneading patiently for about a minute or two. The warmth from your hands and the natural moisture in the dough will help it come together into a cohesive, firm ball. The dough should be slightly sticky but manageable (see original photo 6 for the final dough texture).
Shaping the Biscotti Logs (First Bake)
Turn the dough out onto a lightly floured surface. Form the dough into a single ball, then divide it neatly in half. Take each half and gently shape it into a log. Aim for logs that are approximately 2cm (¾ inch) thick and about 4 inches (10cm) wide. Ensure the logs are relatively uniform in thickness and width along their entire length; this will help them bake evenly. Place these shaped logs onto your parchment-lined baking tray, leaving some space between them as they will expand slightly during baking (refer to original photos 7-9 for shaping guidance).
Take the reserved egg white from earlier and lightly whisk it with a fork. Using a pastry brush, gently brush the tops and sides of each dough log with a thin, even layer of the egg white. This wash will give your biscotti a lovely, slightly glossy finish and a golden-brown hue after baking. Bake the logs in the preheated oven at 350°F (180°C) for 25 minutes. During this first bake, the logs will firm up and become lightly golden (see original photo 10 for the appearance after the first bake).
Cooling, Cutting, and Second Bake
Once the first bake is complete, carefully remove the baking tray from the oven. Let the logs cool on the tray for just a couple of minutes; they need to be cool enough to handle but still warm enough to cut without crumbling. While they are cooling, immediately reduce your oven temperature to 265°F (130°C). This lower temperature is crucial for the second bake, which is where the biscotti get their characteristic crispness.
Using a very sharp, non-serrated knife (a serrated knife can cause crumbling), carefully cut each log diagonally into slices approximately ½ inch (1cm) thick. The diagonal cuts give biscotti their traditional elongated shape. Arrange the cut biscotti slices back onto the same parchment-lined baking tray, placing them cut-side up. Ensure they are in a single layer and not overlapping (refer to original photo 11 for the cutting and arrangement).
Return the tray to the oven, now set at 265°F (130°C), and bake for another 25 minutes. This second bake is what makes them “twice-baked,” drying them out and giving them their signature crunchy texture. After the second bake, remove the biscotti from the oven and let them cool completely on the baking tray or a wire rack. They will crisp up further as they cool (see original photo 12 for the finished biscotti ready for dipping).
The Final Touch: Dipping in Melted Chocolate
Once your biscotti are completely cool, it’s time for the decadent final step. Prepare your dipping chocolate by melting it gently. You can do this using a double boiler method: place chopped chocolate in a heatproof bowl set over a saucepan of gently simmering water, ensuring the bottom of the bowl does not touch the water. Stir until smooth and completely melted. Alternatively, melt the chocolate in a microwave-safe bowl in 20-30 second intervals, stirring well after each, until smooth. Be careful not to overheat the chocolate, as it can seize.
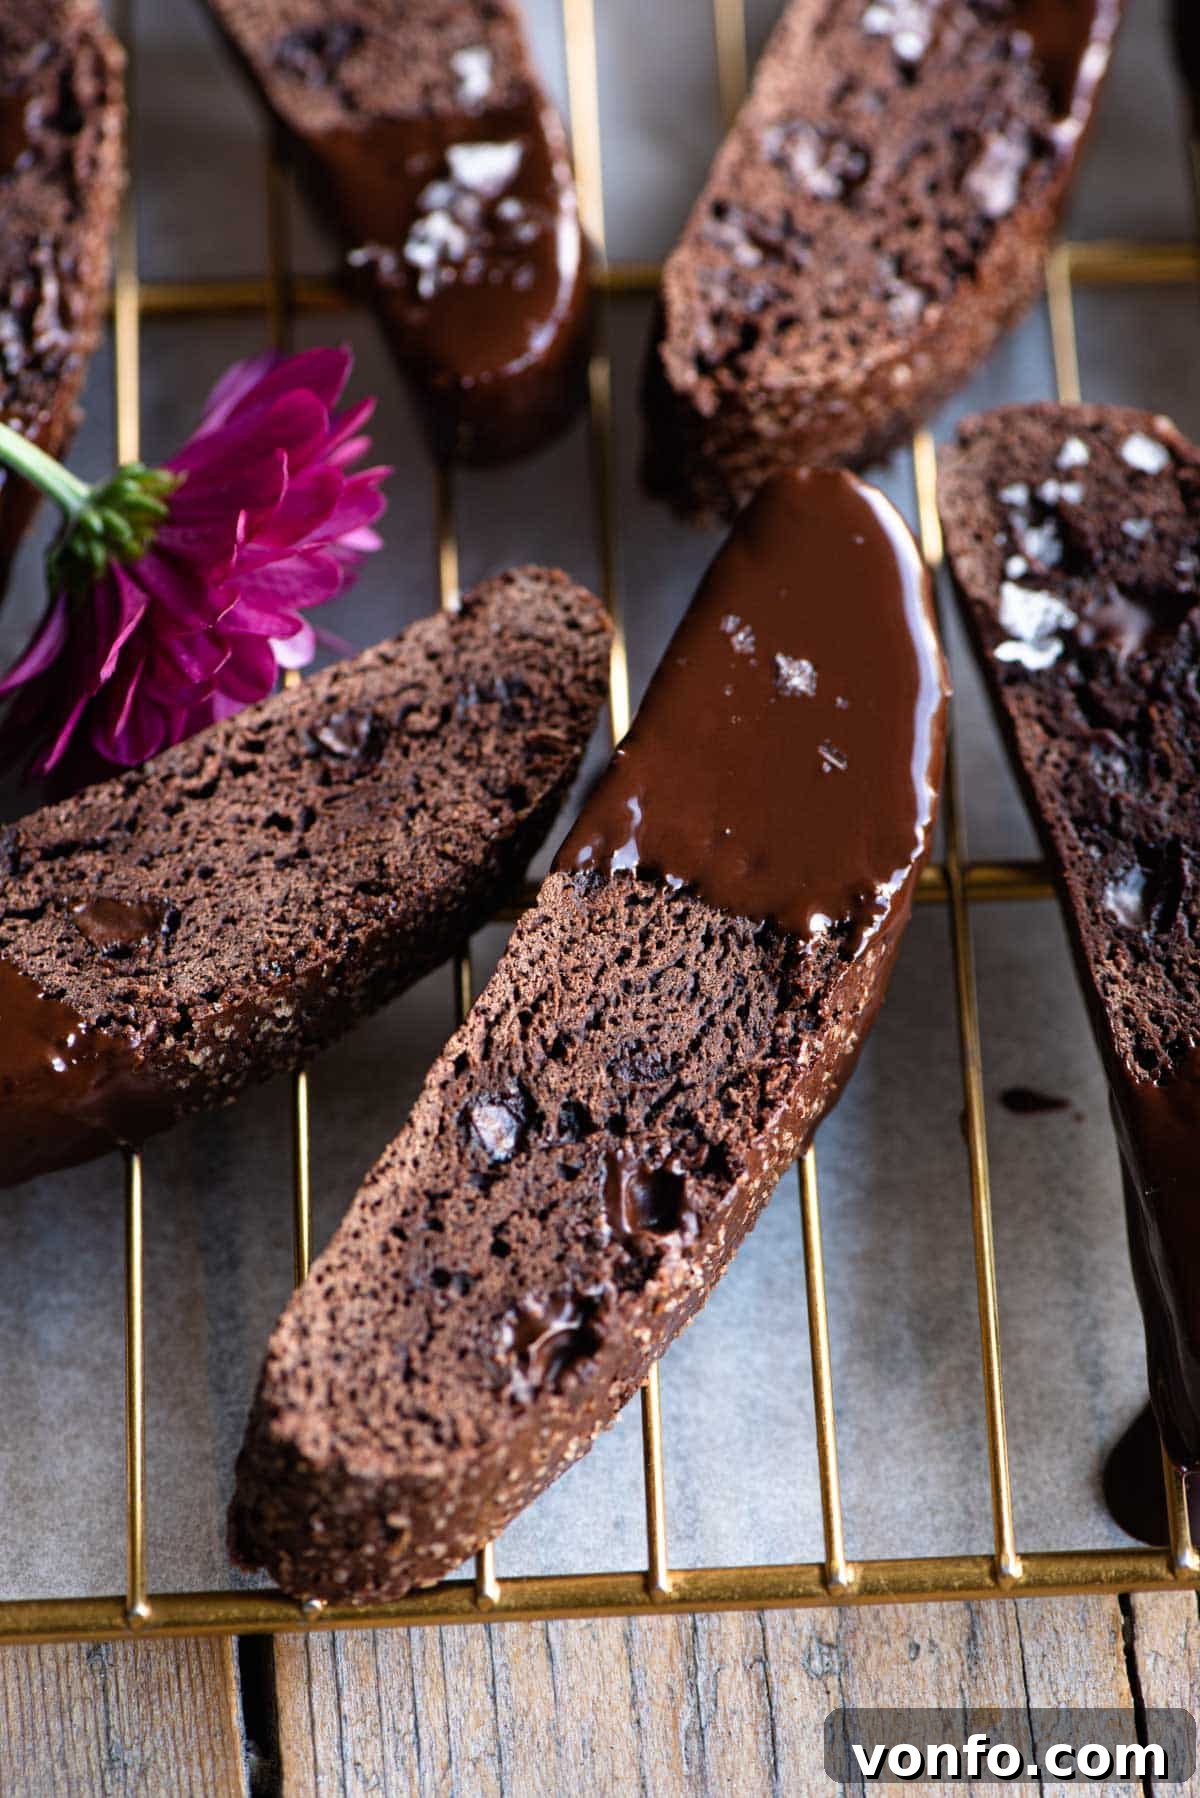
Take each cooled biscotti and dip one end into the luscious melted chocolate, allowing any excess to drip off. You can dip them halfway, or simply coat the tip, depending on your preference. Carefully place the dipped biscotti back onto the parchment-lined baking tray or a clean piece of parchment paper. If desired, sprinkle a tiny pinch of flaky sea salt over the wet chocolate for an exquisite flavor contrast. Allow the chocolate to set completely at room temperature or, to speed up the process, place them in the refrigerator for about 15-20 minutes. Once the chocolate is firm, your Triple Chocolate Biscotti are ready to serve and enjoy (refer to original photos 13-16 for the dipping process).
Expert Tips & Frequently Asked Questions for Chocolate Biscotti
Achieving bakery-quality biscotti is easy with a few insider tips. Here are some common questions and advice to ensure your Triple Chocolate Biscotti turn out perfect every time.
- Dough Consistency – Don’t Add More Liquid: It’s common for biscotti dough to appear quite dry and crumbly when you first start mixing the wet and dry ingredients. This is a characteristic of traditional biscotti dough, designed to achieve that signature crunch. Resist the temptation to add any extra milk or water. As you continue to knead the dough with your hands, the warmth from your palms and the moisture from the eggs will help it come together into a cohesive, firm ball. Trust the process! If you have access to a video tutorial or process shots, observe the texture to understand what the dough should look like at each stage.
- Cutting Technique – Use a Sharp, Non-Serrated Knife: After the first bake, the biscotti logs will be firm but still somewhat soft. For clean, even slices without crumbling, it is absolutely essential to use a very sharp, long chef’s knife or a slicing knife. Avoid using a serrated knife at this stage, as the saw-like action is likely to tear and crumble the delicate, warm biscotti, resulting in uneven and broken pieces. Cut firmly and cleanly through the logs in a single motion where possible.
- Customization – Delicious Variations: This triple chocolate biscotti recipe is a fantastic base for experimentation!
- Chocolate Choices: Feel free to swap out the dark chocolate chips for milk chocolate, white chocolate, or even a mix. Similarly, the dipping chocolate can be adjusted to your preference.
- Flavor Enhancers: Introduce different flavor notes into the dough. A teaspoon of orange zest or a few drops of orange essence can add a bright, citrusy counterpoint to the rich chocolate. Espresso powder (1-2 teaspoons) can intensify the chocolate flavor without making the biscotti taste like coffee.
- Nutty Additions: For added texture and flavor, fold in half a cup of toasted chopped nuts like almonds, hazelnuts, or pecans along with the chocolate chips.
- Setting the Chocolate: After dipping your biscotti, allow the melted chocolate to set completely before storing them. This prevents the biscotti from sticking together and ensures a neat, professional finish. You can let them set at room temperature or, for a quicker set, place them in the refrigerator for 15-20 minutes.
- Cooling Completely: Ensure the biscotti are fully cooled after the second bake and before dipping. Warm biscotti will absorb the melted chocolate differently and might become soggy, compromising the crisp texture.
When stored in an airtight container at room temperature, these biscotti will maintain their delicious crunch and flavor for 2 to 3 weeks. Their twice-baked nature means they have an excellent shelf life.
Yes, biscotti are very freezer-friendly! You can freeze either the baked and cooled cookies (before dipping in chocolate) or the raw dough logs. If freezing baked cookies, wrap them tightly in plastic wrap and then in foil. If freezing raw dough logs, wrap them well. When ready to enjoy, simply defrost the cookies at room temperature before serving, or thaw the raw dough logs and proceed with the baking instructions.
Biscotti (singular: biscotto) translates from Italian as “twice-baked,” which perfectly describes its preparation method. Originating in Tuscany, Italy, these dry, crunchy cookies were historically made to be durable and long-lasting, ideal for travelers and soldiers. Their firm texture makes them perfect for dipping, softening them slightly before enjoying.
The twice-baking process is fundamental to the unique characteristics of biscotti. The first bake cooks the dough through and sets its shape. The second, lower-temperature bake (often called “toasting” or “drying”) removes almost all moisture from the cookies, making them incredibly crunchy, dry, and giving them their extended shelf life. This also makes them ideal for dipping, as they won’t disintegrate quickly into your beverage.
These Triple Chocolate Biscotti are wonderfully versatile. They are traditionally enjoyed by dipping them into a strong Italian coffee like espresso or a creamy cappuccino. They also pair beautifully with a cup of black tea, hot chocolate, or even a glass of sweet dessert wine like Vin Santo. For a truly indulgent treat, serve them alongside a scoop of vanilla bean ice cream or a dollop of whipped cream.
Explore More Delicious Italian Cookies
If you’ve fallen in love with these Triple Chocolate Biscotti, you’ll be delighted to explore other traditional Italian cookies. Each offers a unique flavor and texture, perfect for any occasion or simply as a sweet indulgence.
- Pignoli Cookies (Biscotti ai Pinoli): A classic almond-based cookie adorned with pine nuts.
- White Chocolate and Pistachio Cantucci Biscuits: A vibrant and nutty variation of the famous twice-baked cookie.
- Chocolate Salami (Salame di Cioccolato): A no-bake, rich chocolate confection resembling salami, often served sliced.
- Orange Chocolate Cantucci Biscuits: A delightful blend of citrusy orange and rich chocolate in a crunchy biscotti form.
- Italian Almond Cookies (Ricciarelli): Soft, chewy, and naturally gluten-free almond cookies, a specialty of Siena.
We hope you thoroughly enjoy making and savoring these incredible Triple Chocolate Biscotti! If you’ve tried this recipe or any other from our collection, please don’t hesitate to share your thoughts. Rate the recipe and leave a comment below – we truly love hearing from you! You can also FOLLOW US on FACEBOOK, INSTAGRAM, and PINTEREST for more delicious inspiration. Don’t forget to sign up for our NEWSLETTER to get new recipes delivered straight to your inbox every week!
Step By Step Photos Above
Most of our recipes come with step by step photos, helpful tips and tricks to make it perfectly first time and even video!
Triple Chocolate Biscotti
By Emily
10 minutes
50 minutes
1 hour
20
biscotti
Ingredients
-
1 + 1/2
cups
all-purpose flour,
(200g), sifted -
1/2
cup
cocoa powder,
(50g), good quality, sifted -
¾
cup
sugar,
(150g), granulated or caster -
3
large eggs,
at room temperature (2 whole, 1 yolk; reserve 1 egg white for brushing) -
1
tbsp
honey,
clear honey recommended -
1
tsp
vanilla extract,
pure extract preferred -
½
cup
dark chocolate chips,
(100g), or semi-sweet/milk chocolate -
1
pinch
salt,
plus extra sea salt for sprinkling (optional) -
¾
cup
chocolate,
for dipping (100g), dark, semi-sweet, or bittersweet, good quality
Instructions
-
Preheat your oven to 350°F (180°C). Line a large baking tray with parchment paper, ensuring it lies flat. This prevents sticking and ensures even baking.
-
In a spacious mixing bowl, sift together the all-purpose flour and cocoa powder. This step is vital for a smooth dough and to prevent lumps. Add the sugar and salt to the bowl and whisk everything together thoroughly until all dry ingredients are well combined.
-
In a separate bowl, add 2 large eggs and 1 egg yolk (remember to reserve the extra egg white; it will be used later for brushing the biscotti logs). Stir in the vanilla extract and honey. Lightly beat the eggs, vanilla, and honey together with a fork until just combined.
-
Create a well in the center of your dry mixture. Pour the wet egg mixture into this well. Using a fork, gradually mix the wet and dry ingredients together until a rough, shaggy dough begins to form. It will look dry and crumbly at this stage, which is perfectly normal.
-
Add the chocolate chips to the dough. Using your hands, knead the dough directly in the bowl until it comes together into a cohesive ball. Although it may initially seem too dry, continue kneading for about a minute or so; the dough will become smoother and more pliable without needing additional liquid.
-
Form the dough into a single ball, then cut it in half. Shape each half into a small log, then gently press each log to an approximate thickness of 2cm (¾ inch) and a width of 4 inches (10cm). Ensure logs are uniform for even baking.
-
Place the shaped dough logs onto your lined baking tray. Whisk the reserved egg white lightly and brush the tops and sides of the logs with a thin, even coat. Bake in the preheated oven for 25 minutes until lightly golden and firm.
-
Remove the tray from the oven and let the logs cool for a couple of minutes until they are warm but manageable. Immediately reduce your oven temperature to 265°F (130°C). Using a very sharp, non-serrated knife, carefully cut each log diagonally into slices approximately ½ inch (1cm) thick.
-
Arrange the individual biscotti slices back on the baking tray, cut-side up, ensuring they are in a single layer. Bake for another 25 minutes at the reduced temperature to crisp them up. Remove from the oven and let them cool completely on the tray or a wire rack; they will become crunchier as they cool.
-
Once completely cooled, melt the dipping chocolate. You can use a double boiler method (bowl over gently simmering water) or melt in the microwave in short intervals, stirring frequently until smooth. Dip one end of each biscotti into the melted chocolate. Place them on parchment paper to set. If desired, sprinkle with a little flaky sea salt. Allow the chocolate to fully set before serving or storing.
Notes
- Dough Consistency – Don’t Add More Liquid: When mixing, the dough may appear dry, but it will come together after a minute or so of kneading. Trust the process and resist adding extra liquid.
- Use a Sharp Knife for Cutting: For clean, crumb-free slices, use a very sharp, non-serrated knife to cut the warm biscotti logs. Serrated knives can cause crumbling.
- Flavor Variations: Feel free to experiment with the type of chocolate chips and dipping chocolate. You can also add other flavorings to the dough, such as orange zest, espresso powder, or chopped nuts, for a personalized touch.
- Allow Chocolate to Set: Ensure the melted chocolate is completely set on the biscotti before storing them to prevent sticking and maintain a beautiful finish.
- Storage and Freezing: Store cooled and set biscotti in an airtight container at room temperature for 2-3 weeks. Baked biscotti or raw dough logs can also be frozen; make sure to defrost before serving or baking.
Helpful Info for All Recipes
- I always use extra virgin olive oil in all of my recipes unless stated otherwise.
- When I use canned or jarred tomatoes of any kind, I always use Cirio or Mutti brands for the best results and flavor.
- All vegetables are medium sized unless stated otherwise.
- All recipes are tested and developed using a fan (convection) oven.
- Find out more about how nutrition is calculated.
- Check out our must-have Italian Pantry Staples.
- You can also find all our Essential Kitchen Tools for Italian Cooking.
Nutrition
Calories:
145
kcal
|
Carbohydrates:
24
g
|
Protein:
3
g
|
Fat:
5
g
|
Saturated Fat:
3
g
|
Trans Fat:
1
g
|
Cholesterol:
25
mg
|
Sodium:
19
mg
|
Potassium:
110
mg
|
Fiber:
2
g
|
Sugar:
14
g
|
Vitamin A:
36
IU
|
Vitamin C:
1
mg
|
Calcium:
25
mg
|
Iron:
1
mg
Nutrition information is automatically calculated, so should only be used as an approximation.
Did you try this recipe?
Leave a comment below!