
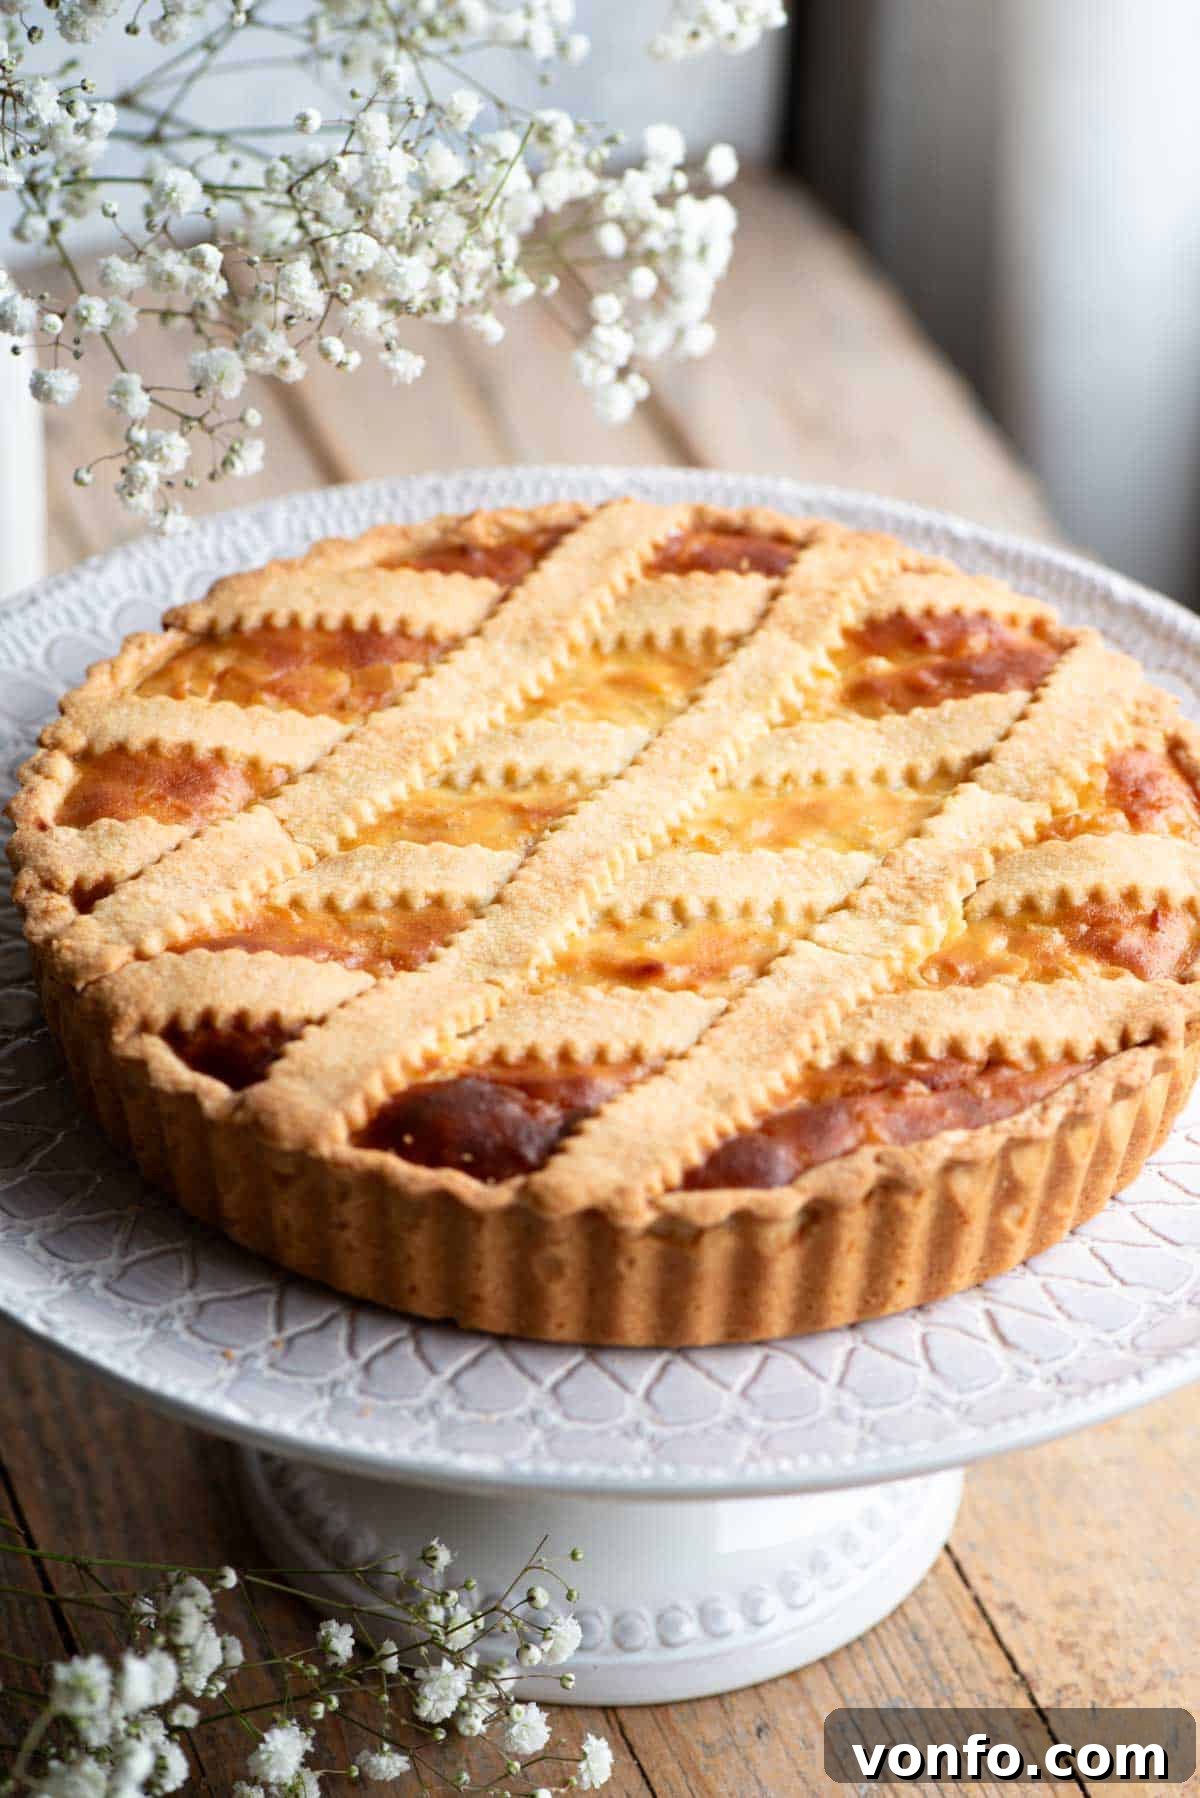
Pastiera Napoletana: The Essential Italian Easter Pie Recipe
Pastiera Napoletana is more than just a dessert; it’s a beloved symbol of Easter in Naples, Italy, cherished for its rich history, unique ingredients, and captivating aroma. This traditional sweet pie features a fragrant filling made from tender Grano Cotto (cooked wheat berries), creamy ricotta, delicate candied citrus fruits, and the evocative essence of orange blossom water, all encased in a sweet shortcrust pastry.
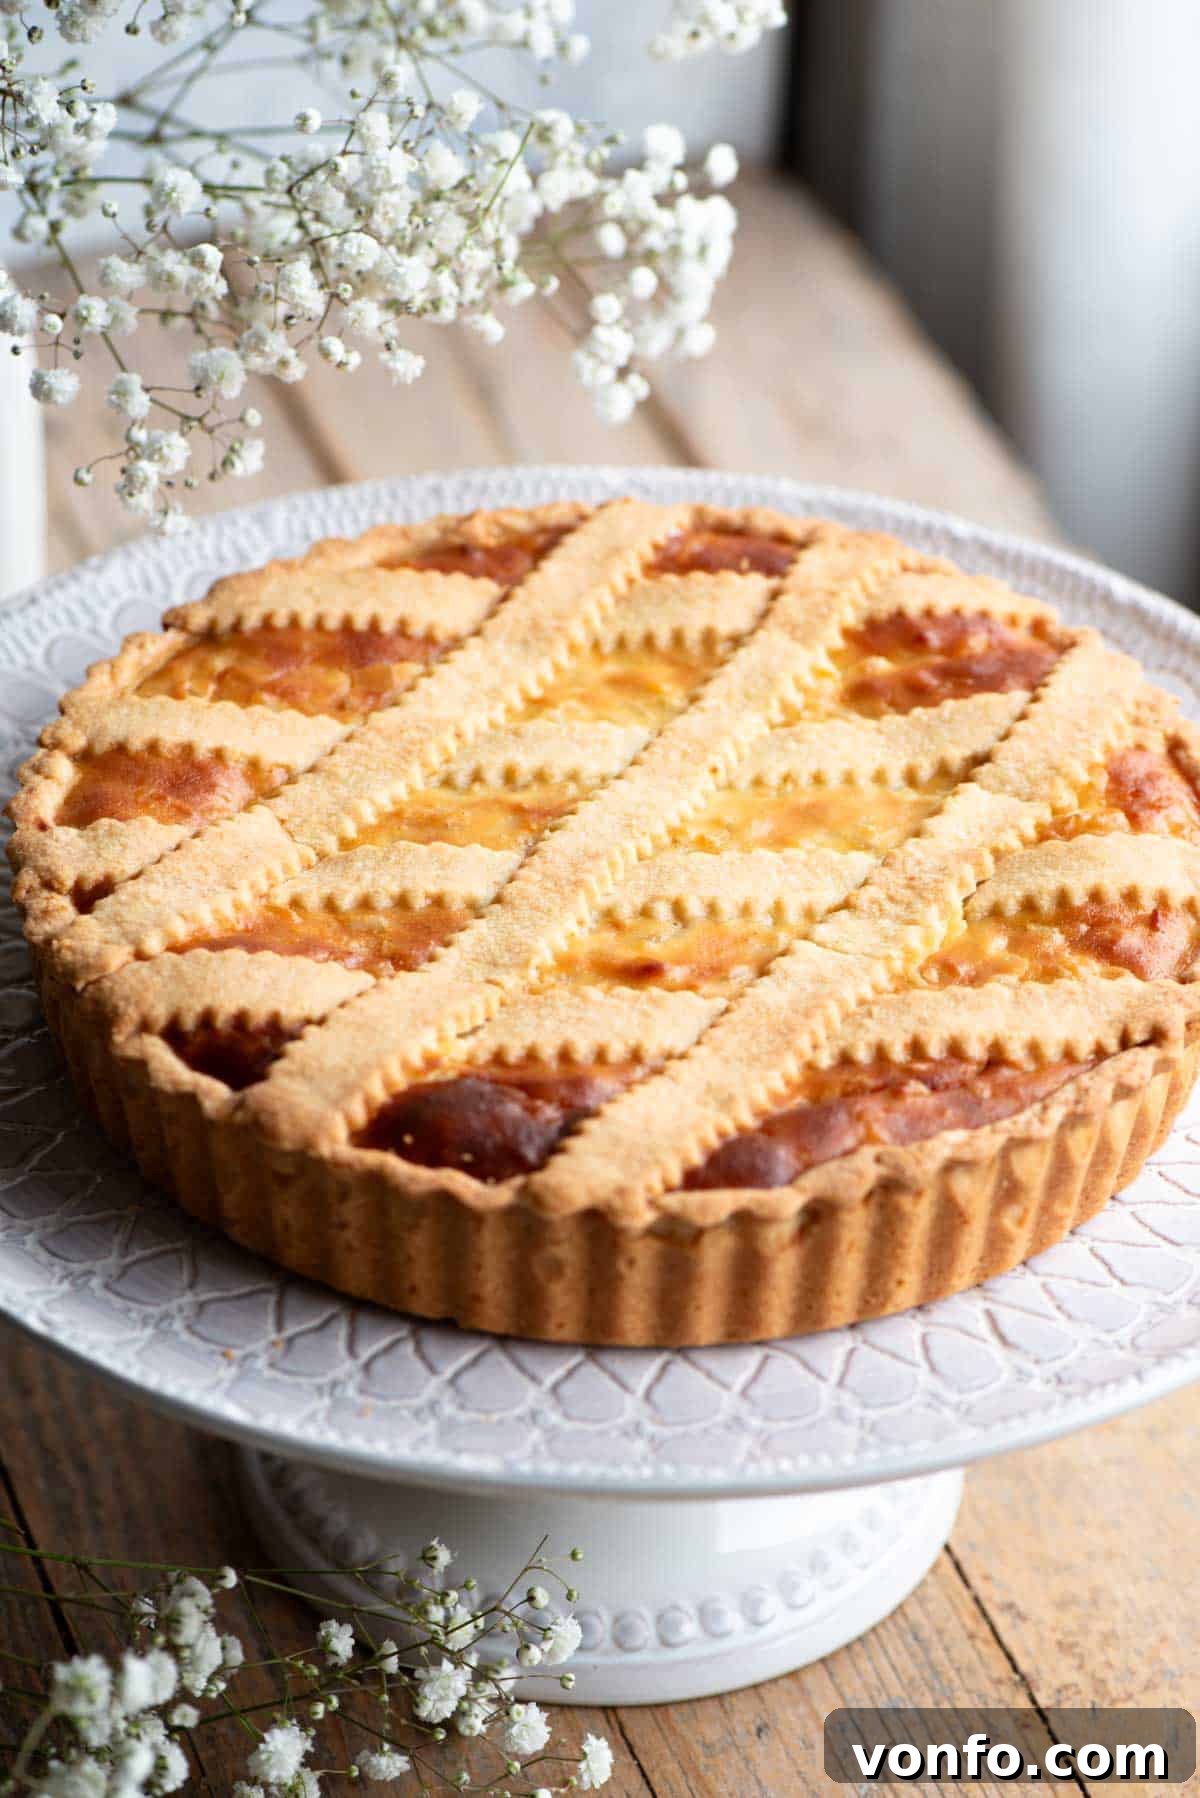
If you have yet to experience the delightful taste of Pastiera Napoletana, prepare to be enchanted. For those who have, you likely understand why it becomes an indispensable part of every Easter celebration. Its unique blend of textures and flavors creates an irresistible dessert that truly defines the spirit of an Italian Easter.
Throughout Naples and indeed across Italy, Pasticcerie (pastry shops) proudly display this iconic Easter dessert as the holiday approaches. It’s a culinary masterpiece that evokes memories of springtime, family gatherings, and centuries-old traditions. What sets Pastiera apart is one particular ingredient: Grano Cotto.
Grano Cotto, or cooked wheat berries, is a staple found in jars in most Italian supermarkets, particularly abundant during the Easter season. This humble ingredient forms the heart of the filling, lending a tender texture and subtle earthy flavor that perfectly complements the other components. When combined with fresh ricotta, a hint of cinnamon and vanilla, vibrant candied fruits, and aromatic orange blossom water, it transforms into a creamy, delicate, and profoundly fragrant mixture that promises pure indulgence.
While the preparation of Pastiera Napoletana involves several distinct stages, each step is surprisingly straightforward. It simply calls for a little patience and a touch of passion. Although traditionally enjoyed as a dessert, many Neapolitans embrace Pastiera as the perfect start to Easter morning, savoring a slice alongside a steaming cappuccino. From our kitchen to yours, Buona Pasqua!
The Story Behind Pastiera Napoletana: A Taste of History
The origins of Pastiera Napoletana are steeped in legend and ancient traditions, blending pagan symbolism with Christian celebrations. One popular myth attributes its creation to sirens offering gifts to the goddess Ceres, symbolizing the renewal of spring and the bounty of the earth. Over time, this pagan ritual evolved, with wheat representing fertility and ricotta symbolizing abundance, eventually becoming deeply intertwined with the Christian celebration of Easter.
Monasteries in Naples are often credited with perfecting the recipe over centuries. Nuns were known for their culinary prowess, and it’s said they meticulously developed the balance of ingredients, adding citrus zest, spices, and orange blossom water to create the divine aroma Pastiera is famous for today. The pie’s long shelf life made it ideal for preparation during Holy Week, allowing families to enjoy it throughout the Easter festivities.
Today, making Pastiera is an annual rite, a way to connect with generations past and maintain a cherished cultural heritage. Each family often has its own subtle variations, passed down through recipes handwritten in old cookbooks, making every Pastiera a unique expression of love and tradition.
Ingredient Notes and Substitutions for Your Perfect Pastiera
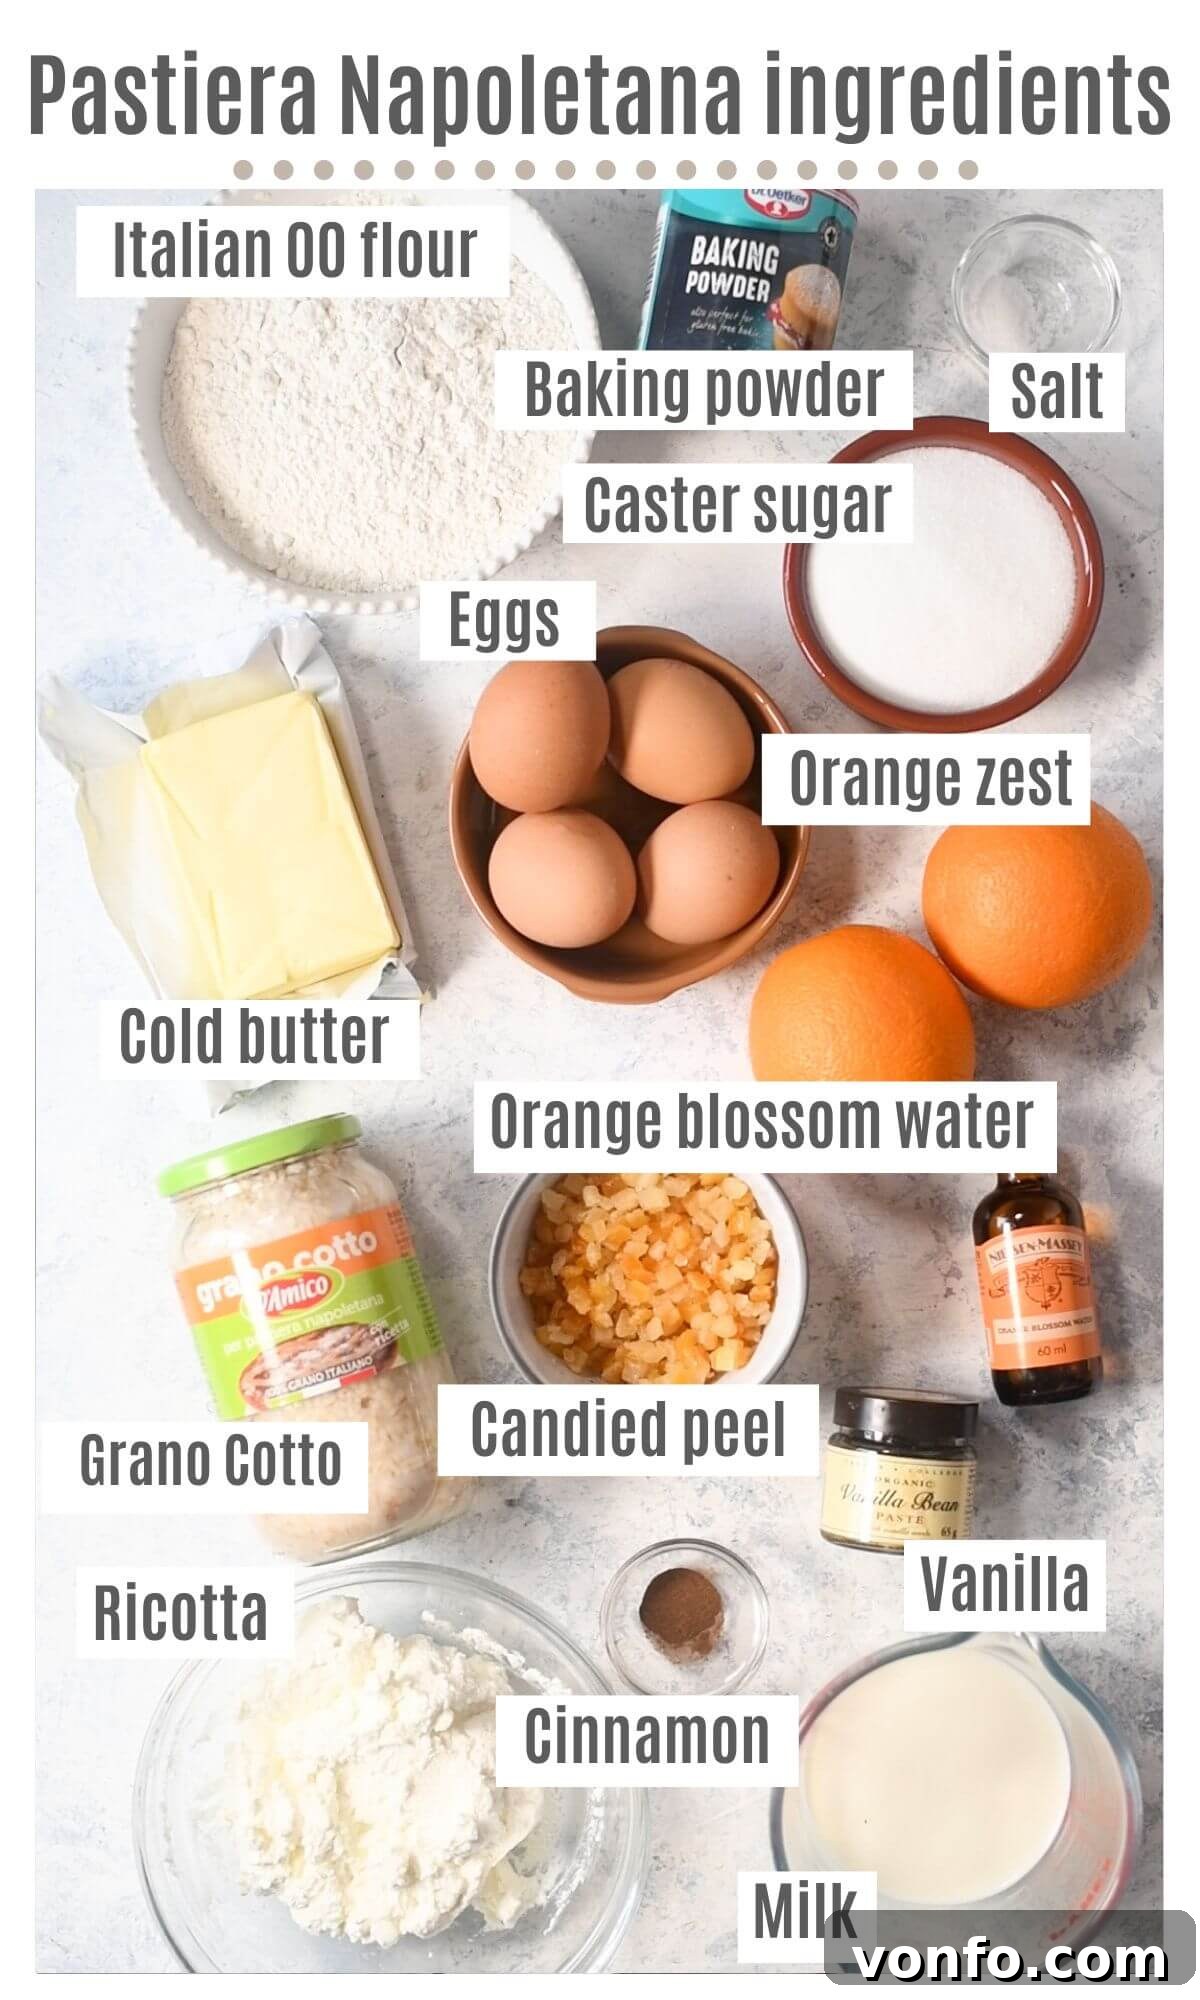
Crafting an authentic Pastiera Napoletana relies on a few key ingredients. Understanding their role and knowing potential substitutions can help you achieve the best results, even if some items are hard to find.
- Pasta Frolla (Sweet Shortcrust Pastry): Our recipe utilizes a classic Italian Pasta Frolla, designed for quick and easy preparation in a food processor. The secret to its tender, crumbly texture lies in using **cold butter, straight from the fridge**. This prevents the butter from melting too quickly into the flour, ensuring a flaky, rather than tough, pastry. If you don’t have 00 flour, a good quality all-purpose flour works perfectly fine.
- Grano Cotto (Cooked Wheat Berries): This is the soul of Pastiera. Grano Cotto provides a distinct texture and subtle sweetness that is irreplaceable. You’ll find it pre-cooked and jarred, especially in Italian food stores or online, particularly around Easter. Do not skip this ingredient; it’s what makes Pastiera truly unique.
- Ricotta Cheese: The quality of your ricotta significantly impacts the creaminess of your filling. Always opt for fresh, whole-milk ricotta. **Crucially, ensure the ricotta is well-drained.** Excess moisture can make your filling watery and prevent proper setting. We recommend draining it in a sieve over a bowl in the refrigerator for at least 24 hours, or even overnight. This simple step makes a huge difference.
- Orange Blossom Water: This floral essence imparts Pastiera with its signature delicate, perfumed aroma. While it can sometimes be challenging to locate, check specialty food stores or online retailers. If unavailable, you may substitute with an equal amount of orange extract for a citrusy note, or simply omit it if you prefer a less pronounced floral flavor. Start with a smaller amount and adjust to your preference, as it can be quite potent.
- Candied Citrus: Traditionally, Pastiera features a mix of candied citron (cedro) and orange. Candied citron offers a slightly more bitter, intense citrus flavor. If candied citron is difficult to source, a combination of candied orange and/or lemon will provide a delicious and authentic taste. Look for good quality candied fruit that is soft and flavorful, not hard and overly sweet.
- Sugar: We prefer caster sugar (superfine sugar) for most desserts due to its finer texture, which allows it to dissolve more quickly and evenly, resulting in a smoother filling. However, granulated sugar can be used as a perfectly acceptable alternative.
Preparation Tips for a Flawless Pastiera
Making Pastiera Napoletana is a labor of love that benefits greatly from thoughtful planning. Breaking down the preparation into a few key steps spread over a day or two will not only make the process more manageable but also enhance the final flavor of your pie.
- The Traditional Easter Timeline: In Naples, it’s customary to prepare Pastiera Napoletana on Good Friday, allowing it to rest and develop its complex flavors before being enjoyed on Easter Sunday. The pie truly improves with age, as the flavors meld and deepen. Following this tradition ensures a spectacular dessert for your Easter feast.
- Drain the Ricotta in Advance: This cannot be stressed enough. Proper drainage of the ricotta is essential for a firm, creamy filling. Place the ricotta in a fine-mesh sieve set over a bowl and refrigerate it for at least 24 hours, or overnight. This allows excess whey to drip away, preventing a watery pie.
- Prepare the Pasta Frolla Ahead: The sweet shortcrust pastry benefits from chilling. Prepare your Pasta Frolla the day before you plan to assemble the pie. Wrap it tightly in plastic wrap and store it in the refrigerator. Remember to remove it from the fridge about 30 minutes before you intend to roll it out, allowing it to soften slightly and become more pliable.
- Allow Grano Cotto Mixture to Cool Completely: After cooking the Grano Cotto with milk and butter, it is crucial to let it cool down to room temperature, or even chill it, before mixing it with the ricotta filling. Adding warm Grano Cotto to the ricotta will affect its texture and could cause the filling to separate.
Visual Walk-Through of the Recipe: Step-by-Step Guidance
Follow these step-by-step photos to guide you through the process of making Pastiera Napoletana. Detailed instructions and our top tips for success are also provided in the comprehensive recipe card below.
1. Preparing the Pasta Frolla (Sweet Shortcrust Pastry)
Achieving a perfect Pasta Frolla is the foundation of an exquisite Pastiera. We use a food processor to make this process incredibly quick and easy.
Begin by combining the flour, sugar, a pinch of salt, baking powder, and the cold, cubed butter in your food processor. Pulse the ingredients until the butter is thoroughly broken down and the mixture resembles coarse breadcrumbs. This ensures the butter is evenly distributed without being overworked, which is key to a tender pastry.
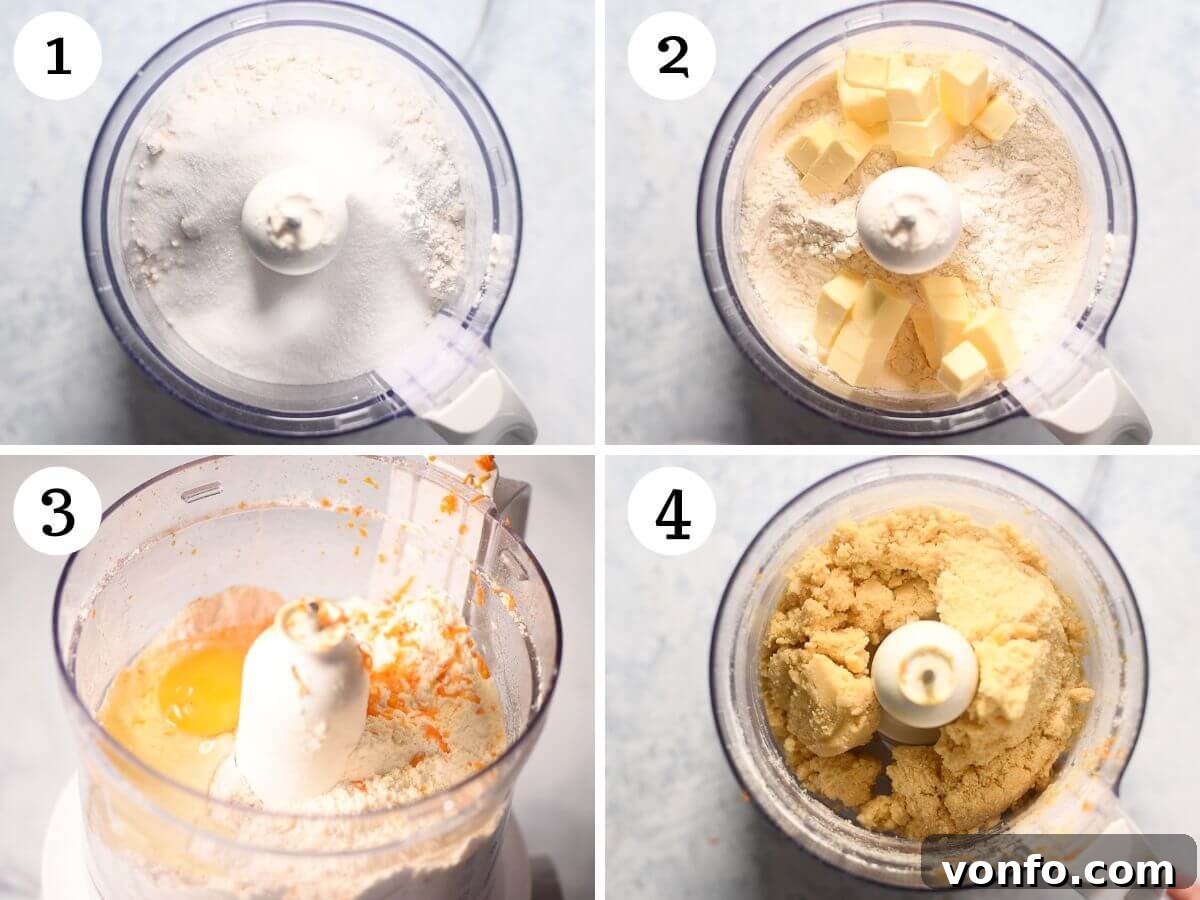
Next, add the large egg and the fragrant grated orange zest to the breadcrumb mixture. Continue to blitz in the food processor until the dough begins to come together and forms a cohesive clump. Be careful not to overmix at this stage. Once a ball forms, turn the dough out onto a lightly floured work surface. Briefly shape it into a neat ball, then gently flatten it into a disc. Wrap this disc tightly in plastic wrap and refrigerate for at least 1 hour. Chilling allows the gluten to relax and the butter to firm up, making the pastry easier to handle and preventing shrinkage during baking.
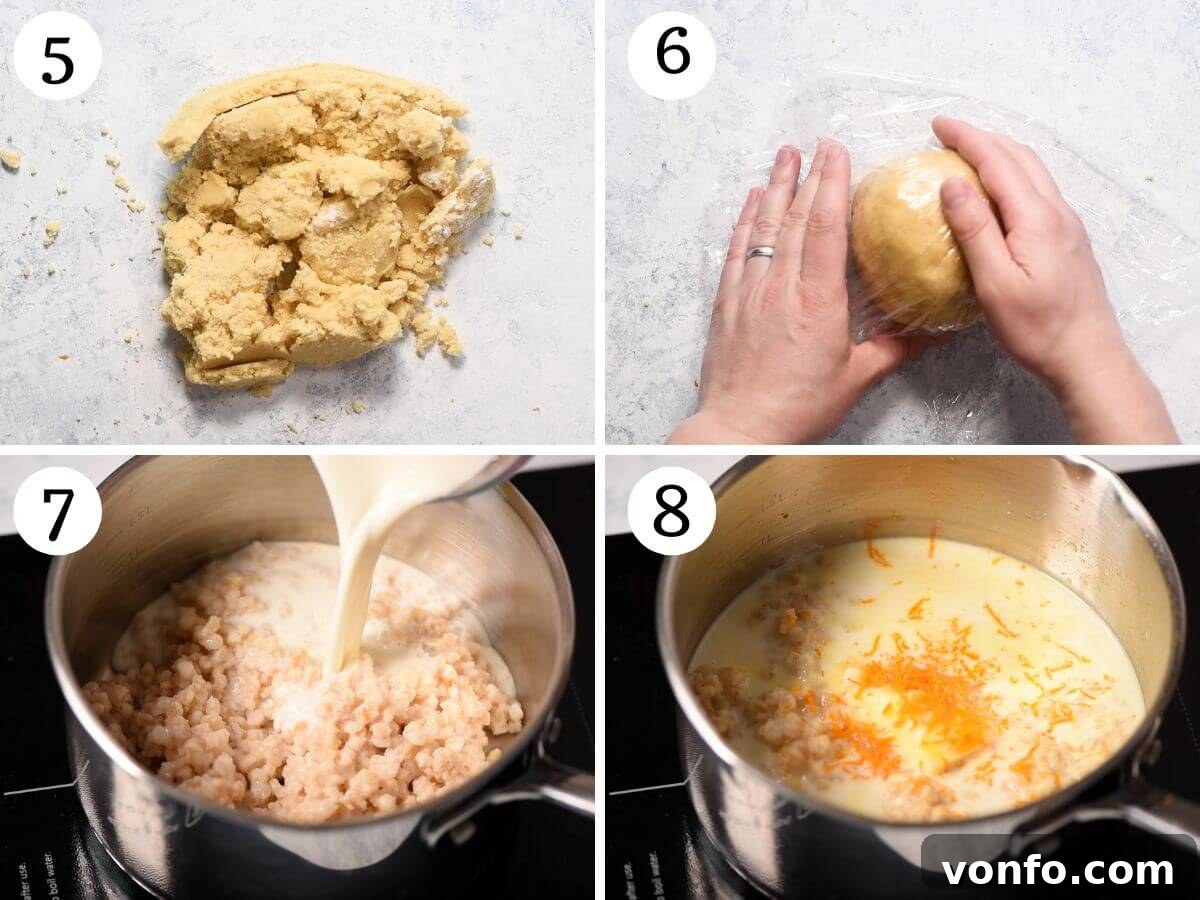
2. Crafting the Grano Cotto Mixture
This cooked wheat berry mixture is central to the Pastiera’s signature texture and flavor. It’s a simple process that yields a wonderfully creamy base for the filling.
In a medium saucepan, combine the Grano Cotto (cooked wheat berries), whole milk, butter, a generous amount of grated orange zest, and a tablespoon of caster sugar. Place the saucepan over a medium-low heat. The goal here is to gently cook the mixture, allowing the flavors to meld and the liquid to be absorbed.
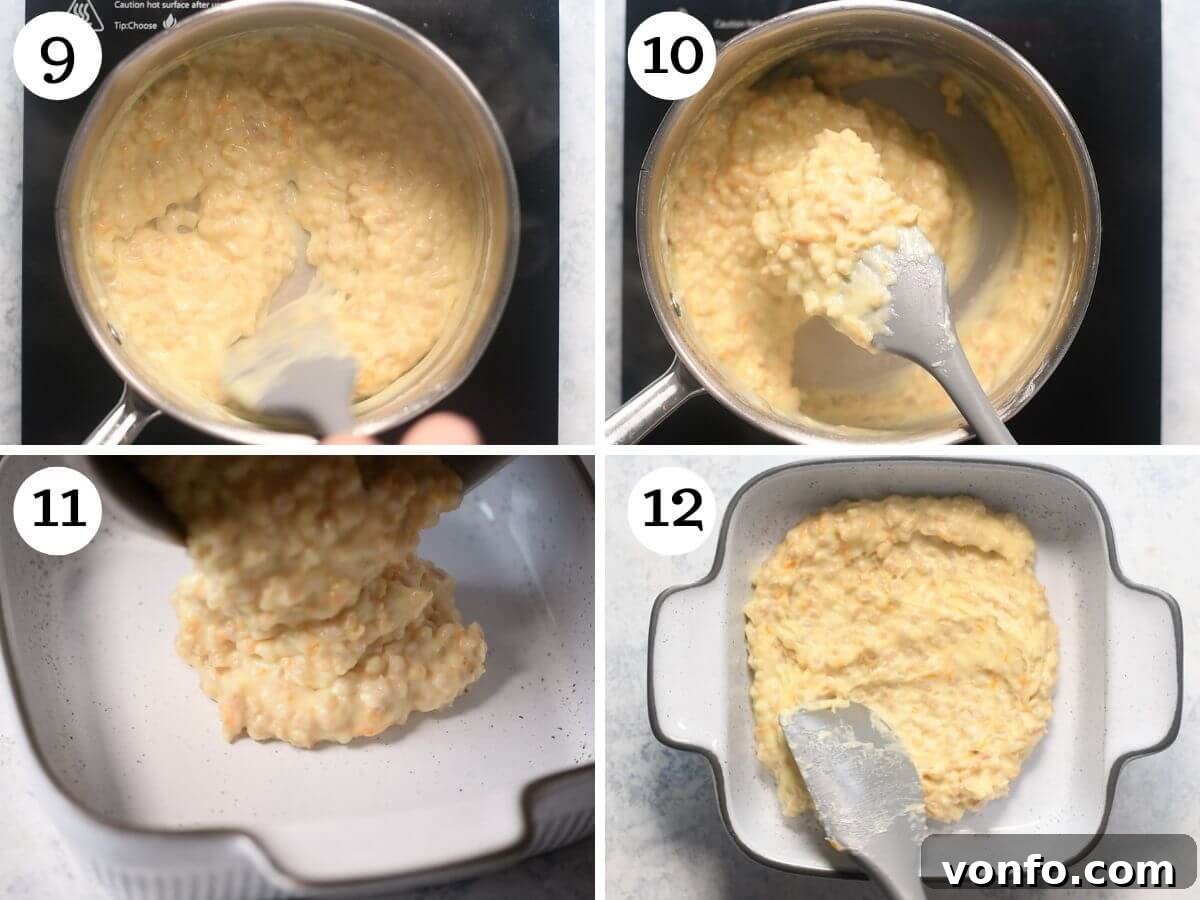
Stir the mixture continuously with a wooden spoon for approximately 20-25 minutes. This gentle stirring prevents sticking and ensures even cooking. Continue until the mixture has thickened considerably and achieved a rich, creamy consistency. It should resemble a porridge-like texture. Once cooked, immediately spread the warm Grano Cotto mixture evenly into a shallow baking dish or onto a plate. This allows it to cool down quickly and thoroughly. Ensure it is completely cold before proceeding to the next step, as warm ingredients can negatively impact the final ricotta filling.
3. Preparing the Creamy Ricotta Filling
The ricotta filling provides the luscious, sweet counterpart to the tender wheat berries, creating a harmonious balance of flavors and textures.
In a large mixing bowl, combine the well-drained ricotta cheese with the caster sugar. Using a hand whisk, beat the mixture until it is smooth, creamy, and well combined. The goal is to eliminate any lumps and achieve a light, airy consistency. Next, incorporate the ground cinnamon, vanilla bean paste (or extract), orange blossom water, and the large eggs. Continue whisking until all ingredients are fully integrated and the mixture is uniform. Finally, gently fold in the candied fruit. Stir carefully to ensure the fruits are evenly distributed throughout the creamy filling without crushing them.
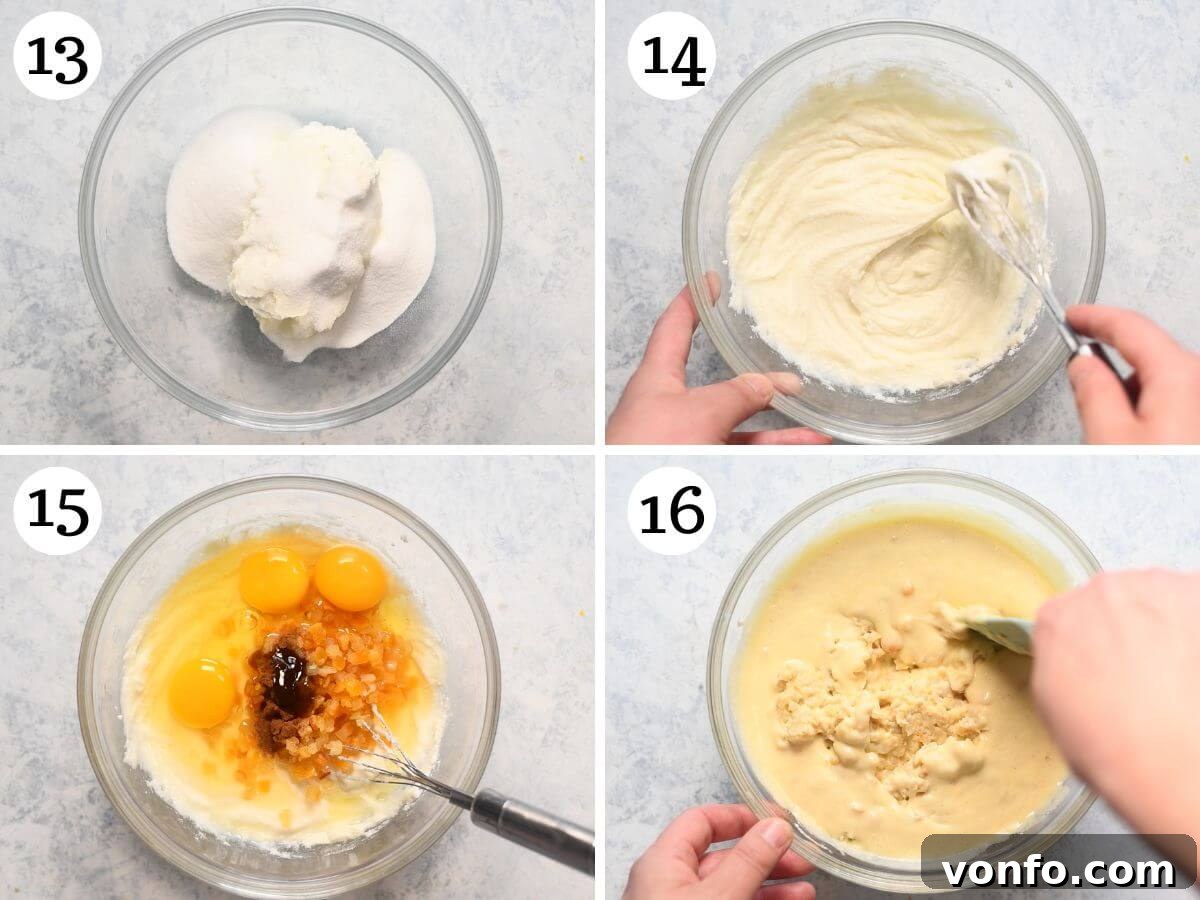
Once the ricotta filling is prepared, cover the bowl and place it in the fridge to chill. This allows the flavors to meld further and keeps the filling cool. Only when the Grano Cotto mixture is completely cold, remove both from the fridge and gently fold the cooled wheat berries into the ricotta mixture. Mix until just combined, being careful not to overmix. The filling is now ready for assembly.
4. Assembly and Baking the Pastiera
The final steps involve assembling your masterpiece and baking it to golden perfection. This stage requires a delicate touch and attention to detail for that iconic look.
Approximately 30 minutes before you plan to assemble, remove the Pasta Frolla from the refrigerator. This allows it to slightly warm up and become more pliable, making it easier to roll without cracking. While the pastry rests, pre-heat your oven to 350°F (180°C).
Lightly dust your work surface and rolling pin with flour. Roll out the Pasta Frolla dough evenly until it is about 3mm thick. Aim for a circular shape large enough to comfortably line your 9-inch tart tin, with some overhang for trimming.
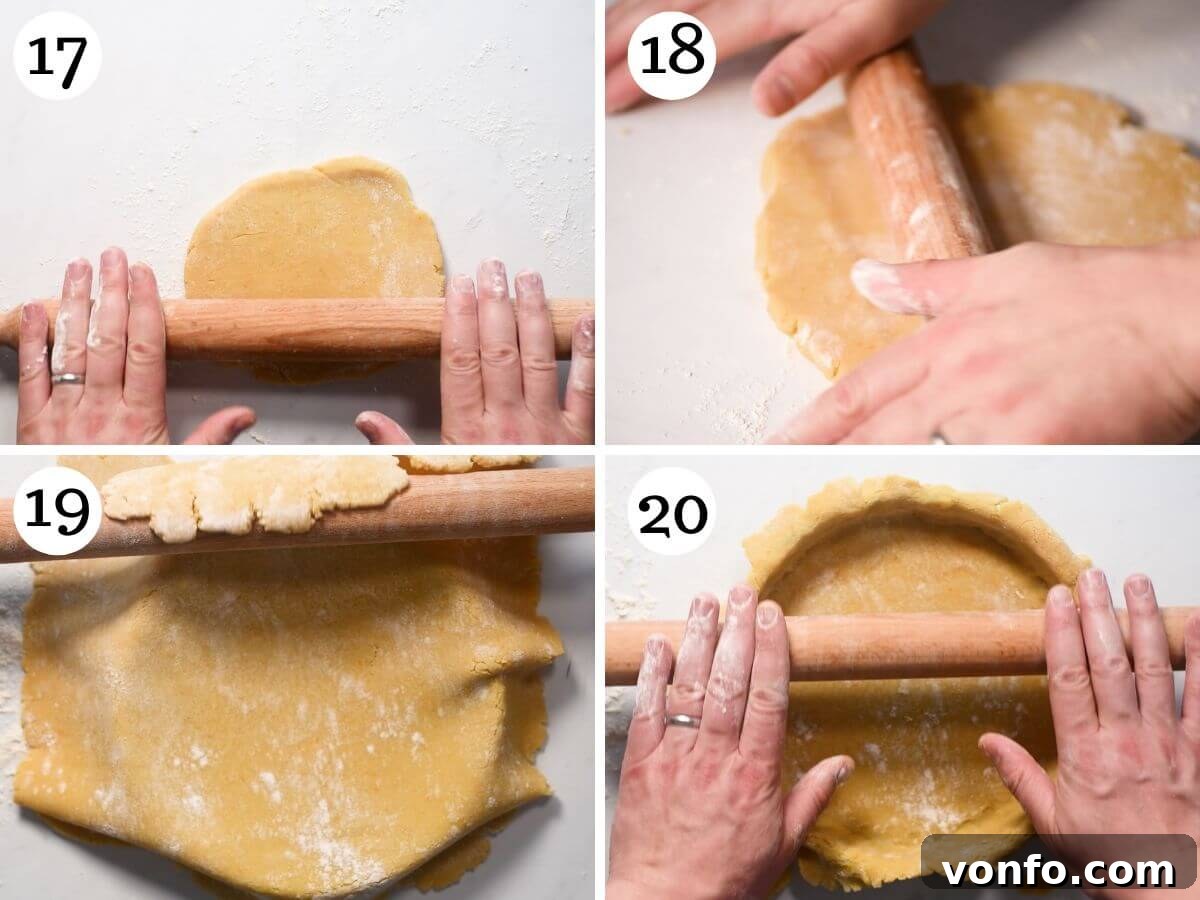
Expert Tip for Rolling Pastry: To prevent the pastry from sticking, roll it a few times in one direction, then gently turn the entire pastry disc, dust the work surface with a little more flour, and continue rolling. Repeat this turning and dusting process until the pastry reaches the desired size. This technique helps ensure even thickness and prevents the pastry from adhering to your surface.
Carefully drape the rolled pastry over your tart tin, using the rolling pin to assist in the transfer. Gently press the pastry into the contours of the tin, ensuring it fits snugly into the base and sides. Fold in the sides and roll the rolling pin firmly over the top edge of the tin to cleanly cut away any excess pastry, leaving a neat border.
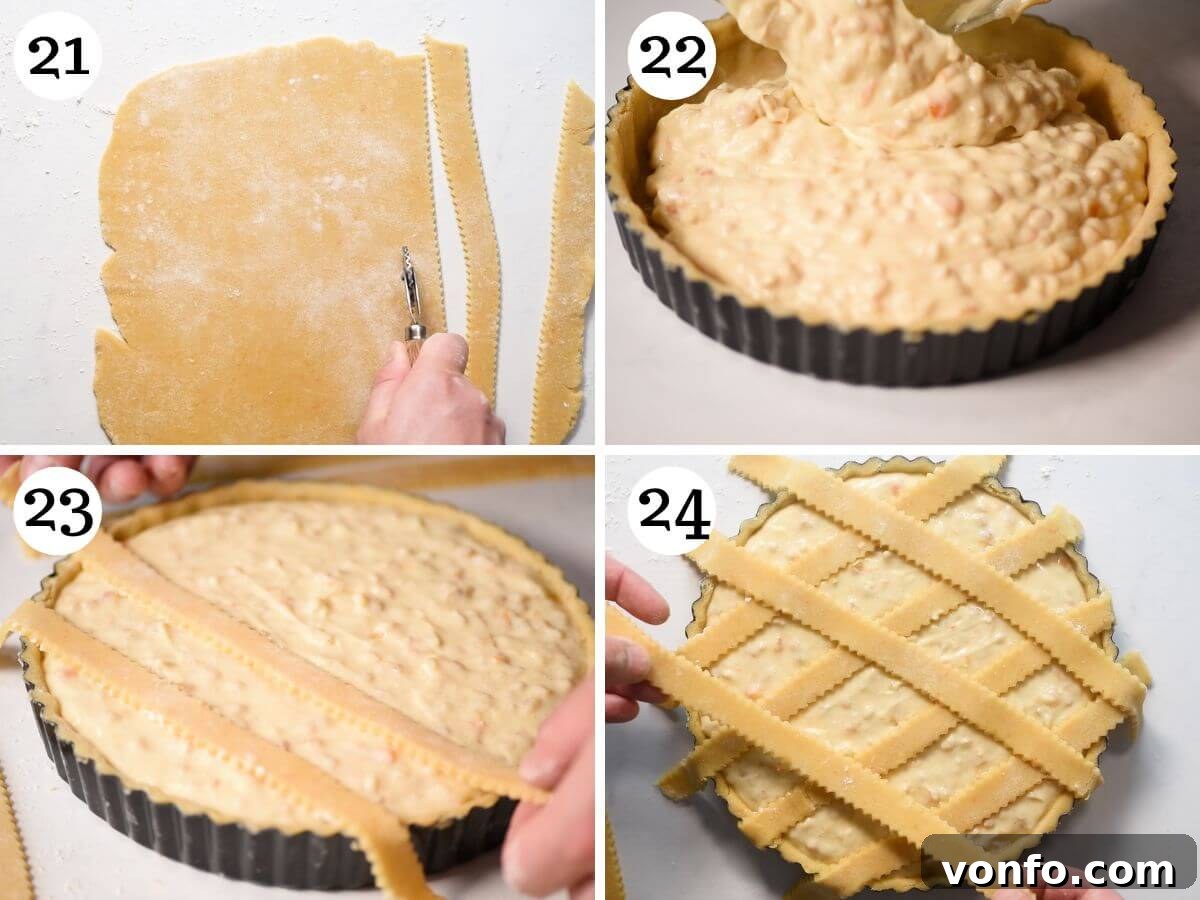
Gather the leftover pastry scraps, gently form them back into a ball, and roll them out again on a lightly floured surface. Using a fluted pasta wheel or a simple pizza cutter, cut out 7 uniform strips of pastry for the characteristic lattice topping of the Pastiera. The fluted edge adds a traditional decorative touch.
Pour the prepared ricotta and Grano Cotto filling into the pastry-lined tart tin, spreading it evenly. Arrange the pastry strips over the filling to create a diamond lattice pattern. The traditional method involves laying 4 strips in one direction, then weaving the remaining 3 strips perpendicularly over them to form the classic Neapolitan lattice.
Carefully place the assembled Pastiera on a baking tray (this makes it easier to transfer in and out of the oven and catches any potential drips). Bake in the pre-heated oven for approximately 50-60 minutes, or until the top is beautifully golden brown and the filling is set. The pie should look invitingly rich and deeply colored.
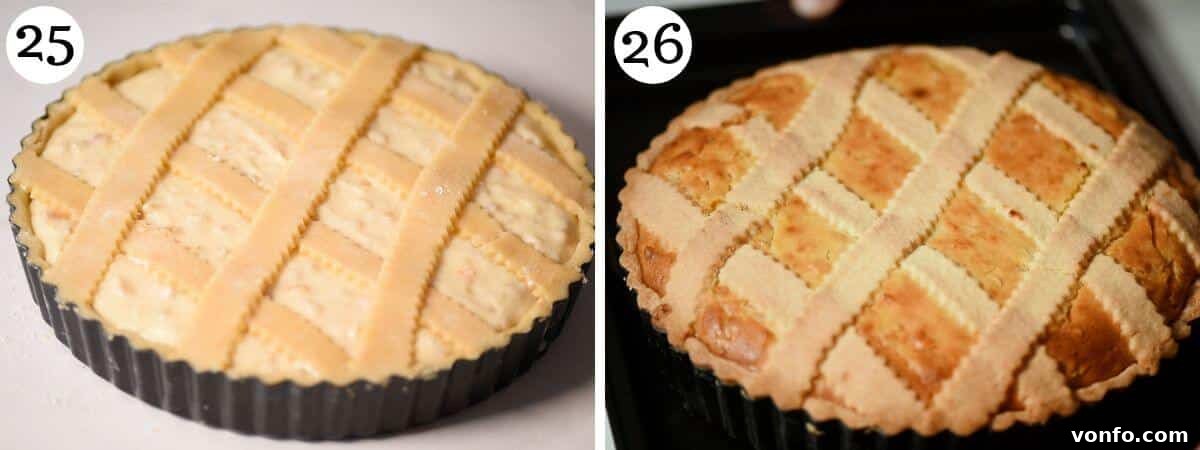
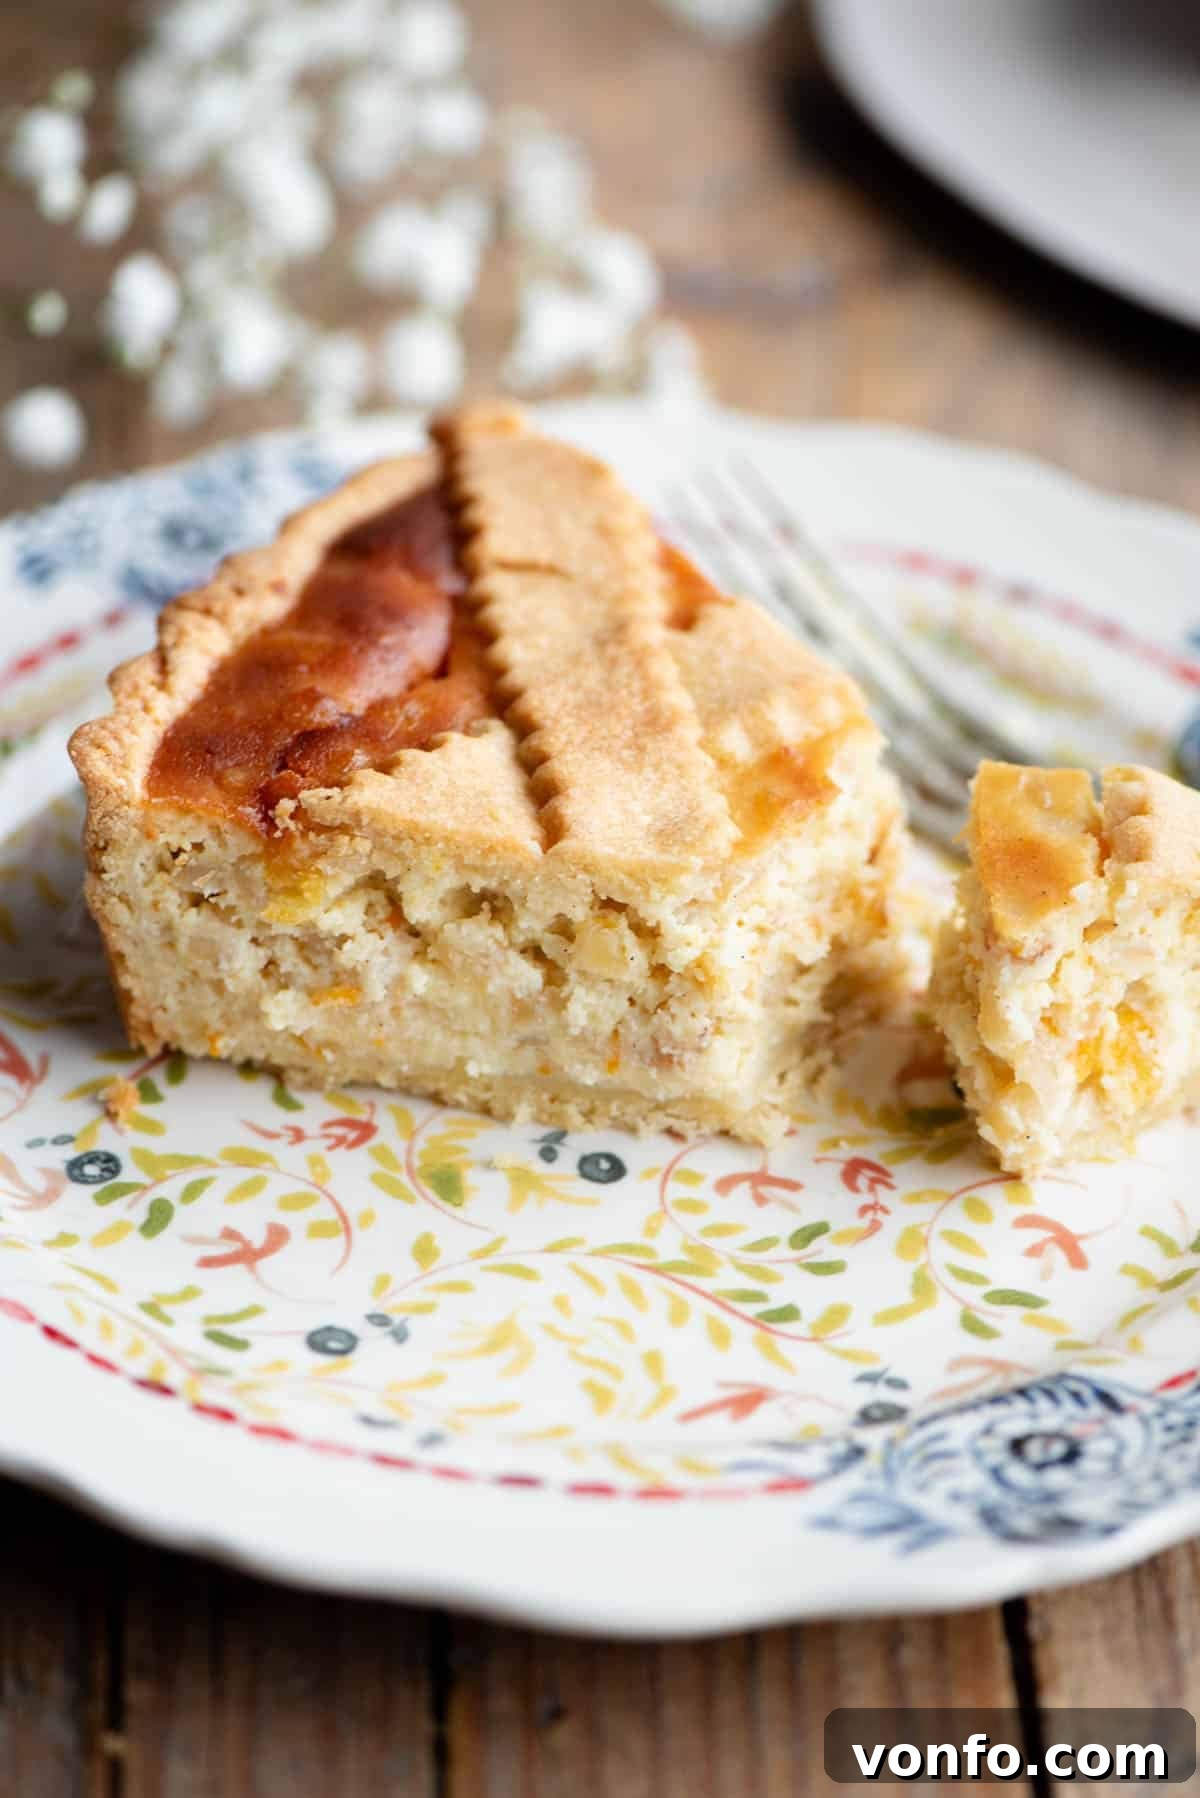
Once baked, remove the Pastiera from the oven and allow it to cool completely in the tart tin on a wire rack. This is crucial as the filling needs time to fully set. Once cooled, carefully remove it from the tart case, ideally one with a loose bottom for easy release. Pastiera Napoletana is renowned for tasting even better 1-3 days after it’s made, as the flavors deepen and meld. Store it in the refrigerator until you are ready to serve. For the best flavor and texture, allow the pie to come to room temperature for at least 30 minutes before slicing and serving.
The Legend of the Seven Strips: A Fun Fact!
The distinctive lattice topping of Pastiera Napoletana, traditionally made with exactly seven pastry strips (four laid parallel, and three woven perpendicularly over them), is steeped in enchanting myths and legends. One popular tale suggests these seven strips represent the seven ancient streets of Naples, symbolizing the city’s enduring connection to this cherished culinary tradition. Other stories link the number seven to various spiritual or historical significances, adding a layer of mystique to this already captivating pie. Regardless of the exact origin, the seven strips are an integral part of Pastiera’s visual identity, a testament to its deep roots in Neapolitan culture.
More Italian Easter Recipes to Explore
If you’ve enjoyed the journey of making Pastiera Napoletana, why not explore other traditional Italian recipes perfect for your Easter celebration? These dishes offer a rich tapestry of flavors and embody the spirit of spring and family gatherings.
Antipasti
Torta Pasqualina (Spinach & Ricotta Egg Pie)
Antipasti
Pizza Rustica (Italian Easter Pie)
Pasta
Italian Lamb Lasagna with Pecorino Bechamel
Italian Desserts
Italian Easter Bread (Pane di Pasqua)
If you’ve tried this Pastiera Napoletana recipe or any other recipe on the blog, we would love to hear from you! Please don’t forget to rate the recipe and share your experience in the comments below. Your feedback is invaluable to us! You can also connect with us on Facebook, Instagram, and Pinterest, or sign up for our Newsletter to receive more delicious recipes directly in your inbox.
Pastiera Napoletana Recipe
By Emily
40 mins
1 hr 20 mins
2 hrs
4 hrs
10 servings
Print Recipe
Pastiera Napoletana is a traditional sweet Easter pie from Naples. It has the most beautiful and fragrant filling made from Grano Cotto (wheat berries), ricotta, candied citrus fruits and orange blossom water.
Equipment
- 9-inch tart tin with a loose bottom
- Food processor
- Large mixing bowls
- Hand whisk
- Saucepan
- Wooden spoon
- Rolling pin
- Fluted pasta wheel or pizza cutter (optional, for lattice)
Ingredients
Pasta Frolla (Pastry)
- 250 g (2 cups spooned and leveled) Italian 00 flour or all-purpose flour
- 80 g (1/2 cup) caster sugar (or granulated sugar)
- ¼ teaspoon baking powder
- 120 g (8.5 tablespoons) cold unsalted butter, cubed
- 1 large egg
- Zest of 1 orange
- Pinch of salt
Ricotta Filling
- 400 g (2 cups) ricotta, well-drained
- 150 g (3/4 cup) caster sugar (or granulated sugar)
- 1 pinch cinnamon
- 1 teaspoon vanilla bean paste (or extract)
- 1 teaspoon orange blossom water (see notes)
- 100 g (3/4 cups) candied fruit (mixed citron and orange, or just orange/lemon)
- 3 large eggs
Grano Cotto Mixture
- 290 g (1.5 cups) Grano Cotto (cooked wheat berries)
- 200 ml (1/2 cup plus 1/3 cup) whole milk (6.7 fl oz)
- 25 g (2 tablespoons) butter
- Zest of 1 orange
- 1 tablespoon caster sugar
Instructions
Preparation Tips (Pre-assembly)
- Make sure to drain the ricotta for at least 24 hours to remove excess moisture. Place it in a sieve over a bowl in the fridge.
To Make the Pasta Frolla (Pastry)
- Put the flour, sugar, salt, baking powder, and cold butter in a food processor. Blitz until the butter is broken up and the mixture resembles breadcrumbs.
- Add the egg and grated orange zest. Blitz until the pastry comes together in a clump. Turn it out onto your work surface and shape it into a ball, then flatten slightly to form a disc. Wrap in plastic wrap and chill in the fridge for at least 1 hour (or overnight).
To Make the Grano Cotto Mixture
- Place the Grano Cotto, milk, butter, grated orange zest, and sugar in a saucepan over a medium-low heat.
- Cook the mixture for around 20-25 minutes, stirring continuously with a wooden spoon, until it’s thick and creamy.
- Once ready, spread it out in a baking dish to cool completely.
To Make the Ricotta Filling
- Place the drained ricotta and sugar in a large mixing bowl. Whisk with a hand whisk until combined and creamy.
- Add the cinnamon, vanilla, orange blossom water, and eggs. Whisk everything together until thoroughly combined.
- Add the candied fruit and stir it into the filling. Place the bowl in the fridge.
- Once the Grano Cotto mixture is completely cold, gently fold it into the ricotta mixture until just combined.
Assemble and Bake
- Remove the Pasta Frolla from the fridge 30 minutes before using to allow it to soften slightly.
- Pre-heat the oven to 350°F (180°C). Dust your work surface and rolling pin with flour. Roll out the Pasta Frolla until it’s about 3mm thick.
Tip: When rolling, roll a couple of times, then turn the pastry, dusting with flour again, and repeat until it’s large enough for the tart tin to prevent sticking. - Using the rolling pin to assist, carefully place the pastry over your tart tin, ensuring it lines the sides. Roll the rolling pin over the top to neatly cut the edges.
- Form the leftover pastry back into a ball and roll it out again with a little flour. Using a fluted pasta wheel or pizza cutter, cut out 7 strips for topping the Pastiera.
- Pour the prepared filling into the pastry-lined tart tin. Arrange the pastry strips over the filling to create a diamond lattice (traditionally 4 on the bottom, 3 on the top).
- Place the Pastiera on a baking tray and bake in the oven for 50-60 minutes, or until the top is golden brown and the filling is set.
- Remove from the oven and allow to cool completely in the tart tin on a wire rack. Once cooled, carefully remove from the tin. Pastiera is best eaten 1-3 days after it’s made, so transfer it to the fridge until ready to serve. Let it come to room temperature before serving for optimal flavor.
Notes and Expert Tips
- Pasta Frolla Texture: Remember that shortcrust pastry is designed to be crumbly. Don’t worry if it breaks or tears slightly during assembly; you can easily patch it with your fingers, and it will be unnoticeable after baking. The key is not to overwork (knead) the dough, as this develops gluten and can make the pastry tough. Also, avoid adding too much extra flour when rolling for the same reason.
- Orange Blossom Water Potency: Orange blossom water is very aromatic and can be overpowering if used in excess. Many traditional recipes call for more, but we recommend starting with a smaller amount (like 1 teaspoon) and adjusting to your personal preference in future attempts. You can always add a little more next time if you prefer a stronger floral note.
- Strategic Preparation: To streamline the baking process, we highly recommend preparing the Pasta Frolla and draining the ricotta cheese the day before you plan to assemble and bake the Pastiera. This significantly reduces active preparation time on baking day.
- Storage Best Practices: Once baked and completely cooled, Pastiera Napoletana keeps exceptionally well. Store it in the refrigerator, loosely covered, for 4-5 days. The flavors actually deepen and improve over the first few days, making it an ideal make-ahead Easter dessert. Always bring it to room temperature before serving for the best taste and texture.
Helpful Info for All Our Recipes
- We consistently use extra virgin olive oil in all our recipes unless a different type of oil is specifically stated.
- For superior flavor and results, we always choose Cirio or Mutti brands when using canned or jarred tomatoes.
- Unless otherwise specified, all vegetables referenced in our recipes are medium-sized.
- All recipes featured on our site have been meticulously tested and developed using a fan (convection) oven.
- Curious about nutritional information? Find out more about how our nutrition is calculated.
- Stock your kitchen like an Italian home chef with our guide to Essential Italian Pantry Staples.
- Discover the tools that make Italian cooking a joy with our list of Essential Kitchen Tools for Italian Cooking.
Nutrition
Nutrition information is automatically calculated and should only be used as an approximation. Individual results may vary based on exact ingredients and preparation methods.