
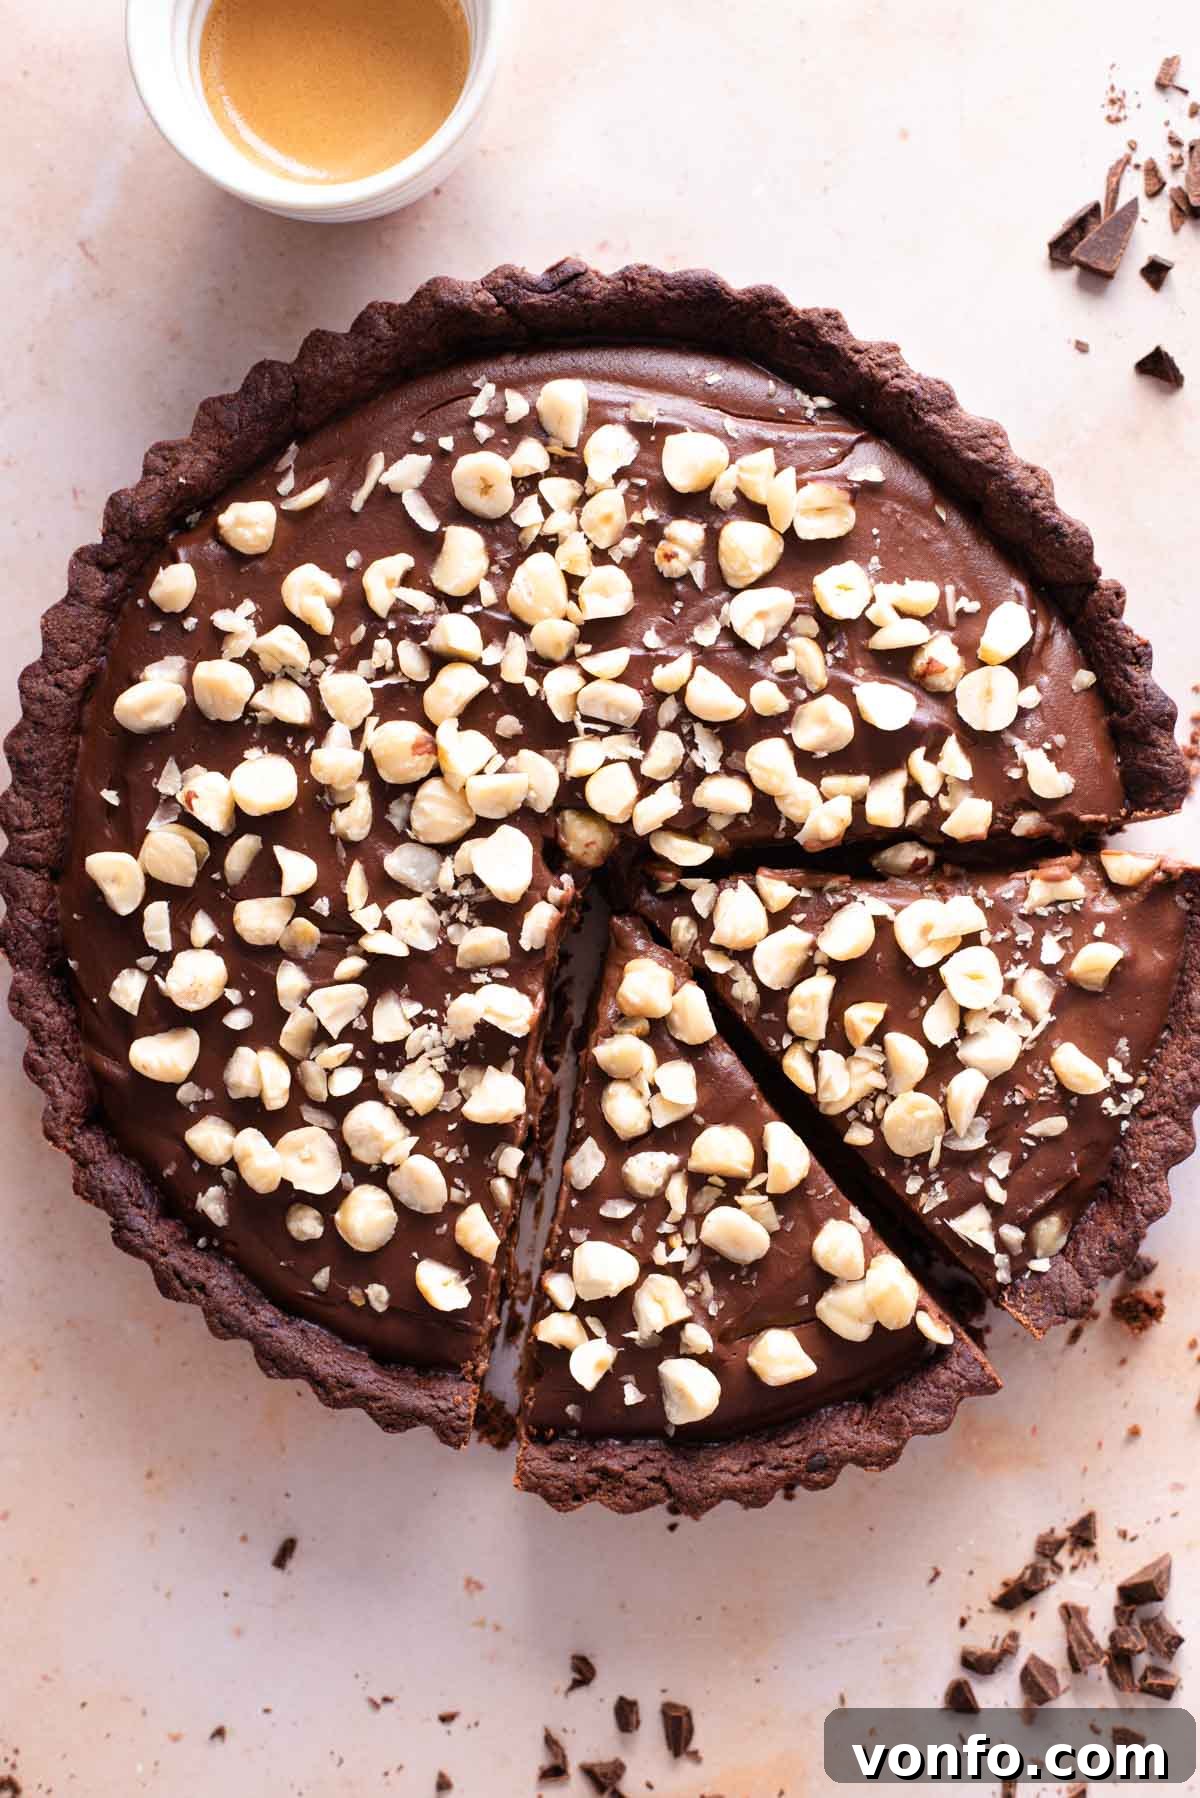
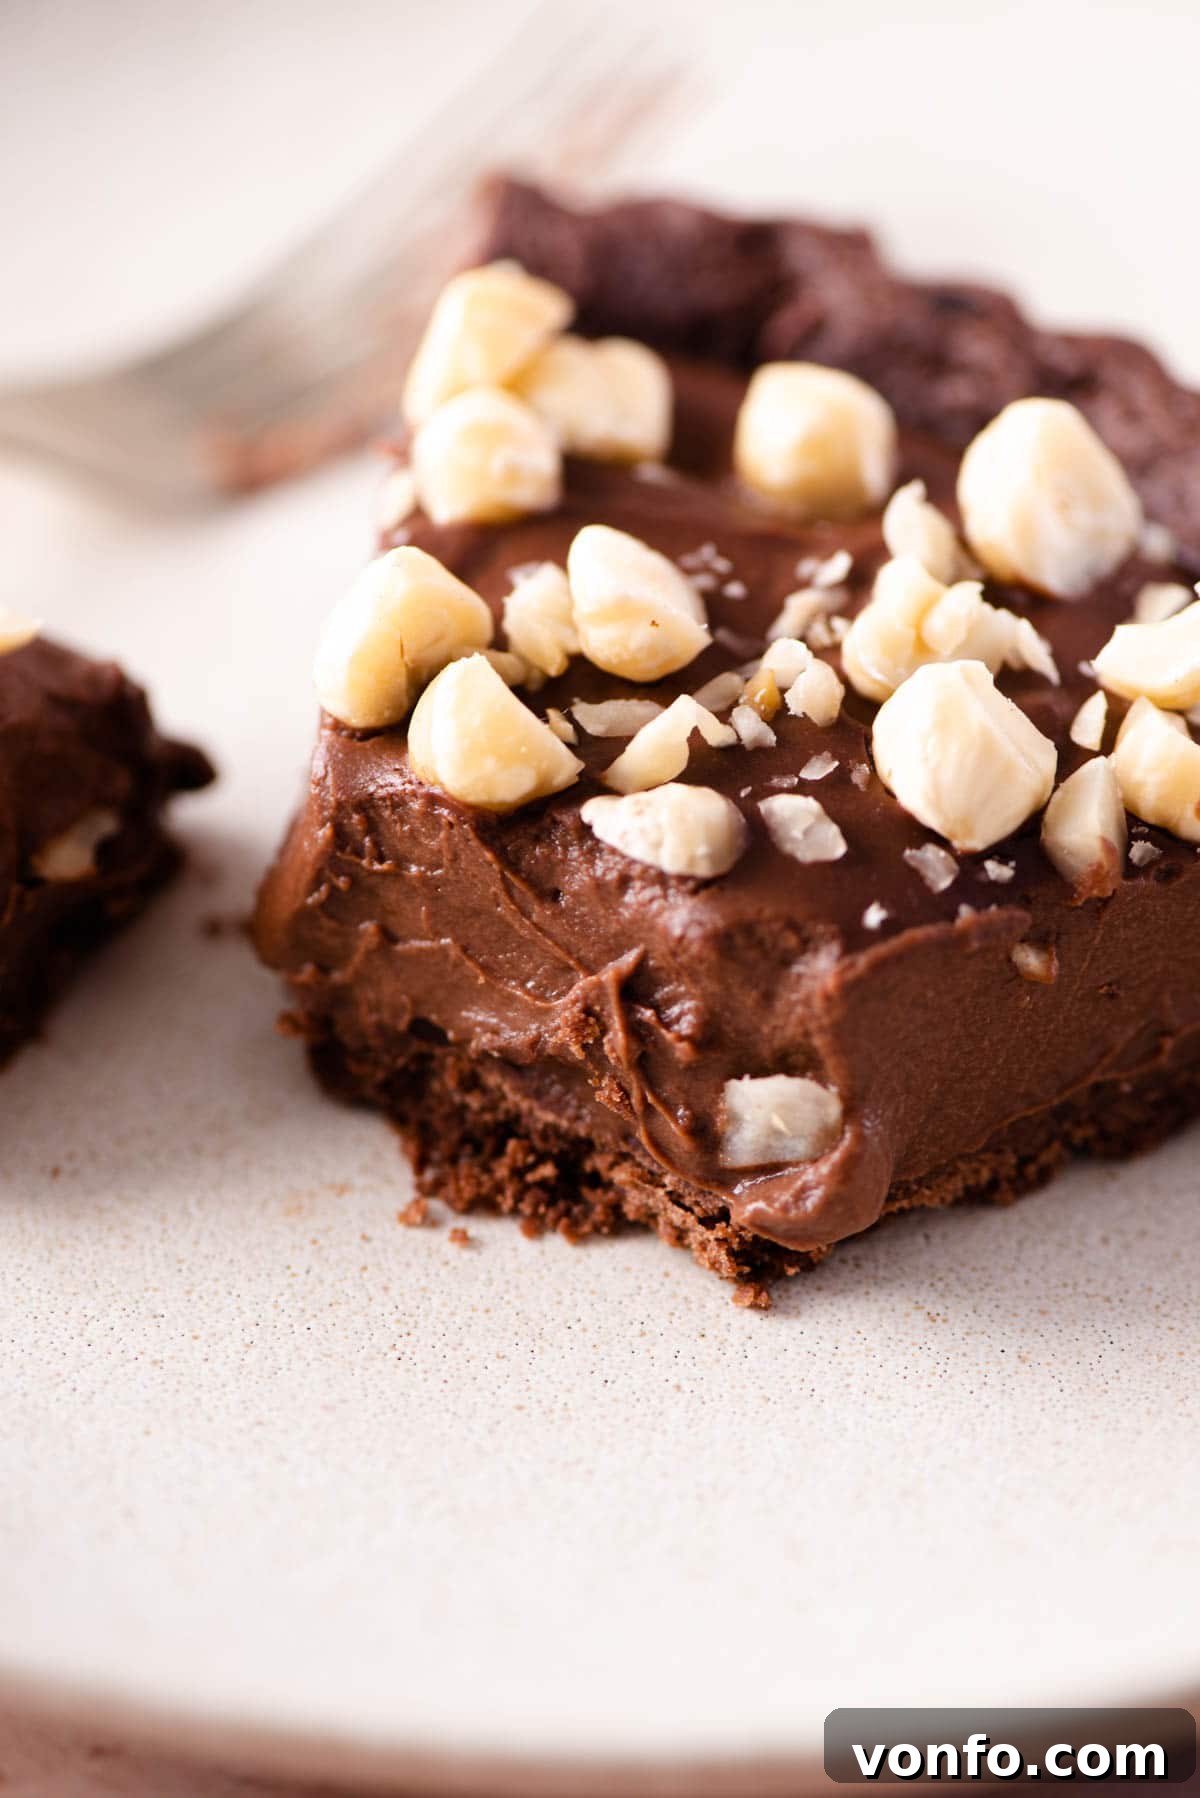
Prepare to delight your senses with this truly indulgent chocolate tart, featuring a perfectly crafted homemade chocolate shortcrust pastry, a velvety smooth and decadent chocolate pastry cream filling, all elegantly crowned with a generous scattering of chopped hazelnuts. This is more than just a dessert; it’s an experience for every chocolate enthusiast, promising a symphony of rich flavors and luxurious textures.
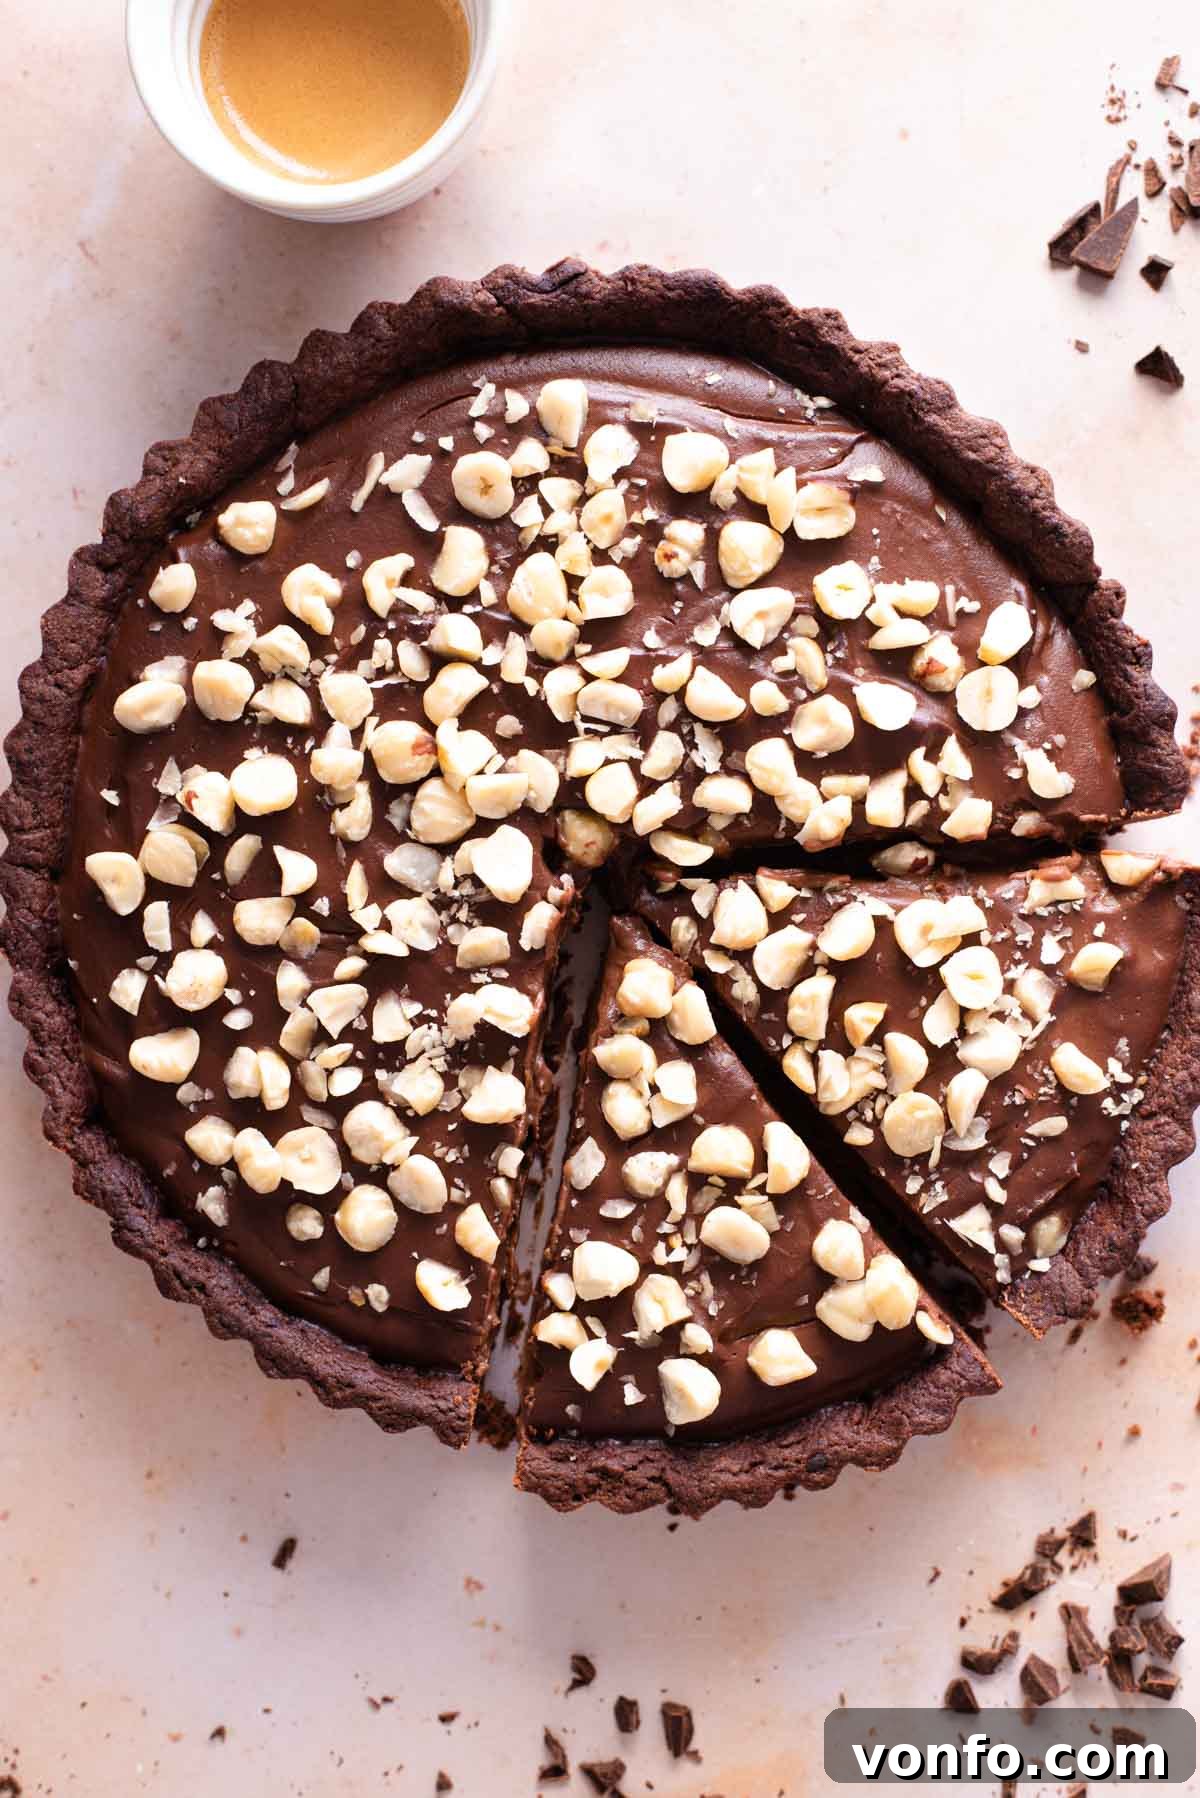
This hazelnut chocolate tart stands out as an absolute favorite, delivering an intensely chocolatey profile that is both profoundly rich and wonderfully smooth. The magic begins with its foundation: a crisp and buttery chocolate pastry crust, known in Italy as “pasta frolla.” This versatile dough isn’t just for tarts; it can also be used to create delightful chocolate cookies, offering a deep chocolate flavor that perfectly complements the creamy filling.
The heart of this tart is its extraordinary chocolate pastry cream (or crema al cioccolato). Unlike many traditional pastry creams, ours is designed to be significantly thicker and stiffer, allowing it to set beautifully in the refrigerator without the need for baking. This makes for a fantastic no-bake tart filling that holds its shape perfectly when sliced, showcasing distinct layers of pastry and creamy chocolate.
While the filling requires no baking, the chocolate tart crust does benefit from a simple blind baking process. Don’t let this step intimidate you; it’s incredibly straightforward and ensures a wonderfully crisp base every time. Below, you’ll find our complete recipe, meticulously detailed with step-by-step instructions, helpful photos, and essential tips to guide you through each stage. Get ready to bake a masterpiece. Buon Appetito!
Essential Ingredients for Your Decadent Chocolate Tart
Crafting the perfect hazelnut chocolate tart begins with selecting high-quality ingredients. Each component plays a crucial role in achieving the rich flavor and desirable texture of this dessert. Here’s a detailed look at what you’ll need and some valuable tips for ingredient selection:
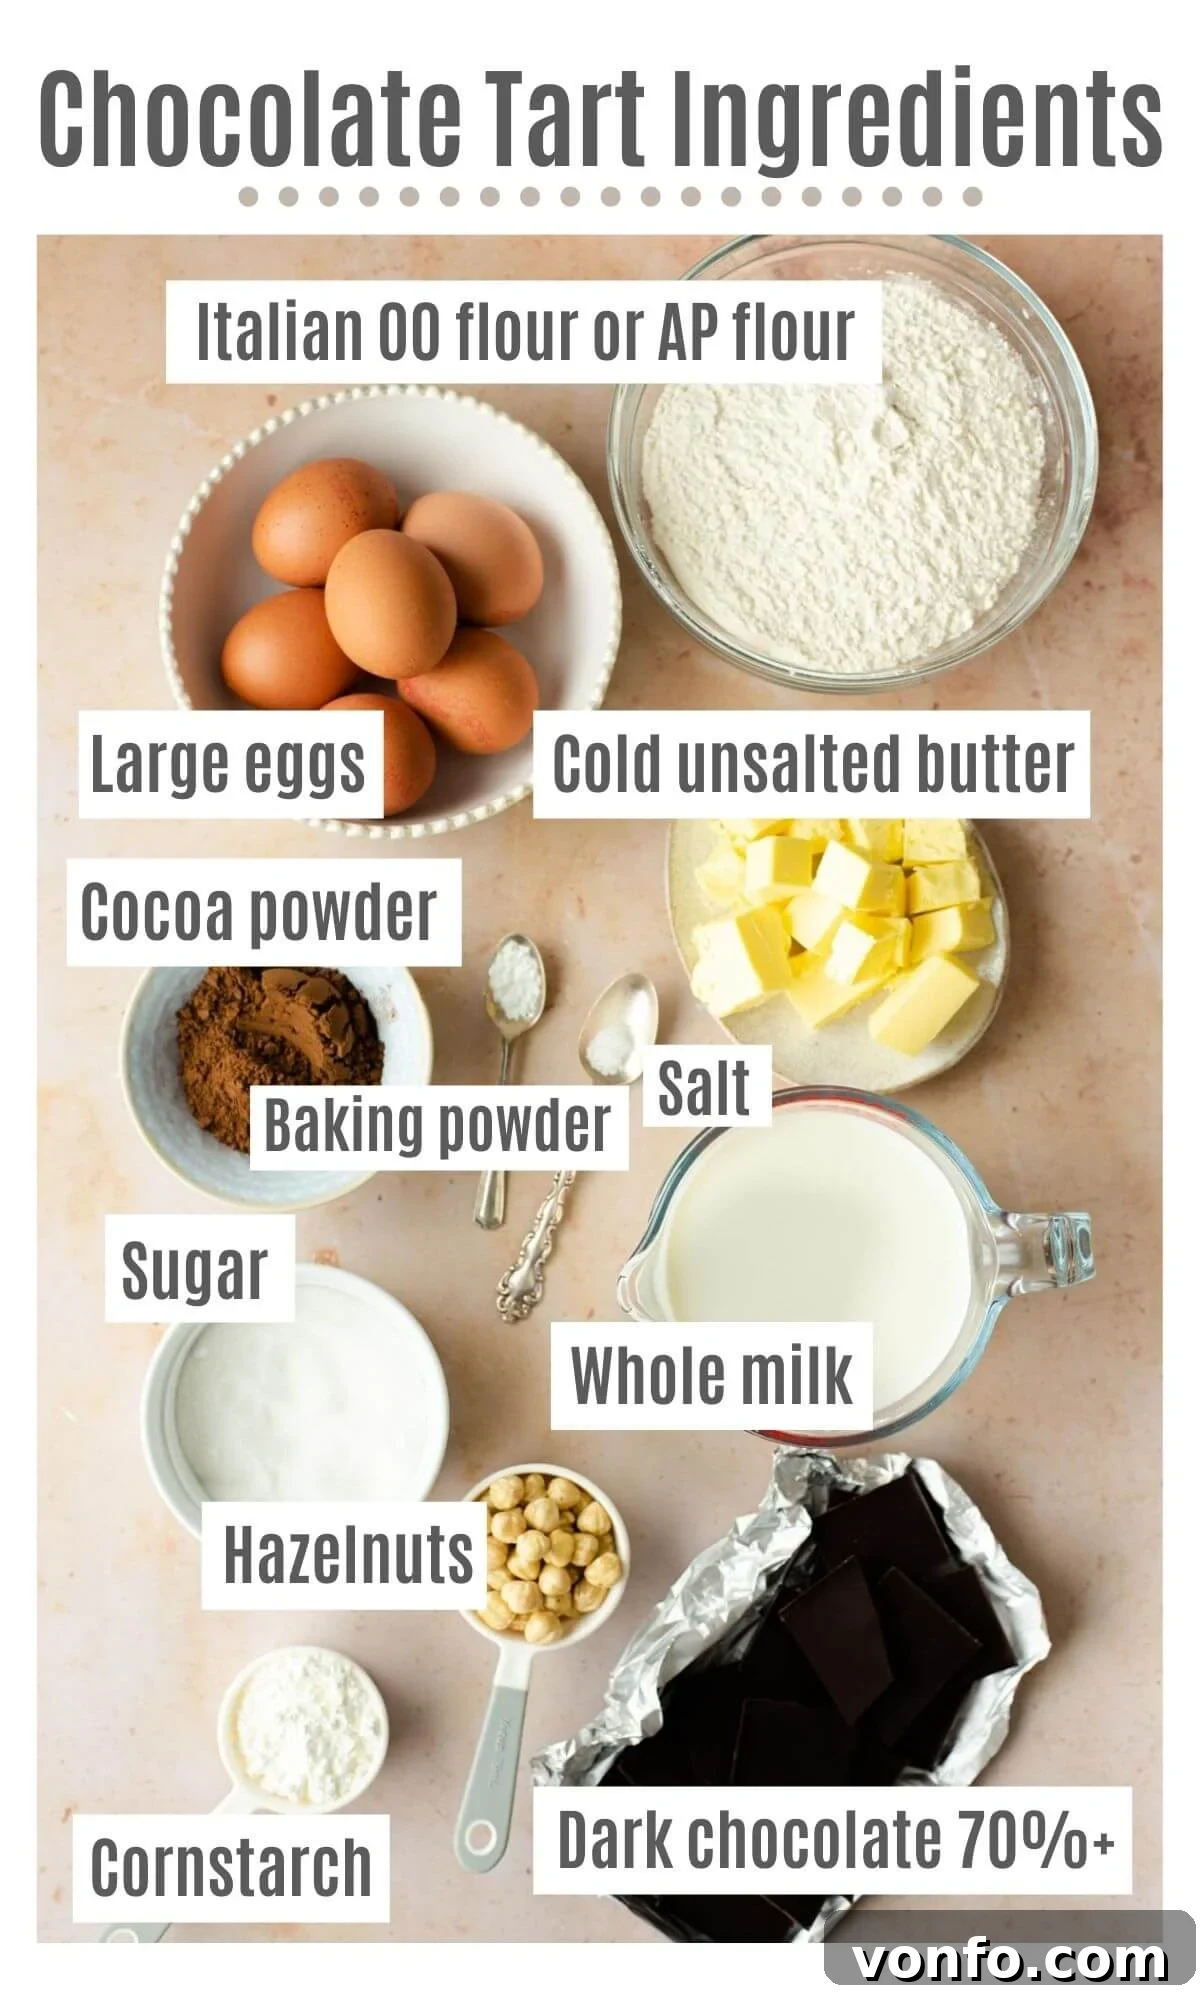
- Flour: For an authentic Italian chocolate pasta frolla, “00” (double zero) flour is ideal for its fine texture, resulting in a tender crust. However, readily available all-purpose flour works just as wonderfully and will yield excellent results.
- Cocoa Powder: The quality of your cocoa powder directly impacts the depth of chocolate flavor in your tart. Opt for a high-quality unsweetened cocoa powder for the richest, most intense chocolate notes in both the pastry and the cream.
- Egg: Always use large, fresh eggs for this recipe. Free-range eggs are often preferred for their richer yolks and superior flavor, contributing to both the pastry’s structure and the cream’s lusciousness.
- Butter: Cold, unsalted butter is key for the shortcrust pastry. Keeping it cold ensures a crumbly, tender texture as it prevents the butter from melting too quickly into the flour mixture before baking.
- Baking Powder: A small amount of baking powder helps the pastry achieve a slightly lighter, flakier texture, preventing it from being too dense.
- Sugar: You can use either white granulated sugar or light brown sugar. White sugar will give a crispier crust, while light brown sugar can add a subtle caramel note and a slightly softer chew. For the pastry cream, caster sugar (fine granulated sugar) dissolves beautifully, ensuring a smooth texture.
- Salt: Even in a sweet recipe, a pinch of salt is essential. It beautifully balances and enhances all the chocolate and hazelnut flavors, preventing the tart from tasting overly sweet.
- Dark Chocolate (70%+ cocoa solids): This is vital for the intense flavor of the pastry cream. Choose a high-quality dark chocolate bar, not chocolate chips, as chips often contain stabilizers that prevent smooth melting. A higher cocoa percentage ensures a deep, rich chocolate flavor that isn’t cloyingly sweet once combined with the other ingredients.
- Full-Fat Milk: Full-fat milk is crucial for achieving the rich, creamy consistency of the pastry cream. Skim or low-fat milk will result in a thinner, less luxurious filling.
- Cornstarch: This acts as the thickening agent for the chocolate pastry cream, giving it its desirable firm, yet smooth texture that sets perfectly without baking.
- Hazelnuts: Roughly chopped hazelnuts not only add a delightful crunch but also complement the chocolate beautifully. Lightly toasting them beforehand can enhance their flavor significantly.
Crafting Your Chocolate Hazelnut Tart: Step-by-Step Guide
Follow these detailed instructions to create your show-stopping hazelnut chocolate tart. We’ve broken down each stage to ensure success from start to finish.
Part 1: Preparing the Chocolate Shortcrust Pastry
The foundation of this exquisite tart is its rich chocolate shortcrust pastry. Taking your time with this step will ensure a perfectly tender and flavorful crust.
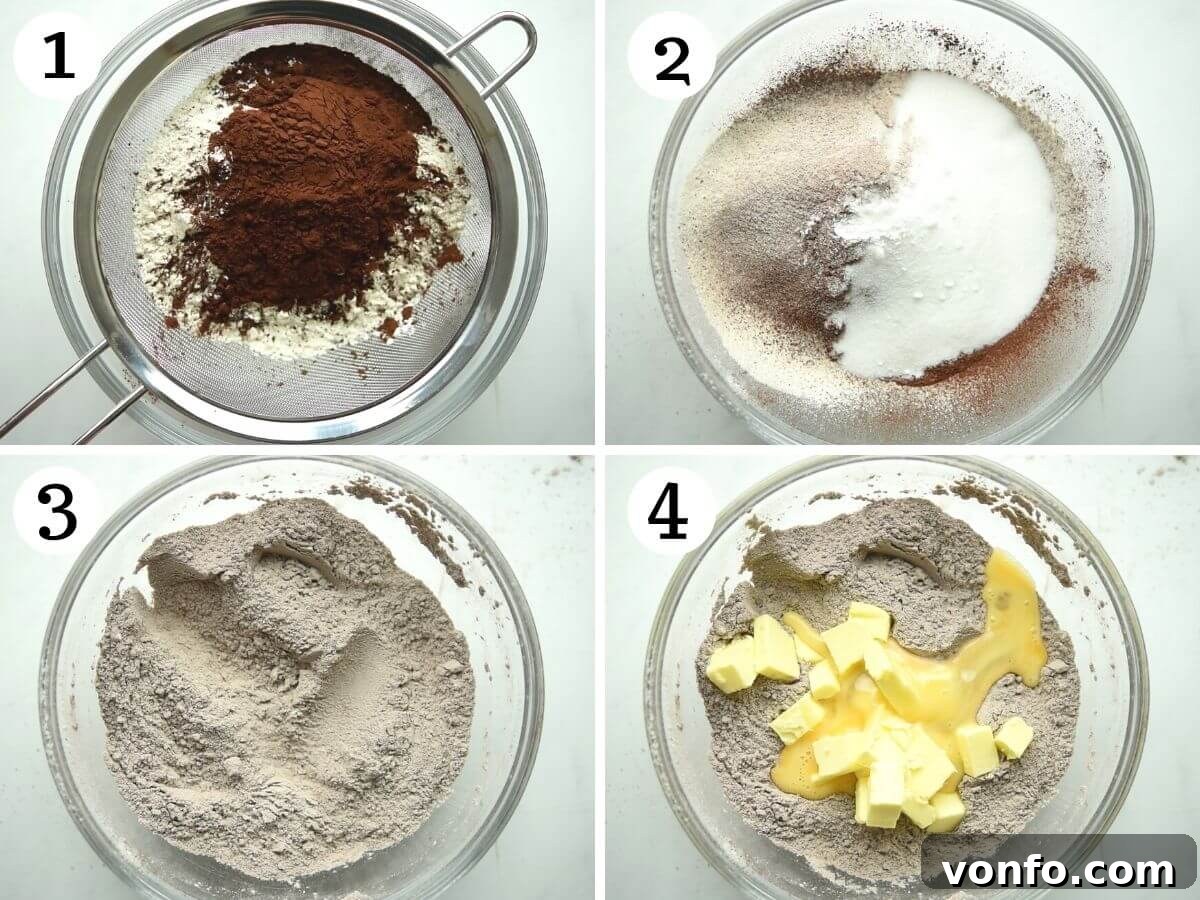
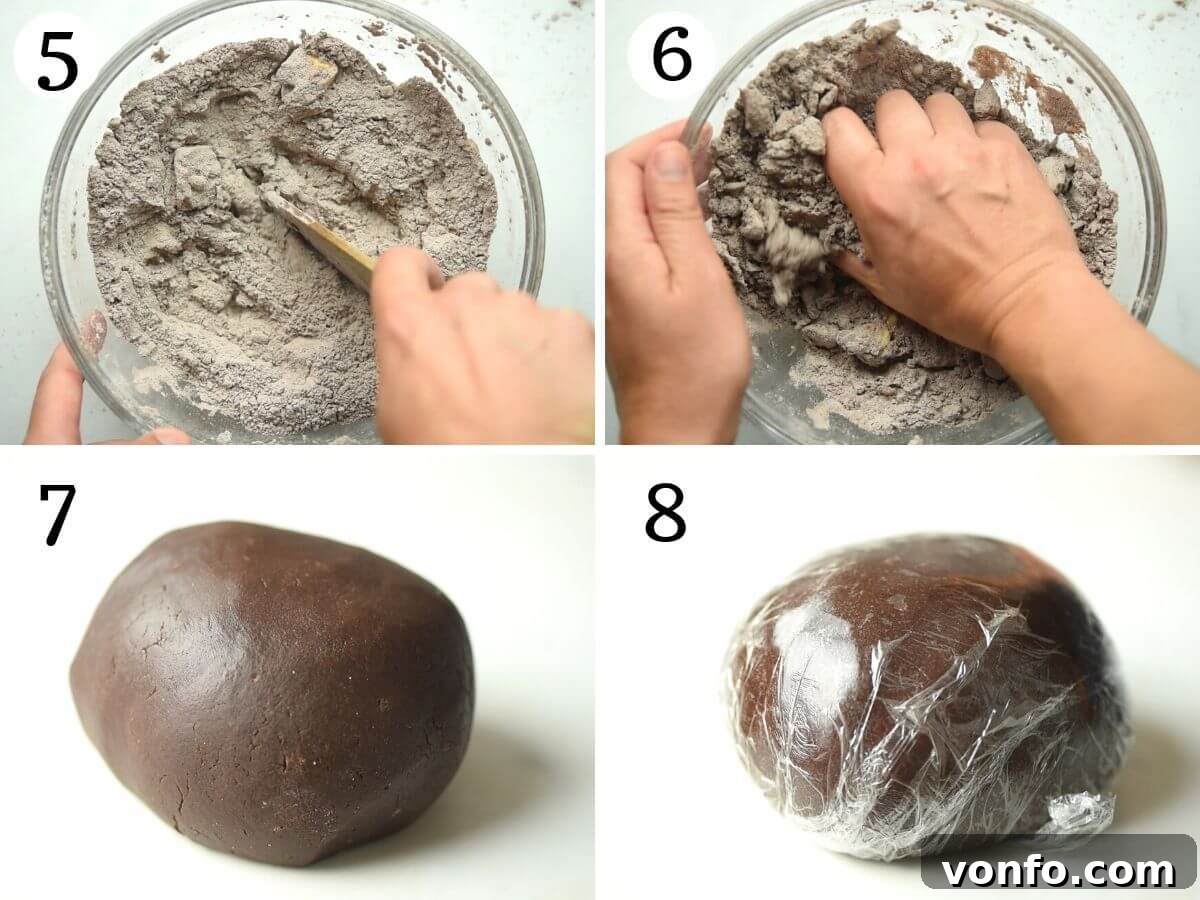
- In a large mixing bowl, begin by sifting together the flour and high-quality cocoa powder. This step ensures there are no lumps and helps aerate the dry ingredients. Once sifted, add the remaining dry ingredients: sugar, baking powder, and a pinch of salt. Stir everything together thoroughly until well combined.
- Add the cold, cubed butter and the large egg to the dry mixture. Using a pastry scraper or a sturdy spatula, cut the butter into the flour until the mixture resembles rough crumbs. Alternatively, you can use your fingertips to rub the butter into the flour, but work quickly to prevent the butter from warming too much.
- Once a crumbly texture is achieved, use your hands to gently bring the mixture together to form a cohesive dough. Initially, the dough may seem dry, but continue to knead it lightly until all the flour is fully absorbed and a smooth, uniform ball forms. Over-kneading can make the pastry tough, so stop as soon as it comes together.
- Wrap the ball of dough tightly in plastic wrap and place it in the refrigerator to chill for at least 1 hour. This chilling period is crucial as it allows the gluten to relax and the butter to firm up, making the dough easier to roll and preventing it from shrinking during baking.
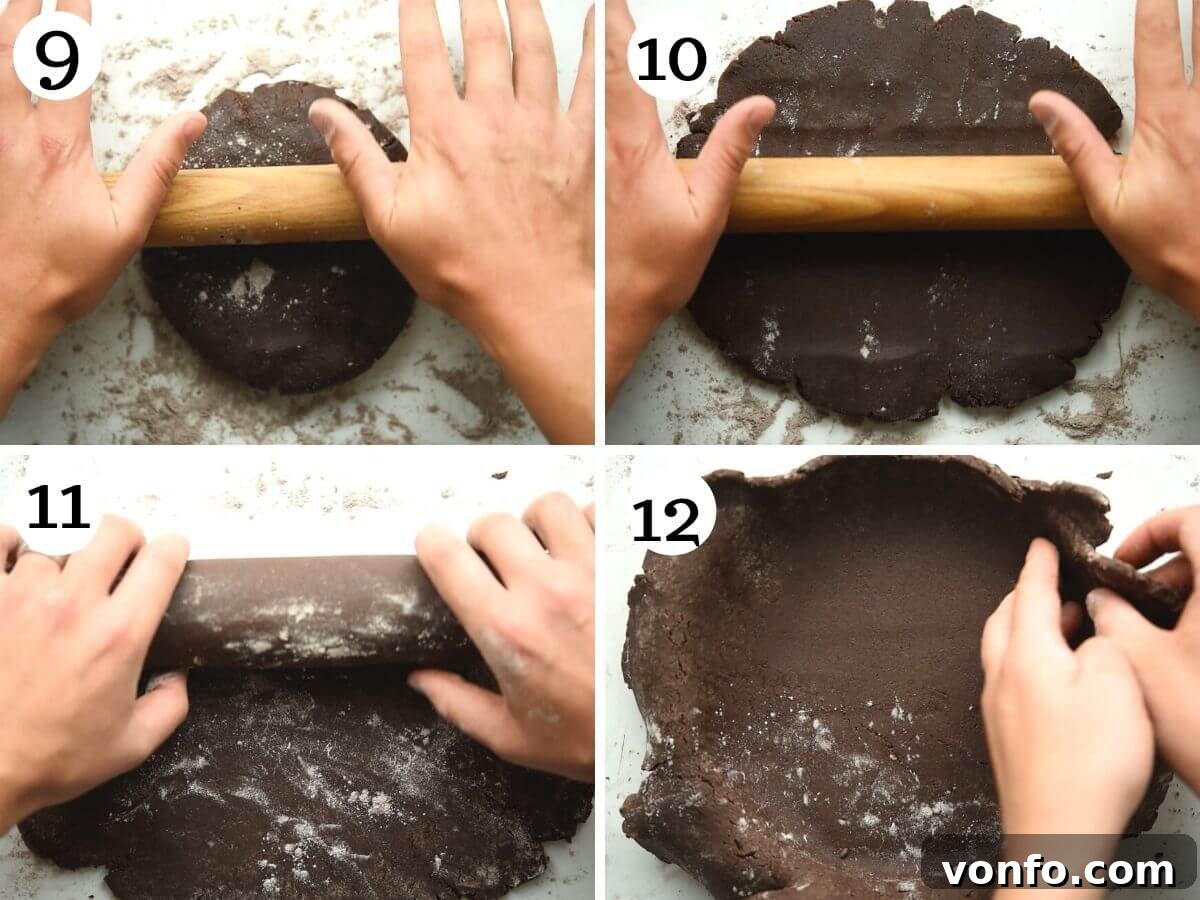
- After the dough has chilled, remove it from the fridge. Lightly dust your work surface with flour. To avoid visible white streaks on your dark chocolate pastry, you can mix a little cocoa powder with your flour for dusting (but never use cocoa powder on its own, as it can dry out the dough). Roll out the dough using a rolling pin until it is approximately ¼ inch (½ cm) thick.
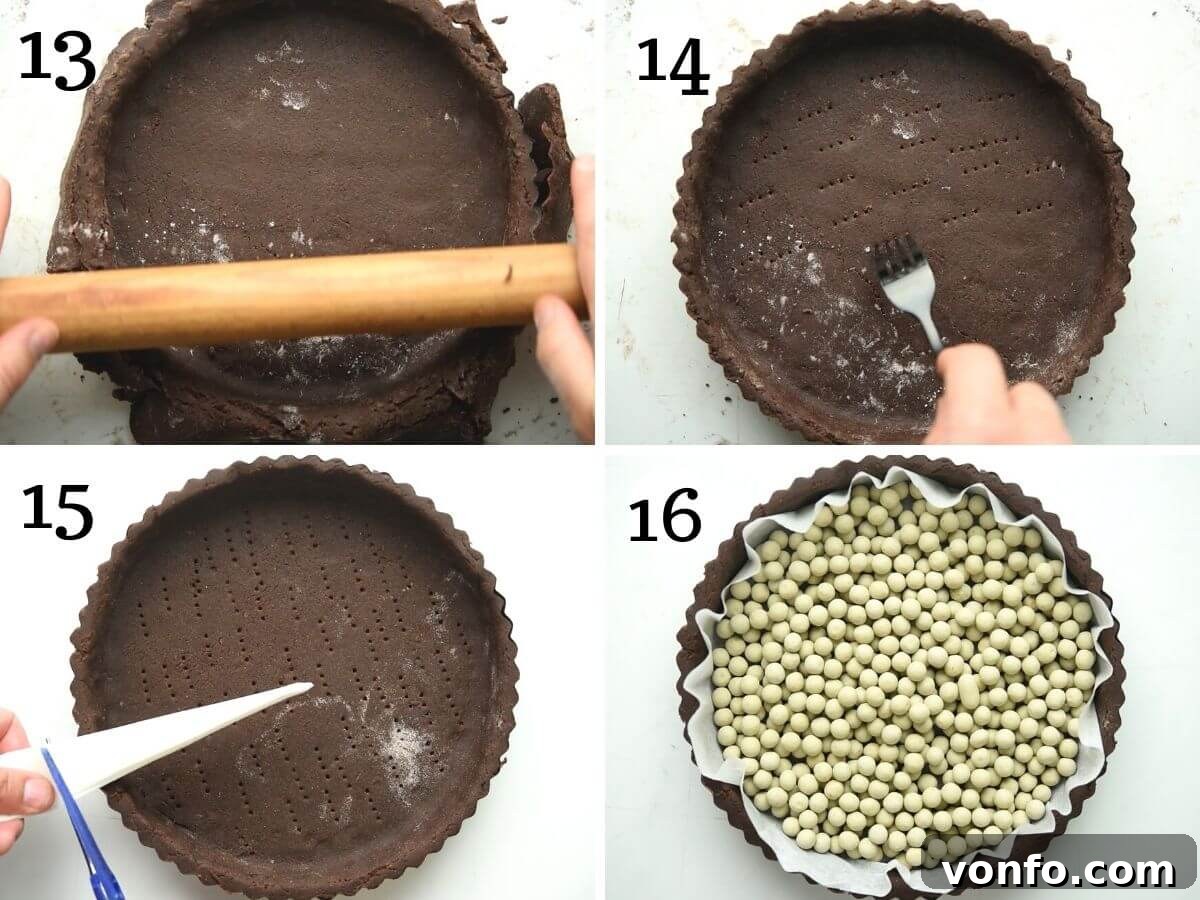
- Carefully lay the rolled-out pastry over a 9-inch (23cm) loose-bottom tart or pie tin. Gently tuck in the sides, ensuring the pastry fits evenly into the contours of the tin. To trim the edges, simply roll your rolling pin over the top of the tart case, or use a sharp knife to cut away any excess dough.
- Prick the base of the pastry all over with a fork. This prevents air bubbles from forming and ensures an even bake. Return the tart case to the fridge for another 30 minutes to chill. This second chill is important for maintaining the pastry’s shape during blind baking.
Part 2: The Art of Blind Baking Your Chocolate Crust
Blind baking is an essential step for a crisp, evenly cooked tart crust, preventing it from becoming soggy once the filling is added.
- Preheat your oven to 350°F (180°C). Once the pastry has chilled for the second time, line the tart case with a piece of scrunched-up baking parchment, ensuring it covers the base and extends up the sides. Fill the parchment-lined tart with baking beads or uncooked rice. These weights prevent the pastry from puffing up and shrinking during baking.
- Bake in the preheated oven for 30 minutes. The weights help maintain the shape of the crust while it par-bakes.
- Carefully remove the tart from the oven. Remove the baking parchment and the baking beads/rice. Allow the pastry crust to cool completely on a wire rack before proceeding. A cooled crust is crucial for ensuring the no-bake chocolate pastry cream sets correctly.
Part 3: Creating the Velvety Chocolate Pastry Cream
This thick, rich chocolate pastry cream is the star of the tart. Its consistency is perfect for a no-bake setting.
- Gently warm the full-fat milk in a saucepan over medium-low heat. Be careful not to let it boil; it should be just warm enough to steam slightly. Once warmed, remove it from the heat and set aside. Separately, chop your dark chocolate into very small pieces and also set aside. Smaller pieces melt more evenly into the warm cream.
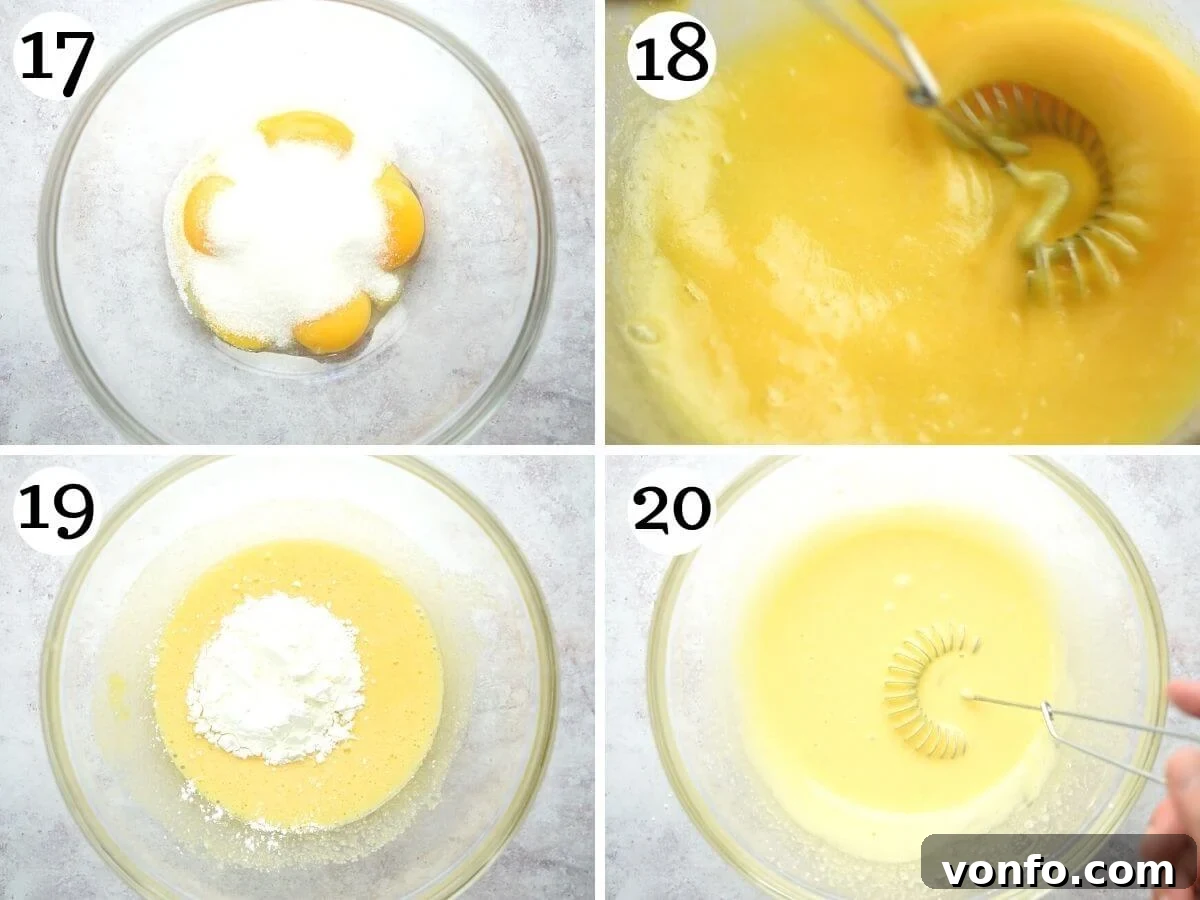
- In a large bowl, whisk together the egg yolks and sugar until the mixture is pale yellow and creamy. Then, add the cornstarch to the egg yolk mixture and whisk thoroughly until a smooth paste forms, free of any lumps. This step is vital to prevent a lumpy pastry cream.
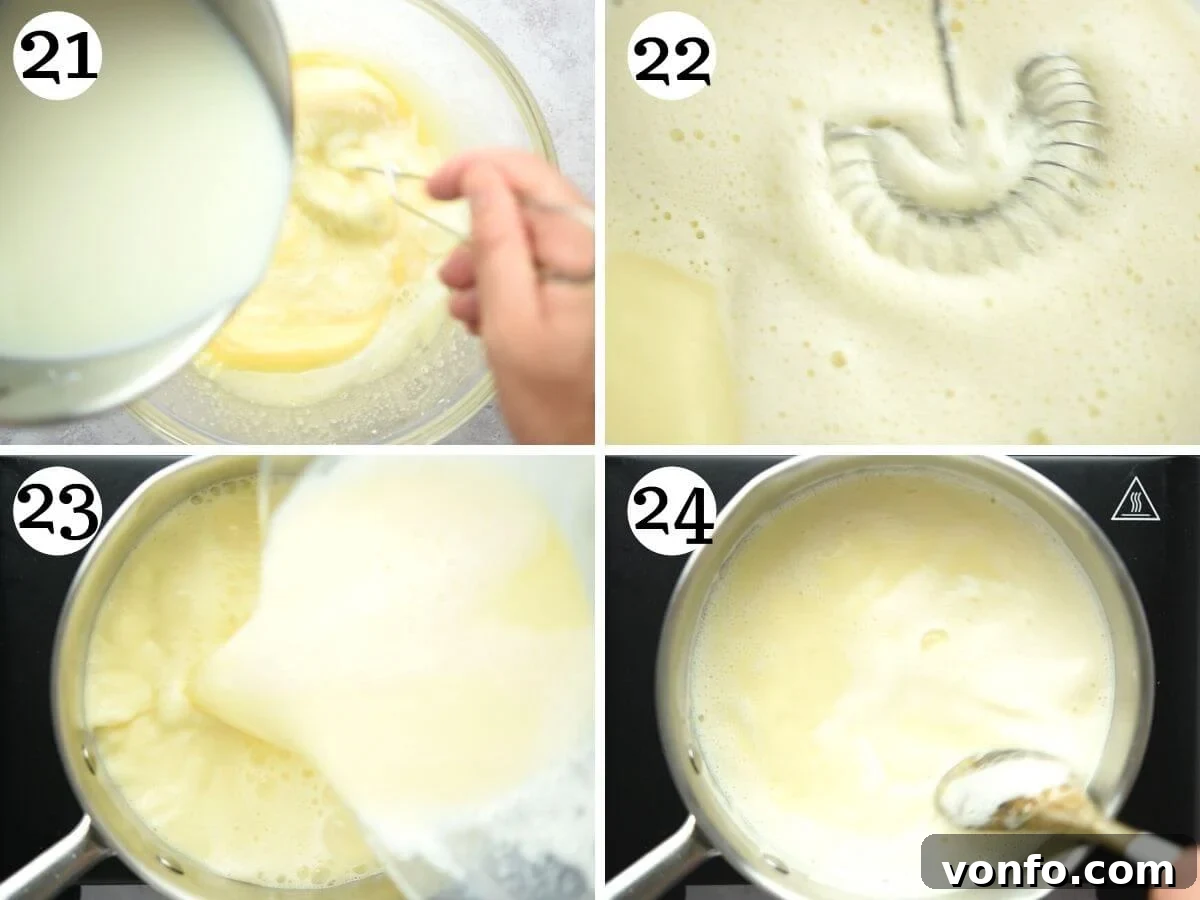
- Slowly temper the egg mixture by gradually pouring the warm milk into the egg and sugar mixture while continuously whisking. This prevents the eggs from scrambling. Continue whisking until the milk is fully incorporated and the mixture is smooth.
- Pour the tempered egg and milk mixture back into the saucepan. Heat it over a low heat, stirring constantly with a wooden spoon or spatula. The constant stirring is crucial to prevent the cream from sticking to the bottom and burning, or forming lumps.
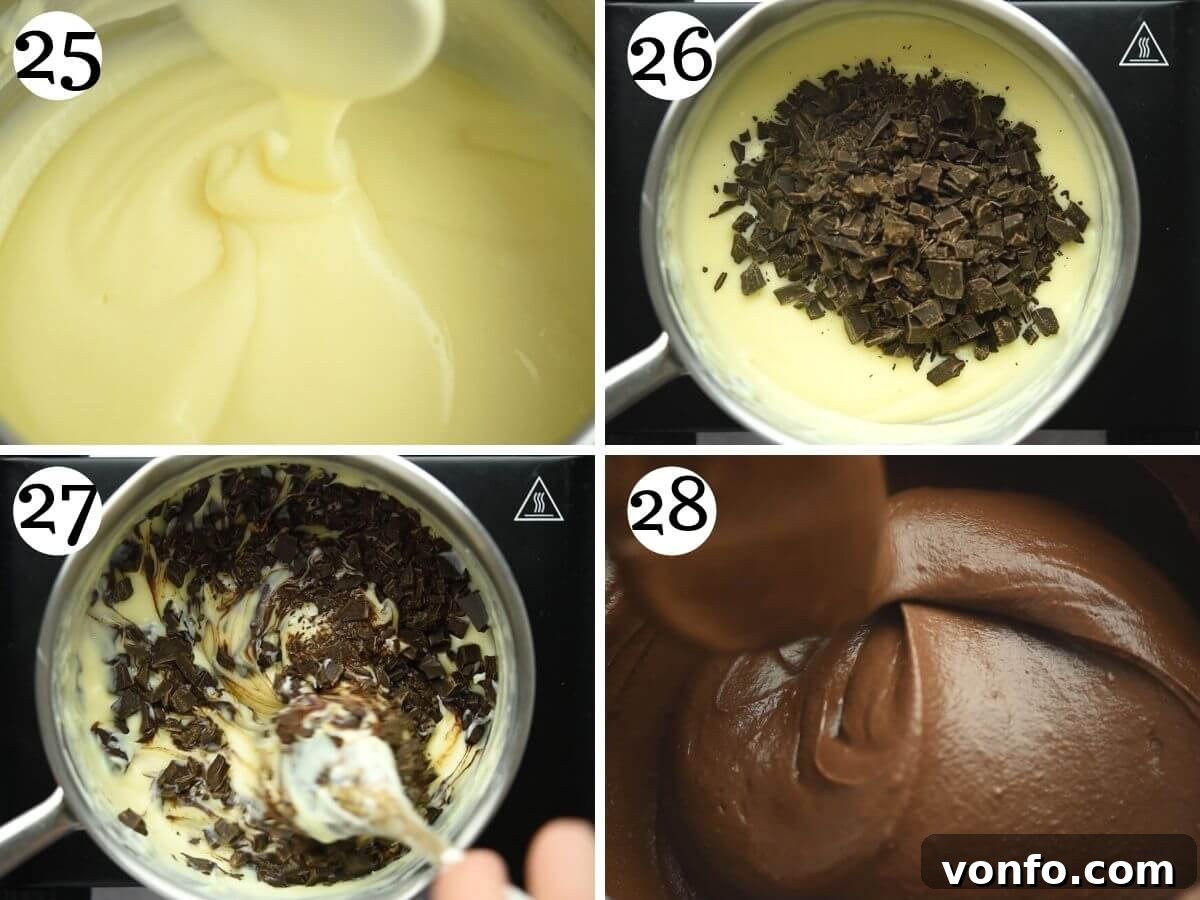
- Continue to stir the mixture constantly until it becomes very thick, reaching a custard-like consistency. This usually takes about 10 minutes. It should coat the back of your spoon thickly.
- Important tip: If at any point you notice the pastry cream getting lumpy, immediately remove it from the heat. Use a whisk to vigorously stir out any lumps until smooth, then return it to a lower heat and continue cooking.
- Once the pastry cream has thickened to the desired consistency, remove it from the heat. Add the finely chopped dark chocolate and stir continuously until the chocolate is completely melted and smoothly incorporated into the cream. The residual heat from the cream will melt the chocolate perfectly.
Part 4: Assembling and Chilling Your Hazelnut Chocolate Tart
The final steps bring all the components together for a truly magnificent dessert.
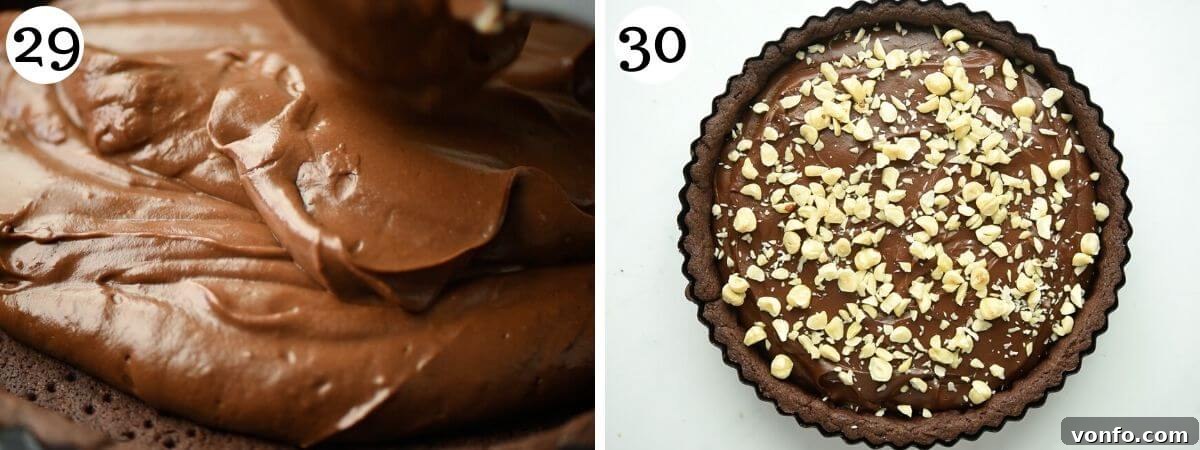
- While the chocolate pastry cream is still warm (to ensure it spreads smoothly), pour it into your cooled, blind-baked chocolate tart crust. Use a spatula or the back of a spoon to smooth the top evenly.
- Generously sprinkle the top of the tart with roughly chopped hazelnuts. Allow the tart to cool completely at room temperature. Once cooled, transfer it to the refrigerator and let it set for a minimum of 6 hours, or ideally overnight. This chilling time is essential for the pastry cream to firm up completely, allowing for clean, beautiful slices.
Expert Tips & Frequently Asked Questions for Chocolate Tart Success
Achieve perfection with your chocolate tart every time by following these helpful tips and answers to common questions:
- Dealing with Pastry Cracks: Shortcrust pastry is naturally crumbly, and it’s quite common for it to crack or split slightly when you’re transferring it to the tart pan. Don’t worry! Simply press the pastry back together with your fingers to seal any breaks. The beauty of homemade pastry is its forgiving nature.
- Blind Baking Essentials: When blind baking, using a weight is crucial to prevent the pastry base from puffing up and losing its shape. If you don’t have ceramic baking beads, uncooked rice or dried beans make an excellent alternative. Ensure the parchment paper is large enough to contain the weights.
- Optimal Chilling Time: While the chocolate filling thickens relatively quickly, allowing it ample time to chill is key for the best texture and clean slices. We highly recommend chilling the tart in the fridge for at least 6 hours, or even better, overnight. This ensures the pastry cream is perfectly firm and stable.
- Best Chocolate for the Filling: Always use high-quality dark chocolate with at least 70% cocoa solids for the filling. This provides a deep, rich chocolate flavor that will be perfectly balanced when sweetened by the pastry cream ingredients. Avoid chocolate chips as they contain stabilizers that can prevent smooth melting.
- Storage Guidelines: Your decadent chocolate tart will remain fresh and delicious when stored properly in the refrigerator for 4-5 days. Always ensure it’s covered to prevent it from absorbing other food odors or drying out.
- Preparing in Advance: This tart is an ideal dessert to prepare ahead of time! Since it requires a minimum of 6 hours of chilling, you can easily make it the day before your event, allowing you to relax and enjoy your guests.
- Freezing the Tart: Unfortunately, we do not recommend freezing this chocolate tart. Custard-based fillings, like our chocolate pastry cream, can often split or become grainy when thawed, compromising the smooth, creamy texture.
Delicious Variations to Customize Your Chocolate Tart
While this hazelnut chocolate tart is exceptional on its own, there are many exciting ways to customize its flavors to your liking. Here are a few ideas to inspire your creativity:
- Chocolate-Orange Delight: For a vibrant citrus twist, add a teaspoon of orange extract or the zest of one orange to your chocolate pastry cream. The bright notes of orange beautifully complement the rich chocolate.
- Mint Chocolate Dream: Infuse your pastry cream with a hint of coolness by adding ½ to 1 teaspoon of mint extract. This creates a refreshing mint-chocolate tart that’s perfect for a palate cleanser.
- Salty-Sweet Indulgence: If you enjoy the classic salty-sweet combination, swap the hazelnuts for salted peanuts as your topping. The crunch and savory notes of the peanuts will elevate the chocolate flavor. Alternatively, a sprinkle of flaky sea salt over the top before chilling can achieve a similar effect.
- Berry Bliss: Enhance the tart with fresh fruit. Once the chocolate tart has set, adorn it with a vibrant array of fresh strawberries, raspberries, or a mix of seasonal berries. A light dusting of powdered (icing) sugar just before serving adds an elegant finish.
- Classic Pastry Base: Not a fan of chocolate pastry crusts? No problem! You can easily substitute our classic sweet shortcrust pastry (pasta frolla) recipe for the base, offering a contrasting flavor to the rich chocolate filling.
More Irresistible Chocolate Desserts to Explore
If you’re a true chocolate lover, your culinary journey doesn’t have to end with this tart. Here are more delightful chocolate dessert recipes from our kitchen that you might enjoy:
- Triple Chocolate Biscotti (Cantucci al Cioccolato)
- Italian Nutella Cookies (Nutellotti)
- Chocolate Salami (Salame di Cioccolato)
- Homemade Nutella – Hazelnut Chocolate Spread
- Chocolate Semifreddo Recipe
- Chocolate Panna Cotta
We hope you thoroughly enjoy making and sharing this Hazelnut Chocolate Tart. If you’ve tried this recipe or any other from our blog, please don’t hesitate to rate it and share your feedback in the comments below – we absolutely love hearing from you! For more delicious food inspiration and recipes, make sure to FOLLOW US on FACEBOOK, INSTAGRAM, and PINTEREST, or subscribe to our NEWSLETTER for weekly updates delivered straight to your inbox.
Photos & Detailed Steps Above
This recipe comes with step-by-step photos, helpful tips, and tricks to ensure perfect results on your first attempt!
Chocolate Tart with Hazelnuts
By Emily
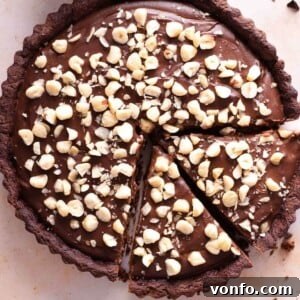
A rich and indulgent Chocolate Tart made with homemade chocolate shortcrust pastry, smooth and decadent chocolate pastry cream and topped with chopped hazelnuts. The ultimate dessert for chocolate lovers!
Equipment
- 9 inch (23cm) loose bottom tart dish
Ingredients
For the Chocolate Pastry
- 2 cups Italian 00 flour or all-purpose flour (250g)
- 3 tbsp cocoa powder (30g)
- ½ cup caster sugar, golden or white (80g)
- 8.5 tbsp cold butter, cubed (120g)
- 1 large egg
- ¼ tsp baking powder
- 1 pinch of salt
For the Filling
- 5 large egg yolks
- ⅓ cup sugar (70g)
- ¼ cup cornstarch (30g)
- 2.5 cups full-fat milk (590ml)
- 5.5 oz dark chocolate 70%+ cocoa solids (150g)
- ½ cup hazelnuts, roughly chopped
Instructions
To make the Pastry
- Sift the flour and cocoa powder into a large bowl then add the rest of the dry ingredients, stir to combine.
- Add the egg and butter and cut it into the flour mixture with a spatula or pastry scraper to form rough crumbs.
- Start to bring the mixture together with your hands to form a dough. Knead the pastry until all the flour is fully absorbed and it becomes a smooth ball. Wrap in plastic wrap and place in the fridge for 1 hour.
- After the dough is chilled, remove it from the fridge and roll out using a rolling pin until ¼ inch (½ cm) thick. You’ll need to lightly dust your work surface with flour. We used flour mixed with a little cocoa powder (don’t use cocoa powder on its own) to avoid bright white marks but it’s not a necessary step.
- Lay the pastry over a tart or pie tin tucking in the sides until it fits evenly. Roll the rolling pin over the tart case to cut the edges (you can also trim the edge with a knife).
- Prick the base with a fork then place back in the fridge for 30 minutes.
To Blind-Bake
- To blind bake the pastry, add the pastry to a tart pan as directed above then place a piece of scrunched up baking parchment over the tart/pie case. Top with baking beads or uncooked rice and bake in a preheated oven at 350F/180C for 30 minutes.
- Remove from the oven, remove the baking parchment and baking beads and allow to cool.
To make the Filling
- Warm the milk in a saucepan then set aside (do not let it boil). Chop up the dark chocolate into small pieces and set aside.
- Mix the egg yolks and sugar together in a large bowl until combined then add the cornstarch and mix it thoroughly.
- Slowly pour the warm milk into the egg mixture whilst whisking constantly to avoid any lumps.
- Once incorporated, pour the egg and milk mixture back into the saucepan and heat it on a low heat.
- Stir the mixture constantly with a wooden spoon until the mixture is very thick in consistency (about 10 minutes).
- Important tip: If at any point you notice the pastry cream getting lumpy, take it off the heat and use a whisk to get rid of any lumps then return to a lower heat.
- Once thickened, turn the heat off and add the chopped chocolate. Stir it in until completely melted and incorporated.
Assemble
- Pour the chocolate pastry cream into the tart case/crust and smooth out with a spatula or wooden spoon.
- Top with roughly chopped hazelnuts then let it cool. Once cooled place in the fridge for at least 6 hours or overnight to set.
Video
For a visual guide, watch the recipe video here: Rich Chocolate Tart with Hazelnuts Video
(Note: Video content is typically embedded via a player, but for static HTML, a direct link is provided).
Notes
- Size of tart dish: This recipe is designed for a 9 inch (23cm) loose bottom tart dish.
- If your pastry cracks or splits: Shortcrust pastry is crumbly and often breaks when adding it to a tart/pie case. Don’t worry, this is normal; just press the pastry back together with your fingers.
- Blind baking: It’s important when blind baking that you use a weight to keep the pastry flat. If you don’t have baking beads, you can use uncooked rice or dried beans.
- Chilling time: The chocolate filling thickens up pretty quickly, but it cuts better the longer it’s chilled. We recommend chilling it in the fridge for at least 6 hours to overnight.
- Storage and freezing: The chocolate tart will keep well in the fridge for 4-5 days; make sure to keep it covered. We don’t recommend freezing as custard can split.
Helpful Info for All Recipes
- We always use extra virgin olive oil in all of our recipes unless stated otherwise.
- When using canned or jarred tomatoes of any kind, we always recommend Cirio or Mutti brands for the best results and flavor.
- All vegetables are medium sized unless stated otherwise.
- All recipes are tested and developed using a fan (convection) oven.
- Find out more about how nutrition is calculated.
- Check out our must-have Italian Pantry Staples.
- You can also find all our Essential Kitchen Tools for Italian Cooking.
Nutrition
Nutrition information is automatically calculated, so should only be used as an approximation.