
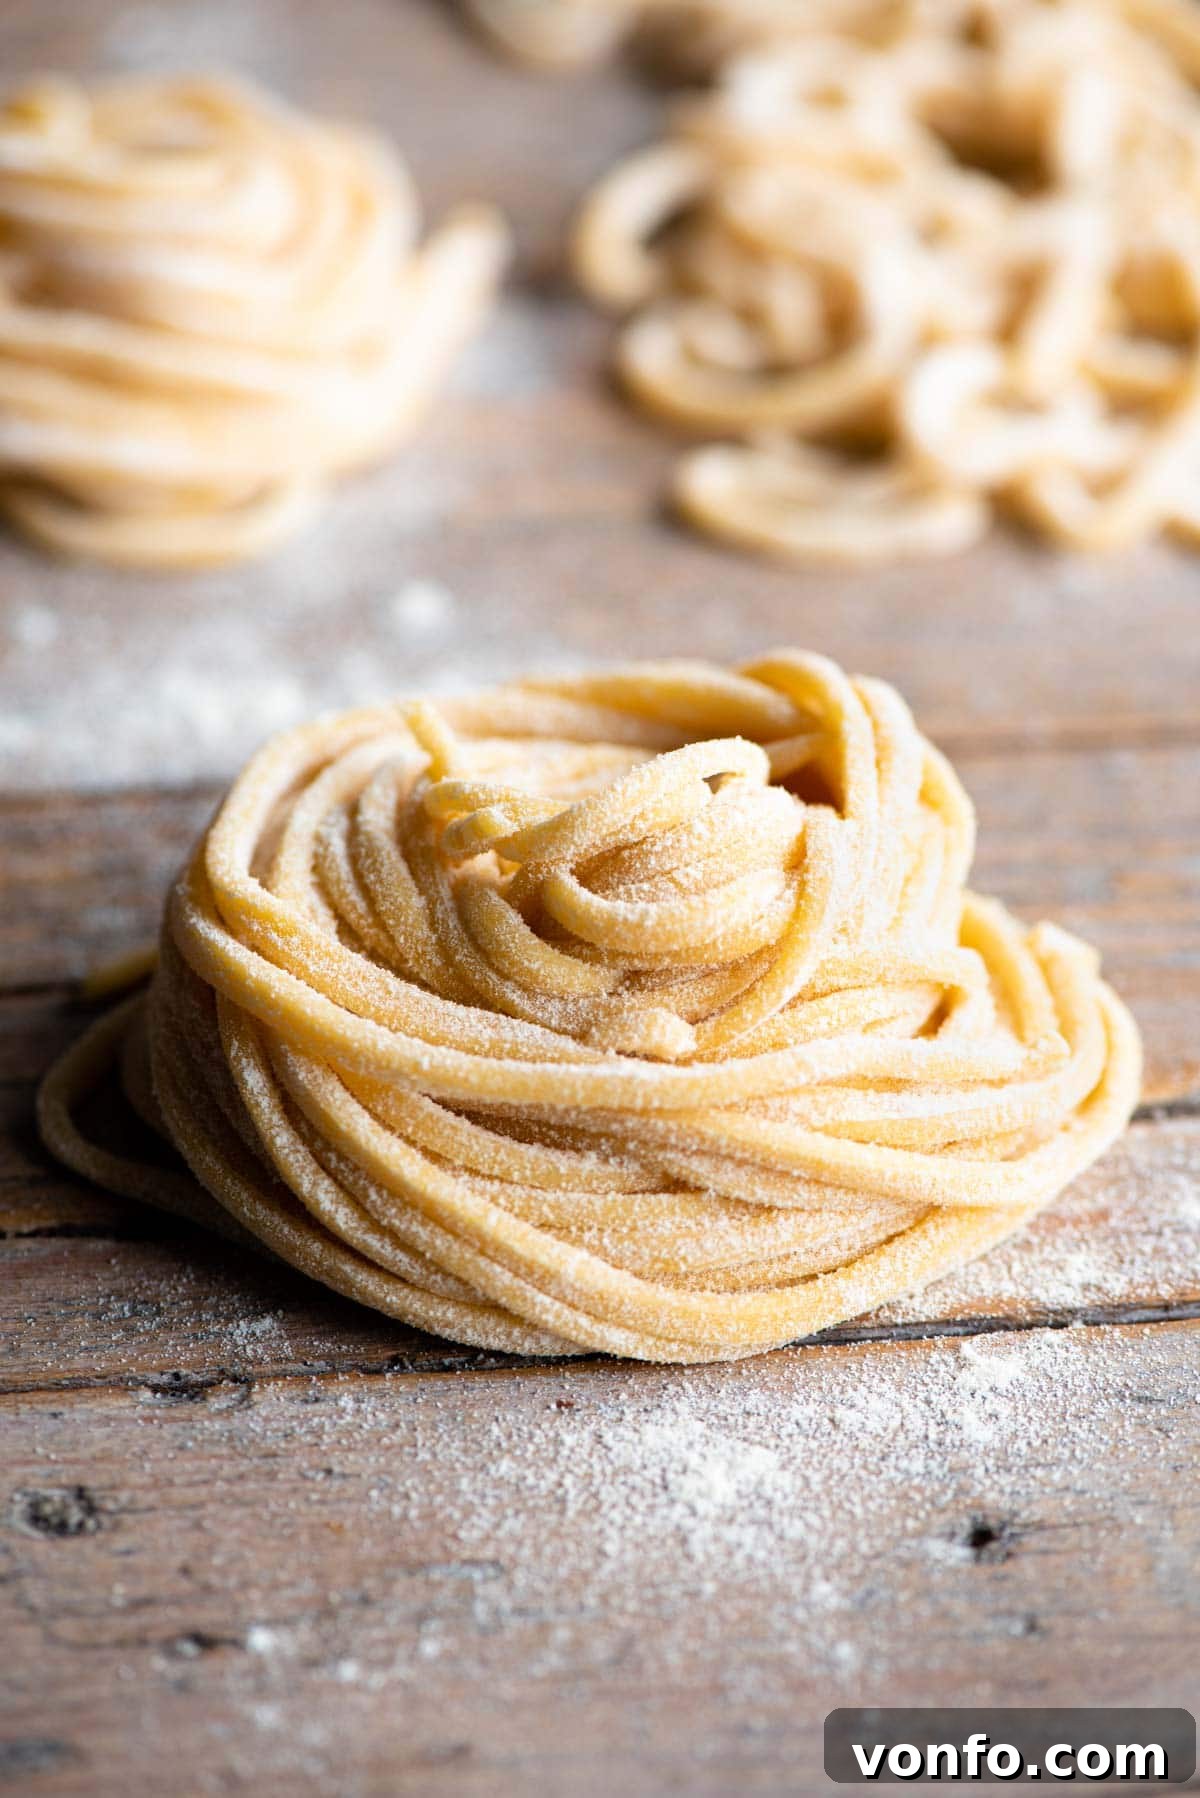
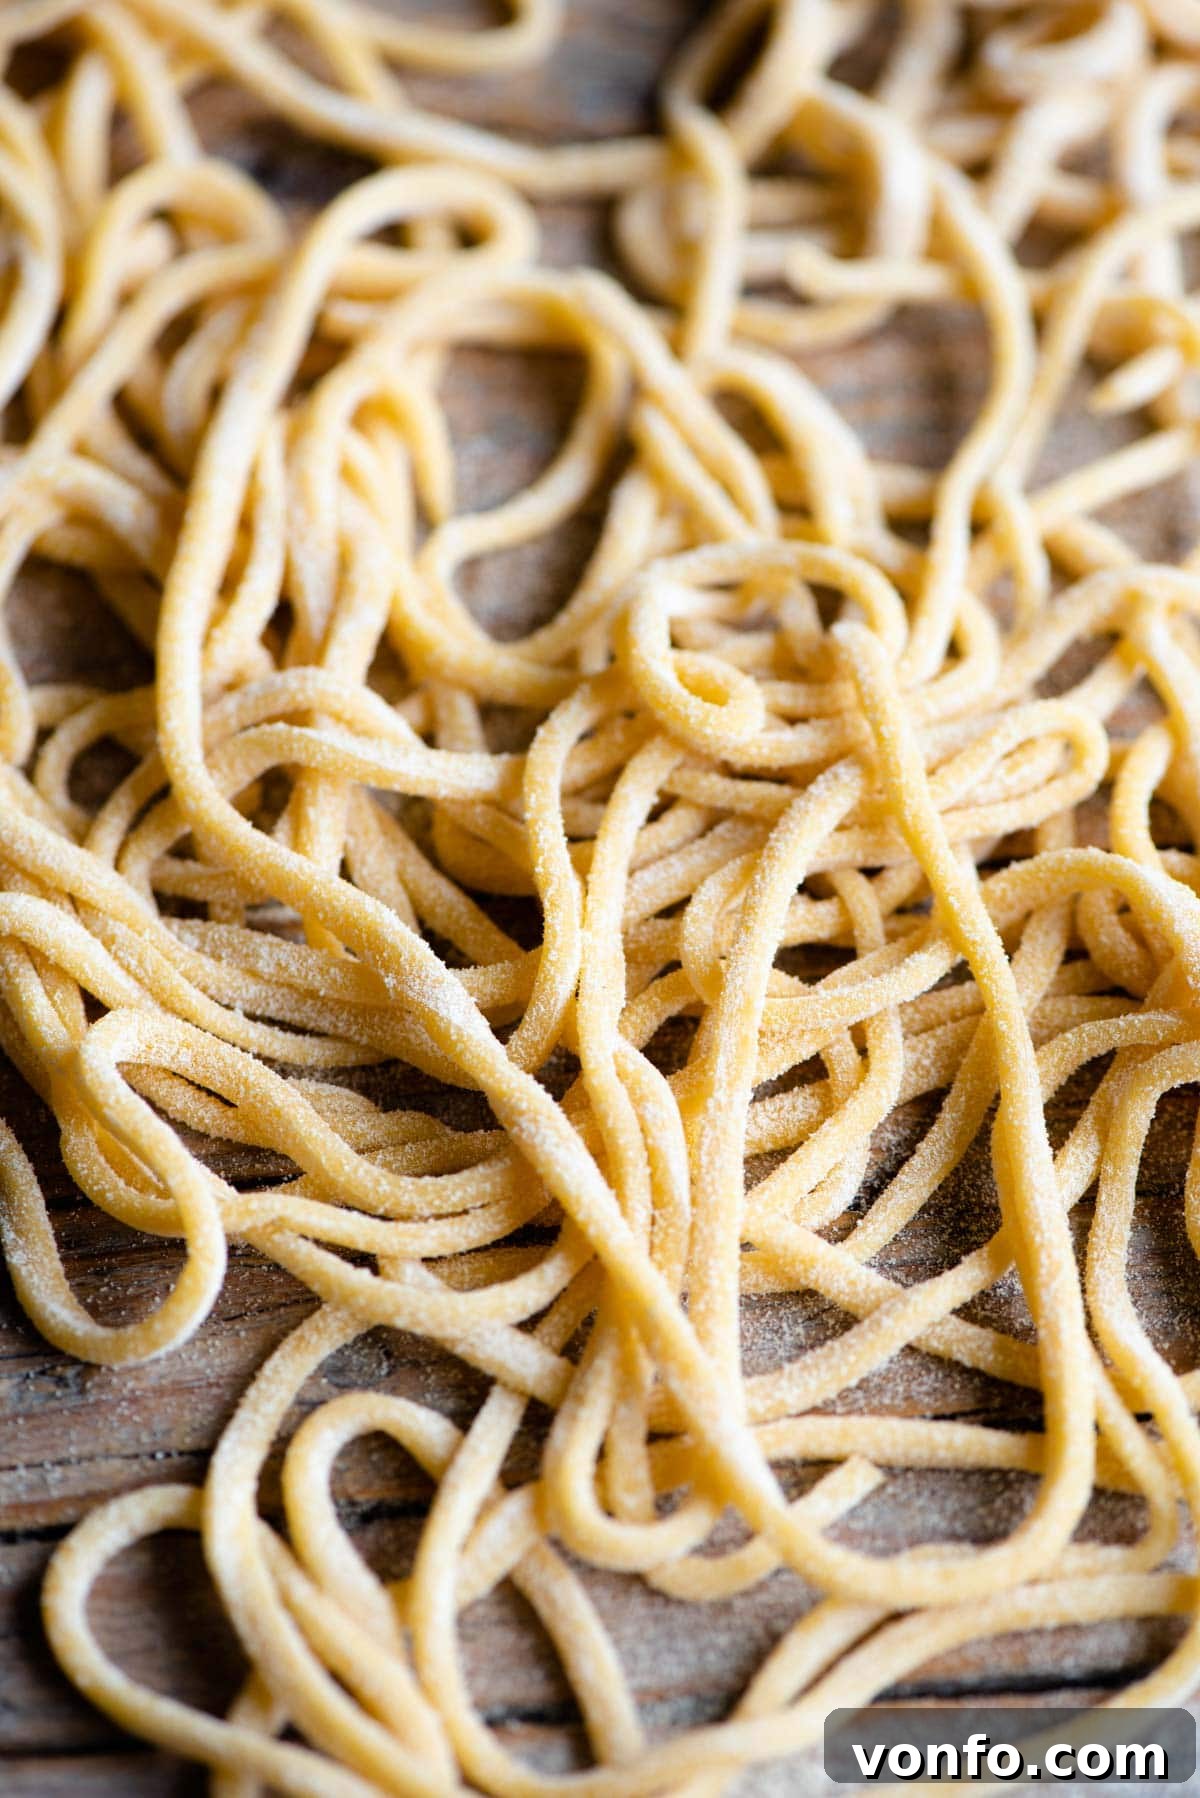
Embark on a culinary journey to the heart of Italy by learning how to make truly authentic Homemade Tonnarelli Pasta. This distinctive long pasta shape, affectionately known as Spaghetti alla Chitarra, is renowned for its unique square cross-section and delightful chewy texture. Unlike standard round spaghetti, tonnarelli’s sharp edges are perfect for clinging to rich sauces, making every bite an unforgettable experience. Making it at home is surprisingly simple, especially with the help of a charming traditional pasta tool called La Chitarra (the guitar). Follow our easy, step-by-step guide to craft your own exquisite tonnarelli pasta from scratch and explore a world of delicious sauces to pair it with!
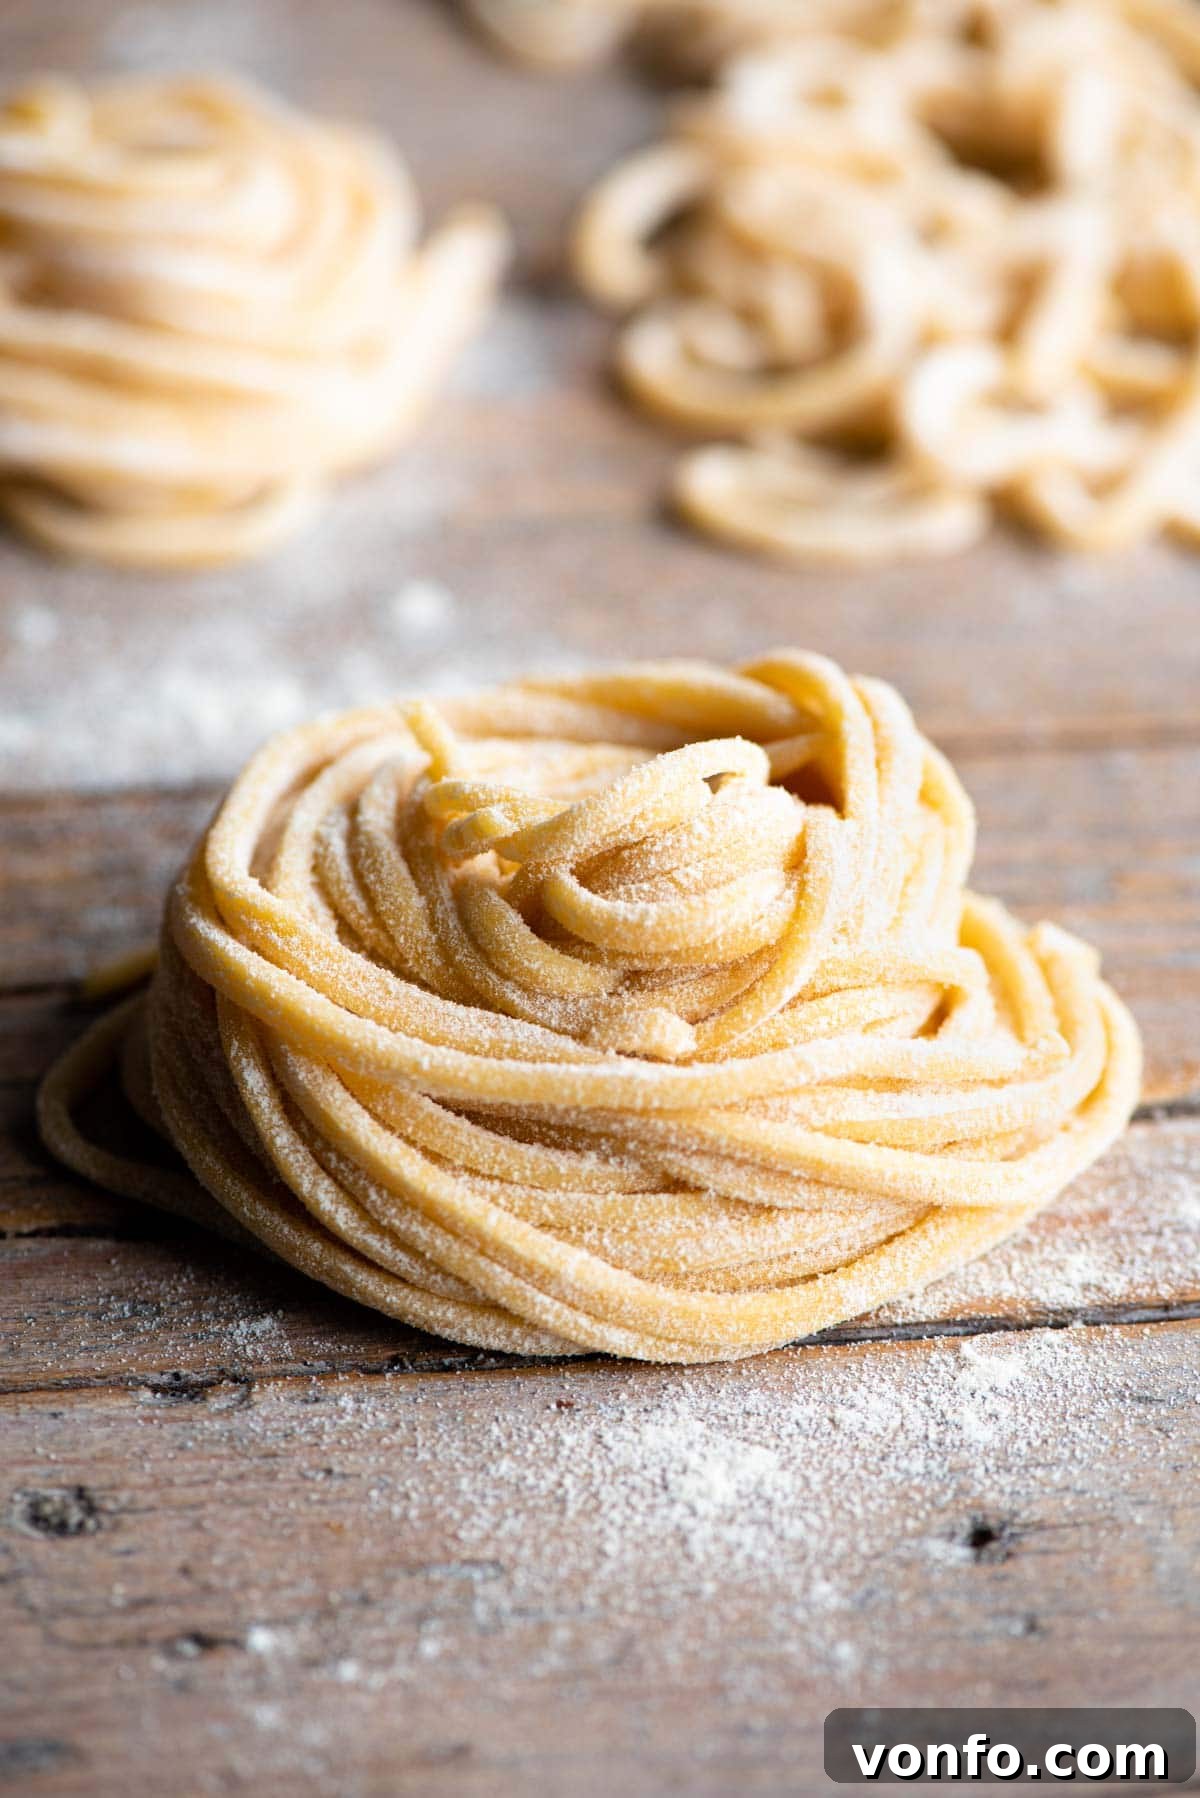
The Allure of Tonnarelli: More Than Just Spaghetti
At first glance, Tonnarelli pasta might resemble spaghetti, but a closer look reveals its distinct character. It’s notably thicker than regular spaghetti and, crucially, boasts square edges rather than round ones. This square profile is not merely aesthetic; it’s a game-changer for texture and sauce adhesion. The unique bite and robust feel of tonnarelli make it a favorite in various Italian regions, especially Lazio and Abruzzo.
This delicious pasta is famously served with Cacio e Pepe in Lazio, a classic Roman dish where the pecorino cheese and black pepper create a creamy, intensely flavorful sauce that perfectly coats each square strand. In Abruzzo, tonnarelli is traditionally prepared alla Teramana style, featuring tiny, flavorful meatballs nestled in a rich tomato sauce – a hearty pairing that showcases the pasta’s ability to hold up to robust flavors.
Mastering La Chitarra: The Pasta “Guitar”
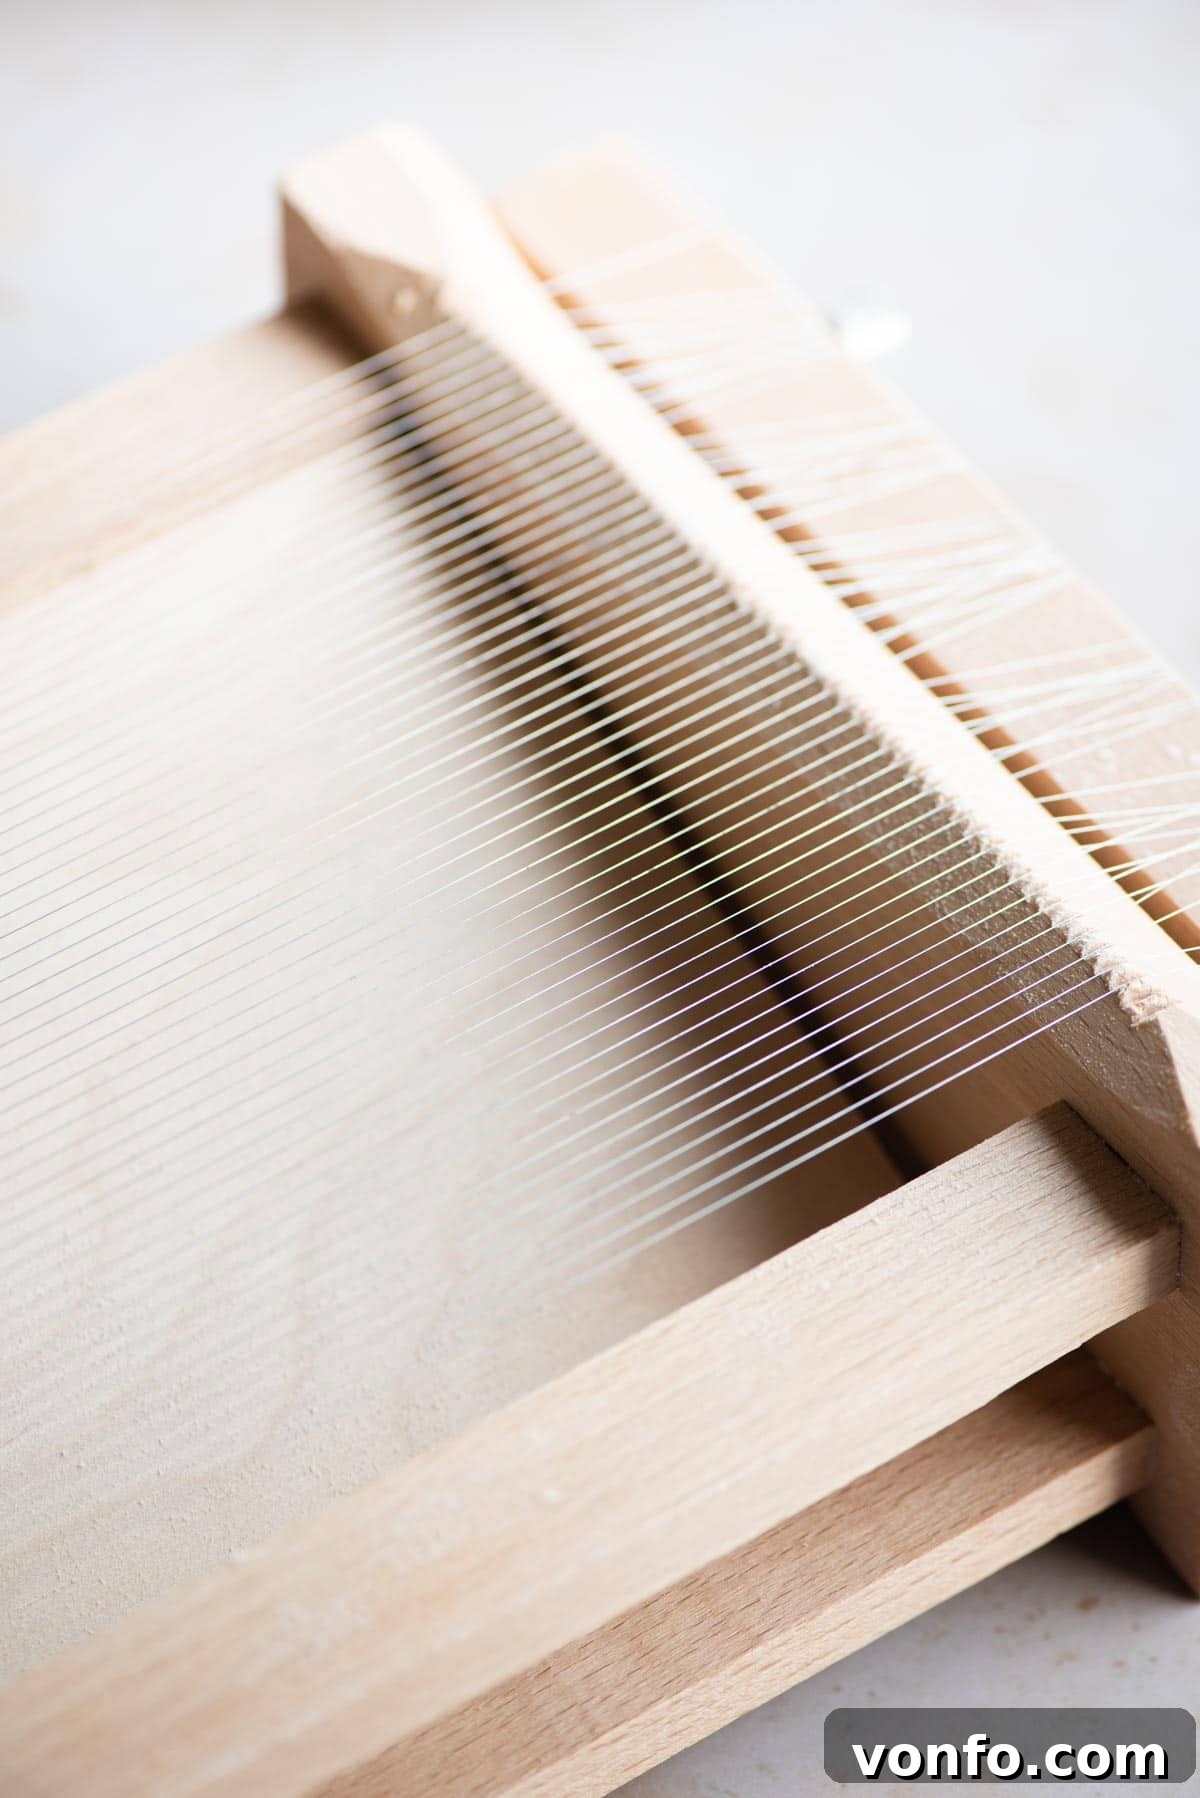
The secret to tonnarelli’s distinctive square shape lies in a special tool: La Chitarra. Literally translating to “the guitar,” this traditional pasta maker is a wooden frame strung with parallel wires, resembling a musical instrument. Rolling a sheet of pasta dough over these wires, pressing down with a rolling pin, effortlessly cuts the dough into perfect square strands. It’s a truly fun and surprisingly easy tool to use, transforming pasta making into an engaging, almost meditative experience. For any pasta enthusiast, a chitarra makes an incredibly thoughtful and practical gift, unlocking a new world of authentic Italian pasta creations.
Using La Chitarra is not just about the shape; it’s about preserving a piece of Italian culinary heritage. The slight roughness imparted by the wires helps the pasta absorb and grip sauces far better than smooth, machine-extruded varieties. This traditional method ensures an unparalleled authentic texture and flavor that elevates any meal.
Ready to get started? Below, you’ll find our complete recipe, including detailed notes on ingredients, step-by-step photos for visual guidance, expert tips, variations, and a full printable recipe. For quick access, simply scroll to the bottom or click the recipe link provided.
Essential Ingredients for Tonnarelli Pasta
Crafting exceptional tonnarelli begins with selecting the right ingredients. The magic happens when simple, high-quality components come together. See the photo below that illustrates everything you need for this recipe, along with some important tips on each ingredient!
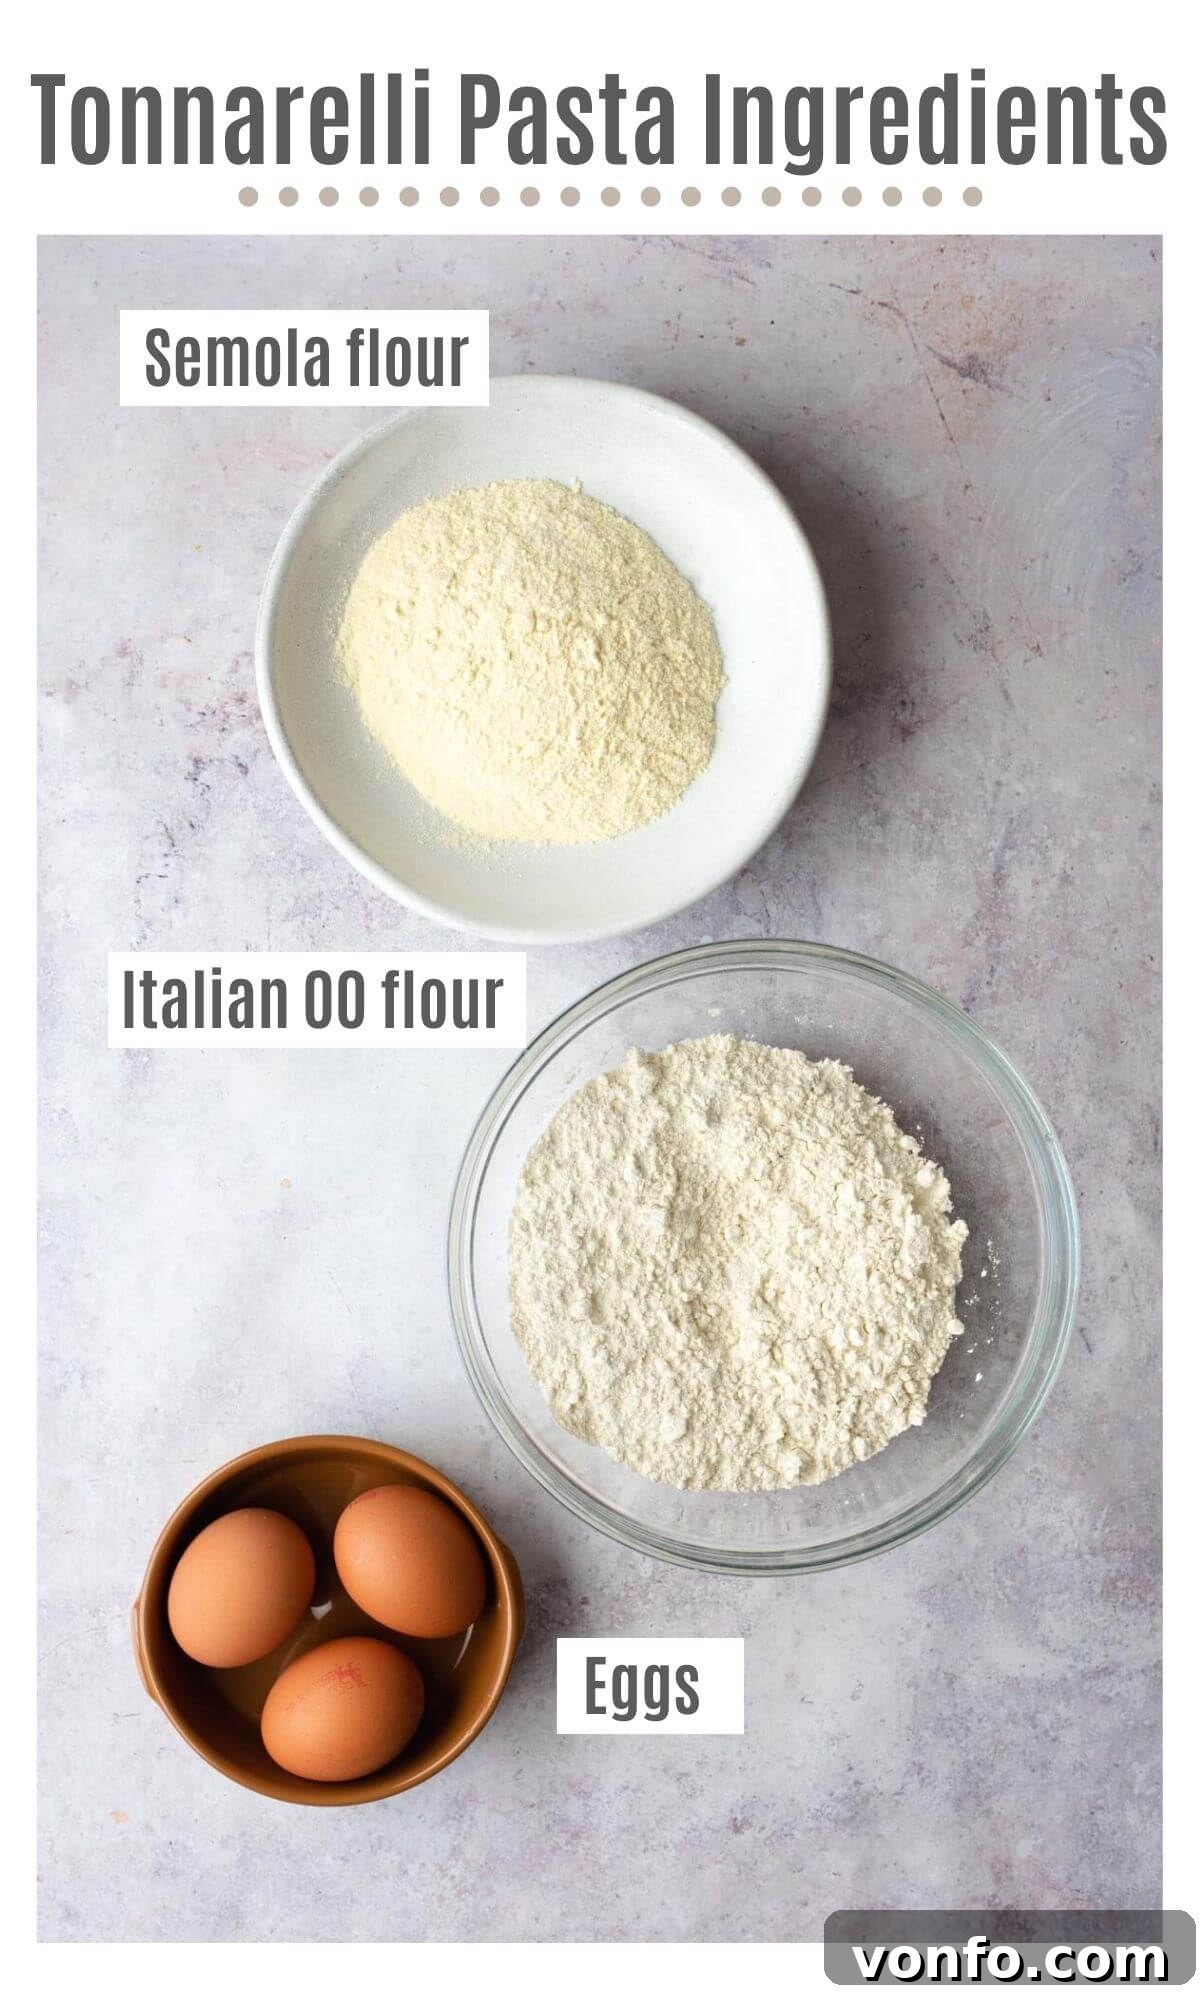
- Italian Tipo 00 Flour: While you technically *could* use all-purpose flour, we wholeheartedly recommend using Italian 00 flour. Its incredibly fine texture and lower protein content create a silky, tender dough that’s ideal for fresh pasta. It makes a significant difference in the final product and is increasingly easy to find in most well-stocked grocery stores or online.
- Semola Rimacinata: This is an extra-fine semolina flour, derived from durum wheat. Incorporating semola into your dough gives the pasta a wonderful, al dente “bite” and a slightly firmer, more rustic texture. It also contributes a beautiful golden hue. If “rimacinata” (re-milled) semola is difficult to source, a very fine regular semolina can be used. If you absolutely cannot find any type of semola, you can substitute it with an equal amount of Tipo 00 flour, though your pasta will be softer and less firm.
- Eggs: Use large, fresh eggs. Eggs bind the flour, provide richness, contribute to the vibrant color, and add elasticity to the dough, making it easier to work with and resulting in a superior texture.
- A Pinch of Salt: While not listed explicitly in the original ingredients, a small pinch of salt in the dough itself (beyond salting the cooking water) can subtly enhance the flavor of the pasta.
Step-by-Step Guide: Crafting Homemade Tonnarelli Pasta
Making fresh pasta at home is a rewarding experience. Follow these detailed steps to create your perfect tonnarelli.
Part 1: Preparing the Dough
Step 1) Create the Flour Well: Begin by mixing both your Tipo 00 flour and semola rimacinata thoroughly in a large bowl. Once combined, tip the mixed flours out onto a clean, dry work surface. Form the flour into a mound, then use the bottom of your mixing bowl or your fist to create a generous well in the center, ensuring the sides are high enough to contain the eggs without spillage (refer to photos 1 & 2 in the collage below for visual guidance).
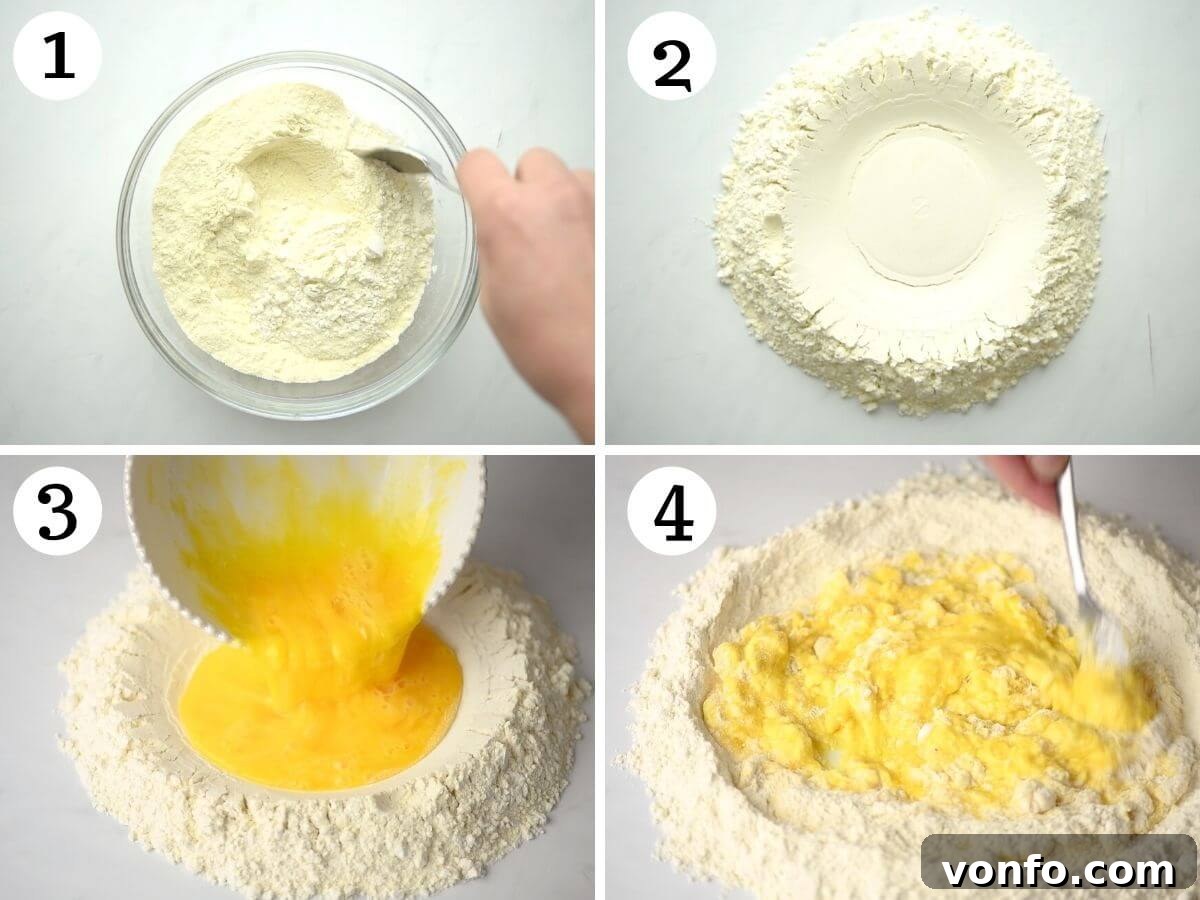
Step 2) Incorporate the Eggs: In a separate small bowl, whisk your large eggs together until the yolks and whites are fully combined and slightly frothy. Carefully pour the whisked eggs into the well you created in the flour mound. Using a fork, gently begin to incorporate the flour from the inner walls of the well into the egg mixture. Work slowly and gradually, pulling in small amounts of flour at a time until a rough, shaggy dough starts to form. Be patient and prevent the egg from breaching the flour wall (see photos 3-5 for illustration).
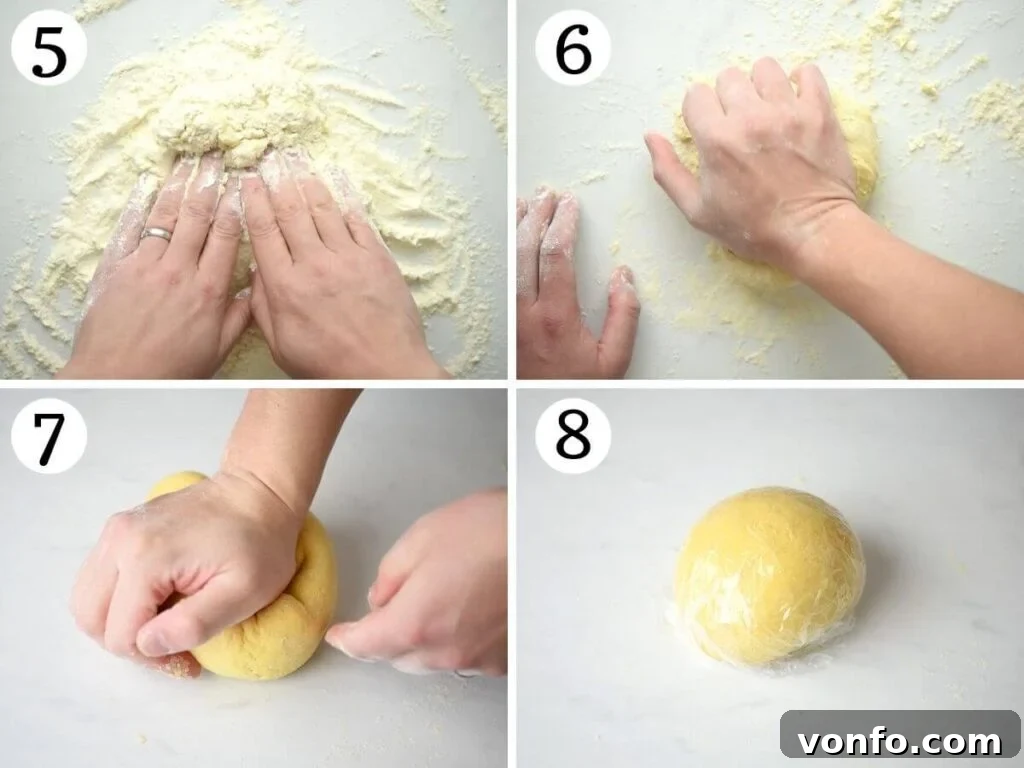
Step 3) Knead and Rest the Dough: Once the flour and eggs have come together into a rough mass, discard your fork and use your hands to knead the dough. This is a crucial step! Knead vigorously for approximately 10 minutes. Use the heel of your hand to push the dough away from you, fold it over, and rotate it. The dough will transform from a sticky, uneven mass to a smooth, elastic, and homogenous ball. It should feel firm but pliable, and no longer sticky. If there is excess flour on your work surface that isn’t incorporating into the dough, that’s perfectly fine; it just indicates your eggs might have been slightly smaller, and the dough has absorbed sufficient flour. Wrap the kneaded dough tightly in plastic wrap or a clean kitchen towel and let it rest at room temperature for at least 30 minutes. This resting period allows the gluten to relax, making the dough much easier to roll out, and helps the flour fully hydrate (photos 6-8 show the kneading and resting process).
Part 2: Shaping the Tonnarelli with La Chitarra
Step 4) Prepare for Shaping: After the dough has rested, unwrap it and cut it into four equal portions. Take one portion and lightly dust your work surface and rolling pin with a little semola (or Tipo 00 flour). Roll out this piece of dough into a rough rectangle, aiming for a thickness of about 2-3mm, or roughly the same thickness as the width of the chitarra strings. The sheet should be wide enough to comfortably fit across the strings of your Chitarra pasta tool (refer to photos 9-11 in the collage below).
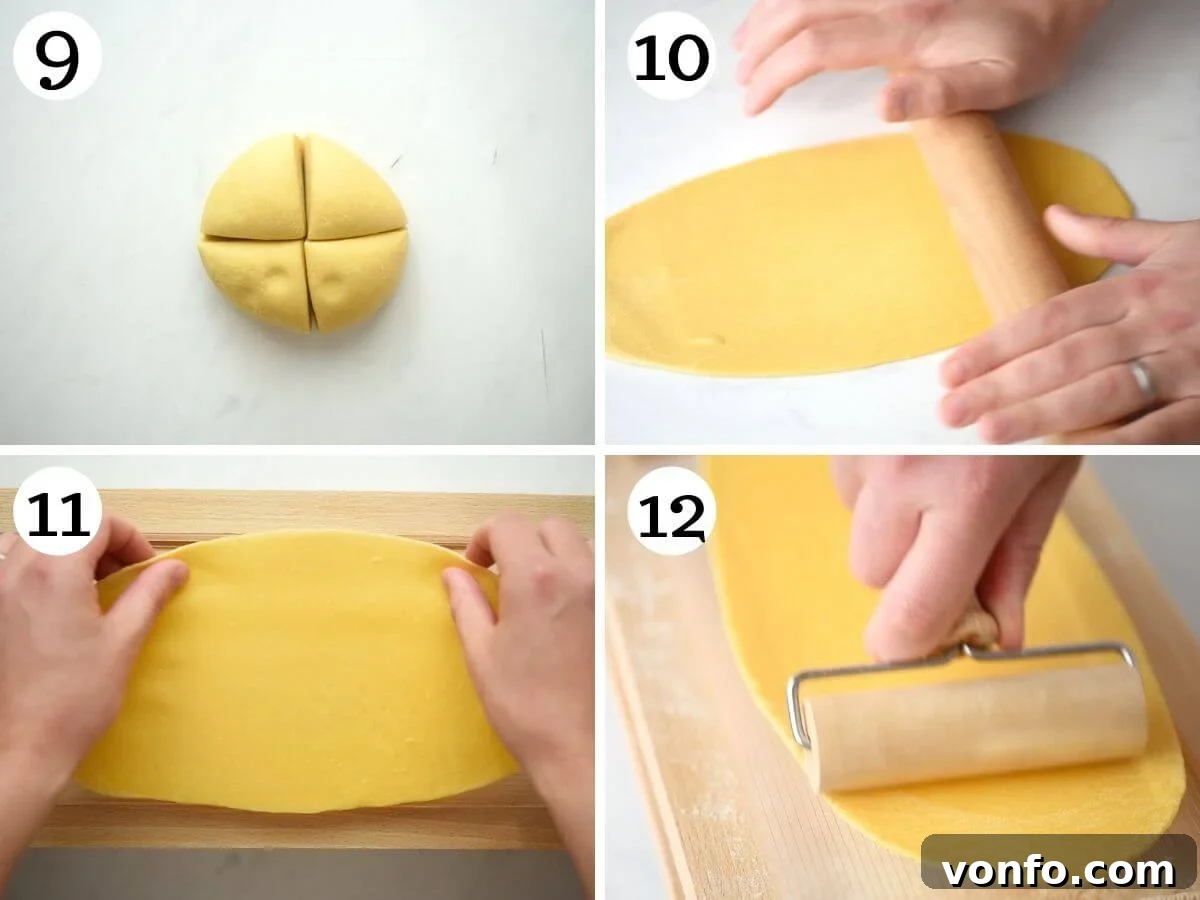
Step 5) Cut the Pasta on La Chitarra: Lightly sprinkle both the Chitarra tool and your rolled-out pasta sheet with a generous amount of semola to prevent sticking. Carefully place the sheet of pasta evenly on top of the strings of the Chitarra. Using a rolling pin, roll firmly and evenly over the pasta sheet, pressing it down onto the wires. Roll back and forth a few times, applying consistent pressure, until the pasta is cleanly cut and the individual strands have fallen through the strings into the trough below (photos 12-15 illustrate this exciting step).
Important Tip: Ensure there’s at least a 1-inch space at the top and bottom of the chitarra once you place your pasta on top. As you roll, the pasta will stretch slightly, and this extra space prevents it from bunching up at the ends.
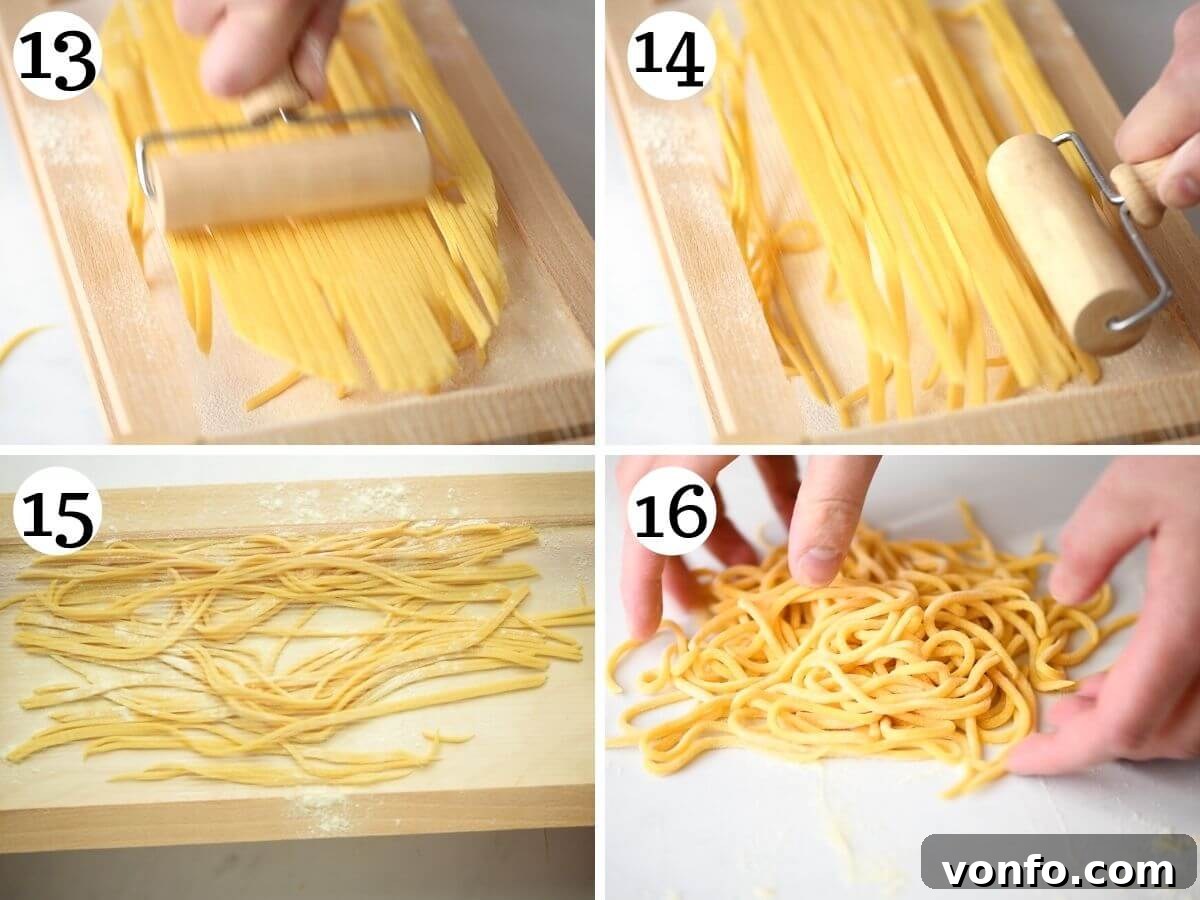
Step 6) Dust and Form Nests: As the Tonnarelli (Spaghetti alla Chitarra) strands fall through, dust them immediately and generously with plenty of semola. This is crucial to prevent them from sticking to each other. You may need to gently separate some strands with your hands. To store the fresh pasta until ready to cook, gather a handful of strands and loosely wrap them around your hand to create a beautiful, individual nest. Place these nests on a baking tray or clean surface that has been generously dusted with semola. Repeat steps 4-6 with the remaining dough portions (photo 16 demonstrates forming nests). Fresh tonnarelli is best used the same day for optimal texture.
Expert Tips for Tonnarelli Perfection & Common Questions
Achieving perfect homemade tonnarelli is straightforward with a few key considerations:
- Kneading the Dough: Don’t skimp on kneading! The 10 minutes are essential for developing the gluten structure, which gives the pasta its elasticity and characteristic chewiness. If you notice a little excess flour on your work surface that isn’t integrating into the dough, it’s usually fine. It simply means your eggs might have been slightly smaller, and the dough has already reached its optimal hydration. Trust the feel of the dough – it should be smooth and elastic.
- Give Space for the Pasta to Stretch: When placing your rolled-out pasta sheet on the Chitarra, ensure there’s at least a 1-inch margin at both the top and bottom. This allows the dough to stretch slightly as you roll, preventing it from bunching up and ensuring a clean cut across all strings.
- Use Plenty of Semola for Dusting: Semola is your best friend when working with fresh pasta, especially tonnarelli. Generously dust your Chitarra tool before placing the dough, and liberally sprinkle semola over the cut pasta strands. This critical step prevents the pasta from sticking together, making it easier to handle and cook.
Frequently Asked Questions (FAQs)
If you find that the strings of your Chitarra are too loose, making it difficult to cut the pasta cleanly, check for tension screws usually located at the bottom or sides of the tool. You can carefully tighten these screws to increase the tension on the wires, ensuring a sharp, precise cut.
Yes, you can make tonnarelli using all Tipo 00 flour. However, be aware that this will result in a much softer pasta with less of the distinctive al dente bite that semola provides. To substitute, simply replace the 100g of semola with an additional 100g of Tipo 00 flour. The texture will still be delicious, just different.
For best results, fresh tonnarelli should be cooked on the same day it’s made. To store temporarily, form the pasta into nests (remembering to dust generously with semola to prevent sticking) and place them on a baking tray dusted with more flour or semola. Cover loosely with a clean kitchen towel to prevent them from drying out too quickly. You can also carefully freeze fresh tonnarelli by placing the dusted nests on a baking sheet and freezing them solid. Once frozen, transfer them to an airtight freezer bag for longer storage (up to 1-2 months). Cook directly from frozen, adding a few extra minutes to the boiling time.
The primary difference lies in their shape and texture. Spaghetti is typically round and smooth, while Tonnarelli (Spaghetti alla Chitarra) is thicker and has a distinct square cross-section. This square shape, along with the coarser texture from semola, allows tonnarelli to hold onto sauces much more effectively, providing a more satisfying and rustic mouthfeel.
Delicious Sauces to Serve with Tonnarelli Pasta
Tonnarelli pasta’s unique texture and ability to absorb flavors make it incredibly versatile. Here are some fantastic sauce ideas to elevate your homemade creation:
- Cacio e Pepe: The quintessential Roman pairing! The creamy, peppery sauce made from Pecorino Romano and black pepper is a match made in heaven for tonnarelli’s rough, square surface.
- Carbonara or Gricia: Other Roman classics, rich with guanciale and eggs (Carbonara) or guanciale and Pecorino (Gricia). Tonnarelli’s robust shape stands up perfectly to these intensely flavorful sauces.
- Simple Tomato Sauce: A fresh, vibrant authentic Italian tomato sauce allows the natural flavor and texture of the homemade pasta to shine through.
- Basil Pesto: A bright and herbaceous pesto sauce clings beautifully to the tonnarelli strands, offering a refreshing contrast.
- Hearty Meat Ragu: Tonnarelli is also exceptional with slow-cooked meat ragù. Its sturdy structure can handle rich, thick sauces, ensuring every forkful is full of flavor. Think a classic Bolognese or a slow-braised lamb ragù.
If you’ve tried this Homemade Tonnarelli recipe or any other recipe from our collection, please don’t forget to rate the recipe and share your experience in the comments below – we love hearing from you! You can also FOLLOW US on FACEBOOK, INSTAGRAM, and PINTEREST, or sign up for our NEWSLETTER to receive more of our delicious recipes directly to your inbox.
Step-by-step photos provided above for visual guidance.
Most of our recipes come with detailed step-by-step photos, helpful tips and tricks to ensure perfect results the first time, and often a video tutorial!
Tonnarelli Pasta (Spaghetti alla Chitarra)
By Emily
30 mins
4 mins
30 mins
1 hr 4 mins
4 servings (450g/15.8oz)
Print Recipe
Equipment
-
Chitarra pasta tool
-
Rolling pin
-
Large mixing bowl
-
Whisk
-
Plastic wrap or clean kitchen towel
Ingredients
- 200 g Italian Tipo 00 flour (approximately 1 and 1/2 cups)
- 100 g Semola rimacinata (extra fine semolina flour) (approximately 3/4 cup) (find it on Amazon)
- 3 large eggs
- A pinch of salt (optional, for dough)
- Extra semola for dusting
Instructions
Make the dough
- Mix both flours together in a large mixing bowl, then tip the mixture out onto a clean work surface. Create a large well in the center of the flour mound by pressing the bottom of the bowl into it.
- Whisk the eggs together in a separate bowl until combined, then pour them carefully into the well. Using a fork, gradually incorporate the surrounding flour into the egg mixture until a rough dough forms.
- Knead the dough by hand for approximately 10 minutes until it becomes smooth, elastic, and no longer sticky. Wrap the dough tightly in plastic wrap or a clean kitchen towel and let it rest at room temperature for at least 30 minutes.
Shape the pasta
- Once rested, cut the dough into 4 equal portions. Take one portion and roll it out with a rolling pin into a rough rectangle, ensuring it’s about 2-3mm thick and wide enough to fit across the strings of your Chitarra pasta tool.
- Lightly dust the Chitarra tool and your pasta sheet with a little semola. Place the pasta sheet on top of the Chitarra strings. Use a rolling pin to firmly roll over the pasta, applying even pressure until the pasta is cut into strands and falls through the strings.
- Repeat this process with the remaining dough portions. You may need to gently separate individual tonnarelli strands once they are cut.
- Generously dust the freshly cut tonnarelli with plenty of semola to prevent sticking. Form the strands into small nests by wrapping them loosely around your hand. Place these nests on a baking tray or surface dusted with more semola until you are ready to cook them.
How to cook the tonnarelli
- Bring a large pot of water to a rolling boil and salt it generously (it should taste like the sea!).
- Carefully add the fresh tonnarelli to the boiling water. Cook for approximately 3-5 minutes, or until al dente. Since it’s fresh pasta, it cooks much faster than dried pasta.
- Drain the pasta, reserving a little pasta water. Transfer the cooked tonnarelli directly into your pre-prepared pasta sauce, tossing to combine. Add a splash of reserved pasta water if needed to achieve the desired consistency. Serve immediately.
Video Tutorial
For a visual guide, watch our detailed video tutorial on how to make Tonnarelli Pasta (Spaghetti alla Chitarra):

Watch Tonnarelli Pasta (Spaghetti alla Chitarra) Video Tutorial
Notes
- Kneading the dough: If you find excess flour left on your work surface that isn’t absorbing, don’t worry. This simply means your eggs were slightly smaller, and the dough has already reached the correct hydration. Focus on achieving a smooth, elastic consistency.
- Dust the pasta and surfaces: It’s absolutely crucial to lightly and generously dust your Chitarra tool, work surface, and the cut pasta strands with semola (or Tipo 00 flour if semola is unavailable). This prevents the fresh pasta from sticking to itself and the tools, making the process much smoother.
- Give space for the pasta to stretch: When placing your rolled pasta sheet on the Chitarra, ensure there is at least a 1-inch space at the top and bottom. This allows the dough to stretch as you roll, ensuring a clean cut and preventing bunching.
Helpful Info for All Recipes
- We always use extra virgin olive oil in all of our recipes unless explicitly stated otherwise.
- For canned or jarred tomatoes, we highly recommend using Cirio or Mutti brands for the best results and authentic Italian flavor.
- Unless otherwise specified, all vegetables are assumed to be medium-sized.
- All recipes are tested and developed using a fan (convection) oven.
- Find out more about how nutrition information is calculated.
- Check out our must-have Italian Pantry Staples.
- You can also find all our Essential Kitchen Tools for Italian Cooking.
Nutrition
Calories:
314
kcal
|
Carbohydrates:
56
g
|
Protein:
13
g
|
Fat:
4
g
|
Saturated Fat:
1
g
|
Polyunsaturated Fat:
1
g
|
Monounsaturated Fat:
1
g
|
Trans Fat:
1
g
|
Cholesterol:
123
mg
|
Sodium:
48
mg
|
Potassium:
207
mg
|
Fiber:
1
g
|
Sugar:
1
g
|
Vitamin A:
178
IU
|
Calcium:
34
mg
|
Iron:
4
mg
Nutrition information is automatically calculated and should only be used as an approximation.
Did you try this recipe?
Leave a comment below and share your experience!